1998 BUICK PARK AVENUE buttons
[x] Cancel search: buttonsPage 16 of 426
a. P
4.
Adjust the driver’s seat and lumbar position (if
equipped) to a safe and comfortable driving position.
Adjust both outside mirrors to suit you. See “Outside
Mirrors”
in the Index.
Press
one of the two MEMORY buttons
corresponding with
your driver number, for longer
than three seconds. You will hear two beeps to
confirm
that the mirror and seat positions have been
entered into memory.
Press
WLOCK on the transmitter within five seconds.
When your vehicle
is in PARK (P), push and release the
memory button you just stored. The
seat and mirrors
will move to the set position. You will hear one beep.
‘To sct the seat and mirror positions for a second
driver, foilow the previous steps, but use the other
MEMORY button.
If you press thc wrong MEMORY button, or if there is a
third ~iriver, USC t.tre: seat adjuster. The
EXIT button ~BQWS for easy exit from the
vehicle.
Push and release the EXIT button while in PARK (a>
and the seat will move all the way back. You will hear
a beep when the
EXIT button is pressed.
You can also set unique exit positions by moving the
seat to the desired position, and then pushing and
holding the EXIT button for greater than three seconds.
You will hear two beeps to confirm the position has
been set. The exit position will be set €or the previously
identified driver.
If the ignition is not in RUN, automatic seat and III~IX-Q~
movement will occur if the UNLOCK button on the
remote keyless entry transmitter
is pressed. Automatic
seat
and mirror movement is programmed through the
Driver Information Center
(DIC) so that the driver can
select whether the seat moves to the programmed
driving position, the programmed exit
position, or does
not move at all. For memory seat and mirror recall
programming instructions, see “DIC Personal Choice
Programming”
in the Index.
4 -4, . . . . , . .
ProCarManuals.com
Page 76 of 426
If only the instant alarm button works, the transmitter
needs to be resynchronized
to the receiver. Do this by
pressing and holding
both the LOCK and UNLOCK
buttons on the transmitter for about eight seconds. You
must be within range of the vehicle.
Once the transmitter
has been resynchonized, the horn
will chirp
and the exterior lamps will flash once. The
system should now operate properly.
-77 F I 1 ~pf;c&YYJAy~pl‘i. s,ptezi
The remote keyless entry transmitter will m the
theft-deterrent system whenever the
doors are closed
and you push the
LOCK button when the ignition is off.
It will disarm the system when you push UNLOCK.
7.- ::+=~*~~p& .?>iD;ee F@%&:sFzs ;,& / ..- c- Z..q&@;e$.> - -A
Each remote keyless entry transmitter can be
programmed to the driver’s preference €or memory QQOF
Bocks, security feedback, delayed locking, memory seats,
perimeter lighting, parallel
park assist WQ~ and
window lockout. See each feature
in the Index. You can
also personalize your comfort control temperature, mode
and fan settings. See “Comfort Controls Personal
Choice” in the Index.
If your vehicle is equipped with the Driver Information
Center
(DIC), you can also program these features
through the
DIC. See “Driver Information Center” in
the Index.
ProCarManuals.com
Page 79 of 426
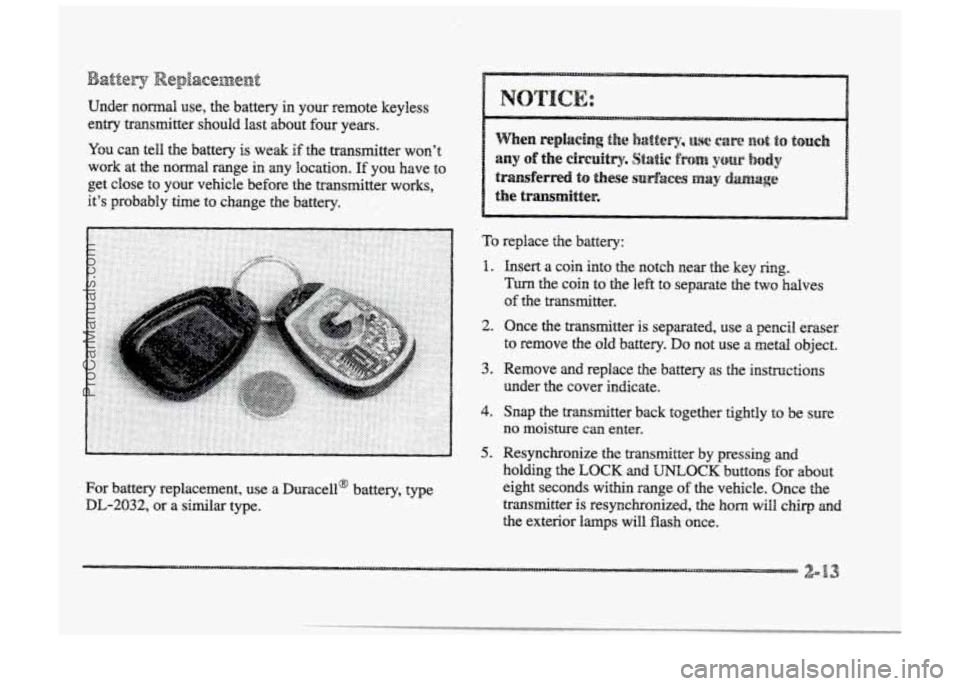
Under normal use, the battery in your remote keyless
entry transmitter should last about four years.
You can tell the battery is weak
if the transmitter won’t
work at the normal range
in any ‘location. If you have to
get close to your vehicle before the transfitter works,
it’s probably time
to change the battery.
For battery replacement, use a Duracell@ battery, type
DL-2032, or a similar type.
To replace the battery:
1. Insert a coin into the notch near the key ring.
Turn the coin to the left to separate the two halves
of the transmitter.
2. Once the transmitter is separated, use a pencil eraser
to remove the old battery. Do not use a metal object.
3. Remove and replace the battery as the instructions
under the cover indicate.
4. Snap the transmitter back together tightly to be sure
no moisture can enter.
5. Resynchronize the transmitter by pressing and
holding the LOCK and UNLOCK buttons for about
eight seconds within range
of the vehicle. Once the
transmitter is resynchronized, the
horn will chirp and
the exterior lmps will flash once.
ProCarManuals.com
Page 134 of 426
3.
4.
Decide which one of the three channels YOU want to
program.
Using both hands, press the hand-held
transmitter bdtton and the desired button on the
universal
transmitter. Continue to hold both buttons
though Step 4.
Wold down both buttons until YQU see the red Bight
QII the universal trmsmitter first flash S~OW~Y,
90 seconds, indicates that the universal transmitter
has been programmed. Release
both buttons once the
light StmS
tQ fhSh KiPidly.
If you have trouble programming the universal
transmitter,
make sure that YOU have followed the
directions exactly
as described and that the batteries in
the hand-l.aeld transmitter
are not dead. If you still
cannot program
it, rotate YQUT hand-held transmitter end
over end
and try again. ne universal transmitter may
not be compatible with a limited number of dder
installaaions due to legislated changes in transmission
frequencies.
If you cannot program the transmitter after
repeated attempts, consult your dealer.
Be sue to keep your ~higind hmd-held transmitter in cse
you need t~ erase and reprogram the miversd transmitter.
Note to Canadfiraa owners: During prograMng, your
hand-heid transmitter may stop transmitting after one or
two seconds. If you are programming from one of these
transmitters,
YOU should press and re-press the button on
the hand-held transmitter every :WO seconds without
ever releasing the button QII the universal tra~ni~ter.
Release both buttons when the red light on the universal
transmitter begins
to flash rapidly.
Press and hold the appropriate button QHZ the universal
transmitter. The
red light comes on while the signal is
being transmitted.
Note that
the ef€ective transmission range of the
universal transmitter may
differ from your hand-held
trmsmitter and from one channel to another.
2-68
ProCarManuals.com
Page 152 of 426
A I'iw is Mowr~, Sce "'%;USC:S and Circuit Breakers" in
the Index.
Keep in mind that yorrr wincishield is part of the WUD
system. If you ever have to have your windshield
replaced,
be sure to get one that is designed for WUD OF
your HUD image may look bhrred or out of focus.
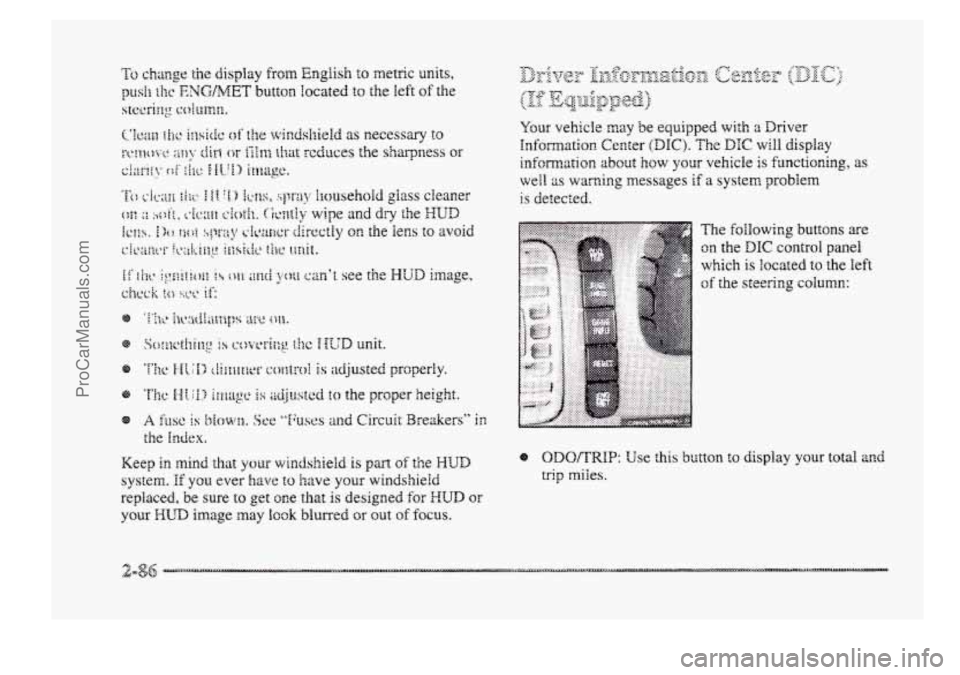
Ymr vehicle may be equipped with a Driver
Infolmntionz Center (DIC). The DIC will display
information about how
your vehicle is functioning, as
well as warning messages if a system pr~b'ee~~~
is deteczed.
The fobwing buttons are
on the DIC control panel
which
is located to the left
of the steering column:
0 ODO/TRfB: Use this button to display your total and
trip miles.
ProCarManuals.com
Page 153 of 426
e mL INFO: Press this button to display fuel
infomation such
as, fuel used, fuel range and
fuel economy.
Q GAGE INFO: Use this button to display oil
pressure,
oil Me, coolant temperature, tire pressure
and battery infomation.
RESET: ”his button, used dong with other buttons,
will reset system functions.
@ ENGNET: Use this button to change the display
between English and metric
units.
p@r@-jn& Choice gJ1c DispEay
This feature allows two different drivers to store and
recall their
QWP~ preferred display mode. The personal
choice settings displayed
on the DIC are determined by
the transmitter used
t~ enter the vehicle. After the
UNLOCK button of a remote keyless entry transmitter
is pressed
and the ignition is in RUN, the DIC will
display
the identified driver. The settings can also be
changed
by briefly pressing one of the MEMORY
buttons located on the driver’s door.
The DIC can also be used to program the following
personal
choice features available with your vehicle:
e Memory Seats
Memory Door Locks
Security Feedback
Delayed Locking
e Perimeter Lighting
Parallel Park Assist Mirror
Window Lockout
See “Personal Choice Features”
in the Index and “DIC
Personal Choice Progran~ning’~ later in this part. The
DIC is used to program infomation €or DWIVEiR #1 and
DRIVER #2. The DIC will identify a person as
UNKNOWN DRIVER if they are neither DRIVER #I
nor DRIVER #2.
ProCarManuals.com
Page 156 of 426
Oil Life Monitor (Index): Psess the GAGES button
until OIL LIFE INDEX appears in the display. The OIL
LEE INDEX NORMAL display will show an estimate
of the oil’s remaining useful Me. When the oil life index
is less
than IO%, the display will show OIL LIFE
INDEX CHANGE OIL. When you have the oil changed
according
to the maintenance schedule (see
“Maintenance Schedule” in the Index), you will have to
reset the oil We monitor.
To do this, press and hold the
RESET’
button for more than five seconds while the oil
life index
is being displayed on the DPC. The oil life will
change to
100%.
Tire Psessure Status: Press the GAGES button until
‘FWE IPWSSUWE appears in the display. TWE
PRESSUWE NORMAL is displayed when the Check
Tire Pressure System believes your ve~cle’s tire
pressures are normal. If a potential tire pressure problem
is detected, the display will show gIRE PRESSURE
LOW CHECK TIRES. If you see the azRE
PRESSURE LOW: CHECK TIRES message, you
should
st~p as soon as you can and check all your tires
for damage. (If a tire is flat, see ‘‘If a Tire Goes Flat” in
the Index.)
Also check the tire pressure in all four tires
as
soon as you can. See “Inflation - Tire Pressure” and
“Check Tire Pressure System” in the Index. mere
are
times when you will have to reset (calibrate)
the
Check Tire Pressure System. See “Check Tire
Pressure System” in
the Index.
jJ&m&qgs sj& &ssag@j
Other messages or warnings may appear in the DE
display such as:
0 WINDSHIELD WASHER FLUID LOW
ENG COOLANT LOW - CHECK LEVEL
ENGINE OIL LOW - CHECK LEVEL
0 CHANGE ENGINE OIL SOON
0 TRACTION CONTROL SYSTEM ACTIVE
0 DOOR AJAR
0 TRUNKAJAR
Pressing any of the DIC control buttons will remove the
above messages or warnings
from the DIC display.
ProCarManuals.com
Page 166 of 426
'Ms section tells you how to operate your comfort
ctrrtt.ro8s. Your comfort control system uses
trxone-friendIy
hi- B 348 refrigerant.
With these systems, you can control the heating, cooling
and ventilation in your vehicle. Your vehicle also has a
flow-through ventilation system described
Eater in
this section.
This feature allows two different drivers to store and
recall their own climate control settings for temperature,
air delivery node, fan and passenger climate COXI~FO~
fdom status. The Personal Choice settings recalled are
determined by the transmitter used to enter the vehicle.
After the UNLOCK button of a remote keyless entry
transmitter
is pressed, and the igrrition is in RUN, the
climate
control will adjust to the last settings of the
identified driver.
The settings can also be changed by
briefly pressing one
of the MEMORY seat switches
located on the
driver's door panel. When adjustments
are made, the new settings are automatically saved for
the
driver.
Your vehicle has the dual automatic cornfortemp climate
control system. The fdowing
infomation tells you how
1: works.
Yorr will hear a beep each time a button is pushed and a
small light orr the button will indicate which buttons lire
active.
The lights are QIP ali buttons except EMP, FAN
and AIR FLOW. The display will show fm speed,
comfort level setting
and airf'~ direction for a few
seconds whenever any button,
except for the rear defog,
is pushed, and then it will display the outside
temperature. The outside temperature reading
is most
accurate when the vehicle
is movi~g.
During stops, when drivkg slow, QF when the engine is
first sta-ted after a short trip, the outside temperature
reading can be affected by road or engine heat. In order
to enswe proper automatic climate control operation, the
outside temperature
display may not update BS quickly
as expected.
ProCarManuals.com