1998 BMW 740I light
[x] Cancel search: lightPage 45 of 211
44n
Sliding/Tilt sunroof
To prevent injuries, exercise care
when closing the sliding/tilt sun-
roof and keep it in your field of vision
until it is shut.
Before leaving the car, switch off the
electric sunroof mechanism by taking
out the ignition key. Do not leave
children unattended in the vehicle with
access to vehicle keys. Use of the key
can result in starting of the engine and
operation of vehicle systems such as
power sunroof, etc. Unsupervised use
of these systems can result in serious
personal injury.<
To avoid pressure or drafts in the pas-
senger compartment when the sunroof
is open or lifted, keep the air vents in
the dashboard open and increase
the air supply if necessary. Refer to
pages 100, 104.
For the convenience operating mode
via the door lock or the radio remote
control, refer to page 32 or page 33.
Safety featureIf the sliding/tilt sunroof encounters re-
sistance at a point roughly past the
middle of its travel when it is closing,
the closing cycle is interrupted and the
sunroof will open again slightly.
Despite this safety feature, be ex-
tremely careful that the closing
path of the sunroof is not obstructed
whenever it is closed. Otherwise, trig-
gering the closing-force limitation may
not be ensured in some situations (with
very thin objects, for instance). You can
override this safety feature by pressing
the switch beyond the resistance point
and holding it.<
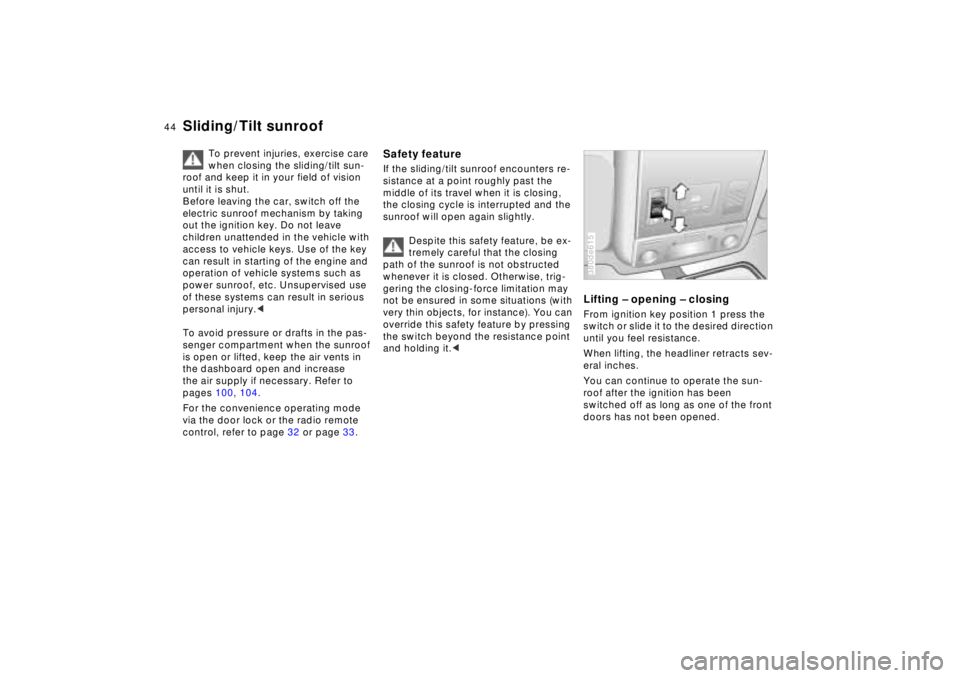
Lifting – opening – closingFrom ignition key position 1 press the
switch or slide it to the desired direction
until you feel resistance.
When lifting, the headliner retracts sev-
eral inches.
You can continue to operate the sun-
roof after the ignition has been
switched off as long as one of the front
doors has not been opened.380de615
Page 47 of 211
46n
Seat adjustment Electric power seatsFor maximum safety when adjusting the
seat position, please observe the fol-
lowing:
Never try to adjust your seat while
operating the vehicle. The seat
could respond with unexpected move-
ment, and the ensuing loss of vehicle
control could lead to an accident.
Wear the safety belt firmly against your
body at all times. In the event of a fron-
tal impact, a loose lap belt could slide
over your hips, leading to abdominal in-
jury. In addition, the safety belt's re-
straint effectiveness is reduced if the
belt is worn loosely.
Never ride with the backrest reclined to
an extreme horizontal angle (especially
important for front passengers to re-
member). Keep the backrest relatively
upright to minimize the risk of "sliding
under" the safety belt and sustaining in-
jury in an accident.
Do not slide the seats to the rear when
the vehicle is at an extreme angle (on
garage ramps or steep slopes, for in-
stance), to prevent the shoulder strap's
automatic height adjustment mecha-
nism from disengaging.<
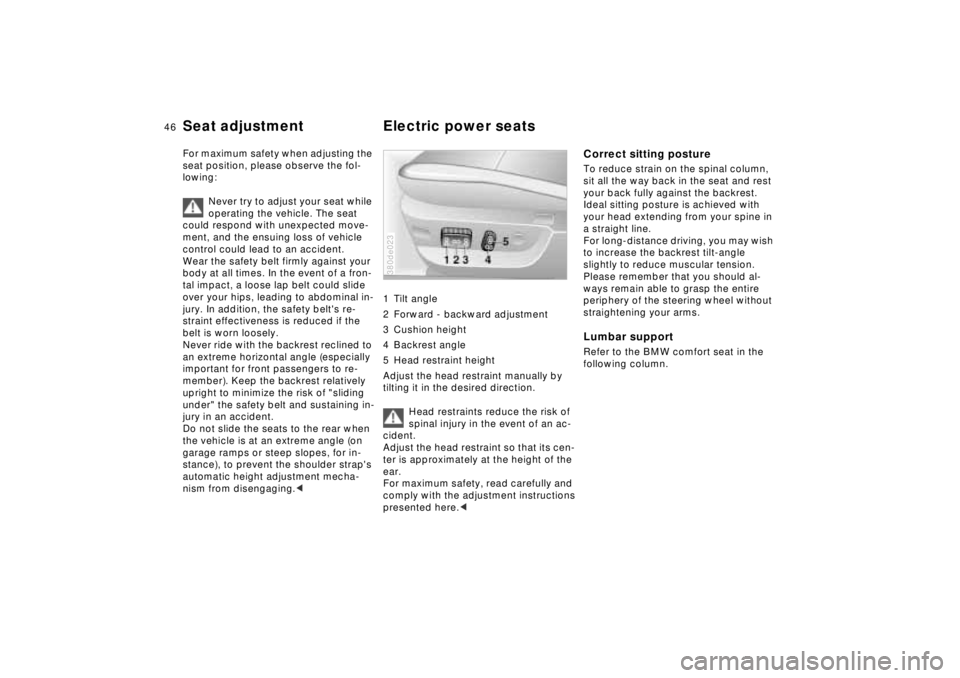
1 Tilt angle
2 Forward - backward adjustment
3 Cushion height
4 Backrest angle
5 Head restraint height
Adjust the head restraint manually by
tilting it in the desired direction.
Head restraints reduce the risk of
spinal injury in the event of an ac-
cident.
Adjust the head restraint so that its cen-
ter is approximately at the height of the
ear.
For maximum safety, read carefully and
comply with the adjustment instructions
presented here.< 380de023
Correct sitting postureTo reduce strain on the spinal column,
sit all the way back in the seat and rest
your back fully against the backrest.
Ideal sitting posture is achieved with
your head extending from your spine in
a straight line.
For long-distance driving, you may wish
to increase the backrest tilt-angle
slightly to reduce muscular tension.
Please remember that you should al-
ways remain able to grasp the entire
periphery of the steering wheel without
straightening your arms.Lumbar supportRefer to the BMW comfort seat in the
following column.
Page 51 of 211
50n
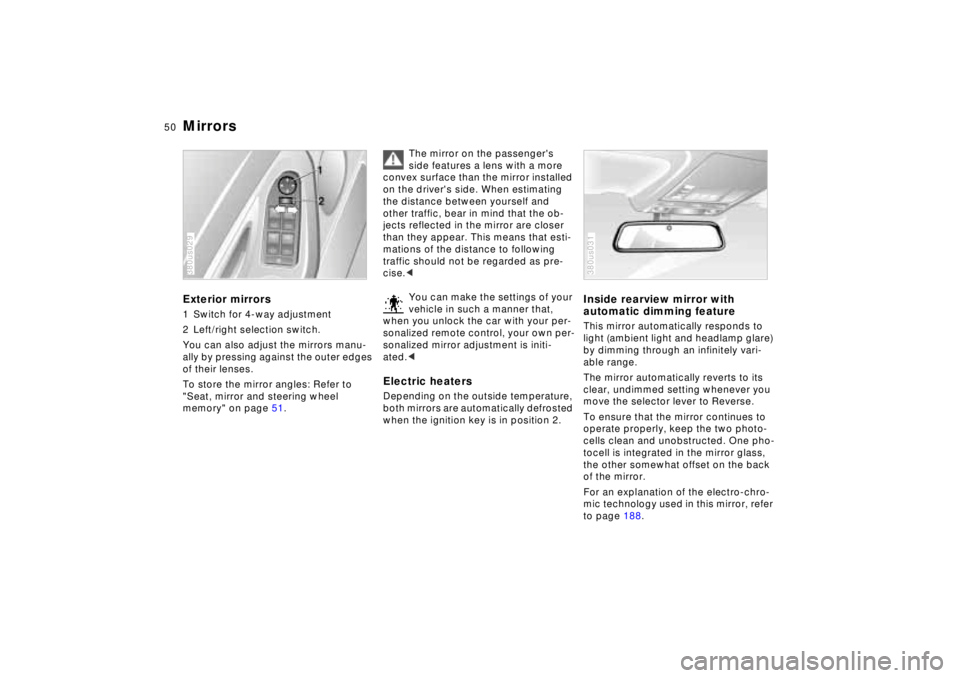
MirrorsExterior mirrors1 Switch for 4-way adjustment
2 Left/right selection switch.
You can also adjust the mirrors manu-
ally by pressing against the outer edges
of their lenses.
To store the mirror angles: Refer to
"Seat, mirror and steering wheel
memory" on page 51.380us029
The mirror on the passenger's
side features a lens with a more
convex surface than the mirror installed
on the driver's side. When estimating
the distance between yourself and
other traffic, bear in mind that the ob-
jects reflected in the mirror are closer
than they appear. This means that esti-
mations of the distance to following
traffic should not be regarded as pre-
cise.<
You can make the settings of your
vehicle in such a manner that,
when you unlock the car with your per-
sonalized remote control, your own per-
sonalized mirror adjustment is initi-
ated.<
Electric heatersDepending on the outside temperature,
both mirrors are automatically defrosted
when the ignition key is in position 2.
Inside rearview mirror with
automatic dimming featureThis mirror automatically responds to
light (ambient light and headlamp glare)
by dimming through an infinitely vari-
able range.
The mirror automatically reverts to its
clear, undimmed setting whenever you
move the selector lever to Reverse.
To ensure that the mirror continues to
operate properly, keep the two photo-
cells clean and unobstructed. One pho-
tocell is integrated in the mirror glass,
the other somewhat offset on the back
of the mirror.
For an explanation of the electro-chro-
mic technology used in this mirror, refer
to page 188.380us031
Page 52 of 211
51n
RepairsIndexOverview Controls Car care Technology Data
Mirrors Seat, mirror and steering wheel memoryLighted vanity mirrorFold down the sun visor and slide the
cover panel to the side as required.
The mirror lamps operate in ignition key
positions 1 and 2.Sun visorsThese can be folded down toward the
windshield or swiveled out against the
side windows.380de670
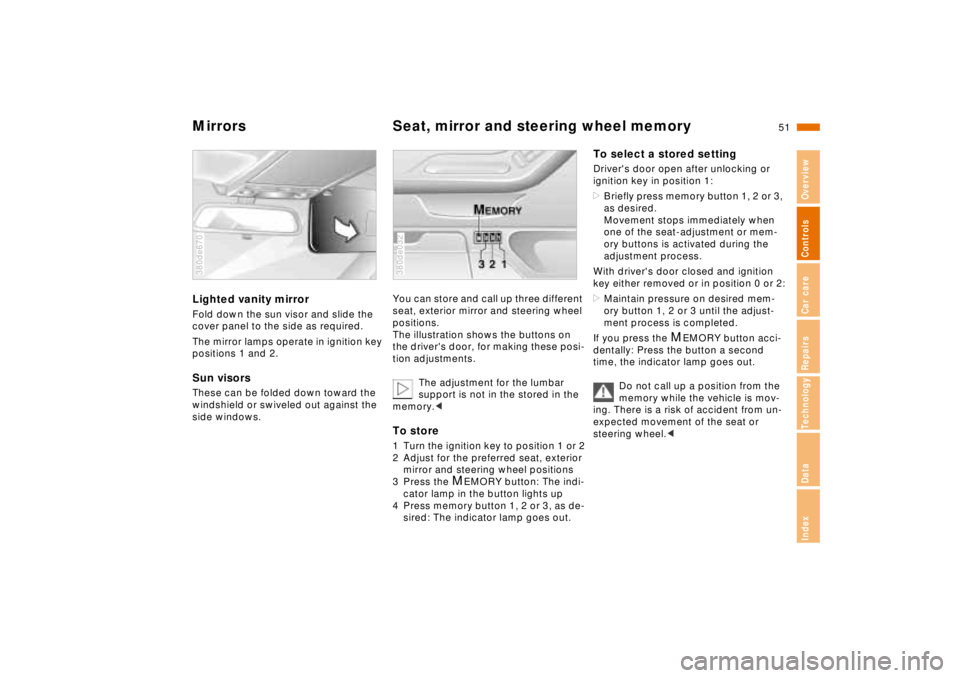
You can store and call up three different
seat, exterior mirror and steering wheel
positions.
The illustration shows the buttons on
the driver's door, for making these posi-
tion adjustments.
The adjustment for the lumbar
support is not in the stored in the
memory.< To store1 Turn the ignition key to position 1 or 2
2 Adjust for the preferred seat, exterior
mirror and steering wheel positions
3 Press the
M
EMORY button: The indi-
cator lamp in the button lights up
4 Press memory button 1, 2 or 3, as de-
sired: The indicator lamp goes out.
380de032
To select a stored settingDriver's door open after unlocking or
ignition key in position 1:
>Briefly press memory button 1, 2 or 3,
as desired.
Movement stops immediately when
one of the seat-adjustment or mem-
ory buttons is activated during the
adjustment process.
With driver's door closed and ignition
key either removed or in position 0 or 2:
>Maintain pressure on desired mem-
ory button 1, 2 or 3 until the adjust-
ment process is completed.
If you press the
M
EMORY button acci-
dentally: Press the button a second
time, the indicator lamp goes out.
Do not call up a position from the
memory while the vehicle is mov-
ing. There is a risk of accident from un-
expected movement of the seat or
steering wheel.<
Page 56 of 211
55n
RepairsIndexOverview Controls Car care Technology Data
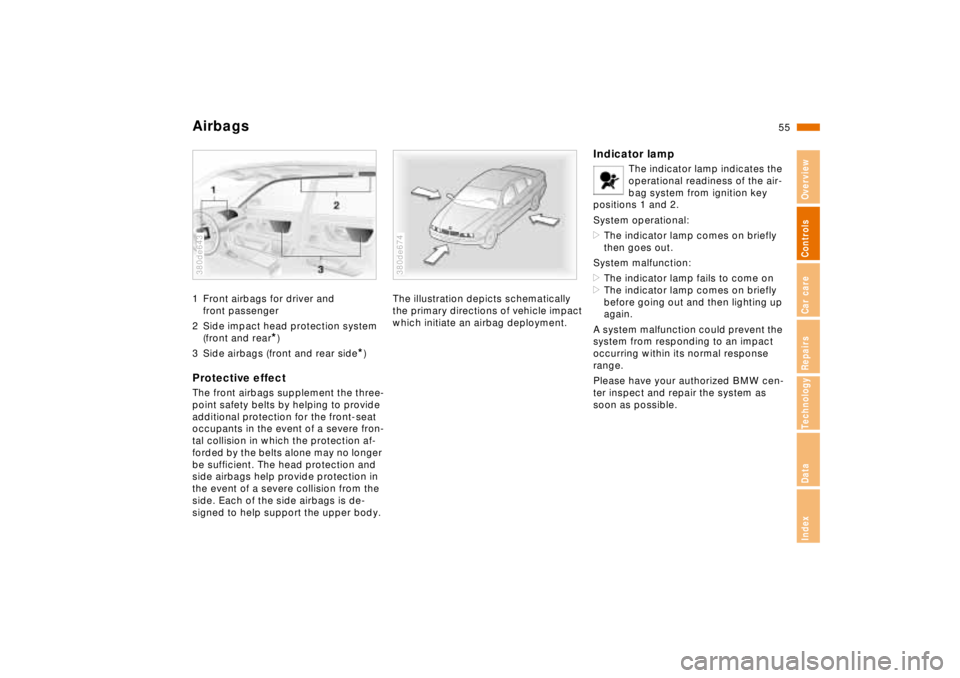
Airbags1 Front airbags for driver and
front passenger
2 Side impact head protection system
(front and rear
*)
3 Side airbags (front and rear side
*)
Protective effectThe front airbags supplement the three-
point safety belts by helping to provide
additional protection for the front-seat
occupants in the event of a severe fron-
tal collision in which the protection af-
forded by the belts alone may no longer
be sufficient. The head protection and
side airbags help provide protection in
the event of a severe collision from the
side. Each of the side airbags is de-
signed to help support the upper body.380de643
The illustration depicts schematically
the primary directions of vehicle impact
which initiate an airbag deployment.380de674
Indicator lamp
The indicator lamp indicates the
operational readiness of the air-
bag system from ignition key
positions 1 and 2.
System operational:
>The indicator lamp comes on briefly
then goes out.
System malfunction:
>The indicator lamp fails to come on
>The indicator lamp comes on briefly
before going out and then lighting up
again.
A system malfunction could prevent the
system from responding to an impact
occurring within its normal response
range.
Please have your authorized BMW cen-
ter inspect and repair the system as
soon as possible.
Page 60 of 211
59n
RepairsIndexOverview Controls Car care Technology Data
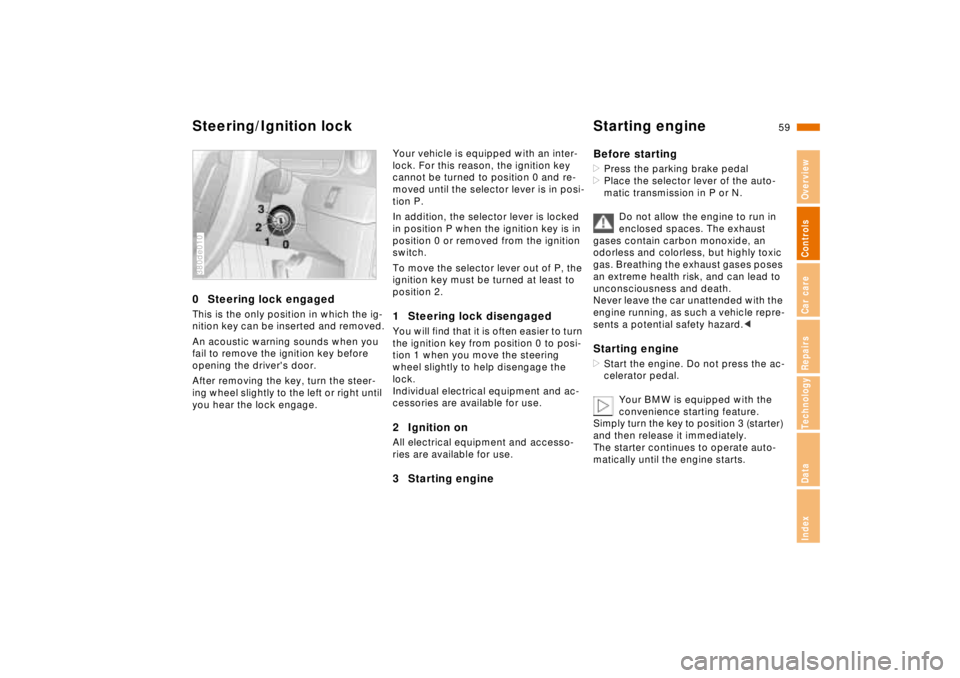
Steering/Ignition lock Starting engine0 Steering lock engagedThis is the only position in which the ig-
nition key can be inserted and removed.
An acoustic warning sounds when you
fail to remove the ignition key before
opening the driver's door.
After removing the key, turn the steer-
ing wheel slightly to the left or right until
you hear the lock engage.380de010
Your vehicle is equipped with an inter-
lock. For this reason, the ignition key
cannot be turned to position 0 and re-
moved until the selector lever is in posi-
tion P.
In addition, the selector lever is locked
in position P when the ignition key is in
position 0 or removed from the ignition
switch.
To move the selector lever out of P, the
ignition key must be turned at least to
position 2.1 Steering lock disengagedYou will find that it is often easier to turn
the ignition key from position 0 to posi-
tion 1 when you move the steering
wheel slightly to help disengage the
lock.
Individual electrical equipment and ac-
cessories are available for use.2 Ignition onAll electrical equipment and accesso-
ries are available for use.3 Starting engineBefore starting
>Press the parking brake pedal
>Place the selector lever of the auto-
matic transmission in P or N.
Do not allow the engine to run in
enclosed spaces. The exhaust
gases contain carbon monoxide, an
odorless and colorless, but highly toxic
gas. Breathing the exhaust gases poses
an extreme health risk, and can lead to
unconsciousness and death.
Never leave the car unattended with the
engine running, as such a vehicle repre-
sents a potential safety hazard.< Starting engine>Start the engine. Do not press the ac-
celerator pedal.
Your BMW is equipped with the
convenience starting feature.
Simply turn the key to position 3 (starter)
and then release it immediately.
The starter continues to operate auto-
matically until the engine starts.
Page 62 of 211
61n
RepairsIndexOverview Controls Car care Technology Data
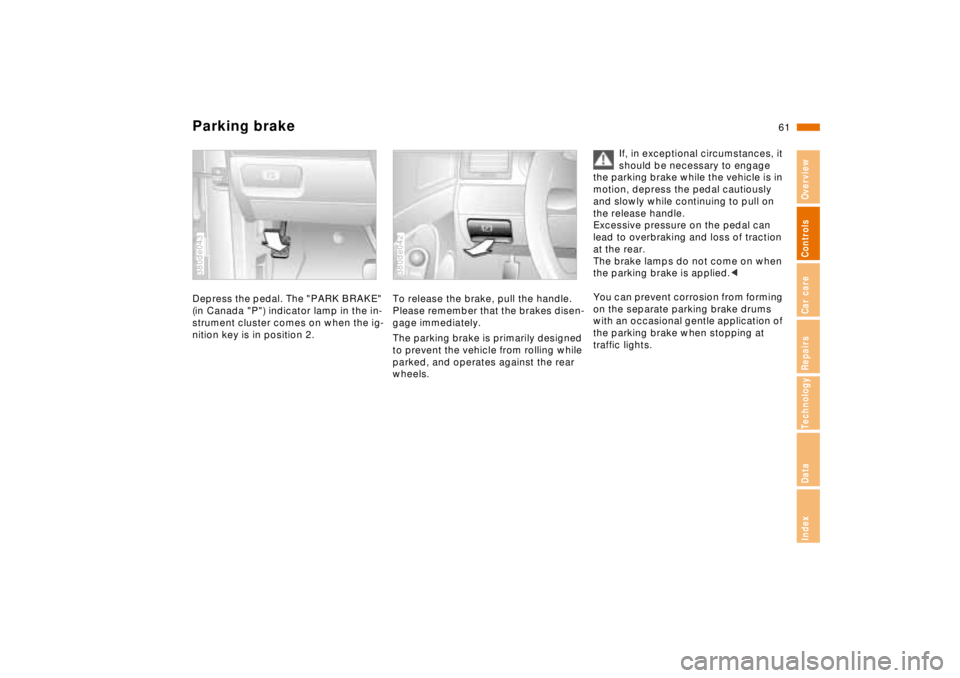
Parking brakeDepress the pedal. The "PARK BRAKE"
(in Canada "P") indicator lamp in the in-
strument cluster comes on when the ig-
nition key is in position 2.380de043
To release the brake, pull the handle.
Please remember that the brakes disen-
gage immediately.
The parking brake is primarily designed
to prevent the vehicle from rolling while
parked, and operates against the rear
wheels.380de042
If, in exceptional circumstances, it
should be necessary to engage
the parking brake while the vehicle is in
motion, depress the pedal cautiously
and slowly while continuing to pull on
the release handle.
Excessive pressure on the pedal can
lead to overbraking and loss of traction
at the rear.
The brake lamps do not come on when
the parking brake is applied.<
You can prevent corrosion from forming
on the separate parking brake drums
with an occasional gentle application of
the parking brake when stopping at
traffic lights.
Page 74 of 211
73n
RepairsIndexOverview Controls Car care Technology Data
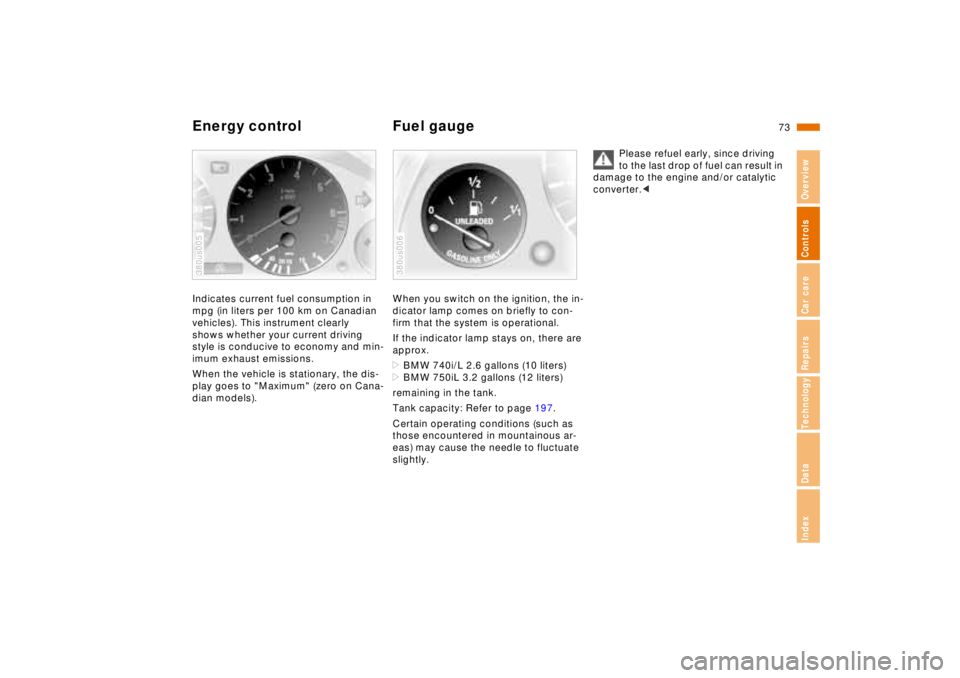
Energy control Fuel gaugeIndicates current fuel consumption in
mpg (in liters per 100 km on Canadian
vehicles). This instrument clearly
shows whether your current driving
style is conducive to economy and min-
imum exhaust emissions.
When the vehicle is stationary, the dis-
play goes to "Maximum" (zero on Cana-
dian models).380us005
When you switch on the ignition, the in-
dicator lamp comes on briefly to con-
firm that the system is operational.
If the indicator lamp stays on, there are
approx.
>BMW 740i/L 2.6 gallons (10 liters)
>BMW 750iL 3.2 gallons (12 liters)
remaining in the tank.
Tank capacity: Refer to page 197.
Certain operating conditions (such as
those encountered in mountainous ar-
eas) may cause the needle to fluctuate
slightly.380us006
Please refuel early, since driving
to the last drop of fuel can result in
damage to the engine and/or catalytic
converter.<