Page 1242 of 1807

1
234
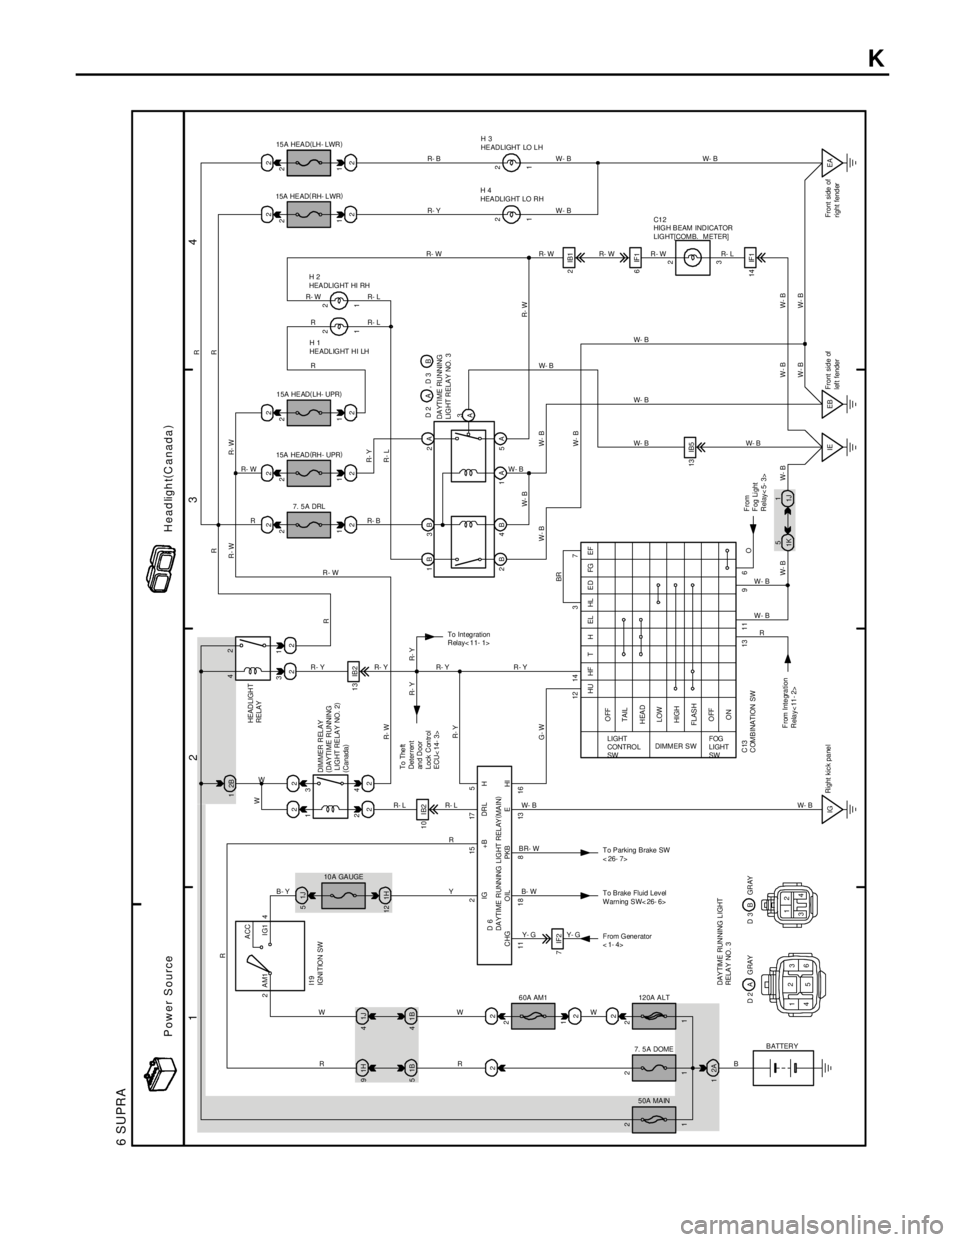
6 SUPRA
2 1
4 334
12
1H 91J41J 522
1B 51B41H 122222
13 IB2
10 IB2
222ACC
IG1 AM1 4
22 2 22
1 2
1 2
IG2222
1 2
1 2
2IB1
6IF1
14 IF1 13 IB5
EA EB IE 5
1K1
1J 2B 1
22
2 2215175
12 14 322 2 22
7
2
311 1 1 1
6 9 11 13 1 111 1 8 8 13 16C HG OIL PKB E HI
G- WR- Y R- W R
W
R- Y R- YR- WRR
R
R- W
R- Y
R- L
R- W
W- B
W- B W- B
W- B W- B W - B
W- BW- B
W- B
W- B W- B
W- B
R-W R-W R-W R-L
W- B
W- B
W- B W- B W- B
W- B
W- B
R
R- Y R- W
RR- L
R- L
R
R- B R R- W
R- WR- WR- Y R- B
W
R R WR R- L
Y R- L R- Y
11
WR- Y R- Y
10 A GA UGE
R
O HU HF T H EL HL E D FG EF
OFF
TAIL
HEAD
LOW
HIGH
FLAS H
OFF
ON
LIGHT
CONTRO L
SWDIMM ER S WFOG
LIGHT
SW
12 0A ALT 6 0A AM1
7. 5 A DOME
50A MAINB ATTERY F rom Gene rator
<1-4> T o Brake Fluid Lev el
Warn ing SW< 26- 6> To Parking Brake SW
< 26- 7>
I19
IGNI TION SW
IG +B DRL H
D 6
DA YTIME R UNN ING LIGHT REL AY(
MA IN)DIMMER R EL AY
(
DAYTI ME R UNNING
LIGHT RELAY NO. 2)
(
Canada)HEAD LIGH T
RELAY
BR- W
B- W
Y- G
2A
W- BW- B
From Integration
Relay<11- 2> C13
COMBINATION SWFrom
F og Li ght
Relay< 5- 3>DA YTI ME RU NNING
LIGHT RELA Y NO. 3
15A HEAD(
LH- UPR)
15A HEAD(
RH - UPR)
7. 5 A DRLH 1
HE ADL IGHT H I LH H 2
HEA DLIGHT HI RH 15A HE AD(
RH- L WR) 15 A HEA D(
LH- LWR)
H 4
HEADLIGHT LO RHH 3
HE AD LIGHT LO L H
C1 2
HIGH B EAM IND ICATOR
LIGHT[COMB. METER]
To Integration
Relay< 11- 1>
To The ft
Deter ren t
an d Door
Lock Con tr ol
ECU< 14- 3>
B B- Y
BR2
1
Right kic k pa ne lFront sid e of
lef t fenderFront side of
right fend er 2B 4B 1A 5A 1B 3B 2A
3
A D 2 A , D 3 B
7IF2
Y- G
DAY TIME RUN NING L IGHT
RELA Y NO. 3
1
4
5 2
3
612
34 A D 2 G RAY BD 3 GR AY 2
2
W W- B
W- B
Power SourceHeadlight(
Canada)
K
Page 1310 of 1807

EM0AV-02
P11544
(2)(3)
(1) EM-58
- ENGINE MECHANICAL (2JZ-GTE)ENGINE UNIT
1163 Author�: Date�:
1997 SUPRA (RM502U)
REMOVAL
1. REMOVE HOOD
2. REMOVE RADIATOR ASSEMBLY
(See page CO-22)
3. DRAIN ENGINE OIL
4. DRAIN FUEL FROM FUEL TANK
5. REMOVE NO.1 AIR HOSE
6. DISCONNECT CONTROL CABLES FROM
THROTTLE BODY
Disconnect these cables:
�Accelerator cable
�Cruise control actuator cable
7. REMOVE AIR CLEANER AND MAF METER
ASSEMBLY
(a) Remove the 3 bolts.
(b) Loosen the hose clamp, disconnect the air hose from the
intake air connector.
(c) Disconnect the MAF meter wire from the clamp on the air
cleaner case.
(d) Disconnect the MAF meter connector, and remove the air
cleaner and MAF meter assembly.
8. M/T:
REMOVE DRIVE BELT TENSIONER DAMPER
(See page EM-15)
9. REMOVE DRIVE BELT, FAN, FLUID COUPLING
ASSEMBLY AND WATER PUMP PULLEY
(See page CO-7)
10. REMOVE CHARCOAL CANISTER
11. DISCONNECT HEATER WATER HOSES
12. DISCONNECT BRAKE BOOSTER VACUUM HOSE
13. DISCONNECT EVAP HOSE
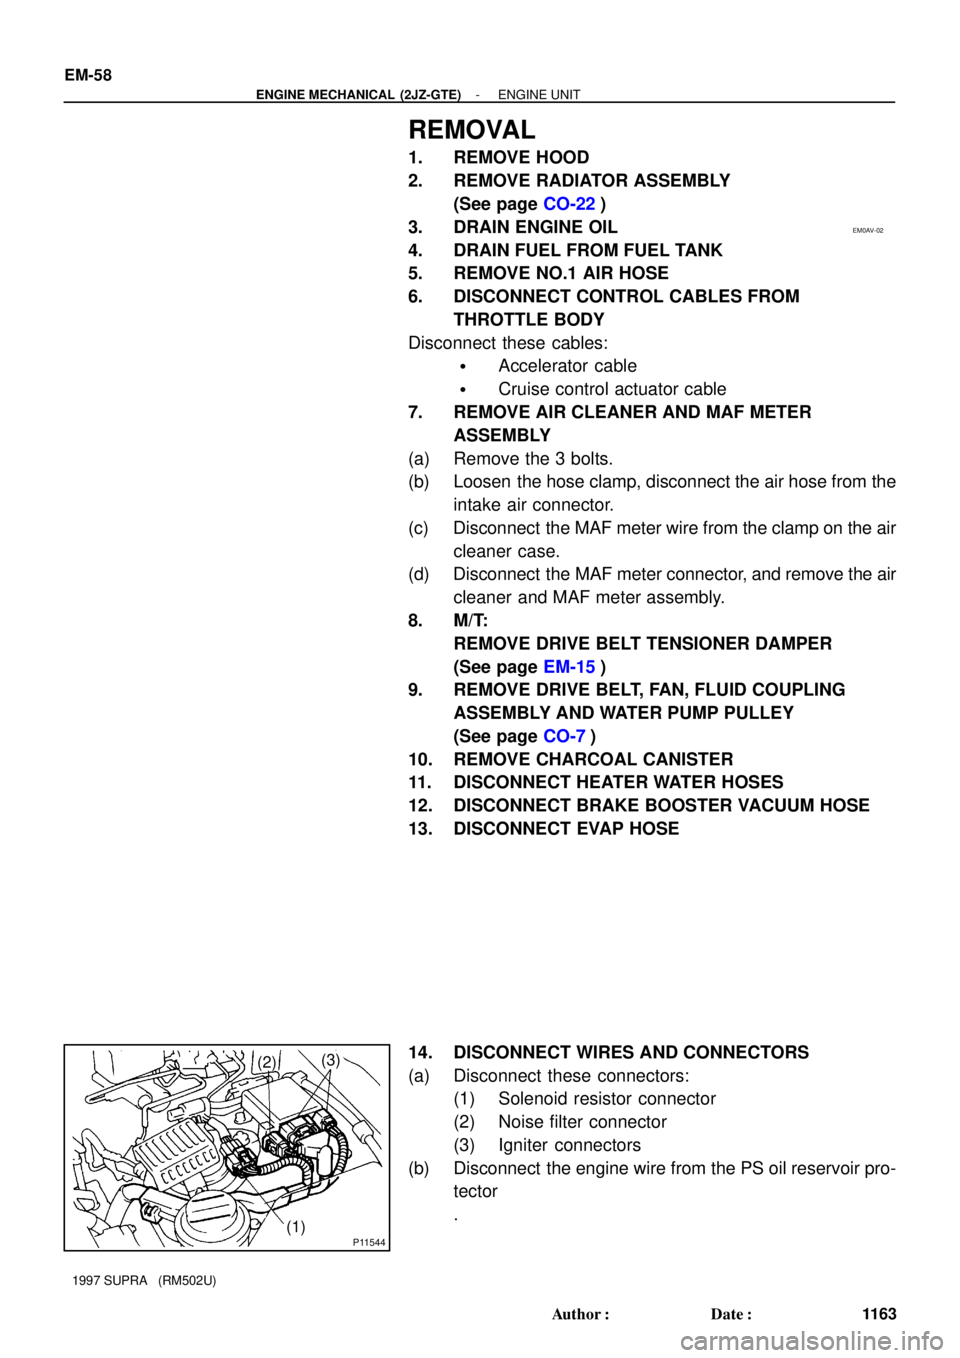
14. DISCONNECT WIRES AND CONNECTORS
(a) Disconnect these connectors:
(1) Solenoid resistor connector
(2) Noise filter connector
(3) Igniter connectors
(b) Disconnect the engine wire from the PS oil reservoir pro-
tector
.
Page 1321 of 1807

Z09735
B B
A
- ENGINE MECHANICAL (2JZ-GTE)ENGINE UNIT
EM-69
1174 Author�: Date�:
1997 SUPRA (RM502U)
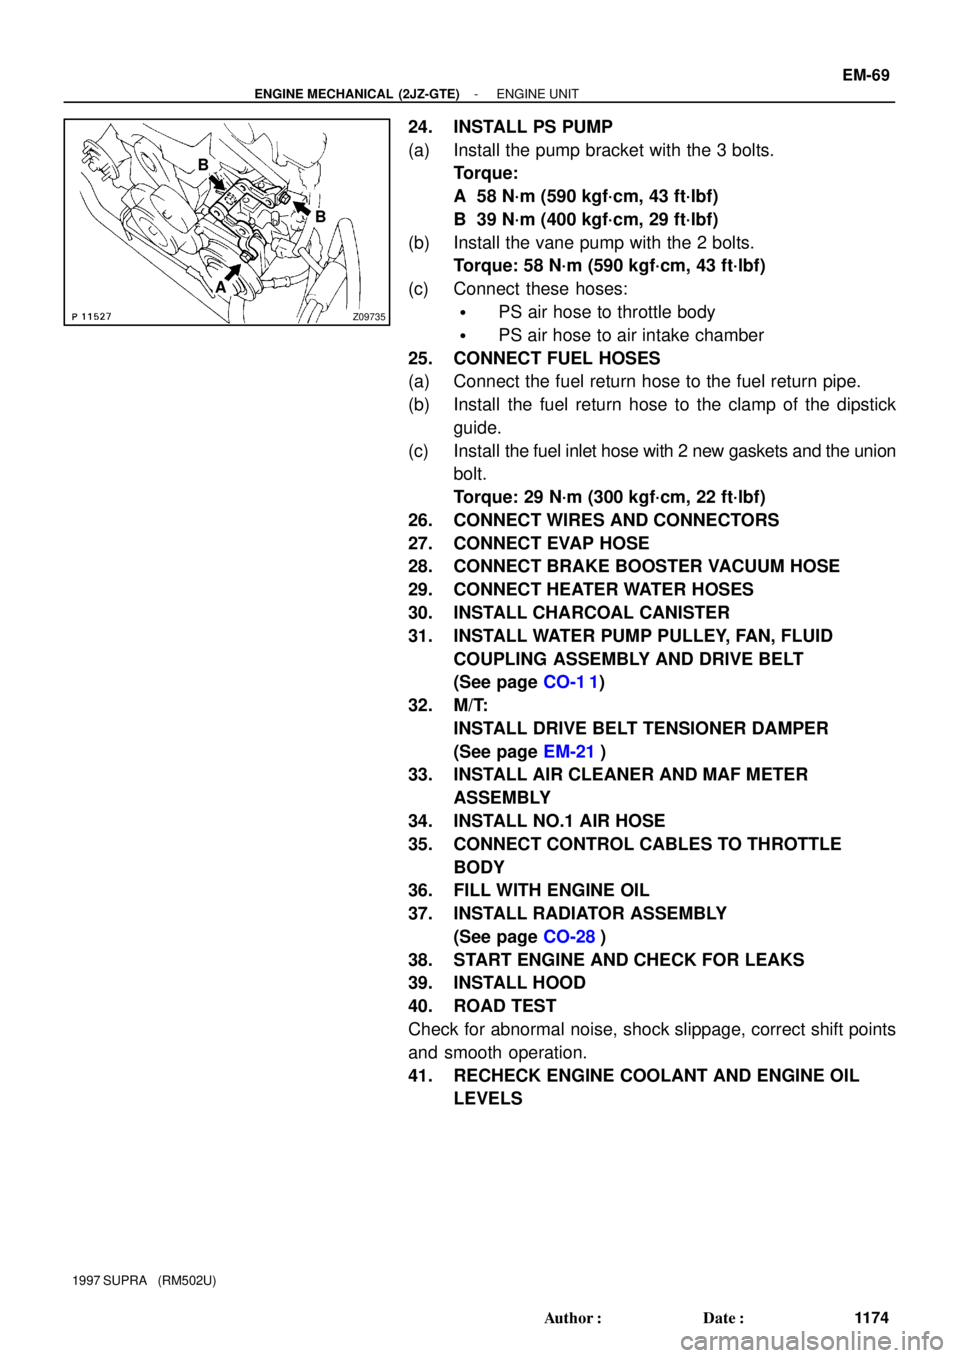
24. INSTALL PS PUMP
(a) Install the pump bracket with the 3 bolts.
Torque:
A 58 N´m (590 kgf´cm, 43 ft´lbf)
B 39 N´m (400 kgf´cm, 29 ft´lbf)
(b) Install the vane pump with the 2 bolts.
Torque: 58 N´m (590 kgf´cm, 43 ft´lbf)
(c) Connect these hoses:
�PS air hose to throttle body
�PS air hose to air intake chamber
25. CONNECT FUEL HOSES
(a) Connect the fuel return hose to the fuel return pipe.
(b) Install the fuel return hose to the clamp of the dipstick
guide.
(c) Install the fuel inlet hose with 2 new gaskets and the union
bolt.
Torque: 29 N´m (300 kgf´cm, 22 ft´lbf)
26. CONNECT WIRES AND CONNECTORS
27. CONNECT EVAP HOSE
28. CONNECT BRAKE BOOSTER VACUUM HOSE
29. CONNECT HEATER WATER HOSES
30. INSTALL CHARCOAL CANISTER
31. INSTALL WATER PUMP PULLEY, FAN, FLUID
COUPLING ASSEMBLY AND DRIVE BELT
(See page CO-1 1)
32. M/T:
INSTALL DRIVE BELT TENSIONER DAMPER
(See page EM-21)
33. INSTALL AIR CLEANER AND MAF METER
ASSEMBLY
34. INSTALL NO.1 AIR HOSE
35. CONNECT CONTROL CABLES TO THROTTLE
BODY
36. FILL WITH ENGINE OIL
37. INSTALL RADIATOR ASSEMBLY
(See page CO-28)
38. START ENGINE AND CHECK FOR LEAKS
39. INSTALL HOOD
40. ROAD TEST
Check for abnormal noise, shock slippage, correct shift points
and smooth operation.
41. RECHECK ENGINE COOLANT AND ENGINE OIL
LEVELS
Page 1420 of 1807

MA01F-02
MA-4
- MAINTENANCEUNDER HOOD
41 Author�: Date�:
1997 SUPRA (RM502U)
UNDER HOOD
GENERAL MAINTENANCE
1. GENERAL NOTES
�Maintenance items may vary from country to country. Check the owner's manual supplement in which
the maintenance schedule is shown.
�Every service item in the periodic maintenance schedule must be performed.
�Periodic maintenance service must be performed according to whichever interval in the periodic main-
tenance schedule occurs first, the odometer reading (miles) or the time interval (months).
�Maintenance service after the last period should be performed at the same interval as before unless
otherwise noted.
�Failure to do even one item an cause the engine to run poorly and increase exhaust emissions.
2. WINDSHIELD WASHER FLUID
Check that there is sufficient fluid in the tank.
3. ENGINE COOLANT LEVEL
Check that the coolant level is between the ºFULLº and ºLOWº lines on the see-through reservoir.
4. RADIATOR AND HOSES
(a) Check that the front of the radiator is clean and not blocked with leaves, dirt or bugs.
(b) Check the hoses for cracks, kinks, rot or loose connections.
5. BATTERY ELECTROLYTE LEVEL
Check that the electrolyte level of all battery cells is between the upper and lower level lines on the case.
6. BRAKE AND CLUTCH FLUID LEVELS
Check that the brake and clutch fluid levels are near the upper level line on the see-through reservoirs.
7. ENGINE DRIVE BELT
Check drive belt for fraying, cracks, wear or oil contamination.
8. ENGINE OIL LEVEL
Check the level on the dipstick with the engine turned off.
9. POWER STEERING FLUID LEVEL
�Check the level on the dipstick.
�The level should be in the ºHOTº or ºCOLDº range depending on the fluid temperature.
10. AUTOMATIC TRANSMISSION FLUID LEVEL
(a) Park the vehicle on a level surface.
(b) With the engine idling and the parking brake applied, shift the selector into all positions from ºPº to ºLº,
and then shift into ºPº position.
(c) Pull out the dipstick and wipe off the fluid with a clean rag. Re-insert the dipstick and check that the
fluid level is in the HOT range.
(d) Do this check with the fluid at normal driving temperature (70 - 80°C, 158 - 176°F).
HINT:
Wait until the engine cools down (approx. 30 min.) before checking the fluid level after extended driving at
high speeds, in hot weather, in heavy traffic or pulling a trailer.
11. EXHAUST SYSTEM
If any change in the sound of the exhaust or smell of the exhaust fumes is noticed, have the cause located
and corrected.