Page 551 of 2053

D AEW OO M Y_2000
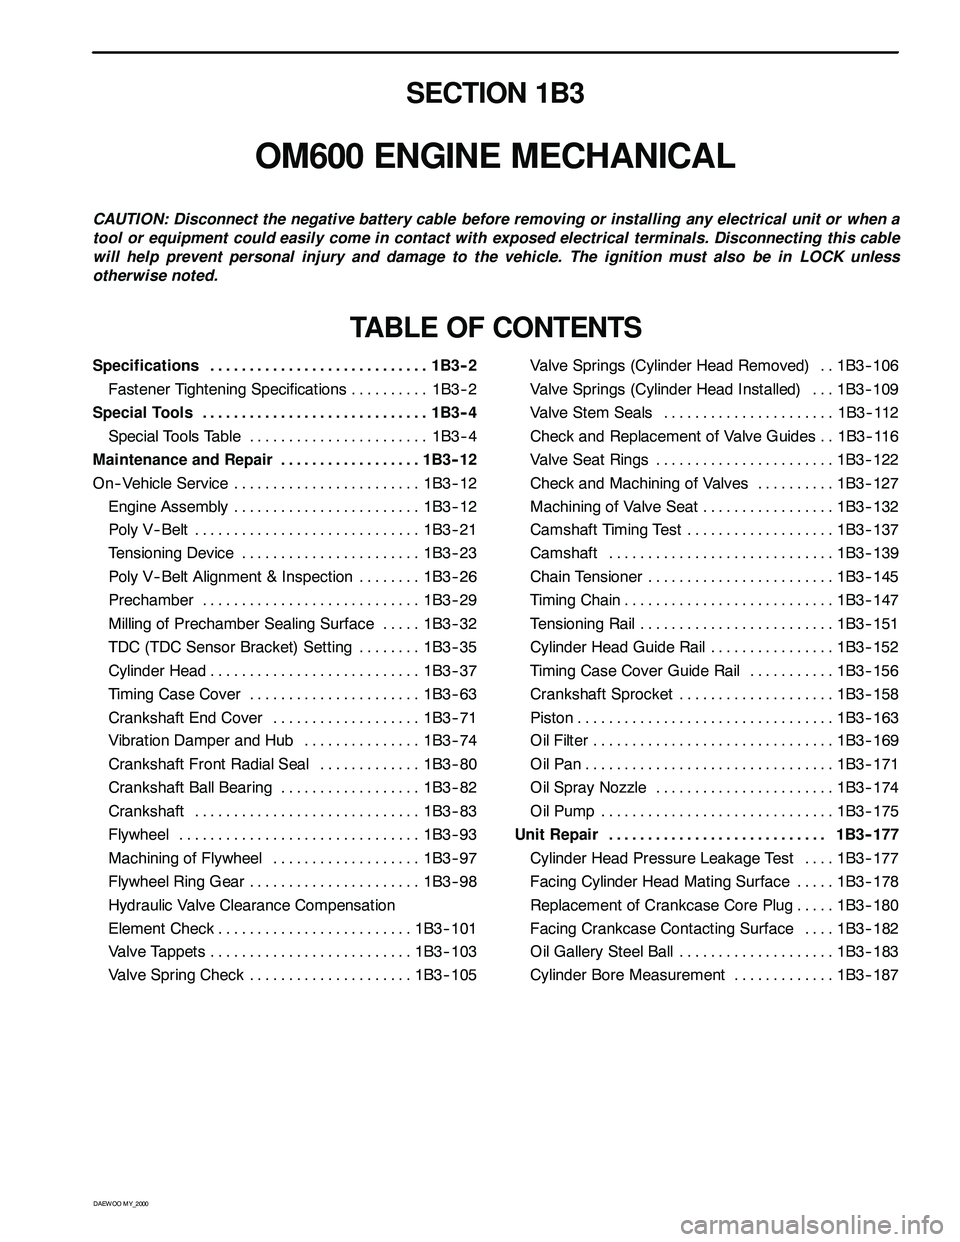
SECTION 1B3
OM600 ENGINE MECHANICAL
CAUTION: Disconnect the negative battery cable before removing or installing any electrical unit or when a
tool or equipment could easily come in contact with exposed electrical terminals. Disconnecting this cable
will help prevent personal injury and damage to the vehicle. The ignition must also be in LOCK unless
otherwise noted.
TABLE OF CONTENTS
Specifications 1B3 -- 2............................
Fastener Tightening Specifications 1B3 -- 2..........
Special Tools 1B3 -- 4.............................
Special Tools Table 1B3-- 4.......................
Maintenance and Repair 1B3 -- 12..................
On-- Vehicle Service 1B3-- 12........................
Engine Assembly 1B3-- 12........................
Poly V-- Belt 1B3 -- 21.............................
Tensioning Device 1B3-- 23.......................
Poly V-- Belt Alignment & Inspection 1B3-- 26........
Prechamber 1B3-- 29............................
Milling of Prechamber Sealing Surface 1B3 -- 32.....
TDC (TDC Sensor Bracket) Setting 1B3 -- 35........
Cylinder Head 1B3-- 37...........................
Timing Case Cover 1B3 -- 63......................
Crankshaft End Cover 1B3-- 71...................
Vibration Damper and Hub 1B3-- 74...............
Crankshaft Front Radial Seal 1B3-- 80.............
Crankshaft Ball Bearing 1B3-- 82..................
Crankshaft 1B3-- 83.............................
Flywheel 1B3 -- 93...............................
Machining of Flywheel 1B3-- 97...................
Flywheel Ring Gear 1B3 -- 98......................
Hydraulic Valve Clearance Compensation
Element Check 1B3-- 101.........................
Valve Tappets 1B3-- 103..........................
Valve Spring Check 1B3-- 105.....................Valve Springs (Cylinder Head Removed) 1B3-- 106..
Valve Springs (Cylinder Head Installed) 1B3-- 109...
Valve Stem Seals 1B3-- 112......................
Check and Replacement of Valve Guides 1B3-- 116..
Valve Seat Rings 1B3-- 122.......................
Check and Machining of Valves 1B3-- 127..........
Machining of Valve Seat 1B3-- 132.................
Camshaft Timing Test 1B3-- 137...................
Camshaft 1B3-- 139.............................
Chain Tensioner 1B3-- 145........................
Timing Chain 1B3-- 147...........................
Tensioning Rail 1B3-- 151.........................
Cylinder Head Guide Rail 1B3-- 152................
Timing Case Cover Guide Rail 1B3-- 156...........
Crankshaft Sprocket 1B3-- 158....................
Piston 1B3-- 163.................................
Oil Filter 1B3-- 169...............................
Oil Pan 1B3-- 171................................
Oil Spray Nozzle 1B3-- 174.......................
Oil Pump 1B3-- 175..............................
Unit Repair 1B3 -- 177............................
Cylinder Head Pressure Leakage Test 1B3-- 177....
Facing Cylinder Head Mating Surface 1B3 -- 178.....
Replacement of Crankcase Core Plug 1B3-- 180.....
Facing Crankcase Contacting Surface 1B3 -- 182....
Oil Gallery Steel Ball 1B3-- 183....................
Cylinder Bore Measurement 1B3-- 187.............
Page 552 of 2053
1B3 -- 2 OM600 ENGINE MECHANICAL
D AEW OO M Y_2000
SPECIFICATIONS
FASTENER TIGHTENING SPECIFICATIONS
Engine Assembly
ApplicationNSmLb-- FtLb-- In
Skid Plate Bolt28 -- 4721 -- 35--
Drain Plug Bolt3022--
Coolong Fan Shroud Bolt3--7--27 -- 62
Control Linkage Nut8--186--13--
Clutch Linkage Cylinder Nut20 -- 3415 -- 25--
Exhaust Manifold Bolt3022--
Propeller Shaft Bolt & Nut (Axle)70 -- 8052 -- 59--
Propeller Shaft Bolt & Nut (T/C)81 -- 8960 -- 66--
Engine Mounting Nut50 -- 7537 -- 55--
Crankshaft Assembly
ApplicationNSmLb-- FtLb-- In
Cooling Fan Belt Pulley Bolt10--89
Socket Bolt2317--
Tighten The Bolt200 / 90_148 / 90_--
End Cover Bolt10--89
Crankshaft Bearing Cap Bolt55 / 90_41 / 90_--
Ball Bearing45 / 90_33 / 90_--
Camshaft Sprocket Bolt25 / 90_18 / 90_--
Oil Pump Sprocket Bolt2518--
Piston
ApplicationNSmLb-- FtLb-- In
Connecting Rod Bolt35 / 90_26 / 90_--
Flywheel
ApplicationNSmLb-- FtLb-- In
12-- Sided Stretch Bolt45 / 90_33 / 90_--
Page 553 of 2053
OM600 ENGINE MECHANICAL 1B3 -- 3
D AEW OO M Y_2000
Cylinder Head
ApplicationNSmLb-- FtLb-- In
Prechamber Threaded Ring13096--
Cylinder Head Cover Bolt10--89
Fuel Injsction Pipe Nut1813--
Socket Bolt2518--
Fuel Filter Pipe Bolt2518--
Idle Pulley Bolt2317--
Damper Bolt2115--
Camshaft Bearing Cap Bolt2518--
Camshaft Sprocket Bolt25 / 90_18 / 90_--
Exhaust Pipe Bolt& Nut2518--
Chain Tensioner8059--
Injection Nozzle4030--
Intake Manifold Not2518--
Injection Nozzle Pipe Not1813--
Oil Dipstick Tube Bolt10--89
Screw Plug M18 x 155037--
Cam Support & Shaft
ApplicationNSmLb-- FtLb-- In
Stud Bolt12--106
Exhaust Manifold Not2518--
CamShaft Bearing Cap Bolt2518--
12-- Sided Bolt (M11)25 / 90_18 / 90_--
Timing Cover
ApplicationNSmLb-- FtLb-- In
Oil Pan Bolt -- Socket Bolt10--89
Oil Pan Bolt--M610--89
Oil Pan Bolt--M232317--
Belt Pulley Bolt3224--
Guide Pulley Bolt4--35
Guide Pulley Bracket Nut2317--
Chain Tensioner8059--
Tesioning Lever Bolt2317--
Page 570 of 2053
OM600 ENGINE MECHANICAL 1B3 -- 21
D AEW OO M Y_2000
POLY V-- BELT
1 Nut 23N∙m (17 lb-ft) .......................
2 Tensioning Lever
3Bolt4Spring
5 Tensioning Lever
6PolyV--Belt
Page 571 of 2053
1B3 -- 22 OM600 ENGINE MECHANICAL
D AEW OO M Y_2000
Removal & Installation Procedure
1. Remove the nut.
2. Push the tensioning lever in direction of arrow with a
rod (F12’ 180mm) and pull out the bolt to the rear.
3. Push back the tensioning lever (arrow direction) to
release the spring tension and remove the belt.
4. Install the poly V-- belt beginning at the tensioning
pulley (7).
7 Tensioning Pulley
8 Crankshaft
9 Generator
10 Water Pump
11 Guide Pulley
12 Power Steering Pump
13 Aircon. Compressor
Length of Belt
Length (L)With Air Conditioner2,100 mm
Length (L)Without Air Conditioner2,040 mm
Page 572 of 2053
OM600 ENGINE MECHANICAL 1B3 -- 23
D AEW OO M Y_2000
TENSIONING DEVICE
Preceding Work : Removal of cooling fan
1 Bolt 21N∙m (15 lb-ft) ......................
2 Damper
3 Nut 21N∙m (15 lb-ft) .......................
4 Tensioning Lever
5 Guide Rail Pin
6Bolt
7PolyV--Belt
8 Belt Pulley
9 Bolt 10N∙m (89 lb-in) .....................10 Tensioning Pulley
11 Socket Bolt 29N∙m (21 lb-ft) ................
12 Closing Cover
13 Washer
14 Tensioning Lever
15 Fit Bolt 100N∙m (74 lb-ft) ...................
16 Closing Cover
17 Spring
18 Bolt 20N∙m (15 lb-ft) ......................
Page 573 of 2053
1B3 -- 24 OM600 ENGINE MECHANICAL
D AEW OO M Y_2000
Removal & Installation Procedure
1. Remove the nut.
Installation Notice
Tightening Torque10 N∙m(89lb-in)
2. Push the tensioning lever in direction of arrow with a
rod (F12’ 180mm) and push out the bolt to the rear.
3. Push back the tensioning lever to release the spring
tension and remove the belt.
4. Remove the bolt (9) and then remove the belt pulley
(8).
5. Remove the bolt (1, 18) and take off the damper (2).
Notice
Pay attention to installation position of the damper.
Page 575 of 2053
1B3 -- 26 OM600 ENGINE MECHANICAL
D AEW OO M Y_2000
POLY V-- BELT ALIGNMENT & INSPECTION
Without Air Conditioner
With Air Conditioner