Page 3384 of 4133

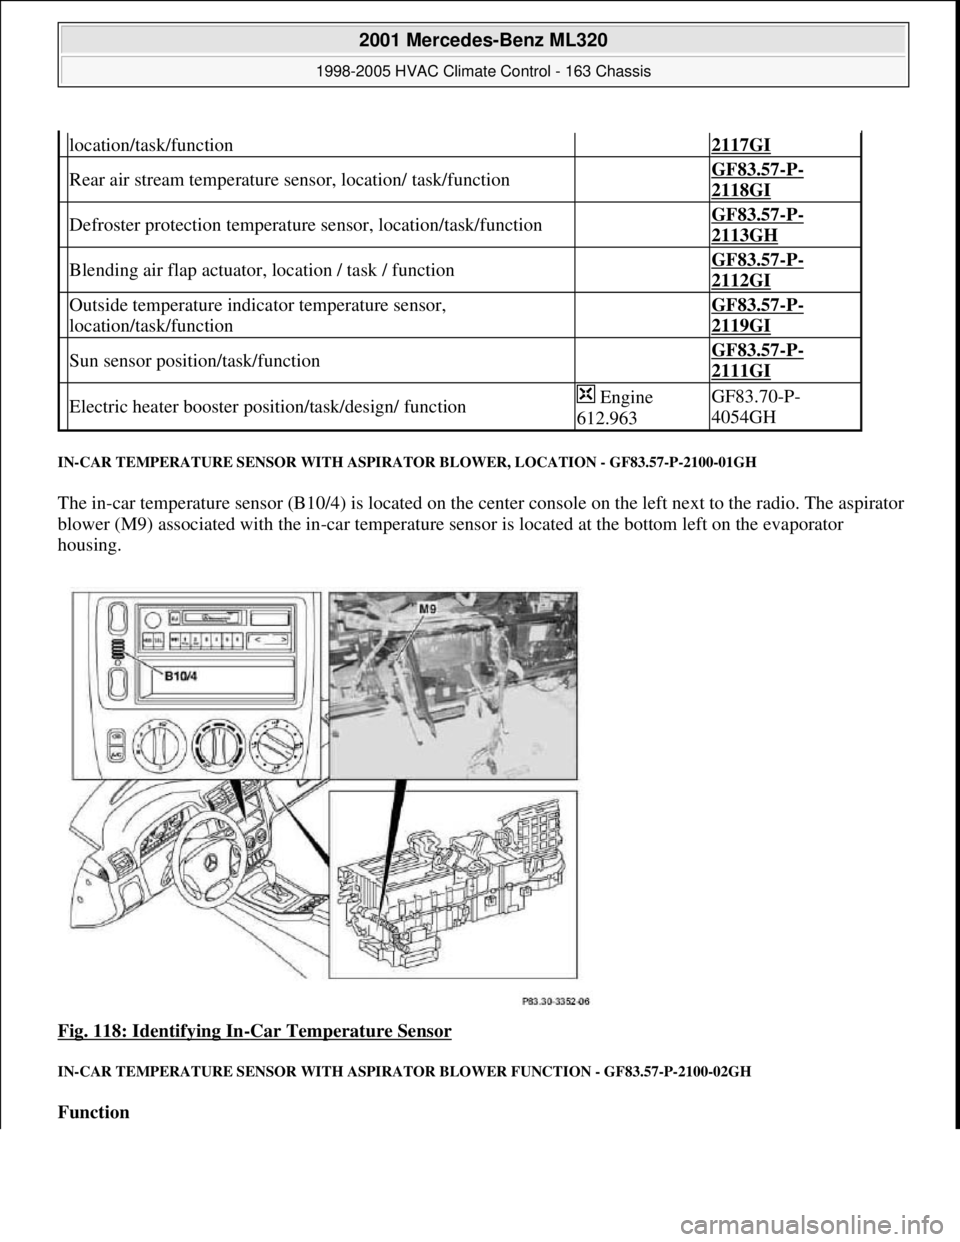
IN-CAR TEMPERATURE SENSOR WITH ASPIRATOR BLOWER, LOCATION - GF83.57-P-2100-01GH
The in-car temperature sensor (B10/4) is located on the center console on the left next to the radio. The aspirator
blower (M9) associated with the in-car temperature sensor is located at the bottom left on the evaporator
housing.
Fig. 118: Identifying In
-Car Temperature Sensor
IN-CAR TEMPERATURE SENSOR WITH ASPIRATOR BLOWER FUNCTION - GF83.57-P-2100-02GH
Function
location/task/function2117GI
Rear air stream temperature sensor, location/ task/function GF83.57-P-
2118GI
Defroster protection temperature sensor, location/task/function GF83.57-P-
2113GH
Blending air flap actuator, location / task / function GF83.57-P-
2112GI
Outside temperature indicator temperature sensor,
location/task/function GF83.57-P-
2119GI
Sun sensor position/task/function GF83.57-P-
2111GI
Electric heater booster position/task/design/ function Engine
612.963GF83.70-P-
4054GH
2001 Mercedes-Benz ML320
1998-2005 HVAC Climate Control - 163 Chassis
me
Saturday, October 02, 2010 3:23:17 PMPage 140 © 2006 Mitchell Repair Information Company, LLC.
Page 3391 of 4133

MODEL 163 up to 31.8.01 with CODE (580) Air conditioning or Tempmatic for USA
MODEL 163 as of 1.9.01 with CODE (580a) Automatic air conditioning
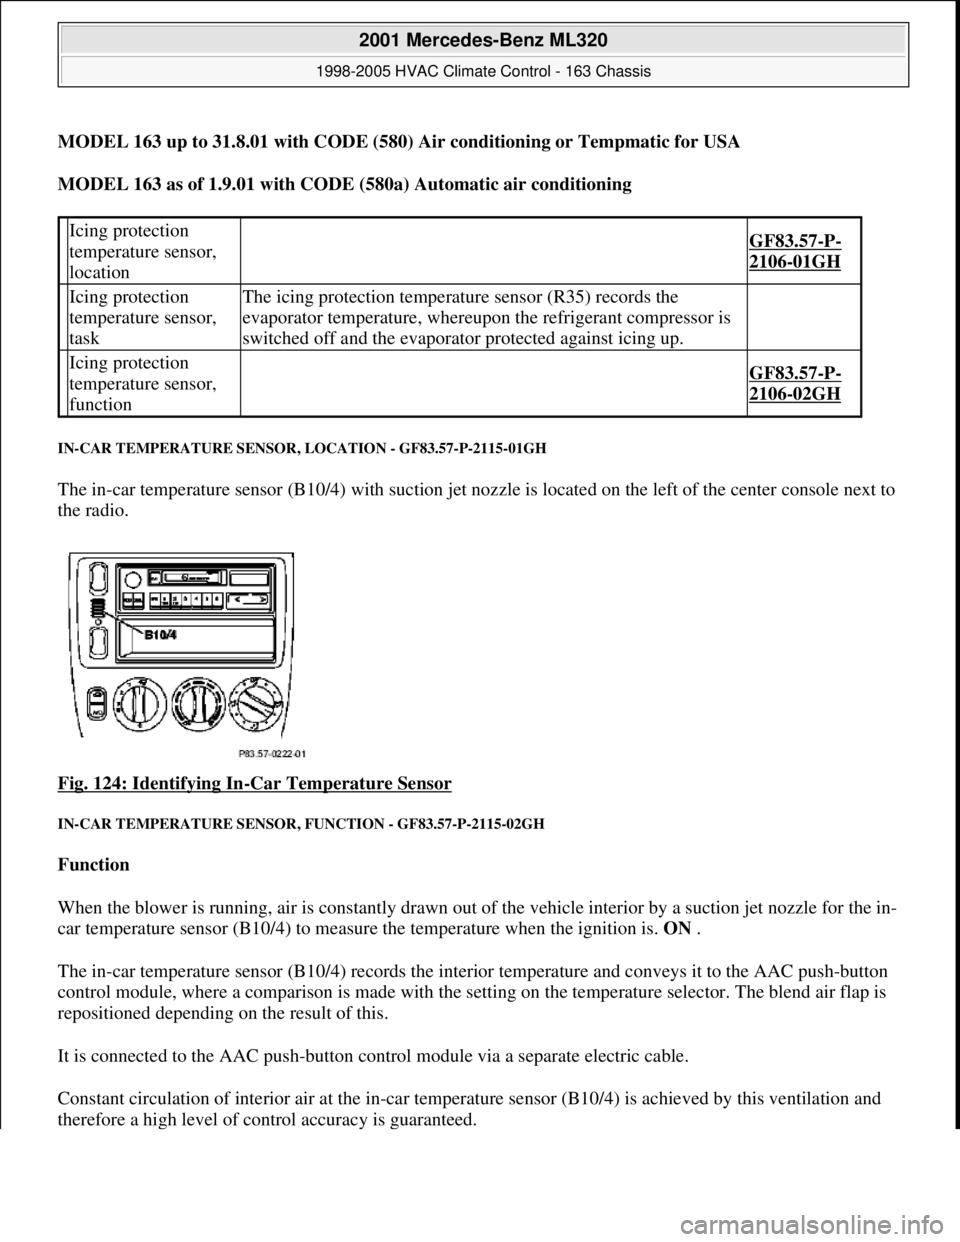
IN-CAR TEMPERATURE SENSOR, LOCATION - GF83.57-P-2115-01GH
The in-car temperature sensor (B10/4) with suction jet nozzle is located on the left of the center console next to
the radio.
Fig. 124: Identifying In
-Car Temperature Sensor
IN-CAR TEMPERATURE SENSOR, FUNCTION - GF83.57-P-2115-02GH
Function
When the blower is running, air is constantly drawn out of the vehicle interior by a suction jet nozzle for the in-
car temperature sensor (B10/4) to measure the temperature when the ignition is. ON .
The in-car temperature sensor (B10/4) records the interior temperature and conveys it to the AAC push-button
control module, where a comparison is made with the setting on the temperature selector. The blend air flap is
repositioned depending on the result of this.
It is connected to the AAC push-button control module via a separate electric cable.
Constant circulation of interior air at the in-car temperature sensor (B10/4) is achieved by this ventilation and
therefore a hi
gh level of control accuracy is guaranteed.
Icing protection
temperature sensor,
location
GF83.57-P-
2106-01GH
Icing protection
temperature sensor,
taskThe icing protection temperature sensor (R35) records the
evaporator temperature, whereupon the refrigerant compressor is
switched off and the evaporator protected against icing up.
Icing protection
temperature sensor,
function
GF83.57-P-
2106-02GH
2001 Mercedes-Benz ML320
1998-2005 HVAC Climate Control - 163 Chassis
me
Saturday, October 02, 2010 3:23:17 PMPage 147 © 2006 Mitchell Repair Information Company, LLC.
Page 3423 of 4133
Fig. 149: Identifying Rear Air Nozzle Components
REMOVE, INSTALL SWITCH UNIT FOR HEATER/VENTILATION - AR83.20-P-1835GH
MODELS 163.113/136/154/172/174 up to 31.8.01 with CODE (580) air conditioning or Tempmatic for
USA
Remove/install
1Remove rear center console (1) AR68.20-P-2020GI
2Loosen retaining clamps (2) on the sides of the air nozzle (3)
3Remove air nozzle (3) from the rear center console
4Install in the reverse order
2001 Mercedes-Benz ML320
1998-2005 HVAC Climate Control - 163 Chassis
me
Saturday, October 02, 2010 3:23:18 PMPage 179 © 2006 Mitchell Repair Information Company, LLC.
Page 3454 of 4133
Fig. 169: Identifying Rear Blower Motor Components
REMOVE/INSTALL AUXILIARY FAN - AR83.30-P-5600GH
MODEL 163.136 /154 /157 /172 with CODE (580) Air conditioning or Tempmatic for USA
Remove/install
1Remove center console AR68.20-P-
2000GH
2Disconnect rear blower
motor connector (1, 2)
3Remove screws (3)
4Pull out rear blower motor
(M2/1) to the rear Installation: Ensure that the rear blower
motor (M2/1) is connected to the air duct
correctly (4).
5Install in the reverse order
2001 Mercedes-Benz ML320
1998-2005 HVAC Climate Control - 163 Chassis
me
Saturday, October 02, 2010 3:23:18 PMPage 210 © 2006 Mitchell Repair Information Company, LLC.
Page 3465 of 4133

Dashboard
Air conditioning system
8Remove wiper system AR82.30-P-
6400GH
9Remove nuts (5) from instrument
panel at firewall
*BA68.10-
P-1001-
01A
10Remove paneling from A-pillar AR68.30-P-
4050GH
11Remove plastic nuts on driver's side
at paneling below instrument panel
12Remove paneling on right in footwell AR68.30-P-
4010GH
13
Remove rubber covers on side at the
A-pillars and unscrew screws for
instrument panel at A-pillar (arrows)
*BA68.10-
P-1002-
01A
14Remove center console AR68.20-P-
2000GH
15Unscrew bolt (6) underneath the
instrument panel
*BA68.10-
P-1003-
01A
16Withdraw instrument panel to the
rear Bring in helper. Cushion front edge of
selector lever module so that lower edge of
instrument panel is not damaged.
17Turn instrument panel around so that
the back is accessible Do not overstretch interior wiring
harness.
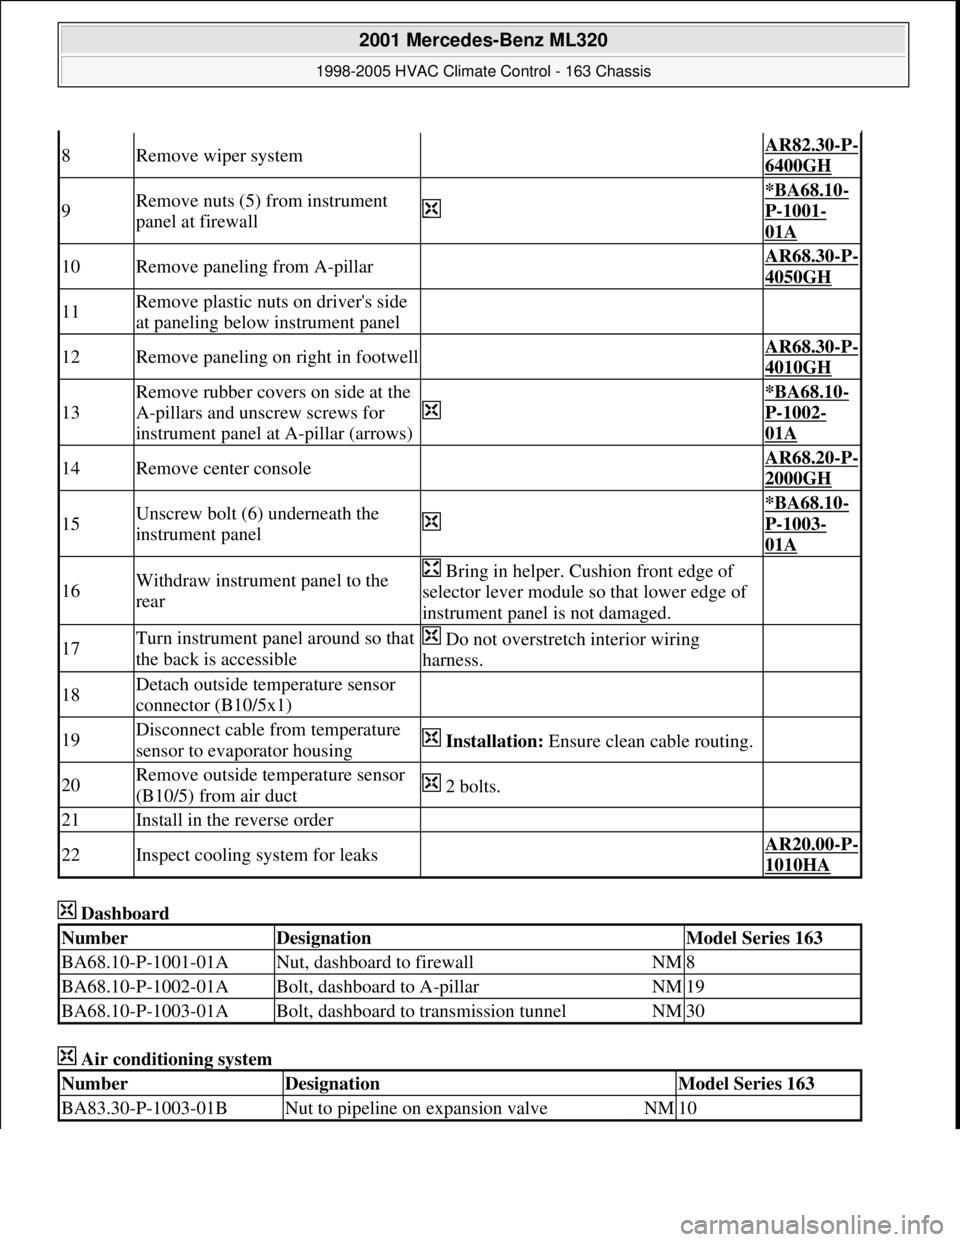
18Detach outside temperature sensor
connector (B10/5x1)
19Disconnect cable from temperature
sensor to evaporator housing Installation: Ensure clean cable routing.
20Remove outside temperature sensor
(B10/5) from air duct 2 bolts.
21Install in the reverse order
22Inspect cooling system for leaks AR20.00-P-
1010HA
NumberDesignationModel Series 163
BA68.10-P-1001-01ANut, dashboard to firewallNM8
BA68.10-P-1002-01ABolt, dashboard to A-pillarNM19
BA68.10-P-1003-01ABolt, dashboard to transmission tunnelNM30
NumberDesignationModel Series 163
BA83.30-P-1003-01BNut to pipeline on expansion valveNM10
2001 Mercedes-Benz ML320
1998-2005 HVAC Climate Control - 163 Chassis
me
Saturday, October 02, 2010 3:23:19 PMPage 221 © 2006 Mitchell Repair Information Company, LLC.
Page 3468 of 4133
Fig. 180: Identifying Rear Air Stream Temperature Sensor And Connector
REMOVE, INSTALL IN-CAR TEMPERATURE SENSOR FOR ASPIRATOR BLOWER (M9) - AR83.30-P-8100GH
MODELS 163.113/136/154/172/174 as of 1.9.99 up to 31.8.01
Remove/install
1Remove center console AR68.20-P-
2000GH
2Remove sound deadener
3
Disconnect plug (1) from rear
air stream temperature sensor
(B10/7) The rear air stream temperature sensor
(B10/7) is positioned in the left air nozzle on
the blower motor.
4Remove rear air stream
temperature sensor (B10/7)
Do not damage rear air stream temperature
sensor (B10/7).
Turn rear air stream temperature sensor
(B10/7) 90 counterclockwise.
5Install in the reverse order
2001 Mercedes-Benz ML320
1998-2005 HVAC Climate Control - 163 Chassis
me
Saturday, October 02, 2010 3:23:19 PMPage 224 © 2006 Mitchell Repair Information Company, LLC.
Page 3511 of 4133
17
Unscrew screws (2) for instrument panel
carrier (3) from A-pillar
18
Remove instrument panel carrier (3) and take
out of passenger compartment to side
through passenger door
Be careful not to damage center console
when removing and installing.
19
Install in the reverse order
Jacket tube
Number
Designation
MODEL
Series 163
BA46.10-P-1006-03C
Screw for jacket tube on upper instrument
panel carrier
Nm
20
BA46.10-P-1007-03C
Jacket tube collar nut on instrument panel
carrier at bottom
Nm
18
Copyright DaimlerChrysler AG 09.05.2006 CD-Ausgabe G/10/04 . This WIS print-out will not be recorde
d by Modification services.
Page 2
Page 3532 of 4133

air nozzleMODEL 163.113 /128 /136 /154 /157 /172 /174 /1751150GH
Removing and installing glove
compartment lidMODEL 163.136 /154 /172 up to 31.8.99AR68.10-P-
1200GH
Disassembling and assembling
glove compartment lidMODEL 163.136 /154 /172 up to 31.8.99AR68.10-P-
1220GH
Adjust glove compartment lidMODEL 163.136 /154 /172 #A up to 145272AR68.10-P-
1300GH
Remove/install glove
compartmentMODEL 163.136 /154 /172 #A up to 145272AR68.10-P-
1400GH
Remove/install glove
compartmentMODEL 163...AR68.10-P-
1400GI
Removing and installing cover
below instrument panel (left)MODELS 163.113 /128 /136 /154 /157 /172 /174 /175AR68.10-P-
1500GH
Remove/install cover below
instrument panel (right)MODEL 163.136 /154 /172 #A up to 145272,
163.136 /154 /172 #X up to 708318AR68.10-P-
1520GH
Remove/install cover below
instrument panel (right)MODEL 163...AR68.10-P-
1520GI
Remove/install stowage
compartment or beverage holderMODEL 163.113 /128 /136 /154 /157 /172 /174 /175
driver's sideAR68.10-P-
1600GH
Remove/install stowage
compartment or beverage holderMODEL 163.113 /128 /136 /154 /157 /172 /174 /175
passenger sideAR68.10-P-
1600GI
Remove/install center consoleMODEL 163.113 /128 /136 /154 /157 /172 /174 /175AR68.20-P-
2000GH
Removing and installing rear
section of center consoleMODEL 163.113 /136 /154 /172 /174 as of 1.9.99 up to
31.8.01AR68.20-P-
2020GH
Remove/install rear center
consoleMODEL 163.113 /154 /174 #A as of 289565, 163.113
#X as of 754620, 163.128 /157 /175AR68.20-P-
2020GI
Remove/install floor coveringMODEL 163.113 /128 /136 /154 /157 /172 /174 /175AR68.20-P-
2040GH
Disassembling and assembling
center consoleMODEL 163.113 /136 /154 /172 /174 up to 31.8.01AR68.20-P-
2150GH
Disassemble/assemble center
consoleMODEL 163.113 /154 /174 #A as of 289565, 163.113
#X as of 754620, 163.128 /157 /175AR68.20-P-
2150GI
Remove/install rear center
console switch moduleMODEL 163.113 /154 /174 #A as of 289565, 163.113
#X as of 754620, 163.128 /157 /175AR68.20-P-
2210GH
Remove/install rear beverage
holderMODEL 163...AR68.20-P-
2220GH
Remove/install rear beverage
holderMODEL 163.113 /154 /174 #A as of 289565, 163.113
#X as of 754620, 163.128 /157 /175AR68.20-P-
2220GI
Remove/install rear ashtrayMODEL 163.113 /154 /174 #A as of 289565, 163.113
#X as of 754620, 163.128 /157 /175AR68.20-P-
2230GH
Removing and installing cover at
gearshift leverMODEL 163.113 /136 /154 /172 /174 up to 31.8.01AR68.20-P-
2310GH
Remove/install cover on gearshift MODEL 163.113 /154 /174 #A as of 289565, 163.113 AR68.20-P-
2001 Mercedes-Benz ML320
1998-2005 ACCESSORIES & BODY, CAB Interior Equipment - 163 Chassis
me
Saturday, October 02, 2010 3:35:21 PMPage 14 © 2006 Mitchell Repair Information Company, LLC.