1997 MERCEDES-BENZ ML350 check oil
[x] Cancel search: check oilPage 3741 of 4133

AR03.10-P-7311-02V
Measure gap clearance of piston rings
Test values for piston rings
Number
Designation
Engine 112.910/
911/912
Engine 112.920/
921/922/923/940/
941/942/943/944/
945/946/947/948/
960,
113.940/941/942/
943
Engine 113.944/
980/981/982/984
BE03.10-P-1002-05B
Piston ring gap clearance
Groove 1
mm
0,200...0,3500,200...0,3500,200...0,350
Groove 2
mm
0,200...0,4000,200...0,4000,200...0,400
Test values for piston rings
Number
Designation
Engine 113.960/
961/ 962/ 963/
965/ 968/
Engine
113.967
BE03.10-P-1002-05B
Piston ring gap clearance
Groove 1
mm
0,200...0,3500,200...0,350
groove 2
mm
0,200...0,4000,200...0,400
Commercially available tools
(see Workshop Equipment Manual)
Number
Designation
Make (e.g.)
Order number
WH58.30-Z-1008-12A
Feeler gage
Stiefelmayer
D-73734 Esslingen
59
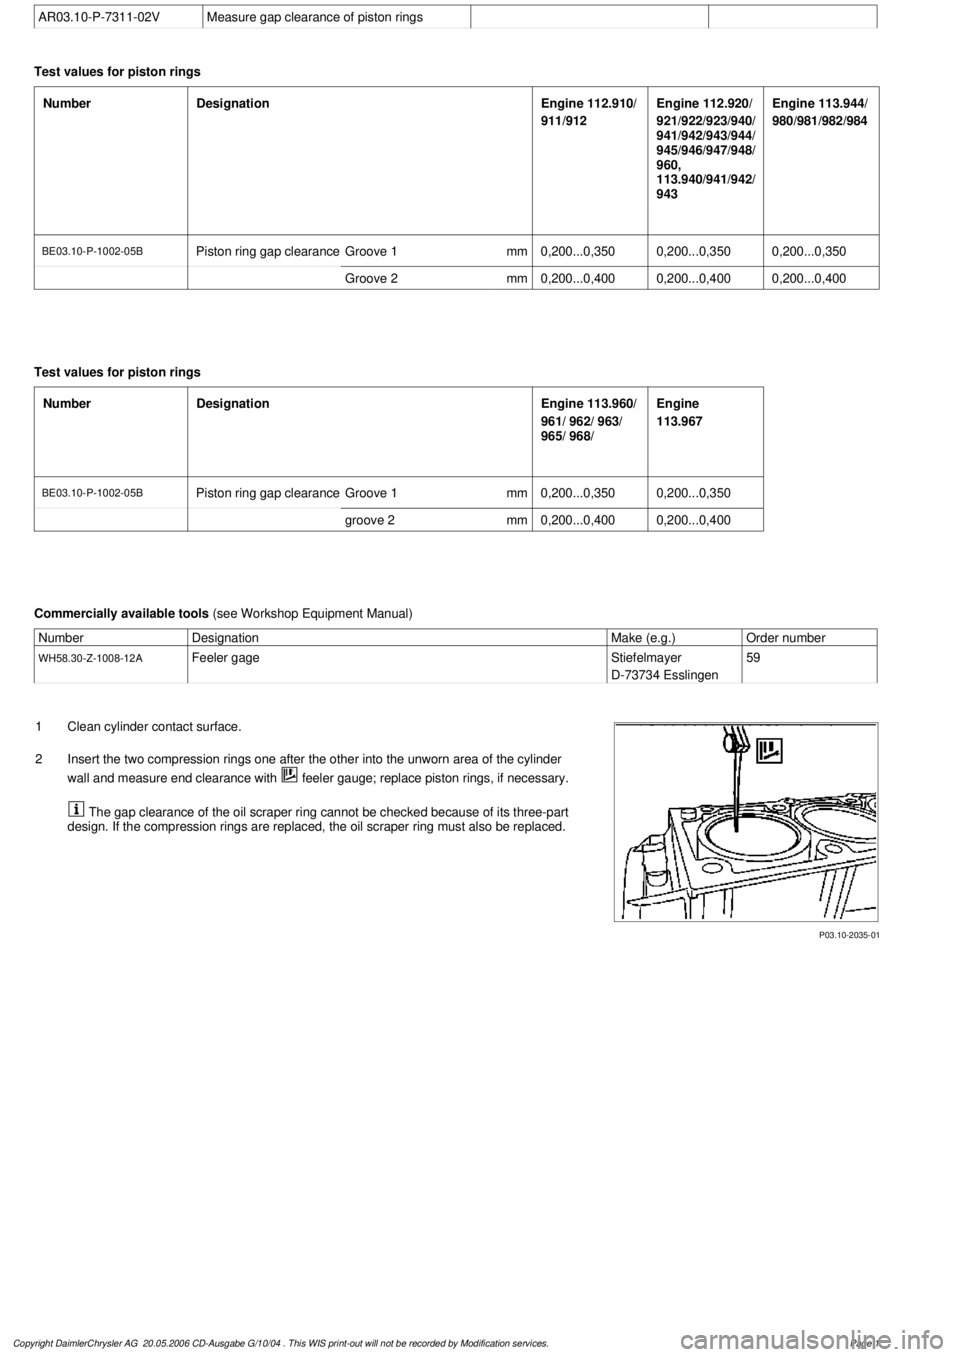
P03.10-2035-01
1
Clean cylinder contact surface.
2
Insert the two compression rings one after the other into the unworn area of the cylinder
wall and measure end clearance with
feeler gauge; replace piston rings, if necessary.
The gap clearance of the oil scraper ring cannot be checked because of its three-part
design. If the compression rings are replaced, the oil scraper ring must also be replaced.
Copyright DaimlerChrysler AG 20.05.2006 CD-Ausgabe G/10/04 . This WIS print-out will not be recorde
d by Modification services.
Page 1
Page 3746 of 4133

11
Oil piston pin (2) and conrod bush
12
Assemble piston (3) and conrod (4)
Install piston (3) with arrow in direction of
travel.
13
Push in piston pin (2) by hand
14
Insert circlip (1) of piston pin (2) in the groove
on piston (3)
Do not damage piston (3). Place a clean
cloth underneath.
15
Oil cleaned parts (cylinder bore, conrod
bearing journal, conrod bearing shells and
pistons)
16
Fit on tensioning strap (10) and tension
Piston ring gaps must be offset 120°.
Tensioning strap
*000589041400
17
Install piston (3) with arrow pointing in
direction of travel
Rotate crankshaft far enough so that the
connecting rod when inserting piston into
cylinder bore does not line up at the
connecting rod journal!
18
Inspect conrod bolts (6)
AR03.10-P-6111-01BV
Thread and shank length
*BE03.10-P-1001-03A
19
Install conrod bearings and fit on conrod
bearing cap (5)
The connecting rod bearing shell (7) with
oil drilling (arrow) must be mounted in the
connecting rod, otherwise the piston pin (2) is
not lubricated.
The anti-twist locks (8) of the connecting rod
bearing shells (7) must be seated in the
grooves (9) in the conrods (4) and connecting
rod bearing caps (5).
AR03.10-P-6111-06AV
The connecting rod and connecting rod
bearing cap are cracked (broken) (arrow).
They must not be installed the wrong side
round!
20
Tighten conrod bolts (6)
AR03.10-P-6111-02BV
*BA03.10-P-1001-01E
21
Rotate crankshaft
To inspect ease of operation.
22
Install oil pump
-
Ensure oil return flow check valve is
correctly located.
-
Clean strainer of oil pump.
-
Fill oil pump with engine oil before
installing so that it pumps oil when first
started.
All except models 203, 209, 211.061/065/070,
220 without 4MATIC, 230.474 /475
AR18.10-P-6020B
Model 203 without 4MATIC, 209,
211.061/065/070
AR18.10-P-6020PV
Model 203 with 4MATIC, model 220 with
4MATIC
AR18.10-P-6020PW
Model 230.474/475
AR18.10-P-6020R
23
Fit on cylinder head
Models 463.206/ 209/ 232/ 233/ 240/ 241/
243/ 244/ 245/ 246/ 247/ 248/ 249/ 250/ 254
AR01.30-P-5800GV
Engine 112 in model 129 and engine 113 in
models 129, 202, 208, 210
AR01.30-P-5800B
Engine 112 in models 170, 202, 208, 210,
220 and engine 113 in models 220,
230.474 /475
AR01.30-P-5800BA
Model 163
AR01.30-P-5800MV
Models 203, 209 with engines 112, 113
Models 211.061/065/070
AR01.30-P-5800PV
24
Fit on top part of oil pan
Model 463
AR01.45-P-7500FG
Model 230.474/475
AR01.45-P-7500R
Model 220 without 4MATIC
AR01.45-P-7500I
Model 220 with 4MATIC
AR01.45-P-7500IW
Model 210 with 4MATIC
AR01.45-P-7500FA
Model 210 without 4MATIC
AR01.45-P-7500F
Models 202, 208
AR01.45-P-7500FC
Model 203 without 4MATIC, 209 with engines
112,113
AR01.45-P-7500PV
Model 203 with 4MATIC
AR01.45-P-7500PW
Model 211.061/065/070
AR01.45-P-7500TV
Model 170
AR01.45-P-7500SV
Model 163
AR01.45-P-7500FB
Model 129
AR01.45-P-7500FD
Copyright DaimlerChrysler AG 20.05.2006 CD-Ausgabe G/10/04 . This WIS print-out will not be recorde
d by Modification services.
Page 3
Page 3752 of 4133

AR46.20-P-0600GH
Removing and installing rack-and-pinion steering
1.3.97
MODEL
163.113 /128 /136 /154 /157 /172 /174 /175
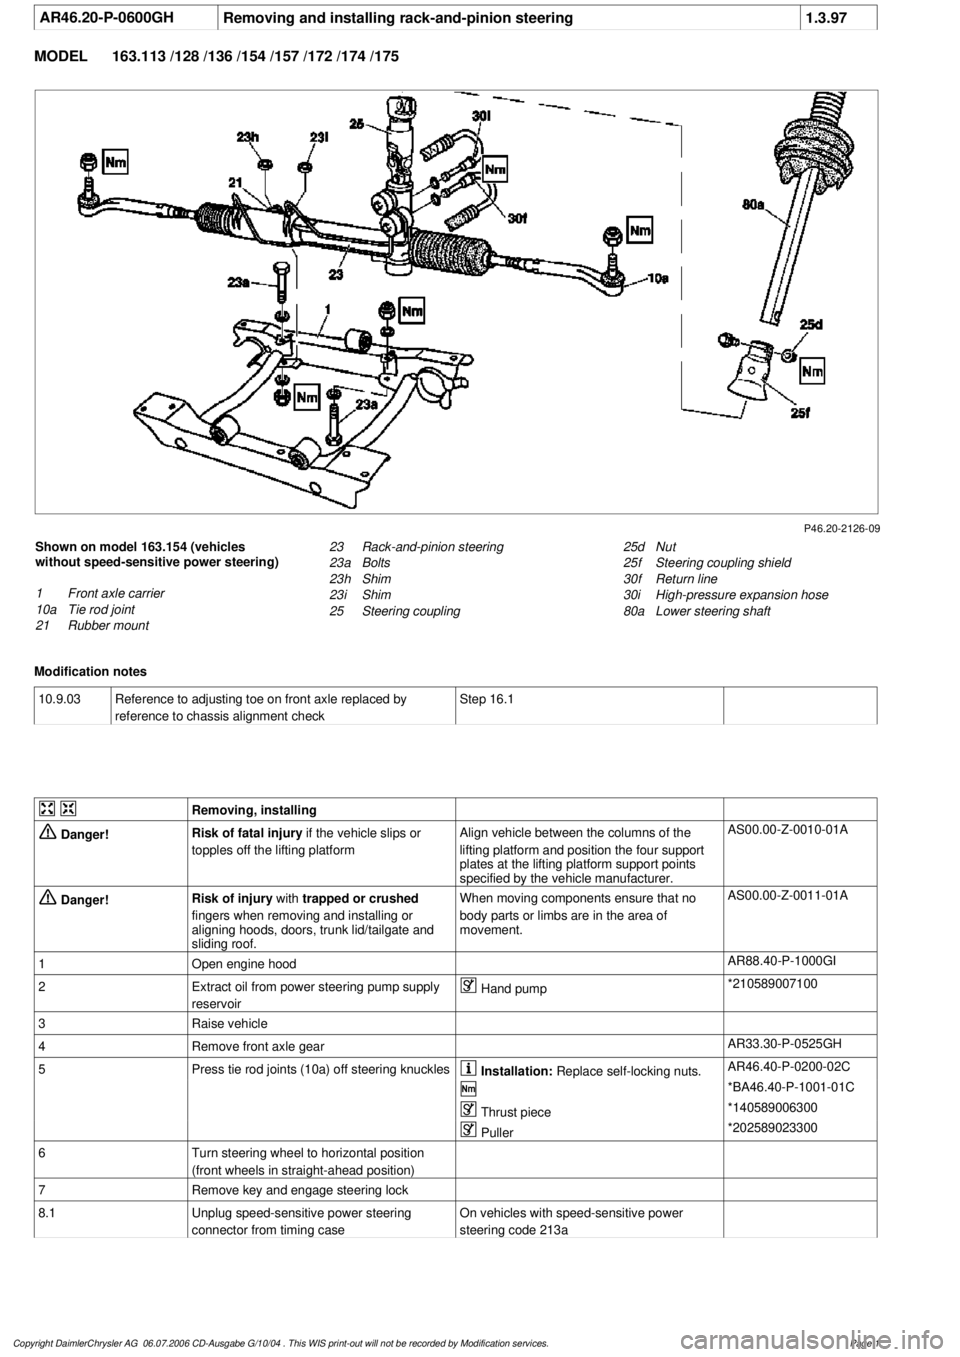
P46.20-2126-09
Shown on model 163.154 (vehicles
without speed-sensitive power steering)
1
Front axle carrier
10a
Tie rod joint
21
Rubber mount
25d
Nut
25f
Steering coupling shield
30f
Return line
30i
High-pressure expansion hose
80a
Lower steering shaft
23
Rack-and-pinion steering
23a
Bolts
23h
Shim
23i
Shim
25
Steering coupling
Modification notes
10.9.03
Reference to adjusting toe on front axle replaced by
reference to chassis alignment check
Step 16.1
Removing, installing
Danger!
Risk of fatal injury
if the vehicle slips or
topples off the lifting platform
Align vehicle between the columns of the
lifting platform and position the four support
plates
at the lifting platform support points
specified by the vehicle manufacturer.
AS00.00-Z-0010-01A
Danger!
Risk of injury
with
trapped or crushed
fingers when removing and installing or
aligning hoods, doors, trunk lid/tailgate and
sliding roof.
When moving components ensure that no
body parts or limbs are in the area of
movement.
AS00.00-Z-0011-01A
1
Open engine hood
AR88.40-P-1000GI
2
Extract oil from power steering pump supply
reservoir
Hand pump
*210589007100
3
Raise vehicle
4
Remove front axle gear
AR33.30-P-0525GH
5
Press tie rod joints (10a) off steering knuckles
Installation:
Replace self-locking nuts.
AR46.40-P-0200-02C
*BA46.40-P-1001-01C
Thrust piece
*140589006300
Puller
*202589023300
6
Turn steering wheel to horizontal position
(front wheels in straight-ahead position)
7
Remove key and engage steering lock
8.1
Unplug speed-sensitive power steering
connector from timing case
On vehicles with speed-sensitive power
steering code 213a
Copyright DaimlerChrysler AG 06.07.2006 CD-Ausgabe G/10/04 . This WIS print-out will not be recorde
d by Modification services.
Page 1
Page 3757 of 4133

3.1
Remove viscous fan (1)
Engine 112.942 /970 and 113.942.
Right-hand thread!
AR20.40-P-5660C
3.2
Remove electric fan
Only Engine 113.965 /981.
AR20.40-P-5000GH
4.1
Pull off plate clamps of fan shroud (2)
Only for Engine 112.942, from 5/98.
5.1
Remove fan shroud (3)
Only for Engine 112.942 /970 und
113.942. Unscrew the bolts at bottom of fan
shroud for this step
Installation:
If installing a new radiator
with integral power steering pump oil cooler, a
new fan shroud is required if a radiator
without integral oil cooler was previously
installed.
6
Remove headlamp (7).
AR82.10-P-4730GH
7
Remove radiator crossmember (8)
AR62.30-P-2300GH
8
Detach coolant line (4, 6) and expansion
reservoir coolant line (5) at the radiator
Installation:
Replace the hose clamps on
the radiator fitting for the coolant hose, as
they could cause damage to the screw/thread.
Hose clamp
*BA20.20-P-1004-01A
9
Remove the rubber seal on radiator (9)
10.1
Remove oil line (return line of radiator
!
power steering pump expansion reservoir)
(18) and oil line (feed line of steering gear
!
radiator) (19)
From 5/98 only, seal off the connections.
Set of plugs
*129589009100
11
Unscrew ATF lines (10) at the radiator
Seal off the connections.
*BA20.20-P-1001-01A
*BA20.20-P-1003-01A
Set of plugs
*129589009100
12.1
Detach the connector from the fan and
remove the fan grille (11)
Only for Engine 112.942 /970 and 113.942.
13
Unscrew the condenser from the radiator
Do not disconnect the lines.
14
Remove fasteners (20) and damper rubber
(21)
The damper rubber (21) is designed to
prevent possible vibrations between the
condenser and radiator (15) during off-road
driving.
15
Remove air conditioning system fluid
reservoir (14) from the radiator
Place aside with the lines connected.
Detach the condenser from the radiator.
16
Remove radiator (15)
When installing, the spigots on the
radiator must be inserted in the rubber
grommets in the bottom crossmember.
Installation:
On Model 163.154 with
Engine 112.942 before VIN end number
043553, when installing a new radiator with
integral power steering pump oil cooler,
additional operations are required, if they
have not already been carried out:
#
v
Retrofit the bracket for the oil cooler line of
the power steering pump
SM46.30-P-0002A
k
Radiator with integral oil cooler for the power
steering pump
BT20.20-P-0001-01A
17
Detach air guides (12)
Replace the clamps on air guides (13).
18
Install in the reverse order
19
Pour in coolant
AR20.00-P-1142HA
20
Check the headlamp setting and correct if
necessary
e
Check and adjust the headlamp setting
AP82.10-P-8260GH
Danger!
Risk of accident
caused by vehicle starting
off when engine is running.
Risk of injury
caused by contusions and burns when
working in engine during starting procedure
Secure the vehicle to prevent it from moving.
Wear closed and snug-fitting work clothes.
Do not grasp hot or rotating parts.
AS00.00-Z-0005-01A
21
Check the oil level in the automatic
transmission and correct if necessary
AR27.00-P-0101A
22
Check the cooling system for leaks
AR20.00-P-1010HA
Radiator, coolant hoses
Copyright DaimlerChrysler AG 12.05.2006 CD-Ausgabe G/10/04 . This WIS print-out will not be recorde
d by Modification services.
Page 2
Page 3762 of 4133

13
Disconnect coolant hose to coolant pump (8),
coolant hose from thermostat housing (9) and
coolant hose from coolant expansion tank
(10) at radiator
Hexagon socket wrench
*WH58.30-Z-1001-06A
Hexagon socket wrench
*WH58.30-Z-1002-06A
14
Detach air guides (12)
Installation:
Replace fastening clamps
(13)
15
Unscrew bolts (16) at condenser (17) to
radiator
Avoid deformation of condenser lines.
Do not disconnect lines.
16
Remove attachment parts (20) and rubber
shock absorber (21)
Installation:
Ensure, that the rubber
shock absorbers do not drop when installing
the radiator.
Replace fastening clamps.
17
Take off fluid reservoir of AC (14) at radiator
Place to the side with lines connected.
External torx set
*001589760900
18
Remove bracket of charge air pipe at left
radiator
Installation:
Insert bracket of charge air
pipe into the bracket at the radiator.
19
Remove radiator (15)
Installation:
When installing, the mounting
studs of the radiator must be inserted into the
rubber grommets of the lower crossmember.
20
Install in the reverse order
21
Check headlamp adjustment, correct if
necessary
e
Check and correct headlamp adjustment
AP82.10-P-8260A
22
Inspect cooling system for leaks
AR20.00-P-1010HA
23
Fill power steering pump and bleed
Danger!
Risk of accident
caused by vehicle starting
off by itself when engine is running.
Risk of
injury
caused by contusions and burns when
working in engine during starting procedure
Secure vehicle to prevent it from moving.
Wear closed and snug-fitting work clothes.
Do not grasp hot or rotating parts.
AS00.00-Z-0005-01A
24
Run engine and inspect for leaks
Crankcase ventilation, cylinder head cover
Number
Designation
Engine
612.963
BA01.20-P-1002-01A
Bolt, cylinder head cover trim panel to
cylinder head cover
Nm
10
BA01.20-P-1003-01A
Bolt, cover panel to charge air distribution
pipe
Nm
10
Power steering pump
Number
Designation
Model
163.113
BA46.30-P-1012-01A
Banjo bolt, power steering oil line to radiator
Nm
30
Cooling system
Number
Designation
Engine
612.963
BF20.00-P-1001-02E
Cooling system
Total capacity
Liter
Y
11.0
Copyright DaimlerChrysler AG 12.05.2006 CD-Ausgabe G/10/04 . This WIS print-out will not be recorde
d by Modification services.
Page 3
Page 3818 of 4133

2
Withdraw ignition key
3
Unclip cap (1) from outer paneling (3)
4
Unscrew bolt (2) from belt end fitting (4)
*BA91.40-P-1001-01D
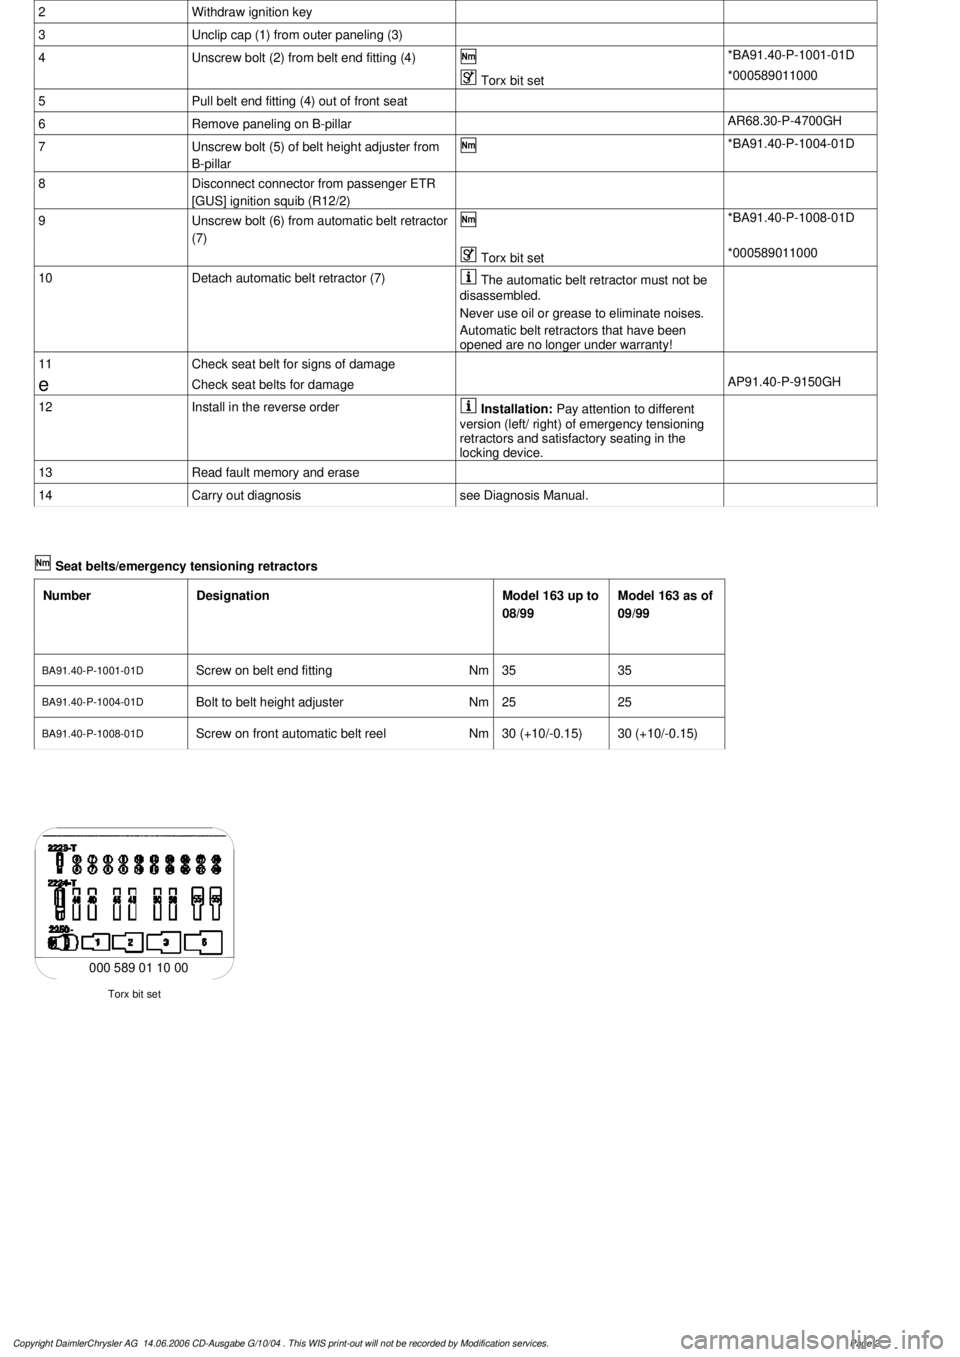
Torx bit set
*000589011000
5
Pull belt end fitting (4) out of front seat
6
Remove paneling on B-pillar
AR68.30-P-4700GH
7
Unscrew bolt (5) of belt height adjuster from
B-pillar
*BA91.40-P-1004-01D
8
Disconnect connector from passenger ETR
[GUS] ignition squib (R12/2)
9
Unscrew bolt (6) from automatic belt retractor
(7)
*BA91.40-P-1008-01D
Torx bit set
*000589011000
10
Detach automatic belt retractor (7)
The automatic belt retractor must not be
disassembled.
Never use oil or grease to eliminate noises.
Automatic belt retractors that have been
opened are no longer under warranty!
11
Check seat belt for signs of damage
e
Check seat belts for damage
AP91.40-P-9150GH
12
Install in the reverse order
Installation:
Pay attention to different
version (left/ right) of emergency tensioning
retractors and satisfactory seating in the
locking device.
13
Read fault memory and erase
14Carry out diagnosis
see Diagnosis Manual.
Seat belts/emergency tensioning retractors
Number
Designation
Model 163 up to
08/99
Model 163 as of
09/99
BA91.40-P-1001-01D
Screw on belt end fitting
Nm
3535
BA91.40-P-1004-01D
Bolt to belt height adjuster
Nm
2525
BA91.40-P-1008-01DScrew on front automatic belt reel
Nm
30 (+10/-0.15)30 (+10/-0.15)
Torx bit set
000 589 01 10 00
Copyright DaimlerChrysler AG 14.06.2006 CD-Ausgabe G/10/04 . This WIS print-out will not be recorde
d by Modification services.
Page 2
Page 3820 of 4133
![MERCEDES-BENZ ML350 1997 Complete Repair Manual 3
Unscrew bolt (1) from seat belt guide bracket
(2)
If necessary, remove belt height adjuster
(5).
*BA91.40-P-1002-01D
4
Disconnect connector from right rear ETR
[GUS] ignition squib (R12/7 MERCEDES-BENZ ML350 1997 Complete Repair Manual 3
Unscrew bolt (1) from seat belt guide bracket
(2)
If necessary, remove belt height adjuster
(5).
*BA91.40-P-1002-01D
4
Disconnect connector from right rear ETR
[GUS] ignition squib (R12/7](/manual-img/4/57306/w960_57306-3819.png)
3
Unscrew bolt (1) from seat belt guide bracket
(2)
If necessary, remove belt height adjuster
(5).
*BA91.40-P-1002-01D
4
Disconnect connector from right rear ETR
[GUS] ignition squib (R12/7)
5
Unscrew bolt (3) from automatic belt retractor
(4)
*BA91.40-P-1003-01D
6
Detach automatic belt retractor (4)
The automatic belt retractor must not be
disassembled.
Never use oil or grease to eliminate noises.
7
Check seat belts for damage
e
Check seat belts for damage
AP91.40-P-9150GH
8
Install in the reverse order
Installation:
Pay attention to different
version (left/ right) of emergency tensioning
retractors and satisfactory seating in the
locking device.
9
Read fault memory and erase
10Carry out diagnosis
see Diagnosis Manual.
Seat belts/emergency tensioning retractors
Number
Designation
Model 163 up to
08/99
Model 163 as of
09/99
BA91.40-P-1002-01D
Screw in rear upper belt guide fitting
Nm
3030
BA91.40-P-1003-01D
Bolt to rear inertia reel
Nm
3030
Copyright DaimlerChrysler AG 14.06.2006 CD-Ausgabe G/10/04 . This WIS print-out will not be recorde
d by Modification services.
Page 2
Page 3835 of 4133

SI18.00-P-0010A
Service Information: oil sludge
26.3.01
ENGINE
111 in MODELS 124, 163, 170, 202, 203, 208, 210
ENGINE
112 in MODELS 129, 163, 170, 202, 203, 208, 210, 220
ENGINE
112, 113 in MODEL 463
ENGINE
113 in MODELS 129, 163, 202, 208, 210, 215, 220
ENGINE
137 in MODEL 215, 220
ENGINE
166 in MODEL 168
Oil sludging in gasoline engines with ASSYST maintenance
system
Recently we have determined that time and time again oil
sludging occurs in gasoline engines with an ASSYST maintenance
system.
Oil sludging can lead to the following complaints:
D
engine oil consumption
D
engine smoke (white/blue)
D
influencing of oil level indicator
D
clogged oil filter, engine oil thickened like jelly
D
Check engine lamp illuminated
D
oil sludge visible during assembly job, e.g. in oil filter, in cylinder
head covers, condensation sludging
(engine 166) etc.
-----------------------------------------------------------------------------------------
The following list of causes may lead individually or as a combination
to engine oil sludging:
D
Crankcase ventilation inoperable, function orifices, bores,
passages in cylinder head cover, cylinder head, crankcase etc.
are mechanically sealed. A nonfunctioning crankcase
ventilation boosts loads on the engine oil through organic
nitrates. The risk of oil sludging increases.
The mechanical condition of the engine is always to be
checked, i.e. all engine oil drain orifices on the cylinder head
and crankcase and all crankcase ventilation ducts must be free
of obstacles. Crankcase breather lines may not be kinked.
Check the ventilation bores in the cylinder head covers.
-----------------------------------------------------------------------------------------
D
The engine oil used does not comply with the specifications in
Sheet 229.1 or 229.3 of the Specifications for Service Products.
The additive process, e.g. dirt-carrying capability, neutralization
capability and oxidation resistance as well as the quality of the
base stock influence sludging time.
Use of engine oils with best possible resistance to formation of
sludge, i.e. use only tested and approved engine oils (from
Sheet 229.1 or 229.3). The best protection is afforded by the
engine oils on Sheet 229.3, which fulfill more stringent
specifications with regard to preventing sludge and deposits
(see Sheet 221.0, page 11). These oils have a distinctly better
anti-sludge characteristic than other engine oils.
D
Sludging after adding a fuel or engine oil special additive.
Do not use fuel or engine oil special additives. More information
hereto is available on Sheet 219.0 of the Specifications for
Service products. Reference to customer not to use special
additives.
D
Engine oil change not performed according to ASSYST
specifications. At driven distances
exceeding > approx. 3000 km, engine oil sludging may occur.
-----------------------------------------------------------------------------------------
Comply with engine oil and filter change as under ASSYST
specifications. Observe remaining distance.
D
Fuel grade lies outside standard (regionally contingent). If
contaminated, deficient fuel is used, then engine oil sludging
may occur even where approved engine oil is used.
Operation with fuel, e.g. as under DIN EN 228. Clarify refueling
behavior of customer. If engine operation regional, is
temporarily possible with deficient oil only, then the startup
distance has to be individually reduced, i.e. the oil change
temporarily performed at an interval of, e.g. 10,000 km.
D
Radiator antifreeze penetration into engine oil, e.g. through an
internal engine leak (cylinder head gasket, casting porosity).
The engine oil sludges within a short period. The crankcase
ventilation clogs up and stops functioning. Condensation
sludging clogs up the oil separator cells
(engine 166).
Rectify coolant leakage. Clean all sludged engine parts, in
particular the crankcase ventilation parts. If the occurrence
repeats, and casting porosity is suspected, e.g. replace
crankcase.
-----------------------------------------------------------------------------------------
Copyright DaimlerChrysler AG 20.05.2006 CD-Ausgabe G/10/04 . This WIS print-out will not be recorde
d by Modification services.
Page 1