1997 MERCEDES-BENZ ML350 boot
[x] Cancel search: bootPage 2520 of 4133
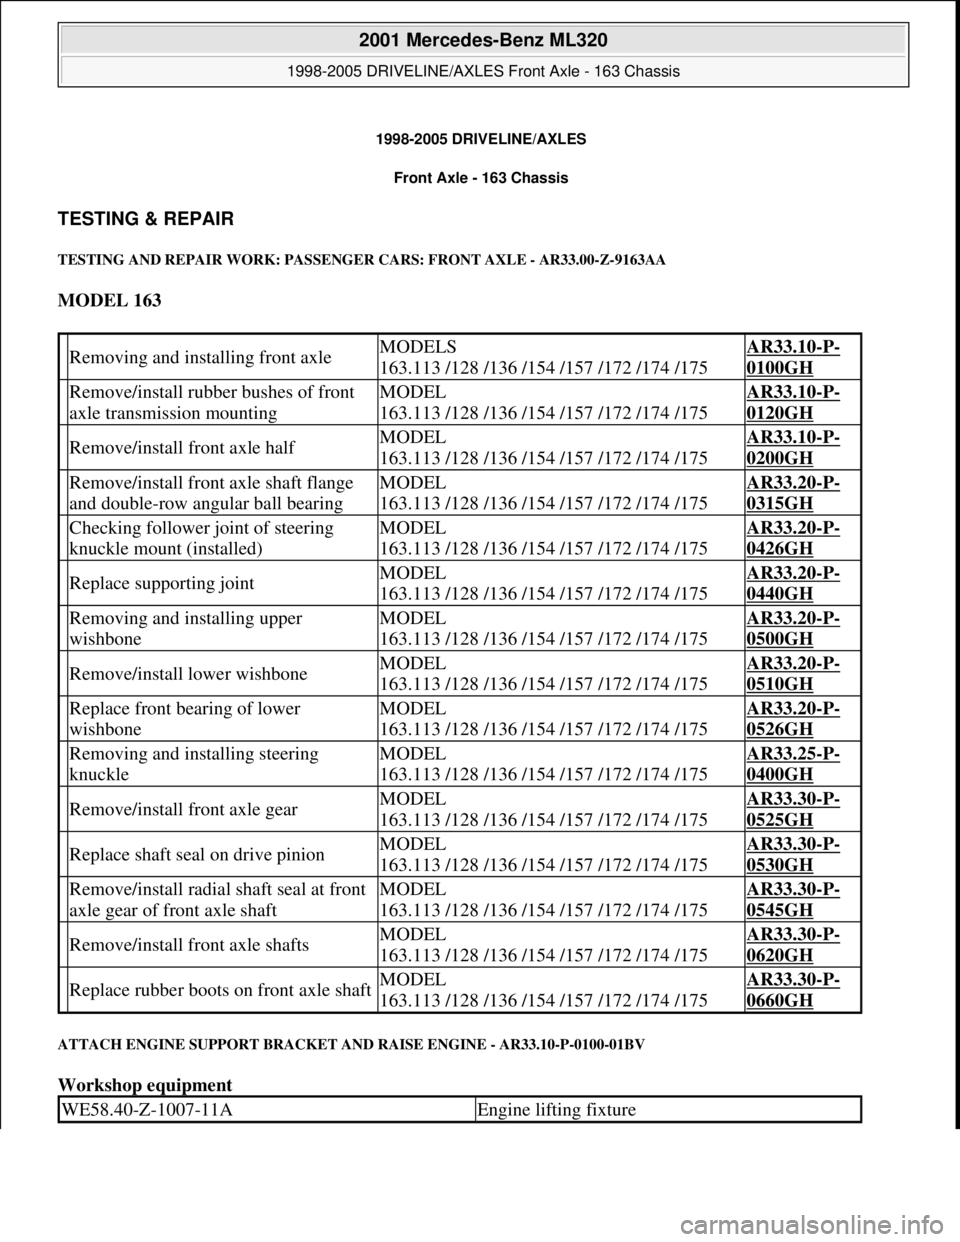
1998-2005 DRIVELINE/AXLES
Front Axle - 163 Chassis
TESTING & REPAIR
TESTING AND REPAIR WORK: PASSENGER CARS: FRONT AXLE - AR33.00-Z-9163AA
MODEL 163
ATTACH ENGINE SUPPORT BRACKET AND RAISE ENGINE - AR33.10-P-0100-01BV
Workshop equipment
Removing and installing front axleMODELS
163.113 /128 /136 /154 /157 /172 /174 /175AR33.10-P-
0100GH
Remove/install rubber bushes of front
axle transmission mountingMODEL
163.113 /128 /136 /154 /157 /172 /174 /175AR33.10-P-
0120GH
Remove/install front axle halfMODEL
163.113 /128 /136 /154 /157 /172 /174 /175AR33.10-P-
0200GH
Remove/install front axle shaft flange
and double-row angular ball bearingMODEL
163.113 /128 /136 /154 /157 /172 /174 /175AR33.20-P-
0315GH
Checking follower joint of steering
knuckle mount (installed)MODEL
163.113 /128 /136 /154 /157 /172 /174 /175AR33.20-P-
0426GH
Replace supporting jointMODEL
163.113 /128 /136 /154 /157 /172 /174 /175AR33.20-P-
0440GH
Removing and installing upper
wishboneMODEL
163.113 /128 /136 /154 /157 /172 /174 /175AR33.20-P-
0500GH
Remove/install lower wishboneMODEL
163.113 /128 /136 /154 /157 /172 /174 /175AR33.20-P-
0510GH
Replace front bearing of lower
wishboneMODEL
163.113 /128 /136 /154 /157 /172 /174 /175AR33.20-P-
0526GH
Removing and installing steering
knuckleMODEL
163.113 /128 /136 /154 /157 /172 /174 /175AR33.25-P-
0400GH
Remove/install front axle gearMODEL
163.113 /128 /136 /154 /157 /172 /174 /175AR33.30-P-
0525GH
Replace shaft seal on drive pinionMODEL
163.113 /128 /136 /154 /157 /172 /174 /175AR33.30-P-
0530GH
Remove/install radial shaft seal at front
axle gear of front axle shaftMODEL
163.113 /128 /136 /154 /157 /172 /174 /175AR33.30-P-
0545GH
Remove/install front axle shaftsMODEL
163.113 /128 /136 /154 /157 /172 /174 /175AR33.30-P-
0620GH
Replace rubber boots on front axle shaftMODEL
163.113 /128 /136 /154 /157 /172 /174 /175AR33.30-P-
0660GH
WE58.40-Z-1007-11AEngine lifting fixture
2001 Mercedes-Benz ML320
1998-2005 DRIVELINE/AXLES Front Axle - 163 Chassis
2001 Mercedes-Benz ML320
1998-2005 DRIVELINE/AXLES Front Axle - 163 Chassis
me
Saturday, October 02, 2010 3:38:21 PMPage 1 © 2006 Mitchell Repair Information Company, LLC.
me
Saturday, October 02, 2010 3:38:25 PMPage 1 © 2006 Mitchell Repair Information Company, LLC.
Page 2533 of 4133
Box wrench bitFig. 5
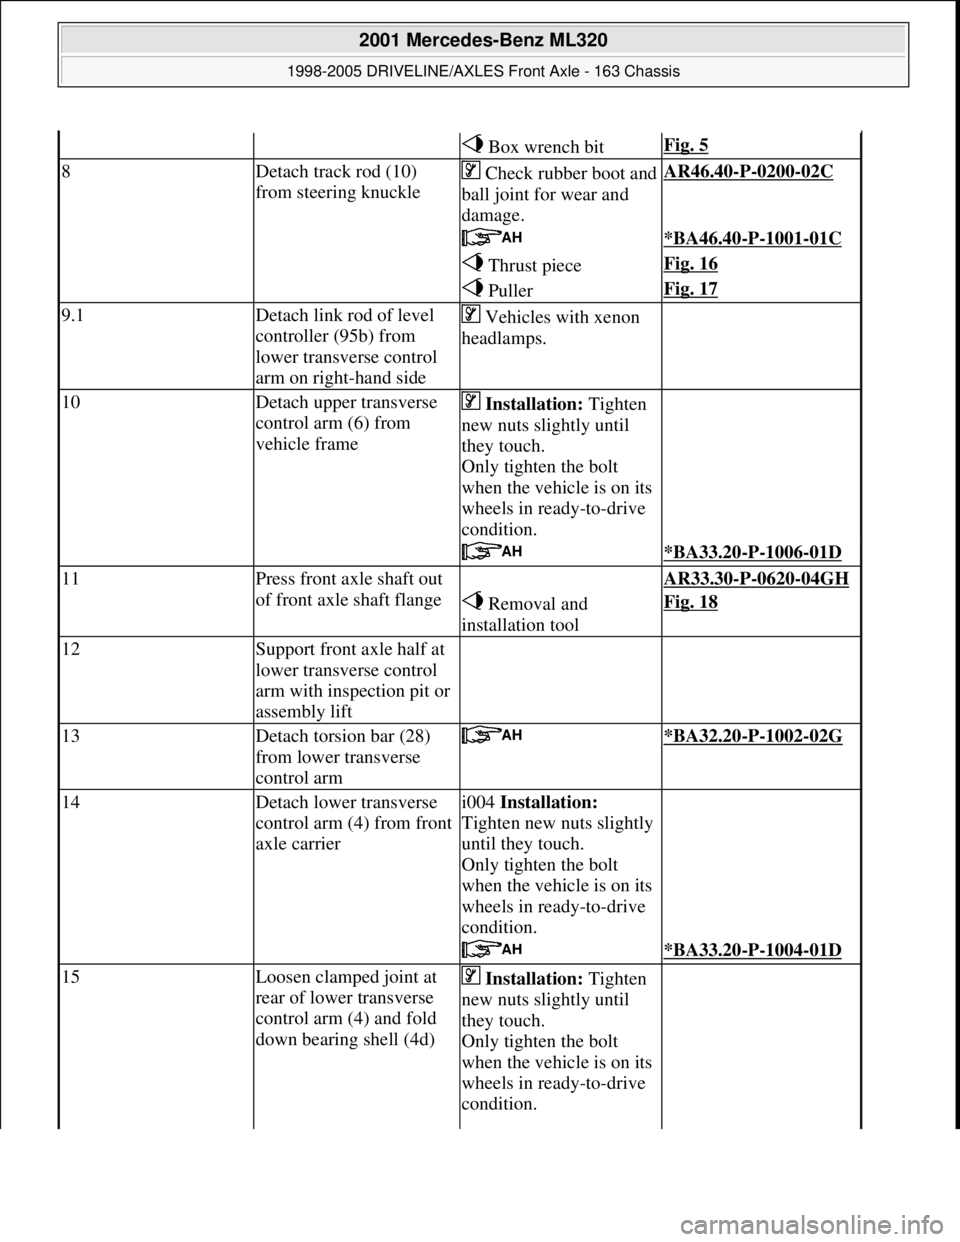
8Detach track rod (10)
from steering knuckleCheck rubber boot and
ball joint for wear and
damage.AR46.40-P-0200-02C
*BA46.40-P-1001-01C
Thrust pieceFig. 16
PullerFig. 17
9.1Detach link rod of level
controller (95b) from
lower transverse control
arm on right-hand side Vehicles with xenon
headlamps.
10Detach upper transverse
control arm (6) from
vehicle frame Installation: Tighten
new nuts slightly until
they touch.
Only tighten the bolt
when the vehicle is on its
wheels in ready-to-drive
condition.
*BA33.20-P-1006-01D
11Press front axle shaft out
of front axle shaft flange AR33.30-P-0620-04GH
Removal and
installation toolFig. 18
12Support front axle half at
lower transverse control
arm with inspection pit or
assembly lift
13Detach torsion bar (28)
from lower transverse
control arm *BA32.20-P-1002-02G
14Detach lower transverse
control arm (4) from front
axle carrieri004 Installation:
Tighten new nuts slightly
until they touch.
Only tighten the bolt
when the vehicle is on its
wheels in ready-to-drive
condition.
*BA33.20-P-1004-01D
15Loosen clamped joint at
rear of lower transverse
control arm (4) and fold
down bearing shell (4d) Installation: Tighten
new nuts slightly until
they touch.
Only tighten the bolt
when the vehicle is on its
wheels in ready-to-drive
condition.
2001 Mercedes-Benz ML320
1998-2005 DRIVELINE/AXLES Front Axle - 163 Chassis
me
Saturday, October 02, 2010 3:38:22 PMPage 14 © 2006 Mitchell Repair Information Company, LLC.
Page 2544 of 4133
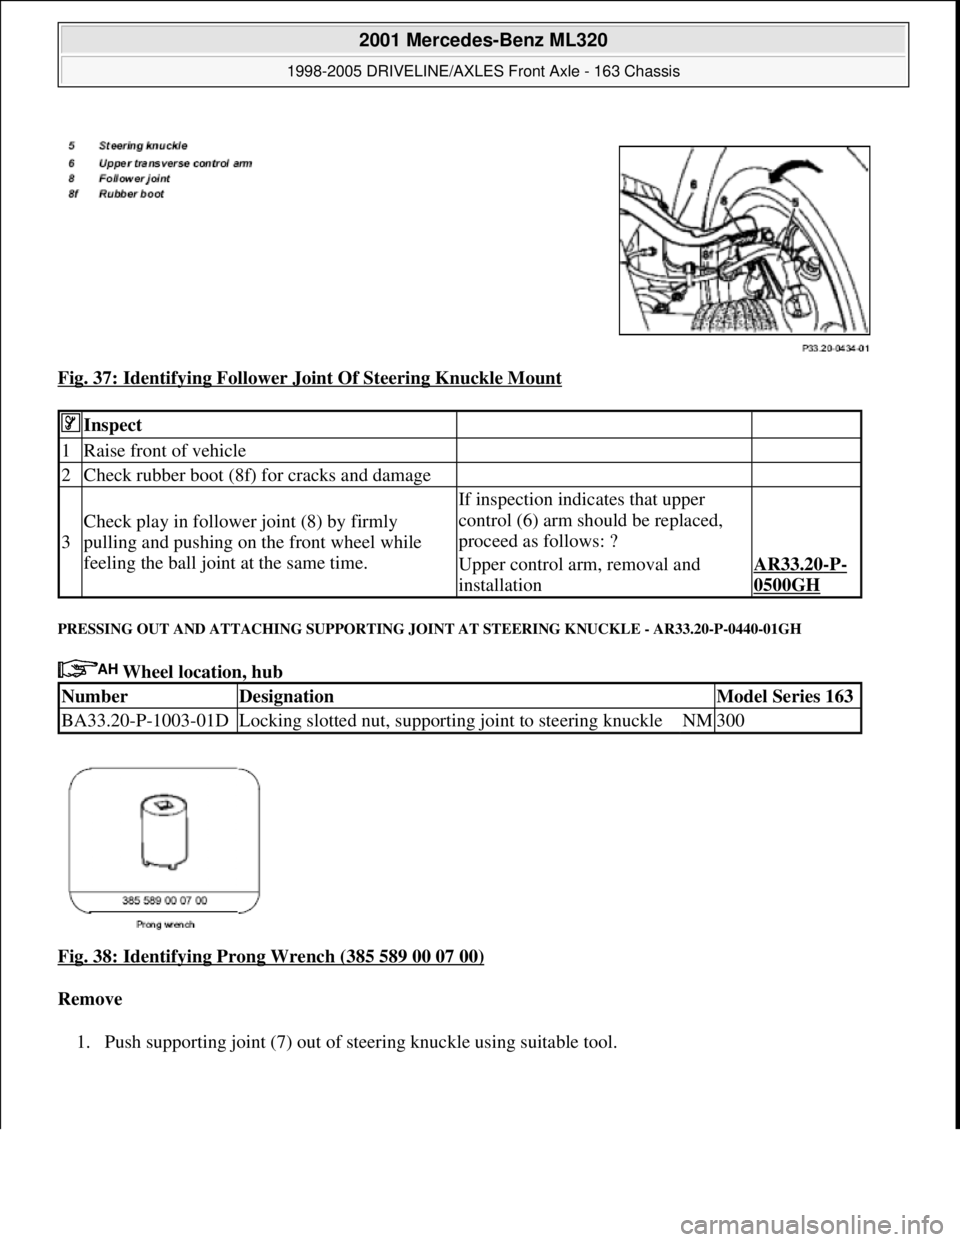
Fig. 37: Identifying Follower Joint Of Steering Knuckle Mount
PRESSING OUT AND ATTACHING SUPPORTING JOINT AT STEERING KNUCKLE - AR33.20-P-0440-01GH
Wheel location, hub
Fig. 38: Identifying Prong Wrench (385 589 00 07 00)
Remove
1. Push supporting joint (7) out of steering knuckle using suitable tool.
Inspect
1Raise front of vehicle
2Check rubber boot (8f) for cracks and damage
3
Check play in follower joint (8) by firmly
pulling and pushing on the front wheel while
feeling the ball joint at the same time.
If inspection indicates that upper
control (6) arm should be replaced,
proceed as follows: ?
Upper control arm, removal and
installationAR33.20-P-
0500GH
NumberDesignationModel Series 163
BA33.20-P-1003-01DLocking slotted nut, supporting joint to steering knuckleNM300
2001 Mercedes-Benz ML320
1998-2005 DRIVELINE/AXLES Front Axle - 163 Chassis
me
Saturday, October 02, 2010 3:38:22 PMPage 25 © 2006 Mitchell Repair Information Company, LLC.
Page 2556 of 4133
Wheel location, hub
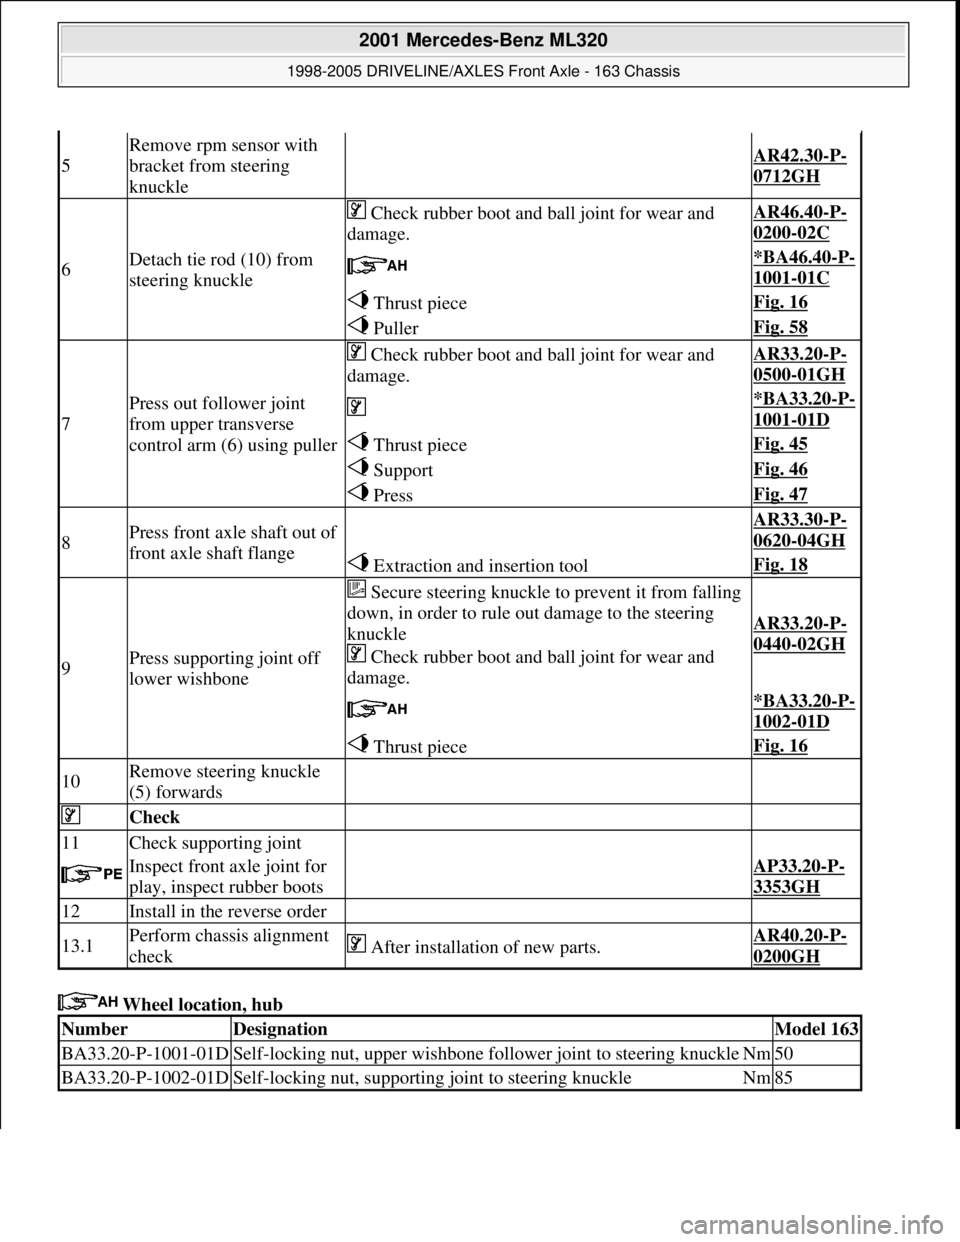
5
Remove rpm sensor with
bracket from steering
knuckle
AR42.30-P-
0712GH
6Detach tie rod (10) from
steering knuckle
Check rubber boot and ball joint for wear and
damage.AR46.40-P-
0200-02C
*BA46.40-P-
1001-01C
Thrust pieceFig. 16
PullerFig. 58
7
Press out follower joint
from upper transverse
control arm (6) using puller
Check rubber boot and ball joint for wear and
damage.AR33.20-P-
0500-01GH
*BA33.20-P-
1001-01D
Thrust pieceFig. 45
SupportFig. 46
PressFig. 47
8Press front axle shaft out of
front axle shaft flange AR33.30-P-
0620-04GH
Extraction and insertion toolFig. 18
9Press supporting joint off
lower wishbone
Secure steering knuckle to prevent it from falling
down, in order to rule out damage to the steering
knuckle
Check rubber boot and ball joint for wear and
damage.
AR33.20-P-
0440-02GH
*BA33.20-P-
1002-01D
Thrust pieceFig. 16
10Remove steering knuckle
(5) forwards
Check
11Check supporting joint
Inspect front axle joint for
play, inspect rubber bootsAP33.20-P-
3353GH
12Install in the reverse order
13.1Perform chassis alignment
check After installation of new parts.AR40.20-P-
0200GH
NumberDesignationModel 163
BA33.20-P-1001-01DSelf-locking nut, upper wishbone follower joint to steering knuckleNm50
BA33.20-P-1002-01DSelf-locking nut, supporting joint to steering knuckleNm85
2001 Mercedes-Benz ML320
1998-2005 DRIVELINE/AXLES Front Axle - 163 Chassis
me
Saturday, October 02, 2010 3:38:22 PMPage 37 © 2006 Mitchell Repair Information Company, LLC.
Page 2561 of 4133
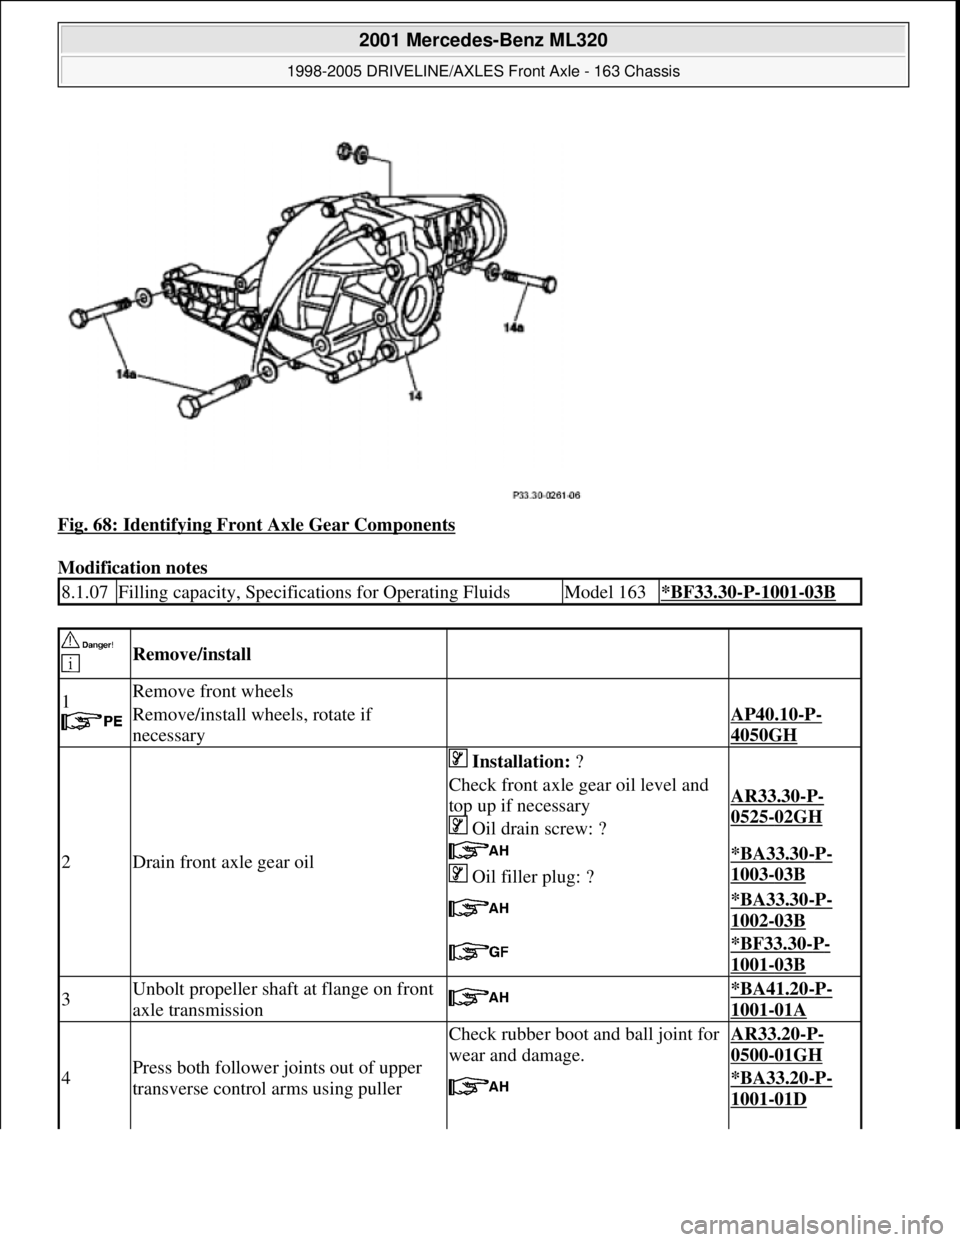
Fig. 68: Identifying Front Axle Gear Components
Modification notes
8.1.07Filling capacity, Specifications for Operating FluidsModel 163*BF33.30-P-1001-03B
Remove/install
1
Remove front wheels
Remove/install wheels, rotate if
necessaryAP40.10-P-
4050GH
2Drain front axle gear oil
Installation: ?
Check front axle gear oil level and
top up if necessary
Oil drain screw: ?AR33.30-P-
0525-02GH
Oil filler plug: ?*BA33.30-P-
1003-03B
*BA33.30-P-
1002-03B
*BF33.30-P-
1001-03B
3Unbolt propeller shaft at flange on front
axle transmission *BA41.20-P-
1001-01A
4Press both follower joints out of upper
transverse control arms using puller
Check rubber boot and ball joint for
wear and damage.AR33.20-P-
0500-01GH
*BA33.20-P-
1001-01D
2001 Mercedes-Benz ML320
1998-2005 DRIVELINE/AXLES Front Axle - 163 Chassis
me
Saturday, October 02, 2010 3:38:22 PMPage 42 © 2006 Mitchell Repair Information Company, LLC.
Page 2571 of 4133
Wheel location, hub
Remove/install wheels,
rotate if necessary AP40.10-P-
4050GH
2
Detach hexagon collared
nut (65a) from front axle
shaft Replace hexagon nut with collar
*BA33.30-P-
1001-02B
3Remove front axle brake
caliper
Hang the floating / fixed caliper to one side with a
hook to relieve the strain on the brake hose.
Leave brake hose connected.
Model 163.136, model 163.113 up to VIN A289564,
X754619, model 163.154 up to VIN A289564, model
163.154 /157 only with US version, code 494a.AR42.10-P-
0070GH
Model 163.128 /172 /174 /175, model 163.113 as of
VIN A289565, X754620, model 163.154 as of VIN
A289565, model 163.154 /157 except US version,
code 494a.
AR42.10-P-
0070GI
4Detach track rod from
steering knuckle
Check rubber boot and ball joint for wear and
damage.AR46.40-P-
0200-02C
*BA46.40-P-
1001-01C
Thrust pieceFig. 16
PullerFig. 17
5
Press follower joint out of
upper transverse control
arm using puller
Check rubber boot and ball joint for wear and damageAR33.20-P-
0500-01GH
*BA33.20-P-
1001-01D
Thrust pieceFig. 45
SupportFig. 46
PressFig. 47
6
Press front axle shaft (65)
out of front axle shaft
flange Hang steering knuckle to one side using wire.AR33.30-P-
0620-04GH
Extraction and installation toolFig. 18
7Lever front axle shaft out
of front axle gear Do not damage shield.
8Remove front axle shaft
(65) Installation: Make sure that the opening in the
circlip (65c) faces downward before inserting into the
front axle gear.
9Install in the reverse order
NumberDesignationModel
163
BA33.20-P-1001-
01DSelf-locking nut, upper transverse control arm follower joint to
steering knuckleNm50
2001 Mercedes-Benz ML320
1998-2005 DRIVELINE/AXLES Front Axle - 163 Chassis
me
Saturday, October 02, 2010 3:38:22 PMPage 52 © 2006 Mitchell Repair Information Company, LLC.
Page 2573 of 4133
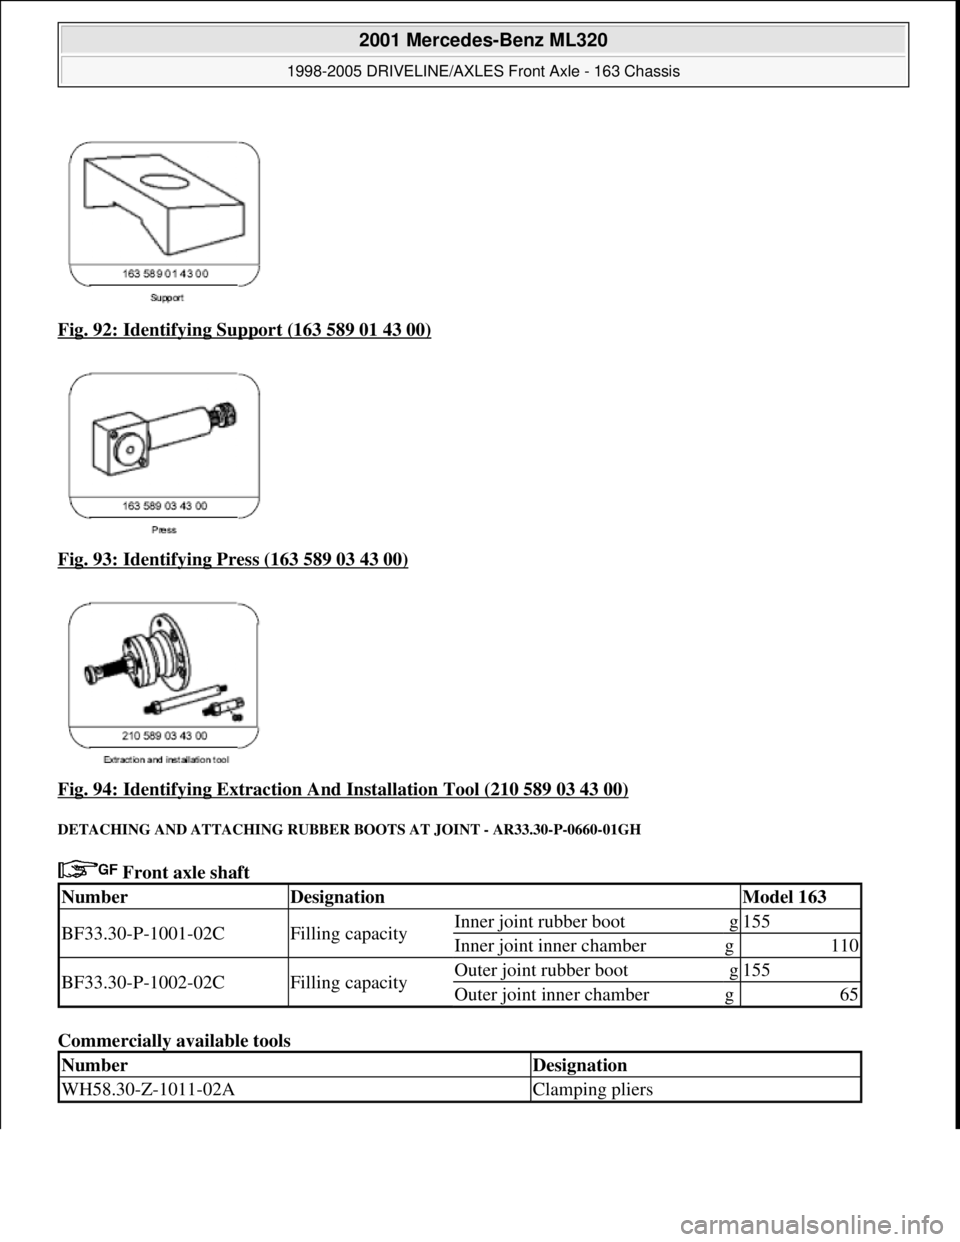
Fig. 92: Identifying Support (163 589 01 43 00)
Fig. 93: Identifying Press (163 589 03 43 00)
Fig. 94: Identifying Extraction A nd Installation Tool (210 589 03 43 00)
DETACHING AND ATTACHING RUBBER BOOTS AT JOINT - AR33.30-P-0660-01GH
Front axle shaft
Commercially available tools
NumberDesignationModel 163
BF33.30-P-1001-02CFilling capacityInner joint rubber bootg155
Inner joint inner chamberg110
BF33.30-P-1002-02CFilling capacityOuter joint rubber bootg155
Outer joint inner chamberg65
NumberDesignation
WH58.30-Z-1011-02AClamping pliers
2001 Mercedes-Benz ML320
1998-2005 DRIVELINE/AXLES Front Axle - 163 Chassis
me
Saturday, October 02, 2010 3:38:22 PMPage 54 © 2006 Mitchell Repair Information Company, LLC.
Page 2574 of 4133
Removal:
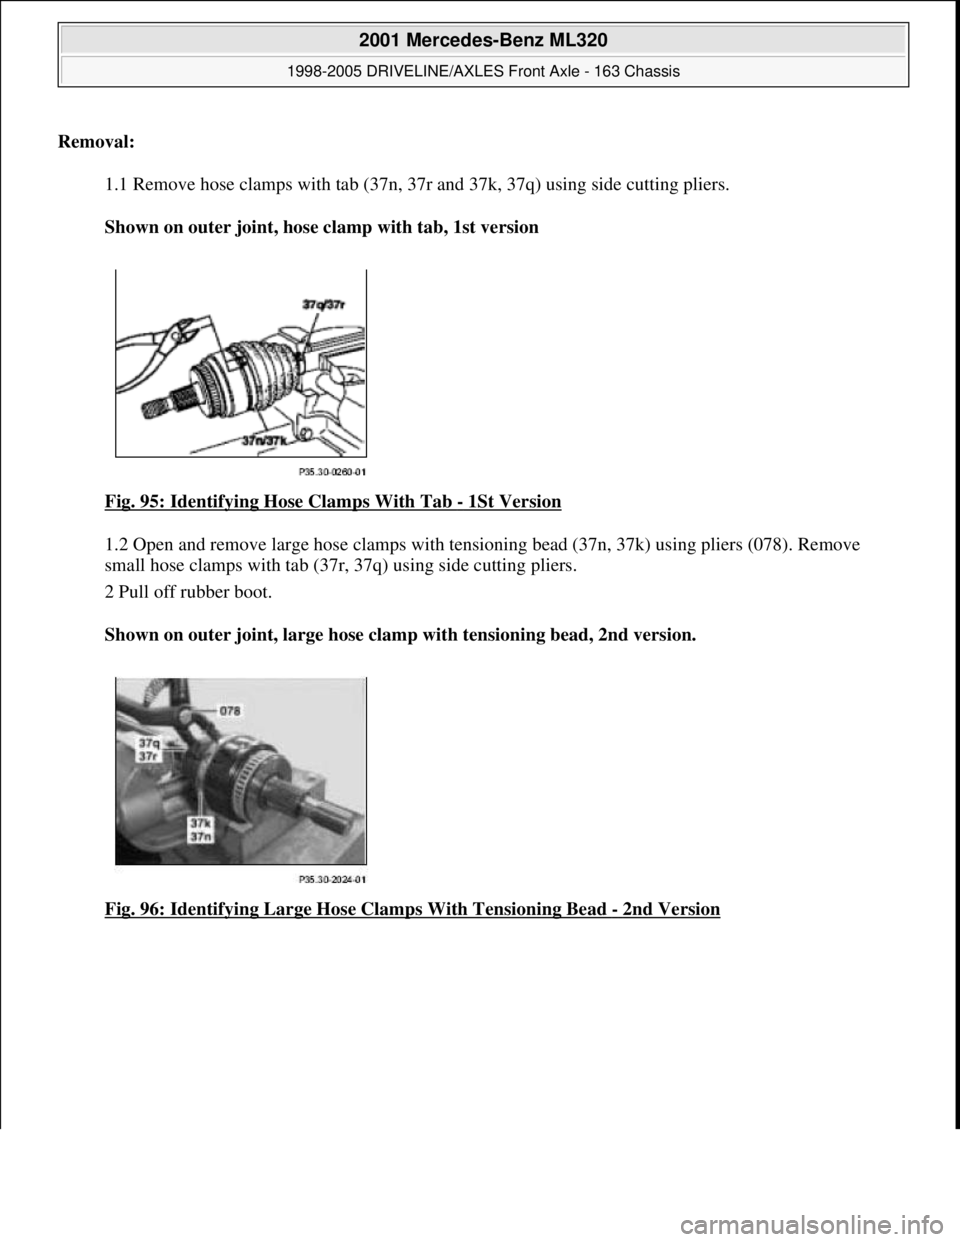
1.1 Remove hose clamps with tab (37n, 37 r and 37k, 37q) using side cutting pliers.
Shown on outer joint, hose clamp with tab, 1st version
Fig. 95: Identifying Ho se Clamps With Tab
- 1St Version
1.2 Open and remove large hose clamps with tens ioning bead (37n, 37k) using pliers (078). Remove
small hose clamps with tab (37r, 37q) using side cutting pliers.
2 Pull off rubber boot.
Shown on outer joint, large hose clam p with tensioning bead, 2nd version.
Fig. 96: Identifying Large Hose Clamps With Tensioning Bead
- 2nd Version
2001 Mercedes-Benz ML320
1998-2005 DRIVELINE/AXLES Front Axle - 163 Chassis
me
Saturday, October 02, 2010 3:38:22 PMPage 55 © 2006 Mitchell Repair Information Company, LLC.