Page 574 of 4133
107
Interior equipment
Te ch n ica l
data
Instruments
and controls Operation
Driving Instrument
cluster display Practical hints Car care Index
Sliding /pop-up roof
(optional)
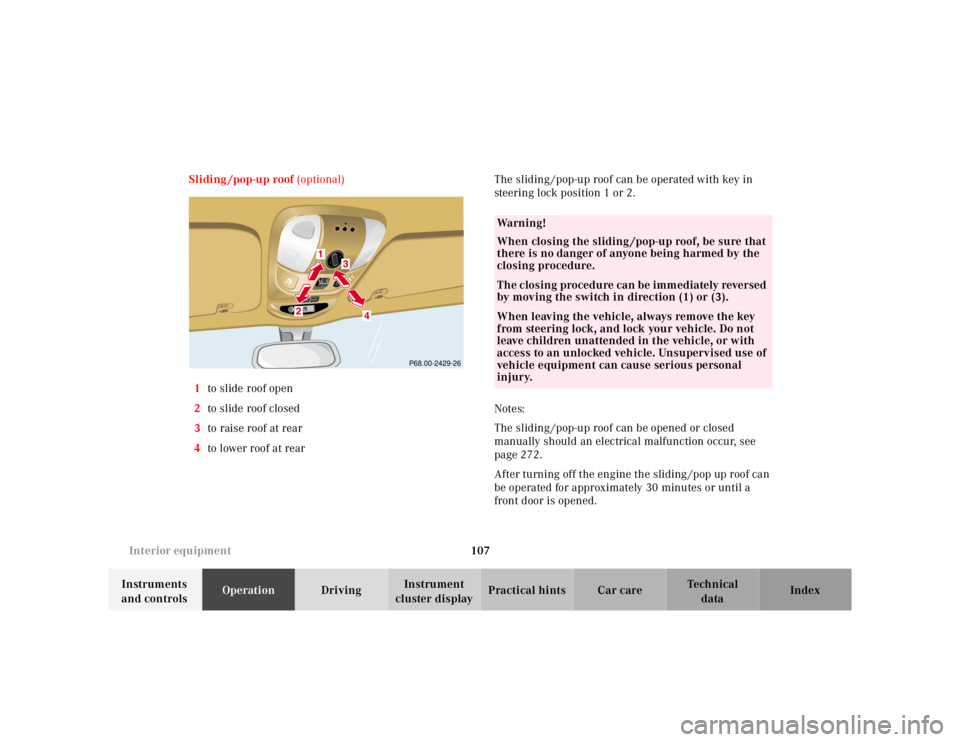
1 to slide roof open
2 to slide roof closed
3 to raise roof at rear
4 to lower roof at rear The sliding /pop-up roof can be operated with key in
steering lock position 1 or 2.
Notes:
The sliding /pop-up roof can be opened or closed
manually should an electrical malfunction occur, see
page 272.
After turning off the engine the sliding /pop up roof can
be operated for approximately 30 minutes or until a
front door is opened.
RESETMODE
P68.00-2429-26
Wa r n i n g !
When closing the sliding /pop-up roof, be sure that
there is no danger of anyone being harmed by the
closing procedure.The closing procedure can be immediately reversed
by moving the switch in direction (1) or (3).When leaving the vehicle, always remove the key
from steering lock, and lock your vehicle. Do not
leave children unattended in the vehicle, or with
access to an unlocked vehicle. Unsupervised use of
vehicle equipment can cause serious personal
injury.
Page 575 of 4133
108
Interior equipment
Te ch n ica l
data
Instruments
and controls Operation
Driving Instrument
cluster display Practical hints Car care Index
With the roof closed or tilted open, a screen can be slid
into the roof opening to guard against sun rays. When
sliding the roof open, the screen will also retract. Express opening of sliding /pop-up roof
To open sliding /pop-up roof automatically, briefly move
switch in direction (1) and release. The roof will not
open fully. Press again to open it fully.
To interrupt procedure, brief ly move switch in any
direction.
Note:
For resynchronizing the express opening feature see
page 272.
RESETMODE
Page 576 of 4133
109
Interior equipment
Te ch n ica l
data
Instruments
and controls Operation
Driving Instrument
cluster display Practical hints Car care Index
Skyview Top
(optional)
The Skyview Top can be operated with key in steering
lock position 1 or 2.
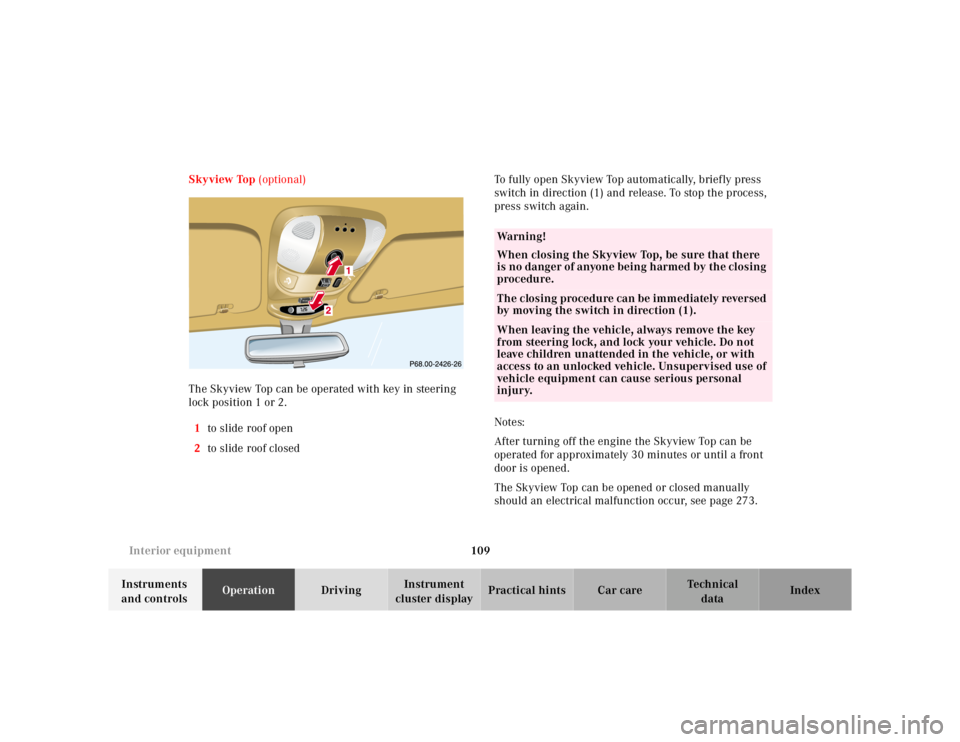
1 to slide roof open
2 to slide roof closed To fully open Skyview Top automatically, brief ly press
switch in direction (1) and release. To stop the process,
press switch again.
Notes:
After turning off the engine the Skyview Top can be
operated for approximately 30 minutes or until a front
door is opened.
The Skyview Top can be opened or closed manually
should an electrical malfunction occur, see page 273.
RESETMODE
Wa r n i n g !
When closing the Skyview Top, be sure that there
is no danger of anyone being h armed by th e closing
procedure.The closing procedure can be immediately reversed
by moving the switch in direction (1).When leaving the vehicle, always remove the key
from steering lock, and lock your vehicle. Do not
leave children unattended in the vehicle, or with
access to an unlocked vehicle. Unsupervised use of
vehicle equipment can cause serious personal
injury.
Page 590 of 4133
123
Interior equipment
Te ch n ica l
data
Instruments
and controls Operation
Driving Instrument
cluster display Practical hints Car care Index
Easy entry/exit feature
(only in vehicles with third row seats)
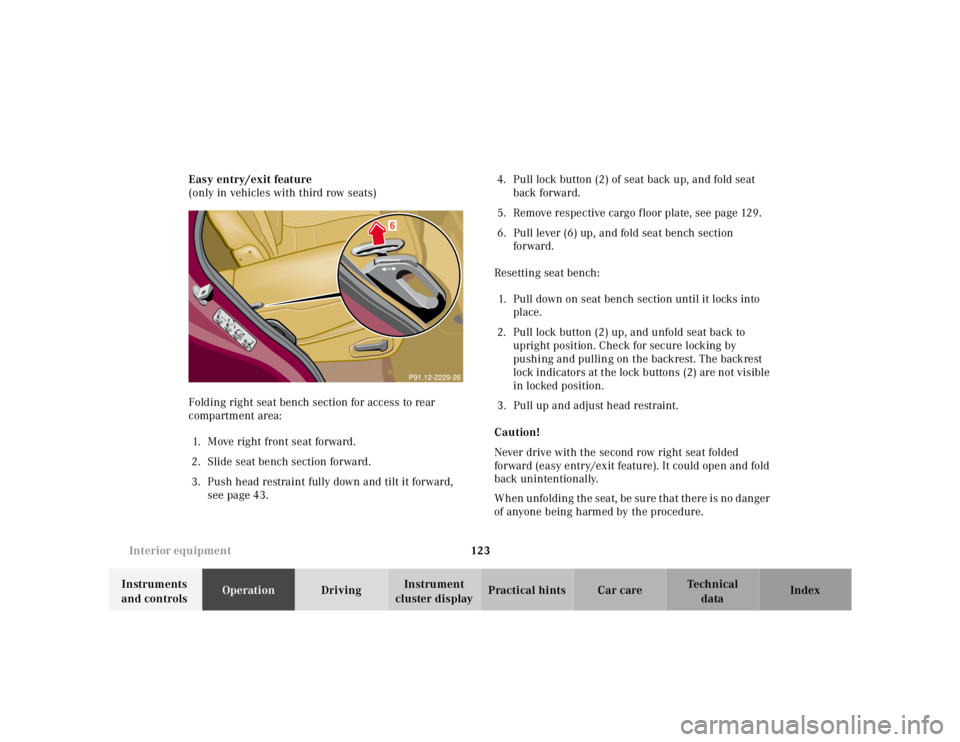
Folding right seat bench section for access to rear
compartment area:
1. Move right front seat forward.
2. Slide seat bench section forward.
3. Push head restraint fully down and tilt it forward, see page 43. 4. Pull lock button (2) of seat back up, and fold seat
back forward.
5. Remove respective cargo floor plate, see page 129.
6. Pull lever (6) up, and fold seat bench section forward.
Resetting seat bench: 1. Pull down on seat bench section until it locks into place.
2. Pull lock button (2) up, and unfold seat back to upright position. Check for secure locking by
pushing and pulling on the backrest. The backrest
lock indicators at the lock buttons (2) are not visible
in locked position.
3. Pull up and adjust head restraint.
Caution!
Never drive with the second row right seat folded
forward (easy entry/exit feature). It could open and fold
back unintentionally.
When unfolding the seat, be sure that there is no danger
of anyone being harmed by the procedure.
Page 598 of 4133
131
Interior equipment
Te ch n ica l
data
Instruments
and controls Operation
Driving Instrument
cluster display Practical hints Car care Index
Enlarged cargo area
The cargo area can be enlarged by moving the rear seat
bench forward. Also, the left, the right or both sections
may be folded according to need.
For folding and resetting seating to standard positions,
see page 120.
Wa r n i n g !
Always lock backrest in its upright position when
rear seat bench is occupied by passengers, or cargo
is being carried behind the seat bench.To help avoid personal injury from smaller objects
flying in the occupant area during a collision or
sudden maneuver, always use partition net when
transporting cargo, see page 133.
Page 618 of 4133
151
Tele Aid
Te ch n ica l
data
Instruments
and controls Operation
Driving Instrument
cluster display Practical hints Car care Index
Initiating an emergency call manually
Briefly press on cover (1) – the cover will open. Press the SOS button (2) briefly (for longer than
2 seconds). The indicator lamp in the SOS button (2)
will flash until the emergency call is concluded. Wait for
a voice connection to the Response Center.
Close the cover (1) after the emergency call is
concluded.
�������������������������
��������������������������������������������������
����������������������
����
RESET
M ODE
1������������������������������������������������������������������������������������������
����������
RESET
MOD E
2
Page 619 of 4133
152
Tele Aid
Te ch n ica l
data
Instruments
and controls Operation
Driving Instrument
cluster display Practical hints Car care Index
Roadside Assistance button •
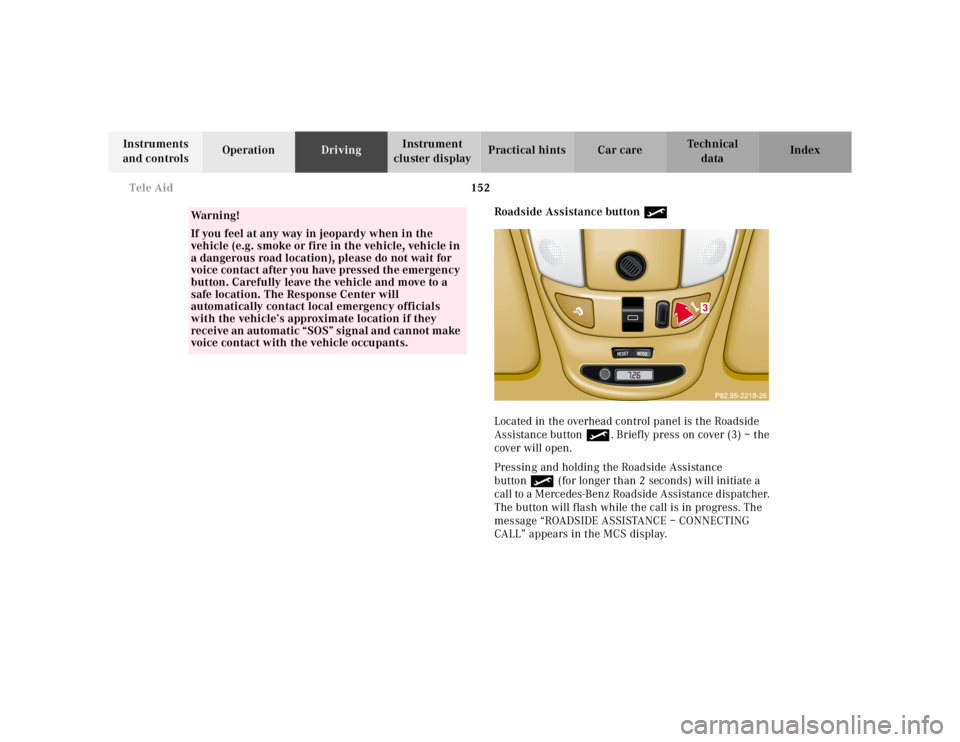
Located in the overhead control panel is the Roadside
Assistance button •. Briefly press on cover (3) – the
cover will open.
Pressing and holding the Roadside Assistance
button • (for longer than 2 seconds) will initiate a
call to a Mercedes-Benz Roadside Assistance dispatcher.
The button will flash while the call is in progress. The
message “ROADSIDE ASSISTANCE – CONNECTING
CALL” appears in the MCS display.
Wa r n i n g !
If you feel at any way in jeopardy when in the
vehicle (e.g. smoke or fire in the vehicle, vehicle in
a dangerous road location), please do not wait for
voice contact after you have pressed the emergency
button. Carefully leave the vehicle and move to a
safe location. The Response Center will
automatically contact local emergency officials
with the vehicle’s approximate location if they
receive an automatic “SOS” signal and cannot make
voice contact with the vehicle occupants.
�����������������������������������������������������������������������������������������������������
RESET
MOD E
3
Page 621 of 4133
154
Tele Aid
Te ch n ica l
data
Instruments
and controls Operation
Driving Instrument
cluster display Practical hints Car care Index
If the indicator lamp in the Roadside Assistance
button • is illuminated continuously and there was
no voice connection to the Response Center established,
then the Tele Aid system could not initiate an Roadside
Assistance call (e.g. the relevant cellular phone network
is not available). The message “ROADSIDE
ASSISTANCE – CALL FAILED” appears in the MCS
display.
Should this occur, assistance must be summoned by
other means.
Roadside Assistance calls can be terminated using the
END button on the MCS unit. Information button
¡
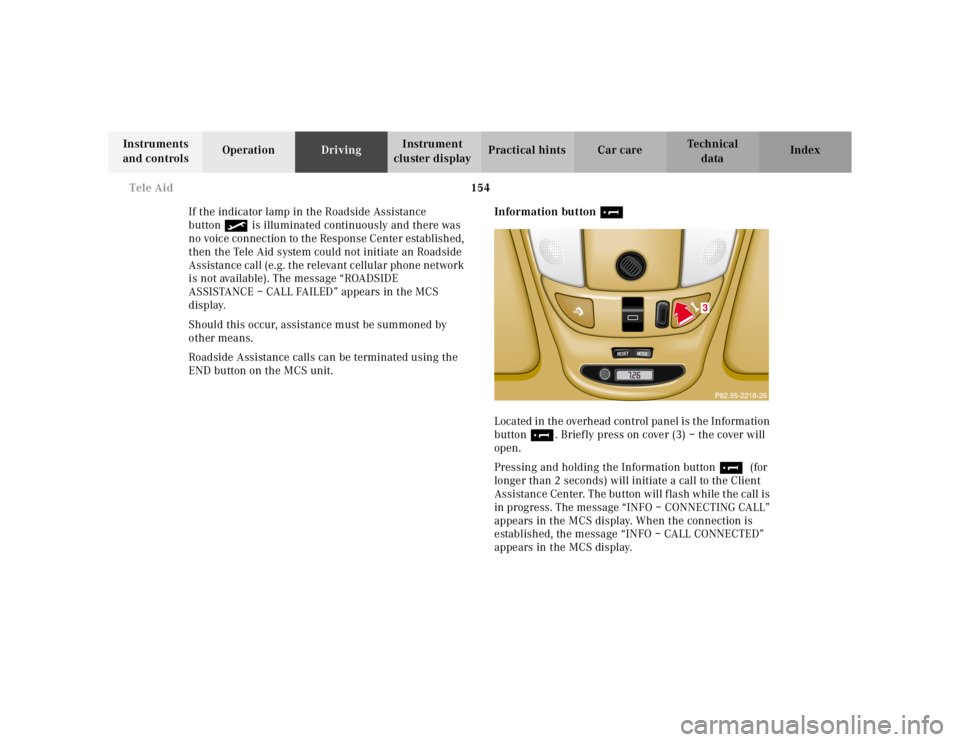
Located in the overhead control panel is the Information
button ¡. Briefly press on cover (3) – the cover will
open.
Pressing and holding the Information button ¡ (for
longer than 2 seconds) will initiate a call to the Client
Assistance Center. The button will flash while the call is
in progress. The message “INFO – CONNECTING CALL”
appears in the MCS display. When the connection is
established, the message “INFO – CALL CONNECTED”
appears in the MCS display.
�����������������������������������������������������������������������������������������������������
RESET
MOD E
3