Page 133 of 315

128The anti-theft system is designed to work with the
factory installed remote entry system. It may not
work with other remote entry systems.Disarming an Untriggered Anti-Theft
SystemYou can disarm the system by:q
unlocking a front door with the key (turn the
key all the way to the end of travel or the
system will not disarm).
q
using the keyless entry unlock code.
q
using the UNLOCK button of the remote entry
transmitter.
q
turning the ignition to ON or ACC.
If you armed the system while inside your vehicle,
you can disarm it by turning the ignition to the ON
or ACC position. This allows you to open the front
door and exit without triggering the system.
Triggering the Alarm SystemThe armed system will be triggered if:q
any door is opened without disarming the
system (see previous paragraphs), or
q
the hood is opened.
Disarming a Triggered SystemThe alarm can be disarmed by:q
unlocking a front door with the key
q
using the keyless entry unlock code
q
using the UNLOCK control on the remote entry
transmitter
NOTE:The flashing lights and honking horn will
shut off automatically approximately three minutes
after the system is triggered. It will trigger again if
another intrusion occurs. However, the engine will
not be allowed to start until the system is disarmed.
File:05fncf8.ex
Update:Thu Jun 27 10:02:20 1996
Page 224 of 315
219
Opening the Hood1. Inside the vehicle, pull the hood release handle
located under the bottom left corner of the
instrument panel.
The hood release under the instrument panel
2. Go to the front of the vehicle and release the
auxiliary latch that is located under the hood at
the center of the vehicle.
The auxiliary latch under the front edge of the
hood3. Lift the hood until the counterbalanced hinges
hold it open.
File:11fnmc8.ex
Update:Thu Jun 20 14:28:32 1996
Page 225 of 315
220Whenever you close the hood, latch it securely.
NOTE:Apply lubricant to the hood latch at
six-month intervals to maintain smooth and
trouble-free operation.
NOTE:Read and understandPrecautions When
Servicing Your Vehicleat the beginning of this
chapter before opening the hood.
If the battery is disconnected, the computer must
relearn its idle control. SeeBatteryin the Index.
Engine CompartmentYour vehicle has a 4.6 liter 4V SFI engine. The
following page shows a diagram of where to find
items that you should regularly service.
File:11fnmc8.ex
Update:Thu Jun 20 14:28:32 1996
Page 228 of 315

223
Checking and Adding Engine OilSince the proper amount of engine oil is important
for safe engine operation, check the oil using the
dipstick each time you put fuel in your vehicle.
Remember the engine must be off, the oil must be
warm and the vehicle must be parked on level
ground.
Checking the engine oil level:
1. Turn the engine off after it has warmed up and
allow a few minutes for the engine oil to drain
back into the oil pan.
2. Set the parking brake, making sure the gearshift
is securely latched in P (Park).
3. Open the hood. Protect yourself from engine
heat.
4. Locate the engine oil dipstick (highlighted in
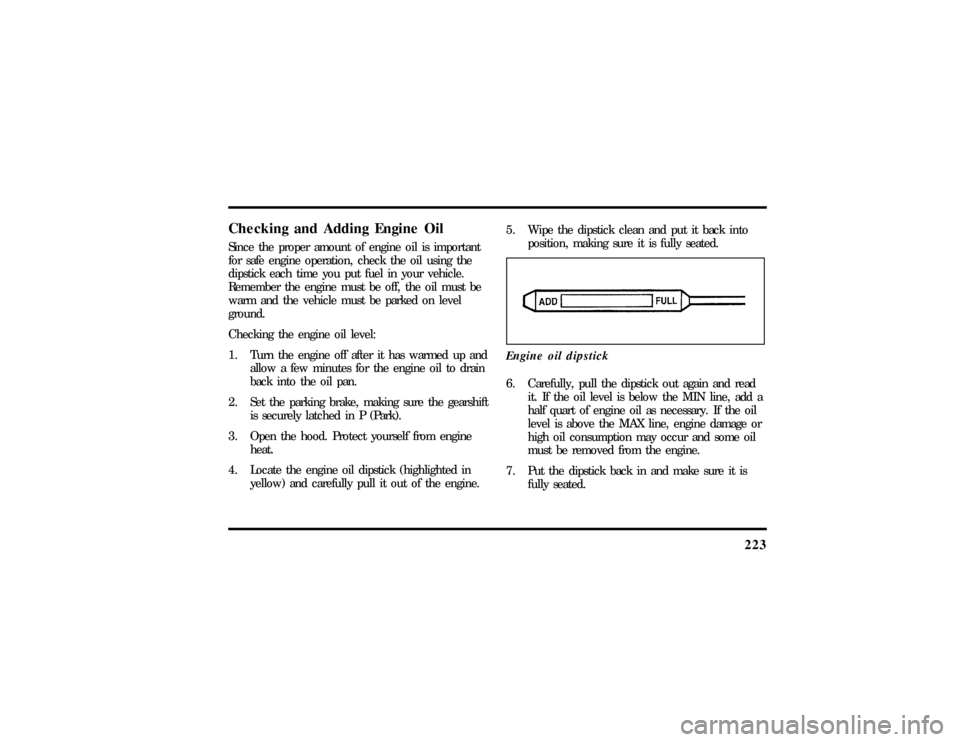
yellow) and carefully pull it out of the engine.5. Wipe the dipstick clean and put it back into
position, making sure it is fully seated.
Engine oil dipstick
6. Carefully, pull the dipstick out again and read
it. If the oil level is below the MIN line, add a
half quart of engine oil as necessary. If the oil
level is above the MAX line, engine damage or
high oil consumption may occur and some oil
must be removed from the engine.
7. Put the dipstick back in and make sure it is
fully seated.
File:11fnmc8.ex
Update:Thu Jun 20 14:28:32 1996
Page 263 of 315
258Horizontal aim adjustment1. Open the hood and lift the front end cover
from its velcro attachments. Locate the
horizontal level indicator and adjustment screw.
2. Use a 6mm socket and ratchet to turn the
horizontal adjusting screw until the horizontal
indicator is in line with the ª0º reference.
Vertical aim adjustmentNOTE:The numbers shown on the vial indicate
beam direction in degrees up or down.
1. Locate the vertical level indicator and
adjustment screw.
2. Use a 6mm socket and ratchet to turn the
vertical adjustment screw until the bubble in
the horizontal level indicator is centered in the
vial.
3. Replace the sight shield and close the hood.
File:11fnmc8.ex
Update:Thu Jun 20 14:28:32 1996