1997 GMC SIERRA tow
[x] Cancel search: towPage 330 of 436
When It’s Time for New Tires
Rust or dirt
on a wheel, or on the parts to which
it is fastened, can make wheel nuts become loose
after a time. The wheel could come
off and cause
an accident. When you change a wheel, remove
any rust
or dirt from places where the wheel
attaches to the vehicle. In an emergency, you can
use a cloth or
a paper towel to do this; but be
sure to use
a scraper or wire brush later, if you
need to,
to get all the rust or dirt off. (See
“Changing
a Flat Tire” in the Index.)
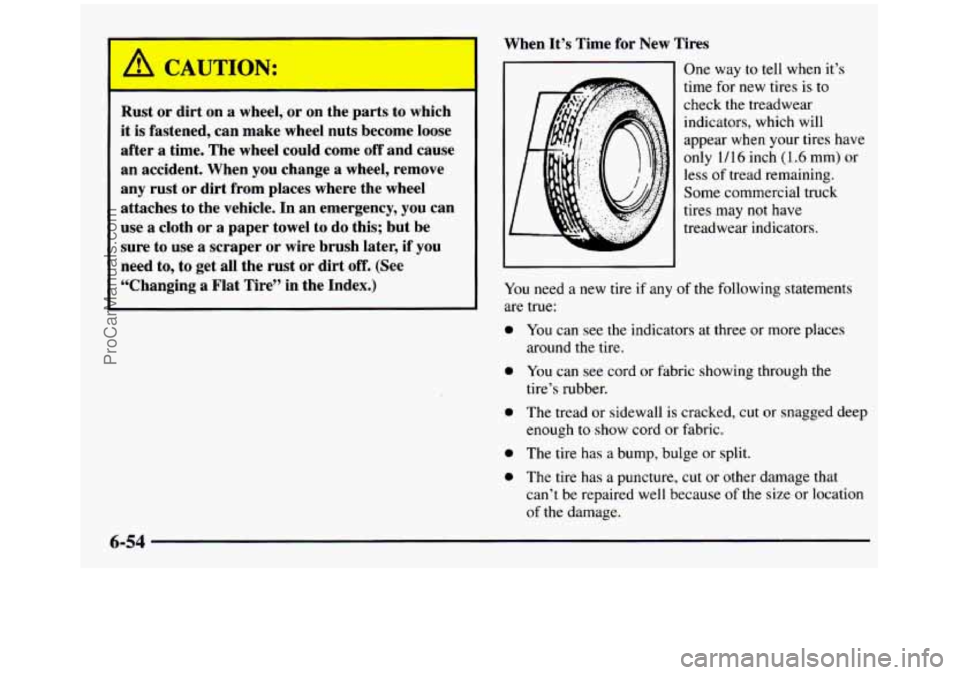
One way to tell when it’s
time for new tires is to
check the treadwear
indicators, which will
appear when your tires have
only 1/16 inch
(1.6 mm) or
less of tread remaining.
Some commercial truck
tires may not have
treadwear indicators.
You need a new tire if any of the following statements
are true:
0 You can see the indicators at three or more places
around the tire.
0 You can see cord or fabric showing through the
0 The tread or sidewall is cracked, cut or snagged deep
tire’s rubber.
enough
to show cord
or fabric.
0 The tire has a bump, bulge or split.
0 The tire has a puncture, cut or other damage that
can’t be repaired well because
of the size or location
of the damage.
6-54
ProCarManuals.com
Page 336 of 436
Don’t use any of these unless this manual says you can.
In many uses, these will damage your vehicle:
0 Alcohol
Laundry Soap
0 Bleach
Reducing Agents
Cleaning the Inside of Your Vehicle
Use a vacuum cleaner often to get rid of dust and loose
dirt. Wipe vinyl
or leather with a clean, damp cloth.
Your GM dealer has two cleaners, a solvent-type spot
lifter and
a foam-type powdered cleaner. They will clean
normal spots and stains very well.
Do not use them on
vinyl or leather.
Here are some cleaning tips:
1. Always read the instructions on the cleaner label.
2. Clean up stains as soon as you can -- before they set.
3. Use a clean cloth or sponge, and change to a clean area
often.
A soft brush may be used if stains are stubborn.
4. Use solvent-type cleaners in a well-ventilated area
5. If a ring forms after spot cleaning, clean the entire
only.
If you use them, don’t
saturate the stained area.
area immediately or
it will set.
Using Foam-Type Cleaner on Fabric
1. Vacuum and brush the area to remove any loose dirt.
2. Always clean a whole trim panel or section. Mask
surrounding trim along stitch or welt lines.
directions
on the container label.
3. Mix Multi-Purpose Powdered Cleaner following the
4. Use suds only and apply with a clean sponge. Don’t
saturate
the material and don’t rub it roughly.
5. As soon as you’ve cleaned the section, use a sponge
to remove the suds.
6. Rinse the section with a clean, wet sponge.
7. Wipe off what’s left with a slightly damp paper towel
8. Dry it immediately with a blow dryer.
or
cloth.
9. Wipe with a clean cloth.
6-60
ProCarManuals.com
Page 337 of 436
Using Solvent-Type Cleaner on Fabric
First, see if you have to use solvent-type cleaner at all.
Some spots and stains will clean off better with just
water and mild soap.
If you need to use a solvent:
1.
2.
3.
4.
Gently scrape excess soil from the trim material with
a clean, dull knife or scraper.
Use very little cleaner, light pressure and clean cloths
(preferably cheesecloth). Cleaning should start at the
outside of the stain, “feathering” toward the center.
Keep changing to a clean section
of the cloth.
When you clean a stain from fabric, immediately
dry the area with a blow dryer to help prevent a
cleaning ring.
Fabric Protection
Your vehicle has upholstery and carpet that has been
treated with Scotchgard” Fabric Protector, a
3M
product. It protects fabrics by repelling oil and water,
which are the carriers of most stains. Even with this
protection,
you still need to clean your upholstery and
carpet often to keep it looking new.
Further information on cleaning is available by calling 1-800-433-3296 (in Minnesota,
1-800-642-6 167).
Special Cleaning Problems
Greasy or Oily Stains
Stains caused by grease, oil, butter, margarine, shoe
polish, coffee with cream, chewing gum, cosmetic
creams, vegetable oils, wax crayon, tar and asphalt can
be removed as follows:
1. Carefully scrape off excess stain.
2. Follow the solvent-type instructions described earlier.
Shoe polish, wax crayon, tar and asphalt will stain if left
on a vehicle’s seat fabric. They should be removed as
soon as possible. Be careful, because the cleaner will
dissolve them and may cause them to spread.
6-61
ProCarManuals.com
Page 340 of 436
Weatherstrips
Silicone grease on weatherstrips will make them last
longer, seal better, and not stick or squeak. Apply silicone
grease with
a clean cloth at least every six months. During
very cold, damp weather more frequent application may be
required.
(See “Recommended Fluids and Lubricants” in
the Index.)
Cleaning the Outside of Your Vehicle
The paint finish on your vehicle provides beauty, depth
of color, gloss retention and durability.
Washing Your Vehicle
The best way to preserve your vehicle’s frnish is to keep it
clean by washing it often with lukewarm or cold water.
Don’t wash your vehicle
in the direct rays of the sun.
Don’t
use strong soaps or chemical detergents. Use
liquid hand, dish
or car washing (mild detergent) soaps.
Don’t use cleaning agents that are petroleum based,
or that contain acid or abrasives. All cleaning agents
should be flushed promptly and not allowed to dry on
the surface, or they could stain. Dry the finish with a
soft, clean chamois or an all-cotton towel to avoid
surface scratches and water spotting.
High pressure car washes may cause water to enter
your vehicle.
Cleaning Exterior LampsLenses
Use lukewarm or cold water, a soft cloth and a liquid
hand, dish or car washing (mild detergent) soap to clean
exterior lamps and lenses. Follow the instructions under
“Washing Your Vehicle.”
Finish Care
Occasional waxing or mild polishing of your vehicle by
hand may be necessary to remove residue from the paint
finish. You can get GM-approved cleaning products
from your dealer. (See “Appearance Care and Materials”
in the Index.)
Your
GM manufactured vehicle may have a
“basecoatklearcoat” paint finish. The clearcoat gives
more depth and gloss to the colored basecoat. Always
use waxes and polishes that are non-abrasive and made for a basecoatklearcoat paint finish.
NOTICE:
~
Machine compounding or aggressive polishing on
a basecoatklearcoat paint finish may dull the
finish or leave swirl marks.
ProCarManuals.com
Page 341 of 436
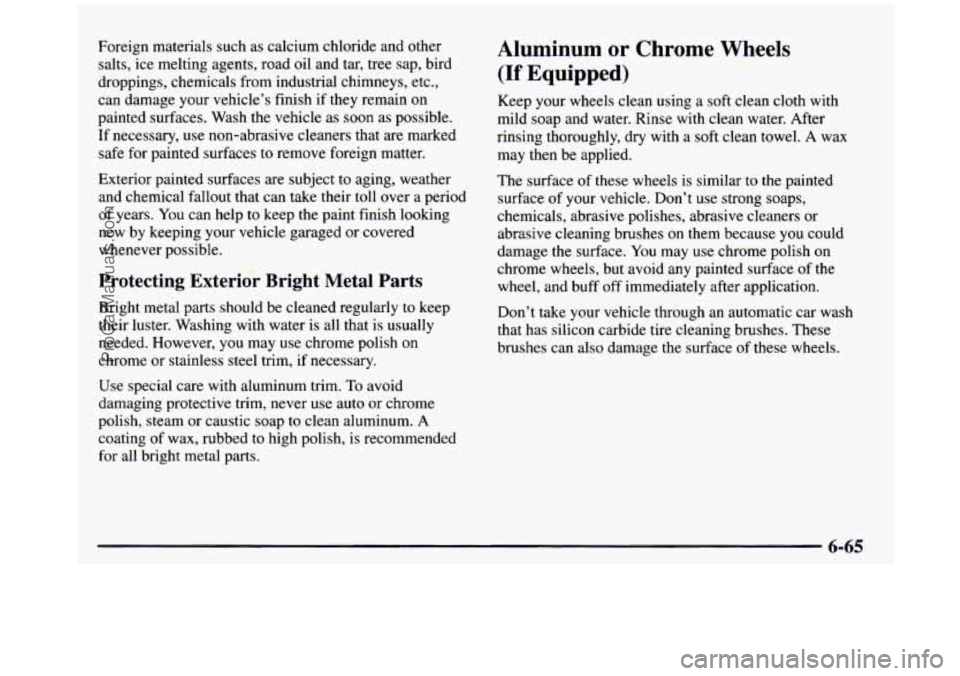
Foreign materials such as calcium chloride and other
salts, ice melting agents, road oil and tar, tree sap, bird
droppings, chemicals from industrial chimneys, etc.,
can damage your vehicle’s finish if they remain on
painted surfaces. Wash the vehicle as soon as possible.
If necessary, use non-abrasive cleaners that are marked
safe for painted surfaces to remove foreign matter.
Exterior painted surfaces are subject to aging, weather
and chemical fallout that can take their toll over a period
of years. You can help to keep the paint finish looking
new by keeping your vehicle garaged or covered
whenever possible.
Protecting Exterior Bright Metal Parts
Bright metal parts should be cleaned regularly to keep
their luster. Washing
with water is all that is usually
needed. However, you may use chrome polish on
chrome or stainless steel trim,
if necessary.
Use special care with aluminum trim.
To avoid
damaging protective trim, never use auto or chrome
polish, steam or caustic soap to clean aluminum.
A
coating of wax, rubbed to high polish, is recommended
for all bright metal parts.
Aluminum or Chrome Wheels
(If Equipped)
Keep your wheels clean using a soft clean cloth with
mild soap and water. Rinse with clean water. After
rinsing thoroughly, dry with a soft clean towel.
A wax
may then be applied.
The surface of these wheels is similar to the painted
surface
of your vehicle. Don’t use strong soaps,
chemicals, abrasive polishes, abrasive cleaners or
abrasive cleaning brushes on them because you could
damage
the surface. You may use chrome polish on
chrome wheels, but avoid any painted surface of the
wheel, and buff off immediately after application.
Don’t take your vehicle through an automatic car wash
that has silicon carbide tire cleaning brushes. These
brushes can also damage the surface
of these wheels.
ProCarManuals.com
Page 359 of 436
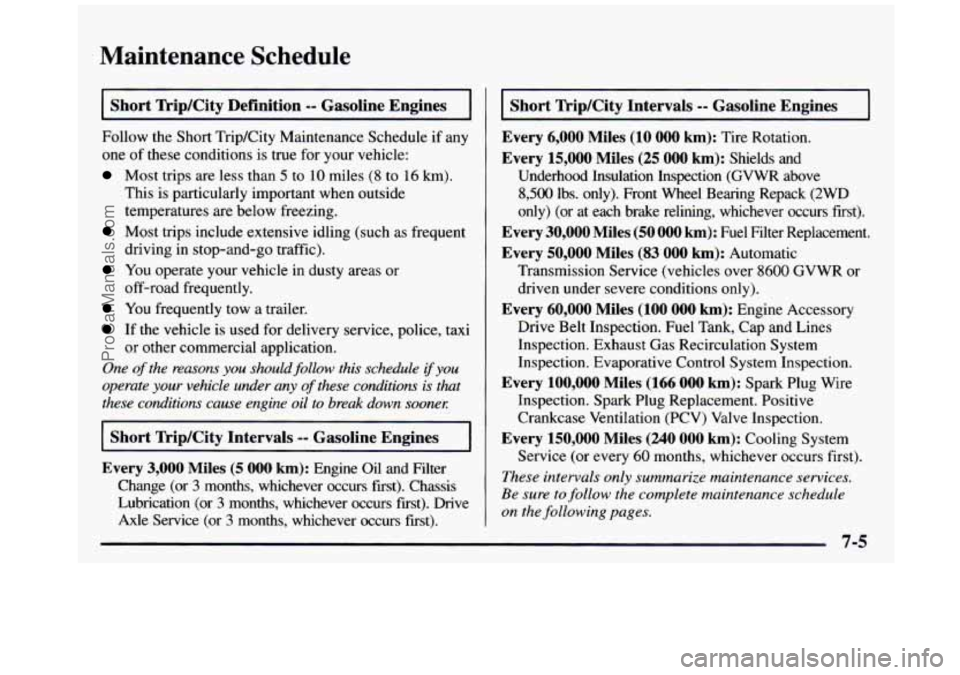
Maintenance Schedule
-
Short Trip/City Definition -- Gasoline Engines
Follow the Short TripKity Maintenance Schedule if any
one of these conditions is true for your vehicle:
Most trips are less than 5 to 10 miles (8 to 16 km).
This is particularly important when outside
temperatures
are below freezing.
driving in stop-and-go traffic).
off-road frequently.
Most trips include extensive idling (such as frequent
You operate your vehicle in dusty areas or
You frequently tow a trailer.
If the vehicle is used for delivery service, police, taxi
One of the reasons you should follow this schedule if you
operate
your vehicle under any of these conditions is that
these conditions cause engine
oil to break down soonel:
Short Trip/City Intervals -- Gasoline Engines
Every
3,000 Miles (5 000 km): Engine Oil and Filter
or other commercial application.
Change (or
3 months, whichever occurs first). Chassis
Lubrication (or
3 months, whichever occurs first). Drive
Axle Service (or
3 months, whichever occurs fmt).
Short Trip/City Intervals -- Gasoline Engines
Every 6,000 Miles (10
000 km): Tire Rotation.
Every 15,000 Miles (25 000 km): Shields and
Underhood Insulation Inspection (GVWR above
8,500 lbs. only). Front Wheel Bearing Repack (2WD
only) (or at each brake relining, whichever occurs first).
Every 30,000 Miles (50 000 km): Fuel Filter Replacement.
Every 50,000 Miles (83 000 km): Automatic
Transmission Service (vehicles over
8600 GVWR or
driven under severe conditions only).
Every 60,000 Miles (100 000 km): Engine Accessory
Drive Belt Inspection. Fuel Tank, Cap and Lines
Inspection. Exhaust Gas Recirculation System
Inspection. Evaporative Control System Inspection.
Every 100,000 Miles (166 000 km): Spark Plug Wire
Inspection. Spark Plug Replacement. Positive
Crankcase Ventilation (PCV) Valve Inspection.
Every 150,000 Miles (240 000 km): Cooling System
Service (or every
60 months, whichever occurs first).
These intervals only summarize maintenance services.
Be sure to follow the complete maintenance schedule
on the following pages.
ProCarManuals.com
Page 360 of 436
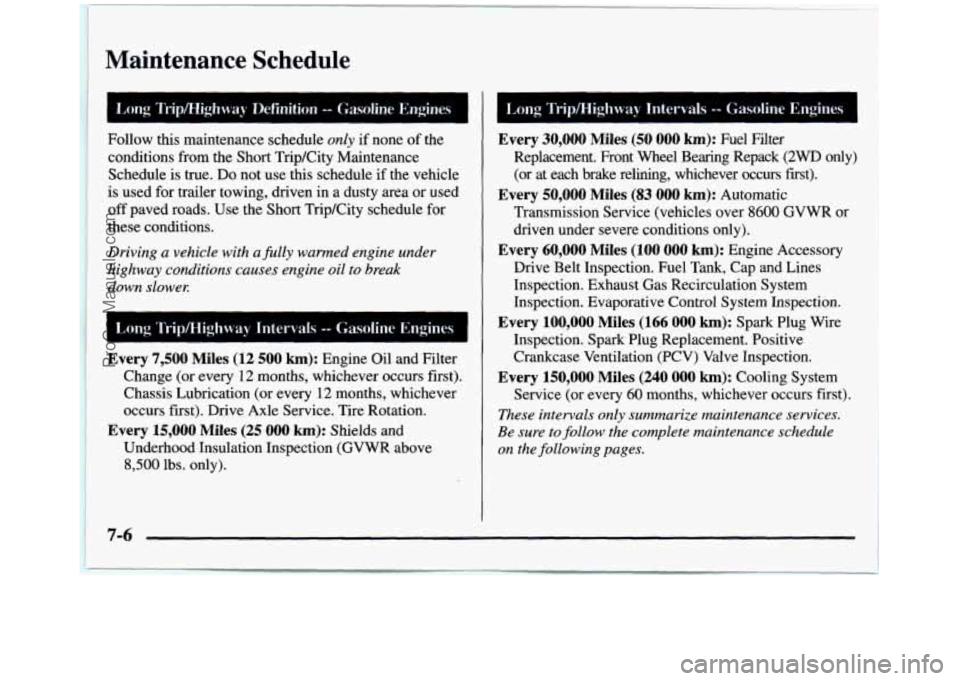
Maintenance Schedule
Follow this maintenance schedule only if none of the
conditions from the Short Trip/City Maintenance
Schedule is true.
Da not use this schedule if the vehicle
is used for trailer towing, driven in a dusty area or used
off paved roads. Use the Short Trip/City schedule for
these conditions.
Driving a vehicle with afully warmed engine under
highway conditions causes engine
oil to break
down slower:
Every 7,500 Miles (12 500 km): Engine Oil and Filter
Change (or every
12 months, whichever occurs first).
Chassis Lubrication (or every 12 months, whichever
occurs first). Drive Axle Service. Tire Rotation.
Underhood Insulation Inspection (GVWR above
8,500 lbs. only).
Every 15,000 Miles (25 OOO km): Shields and
I
1 Long Trip/Highway Intervals -- Gasoline Engines ~~~ ~
~ ~~
Every 30,000 Miles (50 000 km): Fuel Filter
Replacement. Front Wheel Bearing Repack
(2WD only)
(or at each brake relining, whichever occurs fiist).
Transmission Service (vehicles over
8600 GVWR or
driven under severe conditions only).
Every 60,000 Miles (100 000 km): Engine Accessory
Drive Belt Inspection. Fuel
Tank, Cap and Lines
Inspection. Exhaust Gas Recirculation System
Inspection. Evaporative Control System Inspection.
Every 100,000 Miles (166 000 km): Spark Plug Wire
Inspection. Spark Plug Replacement. Positive
Crankcase Ventilation (PCV) Valve Inspection.
Every 150,000 Miles (240 000 km): Cooling System
Service (or every
60 months, whichever occurs first).
Every 50,000 Miles (83 000 km): Automatic
These intervals only summarize maintenance services.
Be sure to
follow the complete maintenance schedule
on the following pages.
7-6
ProCarManuals.com
Page 362 of 436
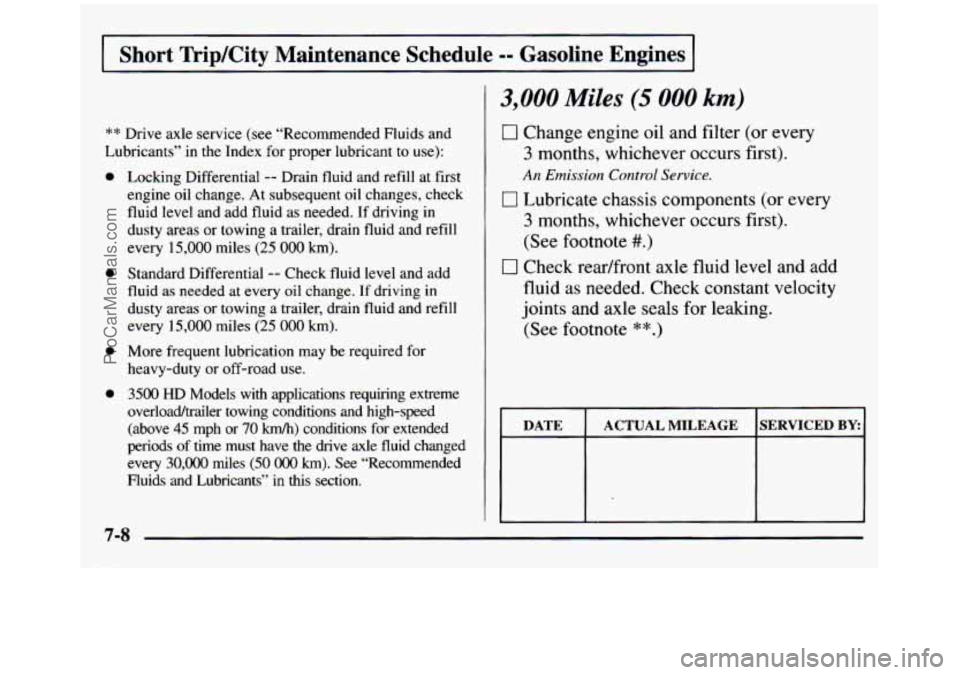
Short TripKity Maintenance Schedule -- Gasoline Engines
** Drive axle service (see “Recommended Fluids and
Lubricants”
in the Index for proper lubricant to use):
0
e
0
0
Locking Differential -- Drain fluid and refill at first
engine oil change. At subsequent oil changes, check
fluid level and add fluid as needed. If driving in
dusty areas
or towing a trailer, drain fluid and refill
every 15,000 miles
(25 000 km).
Standard Differential -- Check fluid level and add
fluid
as needed at every oil change. If driving in
dusty areas or towing a trailer, drain fluid and refill
every
15,000 miles (25 000 km).
More frequent lubrication may be required for
heavy-duty
or off-road use.
3500 HD Models with applications requiring extreme
overloadtrailer towing conditions and high-speed (above
45 mph or 70 km/h) conditions for extended
periods of time must have the drive axle fluid changed every
30,000 miles (50 OOO km). See “Recommended
Fluids and Lubricants” in this section.
3,000 Miles (5 000 km)
0 Change engine oil and filter (or every
3 months, whichever occurs first).
An Emission Control Service.
0 Lubricate chassis components (or every
3 months, whichever occurs first).
(See footnote
#.)
0 Check readfront axle fluid level and add
fluid as needed. Check constant velocity
joints and axle seals for leaking.
(See footnote **.)
DATE ACTUAL MILEAGE SERVICED BY:
ProCarManuals.com