1997 GMC SIERRA wiring
[x] Cancel search: wiringPage 141 of 436
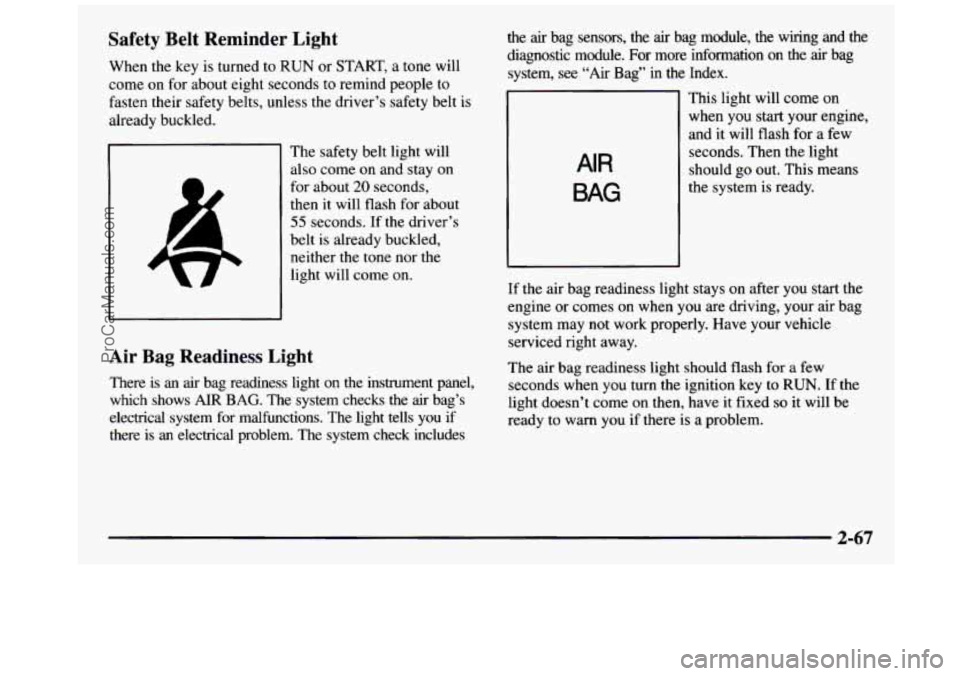
Safety Belt Reminder Light
When the key is turned to RUN or START, a tone will
come on for about eight seconds to remind people to
fasten their
safety belts, unless the driver’s safety belt is
already buckled.
The safety belt light will
also come on and stay on
for about
20 seconds,
then it will flash for about
55 seconds. If the driver’s
belt is already buckled,
neither the tone nor the
light will come on.
Air Bag Readiness Light
There is an air bag readiness light on the instrument panel,
which shows
AIR BAG. The system checks the air bag’s
electrical system for malfunctions. The light tells you if there is an electrical problem. The system check includes the
air bag sensors, the air bag module, the wiring and the
diagnostic module.
For more information on the air bag
system,
see “Air Bag” in the Index.
AIR
BAG
This light will come on
when you start your engine,
and it will
flash for a few
seconds. Then the light
should go out. This means
the system is ready.
If the air bag readiness light stays on after you start the
engine or comes on when you are driving, your air bag
system may not work properly. Have your vehicle
serviced right away.
The air bag readiness light should flash for
a few
seconds when you turn the ignition key to
RUN. If the
light doesn’t come on then, have it fixed
so it will be
ready to warn you if there
is a problem.
2-67
ProCarManuals.com
Page 179 of 436
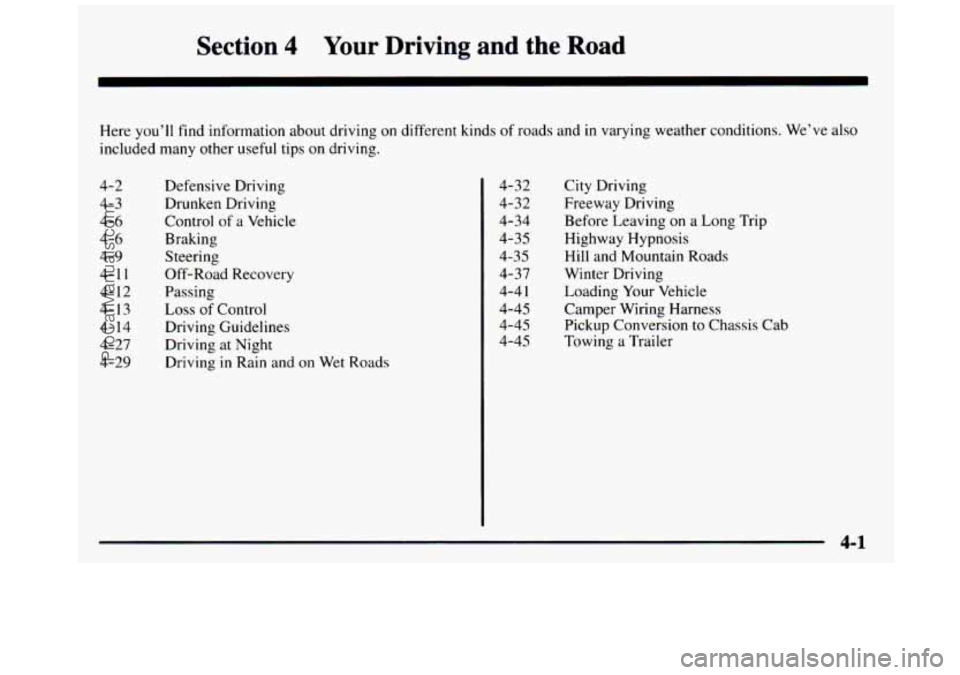
Section 4 Your Driving and the Road
Here you’ll find information about driving on different kinds of roads and in varying weather conditions. We’ve also
included many other useful tips on driving.
4-2 4- 3
4-6
4-6
4-9
4-1
1
4- 12
4-13
4- 14
4-27 4-29 Defensive Driving
Drunken Driving
Control
of a Vehicle
Braking
Steering
Off-Road Recovery
Passing
Loss
of Control
Driving Guidelines
Driving
at Night
Driving
in Rain and on Wet Roads 4-32
4-32
4-34
4-35
4-35
4-37
4-4
1
4-45
4-45
4-45 City Driving
Freeway Driving
Before Leaving
on a Long Trip
Highway Hypnosis
Hill and Mountain Roads
Winter Driving
Loading Your Vehicle
Camper Wiring Harness Pickup Conversion
to Chassis Cab
Towing a Trailer
4-1
ProCarManuals.com
Page 223 of 436
Trailer Recommendations
You must subtract your hitch loads from the CWR for
your vehicle. Weigh your vehicle with the trailer attached,
so that you won’t go over the GVWR or GAWR.
You’ll get
the best performance if you spread out the
weight of your load the right way, and if you choose the
correct hitch and trailer brakes.
For more information, see ‘Trailer Towing”
in the Index.
Camper Wiring Harness (If Equipped)
A five-wire harness is stored in the front stake pocket on
the driver’s side of the bed. The harness has no connector
and should be wired by
a qualified electrical technician. It
must be routed out of your vehicle and securely attached
so that it won’t be pulled or rubbed while you’re using
it. Store the harness in its original position. Wrap the
harness together and tie
it neatly so it won’t be damaged.
Pickup Conversion to Chassis Cab
General Motors is aware that some vehicle owners
may consider having the pickup box removed and a
commercial or recreational body installed. Before
you
do so, first contact the GM Zone Office for your area for
information on such conversions specific to this vehicle.
(See the “Warranty and Owner Assistance” booklet for Zone
Office.) Owners should be aware that,
as
manufactured, there are differences between a chassis
cab and a pickup with the box removed which may
affect vehicle safety. The components necessary to adapt
a pickup to permit its safe use with
a specialized body
should be installed by a body builder in accordance with
the information available from the Zone Office.
Towing a Trailer
If you don’t use the correct equipment and drive
properly, you can lose control when you pull a
trailer. For example, if the trailer is too heavy, the
brakes may not work well
-- or even at all. You
and your passengers could be seriously injured.
Pull a trailer only if you have followed all the
steps in this section.
Ask your GM dealer for
advice and information about towing a trailer with your vehicle.
4-45
ProCarManuals.com
Page 236 of 436
When You Are Ready to Leave After
Parkine
on a Hill
1. Apply your regular brakes and hold the pedal down
while you:
Start your engine;
Shift into a gear; and
Release the parking brake.
2. Let up on the brake pedal.
3. Drive slowly until the trailer is clear of the chocks.
4. Stop and have someone pick up and store the chocks.
Maintenance When Trailer Towing
Your vehicle will need service more often when you’re
pulling a trailer. See the Maintenance Schedule for more
on this. Things that are especially important
in trailer
operation are automatic transmission fluid (don’t
overfill), engine oil, axle lubricant, belt, cooling system
and brake adjustment. Each
of these is covered in this
manual, and
the Index will help you find them quickly.
If you’re trailering, it’s a good idea to review these
sections before you start your trip.
Trailer Wiring Harness
A seven-wire harness is stored under the rear end of
your vehicle, between
the frame rails. An electrical
connector will need to be installed at the trailer end of
the harness, by a qualified electrical technician. For
additional trailer wiring and towing information please
consult your
GM dealer. Securely attach the harness to
the trailer, then tape or strap
it to your vehicle’s frame
rail. Be sure you leave it loose enough
so the wiring
won’t bind or break when turning with the trailer, but
not
so loose that it drags on the ground. Store the
harness in its original position. Wrap the harness
together and tie
it neatly so it won’t be damaged. If you
tow
a trailer, your Center High-Mounted Stoplamp
(CHMSL) may not be properly visible from behind.
You
should select a trailer with a CHMSL on it or, if one is
not available, have one installed. See your
GM dealer
about how to connect your vehicle’s wiring
to a
trailer CHMSL.
Check periodically to see that all hitch nuts and bolts
are tight.
4-58
ProCarManuals.com
Page 346 of 436
Electrical System
Add-on Electrical Equipment
NOTICE:
Don’t add anything electrical to your vehicle
unless you check with your dealer first. Some
electrical equipment can damage your vehicle and the damage wouldn’t be covered by your
warranty. Some add-on electrical equipment
can keep other components from working as
they should.
Your vehicle has an air bag system. Before attempting to
add anything electrical to your vehicle, see “Servicing
Your Air Bag-Equipped Vehicle” in the Index.
Headlamps
The headlamp wiring is protected by an internal circuit
breaker.
An electrical overload will cause the lamps to go
on and off, or in some cases to remain off. If this happens,
have your headlamp wiring checked right away.
Windshield Wipers
The windshield wiper motor is protected by a circuit
breaker and a fuse. If the motor overheats due to heavy
snow, etc., the wiper will stop until the motor cools. If
the overload is caused by some electrical problem and
not snow, etc., be sure to get it fixed.
Power Windows and Other Power Options
Circuit breakers protect the power windows and other
power accessories. When the current load is too heavy,
the circuit breaker opens and closes, protecting the
circuit until the problem is fixed or goes away.
6-70 -
ProCarManuals.com
Page 347 of 436
Fuses and Circuit Breakers
The wiring circuits in your vehicle are protected from
short circuits by a combination of fuses, circuit breakers
and fusible thermal
links. This greatly reduces the
chance of fires caused by electrical problems.
Look at the silver-colored band inside the fuse.
If the
band
is broken or melted, replace the fuse. Be sure you
replace a bad fuse
with a new one of the identical size
and rating.
If you ever have a problem on the road and don’t have
a spare fuse, you can “borrow” one that has the same
amperage. Just pick some feature of your vehicle that
you can get along without -- like the radio or cigarette
lighter
-- and use its fuse, if it is the correct amperage.
Replace
it as soon as you can.
Instrument Panel Fuse Block
The fuse block access door
is on the driver’s side edge
of the instrument panel. Pull
off the cover to access the
fuse block.
You can remove fuses
with a fuse extractor. The fuse
extractor is mounted to the fuse block access door.
To
remove fuses if you don’t have a fuse extractor, hold the
end
of the fuse between your thumb and index finger
and pull straight out.
You may have spare fuses located behind the fuse block
access door. These can be used to replace a bad fuse.
However, make sure
it is of the correct amperage.
6-7 1
ProCarManuals.com
Page 427 of 436

Garage Door Opener ............................ 2-52
GAWR
....................................... 4-41
Gear Positions. Automatic Transmission
............. 2- 15
Gear Positions. Manual Transmission .......... 2- 19. 2-20
GloveBox
.................................... 2-52
Gross Axle Weight Rating
........................ 4-41
Gross Vehicle Weight Rating ...................... 4-41
Guide
en Fransais 11
GVWR ....................................... 4-41
.. .................................
Halogen Bulbs ................................ 6-39
Hazard Warning Flashers
.......................... 5-2
Head Restraints
................................. 1-6
Headlamps .................................... 2-43
Bulb Replacement
....................... 6.40. 6.41
HigWLow Beam Changer
...................... 2-37
OnReminder
................................ 2-44
Wiring
..................................... 6-70
Hearing Impaired. Customer Assistance
.............. 8-4
Heating
........................................ 3-4
High-Beam Headlamps
.......................... 2-37
Highway Hypnosis
.............................. 4-35
Hill and Mountain Roads
......................... 4-35
Hitches. Trailer
................................. 4-53
Hood Checking Things Under
......................... 6-8
Release
...................................... 6-9
Hydraulic Clutch Fluid
........................... 6-26
Hydroplaning
.................................. 4-3 1
Horn
......................................... 2-35 Ignition
Positions
.............................. 2-11
Ignition Transmission Lock Check
................. 7-48
Illuminated Entry
............................... 2-46
Inflation. Tire
.................................. 6-51
Inside Daymight Rearview Mirror
................. 2-48
Inspections
.................................... 7-49
Brake System
................................ 7-50
DriveAxle
.................................. 7-50
Exhaust Systems
............................. 7-49
Radiator and Heater Hose
...................... 7-49
Steering
.................................... 7-49
Suspension
.................................. 7-49
Throttle Linkage
.............................. 7-49
Transfer Case (Four-wheel Drive)
............... 7-50
Instrumentpanel
............................... 2-62
Cleaning
.................................... 6-63
Cluster
..................................... 2-64
FuseBlock
.................................. 6-71
Intensity Control
............................. 2-46
Interior Lamps
................................. 2-46
.................................... J ack. Tire 5-23
Jump Starting
................................... 5-3
Key Lock Cylinders Service
..................... 7-46
Key Release Button
............................. 2-12
Keyless Entry System
............................ 2-7
Keys
.......................................... 2-2
9-5
ProCarManuals.com
Page 433 of 436
Turn Signal and Lane Change Signals ............... 2-37
Turn SignalNultifunction Lever
................... 2-36
Turn Signals When Towing a Trailer
................ 4-56
Underbody Maintenance
........................ 6-67
Underhood FuseRelay Center
..................... 6-73
Vehicle
Control
...................................... 4-6
Damage Warnings
.............................. iv
Identification Number ......................... 6-69
Loading
.................................... 4-41
Storage
..................................... 6-39
Ventilation System
............................... 3-5
Visors, Sun
.................................... 2-61
Voltmeter
..................................... 2-70
warning Devices ............................... 5-3
Warning Lights. Gages and Indicators
............... 2-66
Warranty Information
............................ 8- 10
Washer Fluid. Windshield ........................ 6-33
Washing Your Vehicle
........................... 6-64 Weatherstrips
.................................. 6-64
Nut Torque ............................. 5.30. 6.76
Replacement
................................. 6-57
Wrench
..................................... 5-23
Windows ..................................... 2-33
Lockout Switch
.............................. 2-34
Manual
..................................... 2-33
Power
...................................... 2-33
Sliding Rear
................................. 2-35
Swing-Out
.................................. 2-35
Windshield Washer
............................. 2-39
Fluid .................................. 2-39, 6-33
Fluid Level Check
............................ 7-45
Windshield Wipers
.............................. 2-38
Blade Replacement ...................... 6-49. 6-77
Cleaning the Blades
........................... 6-63
Winter Driving
................................. 4-37
Wiper Blades, Cleaning
.......................... 6-63
Wiring. Headlamp
.............................. 6-70
Wrench. Wheel ................................. 5-23
Wheel
Alignment
.................................. 6-57
Fuses
...................................... 6-70
9-11
ProCarManuals.com