1997 GMC SIERRA tow
[x] Cancel search: towPage 145 of 436
Brake System Warning Light
Your vehicle’s hydraulic brake system is divided into
two parts. If
one part isn’t working, the other part can
still work and stop you. For good braking, though,
you
need both parts working well.
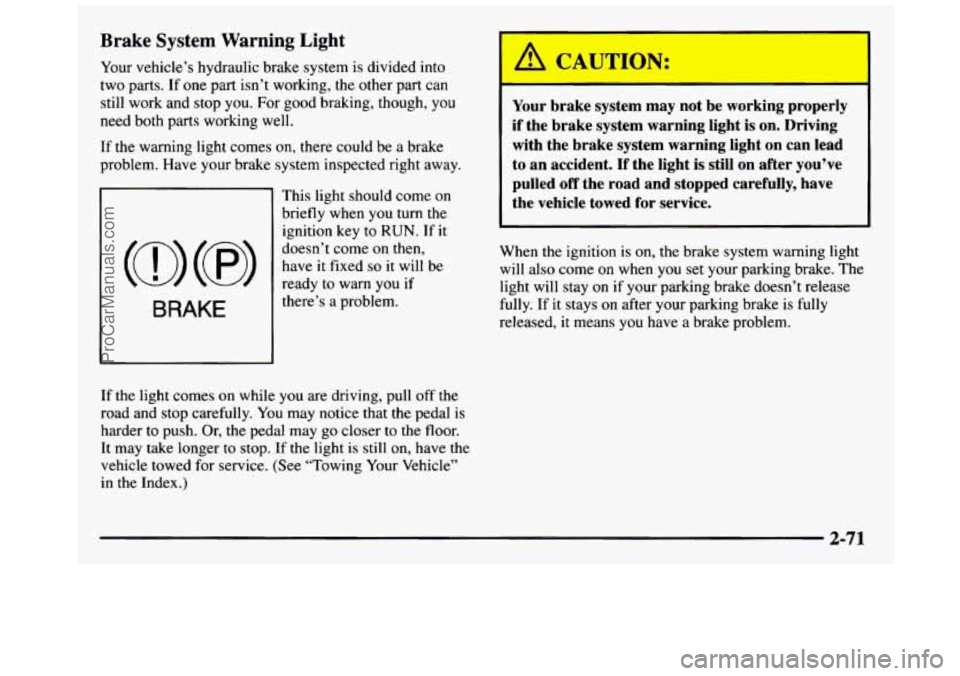
If the warning light comes on, there could be a brake
problem. Have your brake system inspected right away.
This light should come on
briefly when
you turn the
ignition key to
RUN. If it
doesn’t come on then,
have it fixed so it will be
ready to warn
you if
there’s
a problem.
I
Your brake system may not be working properly
if the brake system warning light is on. Driving
with the brake system warning light
on can lead
to an accident. If the light is still on after you’ve
pulled
off the road and stopped carefully, have
the vehicle towed for service.
When the ignition is on, the brake system warning light
will also come
on when you set your parking brake. The
light will stay on
if your parking brake doesn’t release
fully. If it stays on after your parking brake is fully
released,
it means you have a brake problem.
If the light comes on while you are driving, pull off
the
road and stop carefully. You may notice that the pedal is
harder to push. Or, the pedal may go closer to the floor.
It may take longer
to stop. If the light is still on, have the
vehicle towed for service. (See “Towing Your Vehicle”
in the Index.)
2-71
ProCarManuals.com
Page 148 of 436
If the Light Is Flashing If the Light Is On Steady
The following may prevent more serious damage to
your vehicle:
0 Reducing vehicle speed.
0 Avoiding hard accelerations.
0 Avoiding steep uphill grades.
0 If you are towing a trailer, reduce the amount of
cargo being hauled as soon as it is possible.
If the light stops flashing and remains on steady, see “If
the Light Is On Steady” following.
If the light continues to flash, when
it is safe to do so,
stup the vehicle. Find a safe place to park your vehicle.
Turn the key off, wait at least
10 seconds and restart the
engine. If the light remains on steady, see “If the Light
Is On Steady” following. If the light is still flashing,
follow the previous steps, and drive the vehicle to your
dealer or qualified service center for service. You
may be able to correct the emission system
malfunction by considering the following:
Did you recently put fuel into your vehicle?
If
so, reinstall the fuel cap, making sure to fully install
the cap. The diagnostic system can determine if the fuel
cap has been
left off or improperly installed. A loose or
missing fuel cap
will allow fuel to evaporate into the
atmosphere.
A few driving trips with the cap properly
installed should turn the light off.
Did you just drive through a deep puddle of water?
If
so, your electrical system may be wet. The condition
will usually be corrected when the electrical system
dries out.
A few driving trips should turn the light off.
Are you low on
fuel?
As your engine starts to run out of fuel, your engine may
not run as efficiently as designed since small amounts of
air are sucked into the fuel line causing a misfire. The
system can detect this. Adding fuel should correct this
condition. Make sure to install
the fuel cap properly. It
will take a
few driving trips to turn the light off.
2-74
ProCarManuals.com
Page 154 of 436
Comfort Controls
Heater Control System
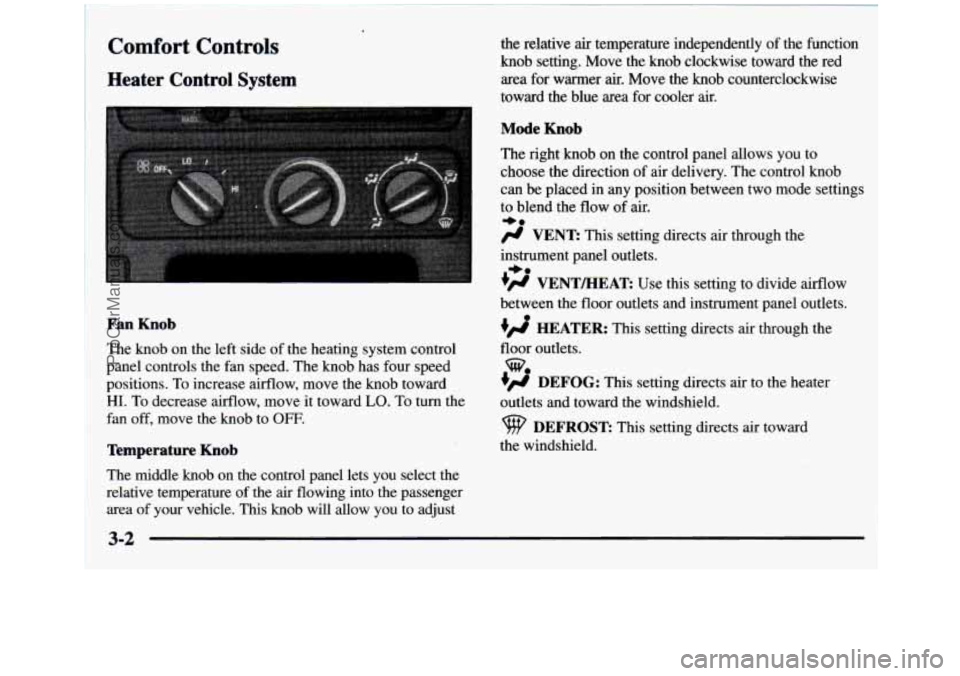
the relative air temperature independently of the function
knob setting. Move the knob clockwise toward the red
area for warmer
air. Move the knob counterclockwise
toward the blue area for cooler air.
Mode Knob
The right knob on the control panel allows you to
choose the direction of
air delivery. The control knob
can be placed in any position between two mode settings
to blend the flow of
air.
-0
/J VENT: This setting directs air through the
instrument panel outlets.
+# VENTEEAT: Use this setting to divide airflow
+0
between the floor outlets and instrument panel outlets.
HEATER: This setting directs air through the
floor outlets.
w
DEFOG: This setting directs air to the heater
outlets and toward the windshield.
DEFROST This setting directs air toward
the windshield.
Fan Knob
The knob on the left side of the heating system control
panel controls the fan speed. The knob has four speed
positions. To increase airflow, move the knob toward
HI. To decrease airflow, move it toward LO. To turn the
fan off, move
the knob to OFF.
Temperature Knob
The middle knob on the control panel lets you select the
relative temperature of the air flowing into the passenger
area of your vehicle. This knob will allow you to adjust
3-2
ProCarManuals.com
Page 155 of 436
Heater and Air Conditioning Control
System
(If Equipped)
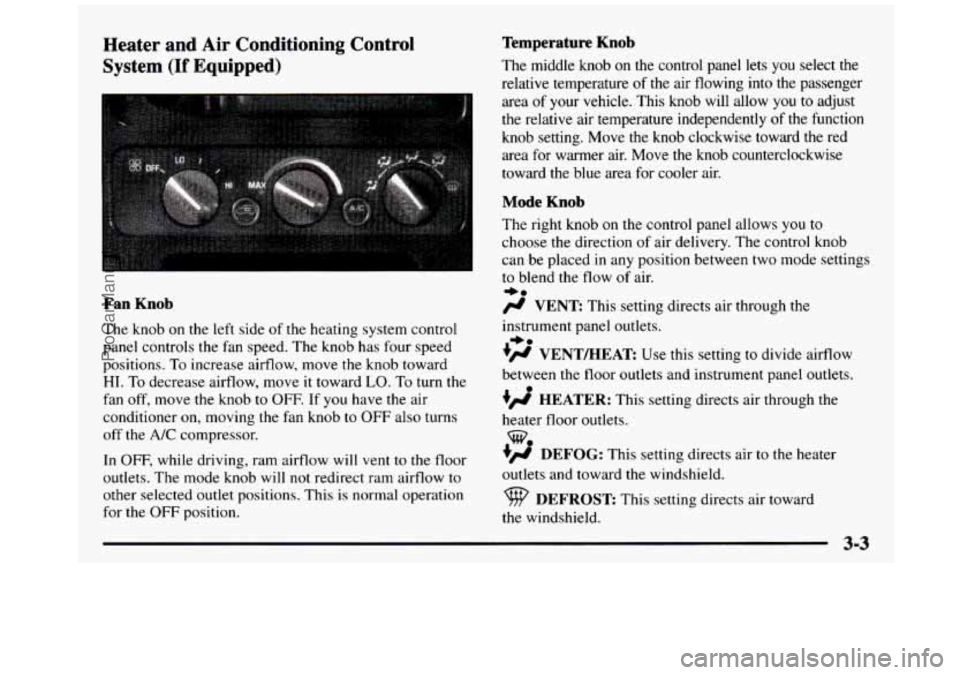
Fan Knob
The knob on the le.ft side of the heating system control
panel controls the fan speed. The knob has four speed
positions. To increase airflow, move
the knob toward
HI. To decrease airflow, move it toward LO. To turn the
fan off, move the knob to OFF. If you have the air
conditioner
on, moving the fan knob to OFF also turns
off the A/C compressor.
In
OFF, while driving, ram airflow will vent to the floor
outlets. The mode knob will not redirect ram airflow
to
other selected outlet positions. This is normal operation
for the
OFF position.
Temperature Knob
The middle knob on the control panel lets you select the
relative temperature
of the air flowing into the passenger
area
of your vehicle. This knob will allow you to adjust
the relative air temperature independently of the function
knob setting. Move the
knob clockwise toward the red
area
for warmer air. Move the knob counterclockwise
toward the blue area for cooler air.
Mode Knob
The right knob on the control panel allows you to
choose the direction of air delivery. The control knob
can be placed in any position between two mode settings
to blend the flow of air.
e0
/J VENT: This setting directs air through the
instrument panel outlets.
?# VENT/HEAT Use this setting to divide airflow
between the
floor outlets and instrument panel outlets.
+’ HEATER: This setting directs air through the
heater floor outlets.
+’ DEFOG: This setting directs air to the heater
outlets and toward
the windshield.
*.
w.
DEFROST This setting directs air toward
the windshield.
ProCarManuals.com
Page 158 of 436
Ventilation Tips
0
0
0
0
Keep the hood and front air inlet free of ice, snow or
any other obstruction
(such as leaves). The heater
and defroster will work far better, reducing the
chance of fogging the inside of your windows.
When you enter
a vehicle in cold weather, turn the
blower
fan to HI for a few moments before driving.
This helps clear the intake ducts of snow and
moisture, and reduces the
chance of fogging the
inside of your windows.
Keep
the air path under the front seats clear of
objects. This helps air to circulate throughout
your vehicle.
The use of hood air deflectors may adversely
affect the performance of the heating and air
conditioning system.
Defogging and Defrosting
On cool, humid days, use DEFOG to keep the
windshield and side windows clear. Use
DEFROST to
remove fog
or ice from the windshield in extremely
humid or cold conditions. Use
DEFROST with the
temperature
knob toward the red area and the fan control
toward
HI.
Rear Window Defogger (If Equipped)
If you see lines running across the rear window, you
have a rear window defogger. The lines warm the glass.
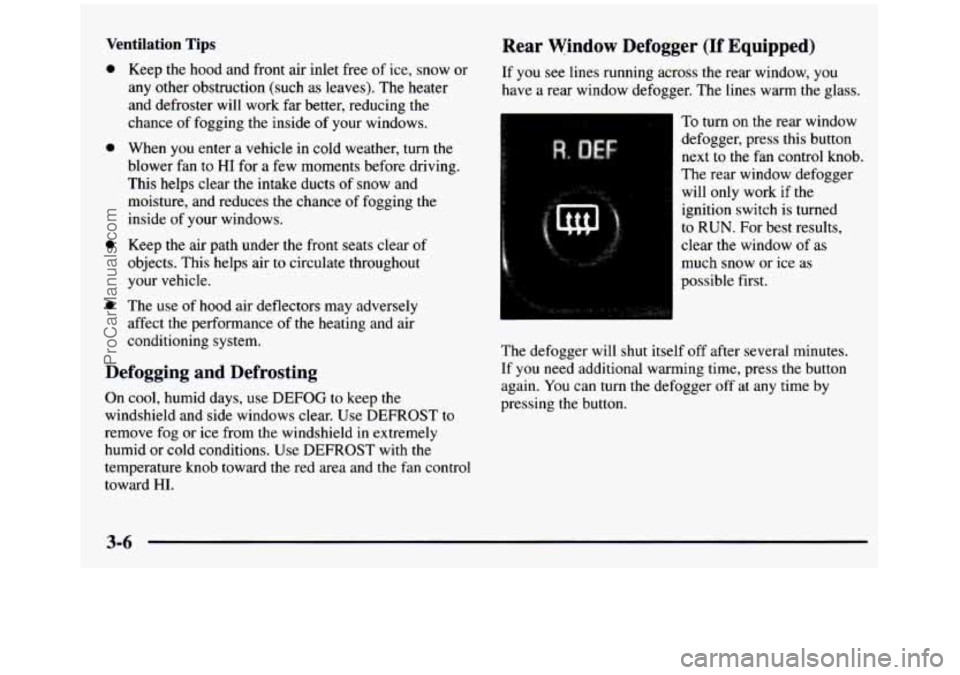
To turn
on the rear window
defogger, press this button
next to
the fan control knob.
The rear window defogger
will only work if the
ignition switch is turned
to RUN. For best results,
clear
the window of as
much snow or ice as
possible first.
The defogger will shut itself off after several minutes.
If you need additional warming time, press the button
again. You can turn the defogger off at any time by
pressing the button.
ProCarManuals.com
Page 179 of 436
Section 4 Your Driving and the Road
Here you’ll find information about driving on different kinds of roads and in varying weather conditions. We’ve also
included many other useful tips on driving.
4-2 4- 3
4-6
4-6
4-9
4-1
1
4- 12
4-13
4- 14
4-27 4-29 Defensive Driving
Drunken Driving
Control
of a Vehicle
Braking
Steering
Off-Road Recovery
Passing
Loss
of Control
Driving Guidelines
Driving
at Night
Driving
in Rain and on Wet Roads 4-32
4-32
4-34
4-35
4-35
4-37
4-4
1
4-45
4-45
4-45 City Driving
Freeway Driving
Before Leaving
on a Long Trip
Highway Hypnosis
Hill and Mountain Roads
Winter Driving
Loading Your Vehicle
Camper Wiring Harness Pickup Conversion
to Chassis Cab
Towing a Trailer
4-1
ProCarManuals.com
Page 223 of 436
Trailer Recommendations
You must subtract your hitch loads from the CWR for
your vehicle. Weigh your vehicle with the trailer attached,
so that you won’t go over the GVWR or GAWR.
You’ll get
the best performance if you spread out the
weight of your load the right way, and if you choose the
correct hitch and trailer brakes.
For more information, see ‘Trailer Towing”
in the Index.
Camper Wiring Harness (If Equipped)
A five-wire harness is stored in the front stake pocket on
the driver’s side of the bed. The harness has no connector
and should be wired by
a qualified electrical technician. It
must be routed out of your vehicle and securely attached
so that it won’t be pulled or rubbed while you’re using
it. Store the harness in its original position. Wrap the
harness together and tie
it neatly so it won’t be damaged.
Pickup Conversion to Chassis Cab
General Motors is aware that some vehicle owners
may consider having the pickup box removed and a
commercial or recreational body installed. Before
you
do so, first contact the GM Zone Office for your area for
information on such conversions specific to this vehicle.
(See the “Warranty and Owner Assistance” booklet for Zone
Office.) Owners should be aware that,
as
manufactured, there are differences between a chassis
cab and a pickup with the box removed which may
affect vehicle safety. The components necessary to adapt
a pickup to permit its safe use with
a specialized body
should be installed by a body builder in accordance with
the information available from the Zone Office.
Towing a Trailer
If you don’t use the correct equipment and drive
properly, you can lose control when you pull a
trailer. For example, if the trailer is too heavy, the
brakes may not work well
-- or even at all. You
and your passengers could be seriously injured.
Pull a trailer only if you have followed all the
steps in this section.
Ask your GM dealer for
advice and information about towing a trailer with your vehicle.
4-45
ProCarManuals.com
Page 224 of 436
NOTICE:
Pulling a trailer improperly can damage your
vehicle and result in costly repairs not covered
by
your warranty. To pull a trailer correctly, follow
the advice in this part, and see your
GM dealer
for important information about towing a trailer with
your vehicle.
Every vehicle is ready for some trailer towing. If yours
was built with trailering options, as many are, it’s ready
for heavier trailers. But trailering is different than just
driving your vehicle by itself. Trailering means changes
in handling, durability and fuel economy. Successful,
safe trailering takes correct equipment, and it has
to be
used properly.
That’s the reason for this part. In it are many
time-tested, important trailering tips and safety rules.
Many
of these are important for your safety and that of
your passengers.
So please read this section carefully
before
you pull a trailer.
If You Do Decide To Pull A Trailer
If you do, here are some important points:
0
0
0
0
There are many different laws, including speed limit
restrictions, having
to do with trailering. Make sure
your
rig will be legal, not only where you live but
also where you’ll be driving.
A good source for this
information can be state
or provincial police.
Consider using
a sway control if your trailer will
weigh less than the capacity stamped on your step
bumper.
You should always use a sway control if
your trailer will weigh more than the capacity
stamped on your step bumper. You can ask
a hitch
dealer about sway controls.
Don’t tow a trailer at all during the first
500 miles
(800 km) your new vehicle is driven. Your engine,
axle or other parts could be damaged.
Then, during the first
500 miles (800 km) that you
tow a trailer, don’t drive over 50 mph (80 kmh) and
don’t make starts at full throttle. This helps your
engine and other parts of your vehicle wear in at the
heavier loads.
4-46
ProCarManuals.com