Page 275 of 436
I NOTICE: I
Spinning your wheels can destroy parts of your
vehicle as well
as the tires. If you spin the wheels
too fast while shifting your transmission back
and forth, you can destroy your transmission.
For information about using tire chains on your vehicle,
see “Tire Chains”
in the Index.
Rocking Your Vehicle To Get It Out
First, turn your steering wheel left and right. That will
clear the area around your front wheels. Then shift back
and forth between REVERSE
(R) and a forward gear
(or with
a manual transmission, between FIRST (1) or
SECOND (2) and REVERSE(R)), spinning the wheels
as little as possible. Release the accelerator pedal while
you shift, and press lightly on the accelerator pedal
when the transmission is in gear. If that doesn’t get
you out after a few tries,
you may need to be towed out.
Or, you can use your recovery hooks if your vehicle has
them.
If you do need to be towed out, see ”Towing Your
Vehicle”
in the Index.
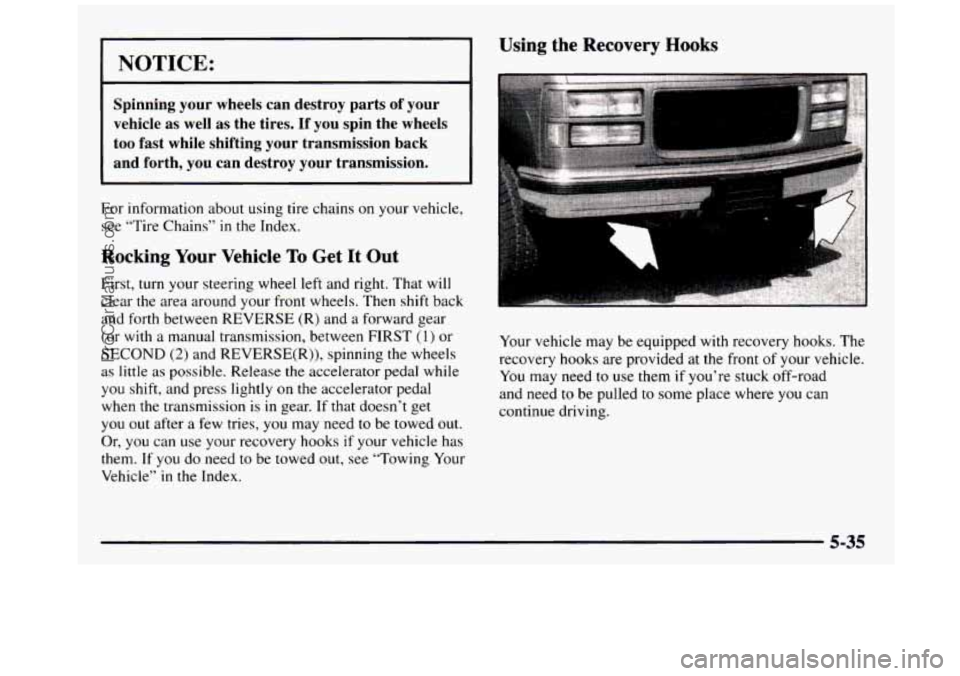
Using the Recovery Hooks
Your vehicle may be equipped with recovery hooks. The
recovery hooks are provided at
the front of your vehicle.
You may need
to use them if you’re stuck off-road
and need
to be pulled to some place where you can
continue driving.
5-35
ProCarManuals.com
Page 276 of 436
I ' A CAUTION:
The recovery hooks, when used, are under a lot of
force. Always pull the vehicle straight out. Never
pull on the hooks at a sideways angle. The hooks
could break
off and you or others could be
injured from the chain or cable snapping back.
I
I NOTICE: I
Never use the recovery hooks to tow the vehicle.
Your vehicle could be damaged and it would not
be covered by warranty.
5-36
ProCarManuals.com
Page 291 of 436
Engine Oil (Gasoline Engine)
If your vehicle has a diesel engine, see “Engine Oil (Diesel Engine)” in the Diesel Engine Supplement.
It’s a good idea to check your engine oil every time you
get fuel. In order to get an accurate reading, the oil must
be warm and the vehicle must be on level ground.
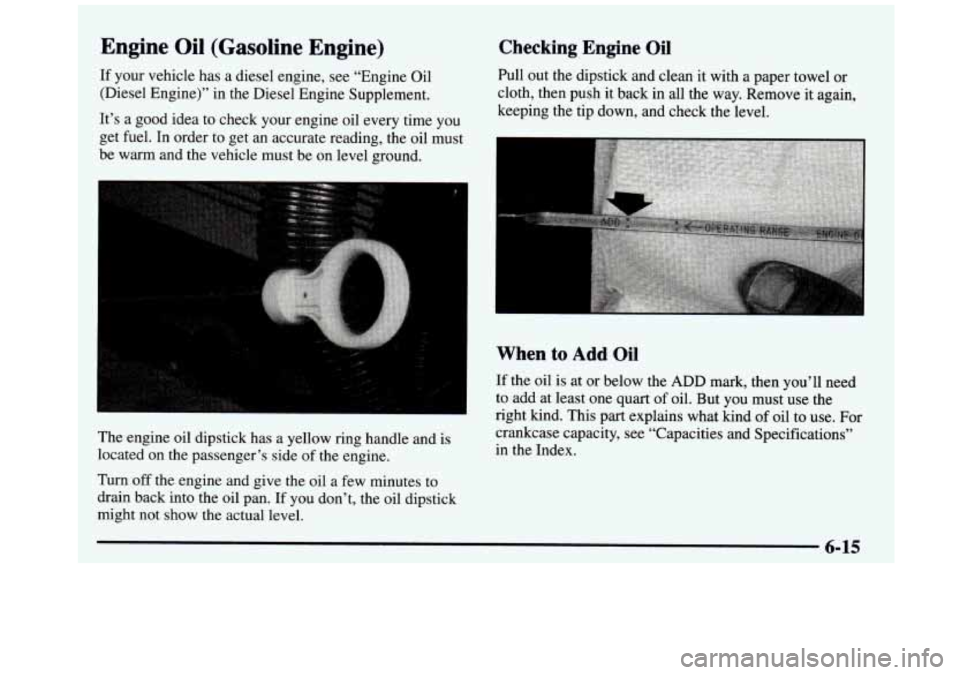
The engine oil dipstick has
a yellow ring handle and is
located on the passenger’s side
of the engine.
Turn
off the engine and give the oil a few minutes to
drain back into the oil pan.
If you don’t, the oil dipstick
might not show the actual level.
Checking Engine Oil
Pull out the dipstick and clean it with a paper towel or
cloth, then push it back in all the way. Remove it again,
keeping the tip down, and check the level.
When to Add Oil
If the oil is at or below the ADD mark, then you’ll need
to add at least one
quart of oil. But you must use the
right kind. This part explains what kind of oil to use.
For
crankcase capacity, see “Capacities and Specifications”
in the Index.
6-15
ProCarManuals.com
Page 294 of 436
Engine Oil Additives
Don’t add anything to your oil. Your GM dealer is ready
to advise if you think something should be added.
When to Change Engine Oil
If any one of these is true for you, use the short tripkity
maintenance schedule:
0
0
0
0
0
Most trips are less than 5 to 10 miles (8 to 16 km).
This is particularly important when outside
temperatures
are below freezing.
Most trips include extensive idling (such as frequent
driving in stop-and-go traffic).
You operate your vehicle in dusty areas or
off-road frequently.
You frequently tow a trailer.
The vehicle is used for delivery service, police, taxi
or other commercial application.
Driving under these conditions causes engine oil to
break down sooner. If any one of these is true for your
vehicle, then you need to change your oil and filter
every
3,000 miles (5 000 km) or 3 months -- whichever
occurs first. If
none
of them is true, use the long triphighway
maintenance schedule. Change the oil and filter
every
7,500 miles (12 500 km) or 12 months -- whichever
occurs first. Driving
a vehicle with a fully warmed
engine under highway conditions causes engine oil to
break down slower.
What to Do with Used Oil
Did you know that used engine oil contains certain
elements that may be unhealthy for your skin and could
even cause cancer? Don’t let used oil stay on your skin
for very long. Clean your skin and nails with soap and
water,
or a good hand cleaner, Wash or properly throw
away clothing or rags containing used engine oil. (See
the manufacturer’s warnings about the use and disposal
of oil products.)
Used oil can be a real threat to the environment.
If you
change your own oil, be sure to drain all free-flowing oil
from the filter before disposal. Don’t ever dispose of oil
by putting it in the trash, pouring it on the ground, into
sewers, or into streams or bodies of water. Instead,
recycle
it by taking it to a place that collects used oil. If
you have a problem properly disposing of your used oil,
ask your dealer, a service station or a local recycling
center for help.
6-18
ProCarManuals.com
Page 297 of 436
Refer to the Maintenance Schedule to determine when to
replace the air filter. See “Owner Checks and Services”
in
the Index.
Operating the engine with the
air cleaner off
can cause you OF others to be burned. The air
cleaner not only cleans the air,
it stops flame if
the engine backfires.
If it isn’t there, and the
engine backfires, you could be burned. Don’t
drive with it
off, and be careful working on the
engine with the air cleaner
off.
I NOTICE:
If the air cleaner is off, a backfire can cause a
damaging engine fire. And, dirt can easily get
into your engine, which will damage it. Always
have the air cleaner in place when you’re driving.
Automatic Transmission Fluid
When to Check and Change
A good time to check your automatic transmission fluid
level is
when the engine oil is changed.
Change both the fluid and filter every
50,000 miles
(83
000 km) if the vehicle’s CVWR is over 8,600 or
if the vehicle is mainly driven under one or more
of
these conditions:
In heavy city traffic where the outside temperature
regularly reaches
90°F (32°C) or higher.
In hilly or mountainous terrain.
When doing frequent trailer towing.
Uses such as found in taxi, police or delivery service.
If your vehicle’s GVWR is not over
8,600 and you do
not use your vehicle under any
of these conditions, the
fluid and filter do
not require changing.
See “Scheduled Maintenance Services’’
in the Index.
ProCarManuals.com
Page 299 of 436
Checking the Fluid Hot or Cold
Park your vehicle on a level place. Keep the
engine running.
With the parking brake applied, place the shift lever
in PARK
(P).
0 With your foot on the brake pedal, move the shift
lever through each gear range, pausing
for about
three seconds in each range. Then, position the shift
lever in PARK (P). Then, without shutting
off the engine, follow these steps:
0 Let the
engine run at idle for three minutes or more.
1. The red transmission dipstick handle is located at the
rear
of the engine compartment, on the passenger's
side. Flip the handle
up and then pull out the dipstick
and wipe
it with a clean rag or paper towel.
2. Push it back in all the way, wait three seconds and
then
pull it back out again.
ProCarManuals.com
Page 303 of 436
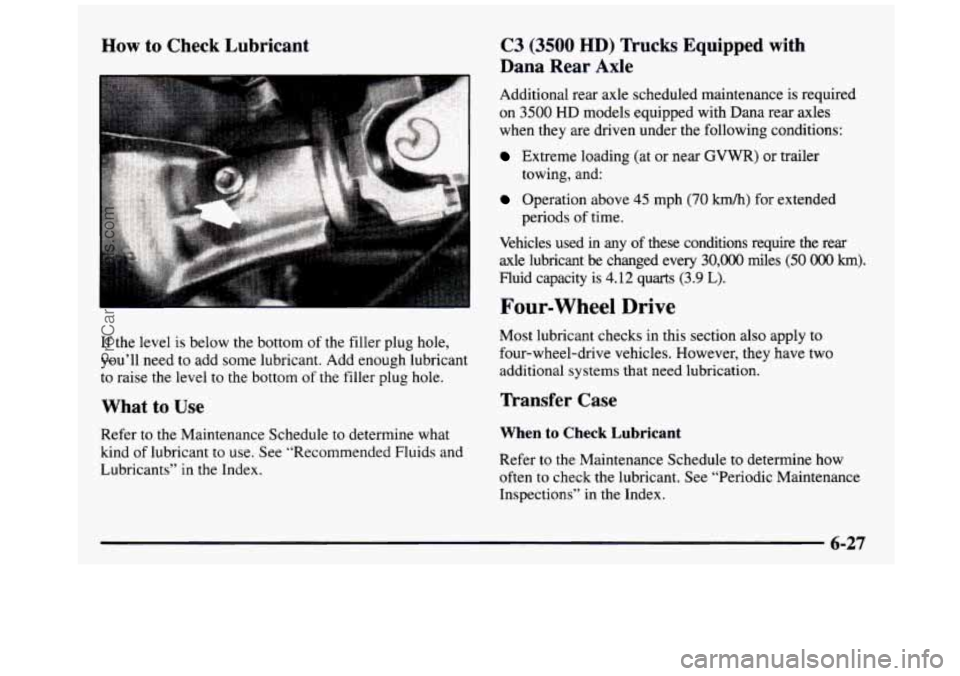
How to Check Lubricant
If the level is below the bottom of the filler plug hole,
you’ll need to add
some lubricant. Add enough lubricant
to raise the level
to the bottom of the filler plug hole.
What to Use
Refer to the Maintenance Schedule to determine what
kind
of lubricant to use. See “Recommended Fluids and
Lubricants”
in the Index.
C3 (3500 HD) Trucks Equipped with
Dana Rear Axle
Additional rear axle scheduled maintenance is required
on
3500 HD models equipped with Dana rear axles
when they are driven under the following conditions:
Extreme loading (at or near GVWR) or trailer
Operation above 45 mph (70 km/h) for extended
towing, and:
periods of time.
Vehicles used in any
of these conditions require the rear
axle lubricant be changed every
30,000 miles (50 OOO km).
Fluid capacity is 4.12 quarts (3.9 L).
Four-wheel Drive
Most lubricant checks in this section also apply to
four-wheel-drive vehicles. However, they have two
additional systems that need lubrication.
Transfer Case
When to Check Lubricant
Refer to the Maintenance Schedule to determine how
often to check the lubricant. See “Periodic Maintenance
Inspections” in the Index.
ProCarManuals.com
Page 325 of 436
d
i”
4. Push in gently on
the bulb,
turn it
counterclockwise and
remove it from
the socket.
5. Put in a new bulb and, pushing in gently, turn it
clockwise until it is tight.
6. Put the socket back in the lamp assembly and replace
the
lens and lens seal.
Windshield Wiper Blade Replacement
For proper type and length, see “Normal Maintenance
Replacement Parts”
in the Index. To replace the
windshield wiper blade assembly:
I A
I
IA
I
1. Lift the wiper arm and rotate the blade until it is
2. Push the release lever and slide the wiper assembly
facing away from the windshield.
toward
the driver’s
side of the vehicle.
3. Install a new blade by reversing Steps 1 and 2.
ProCarManuals.com