Page 145 of 219
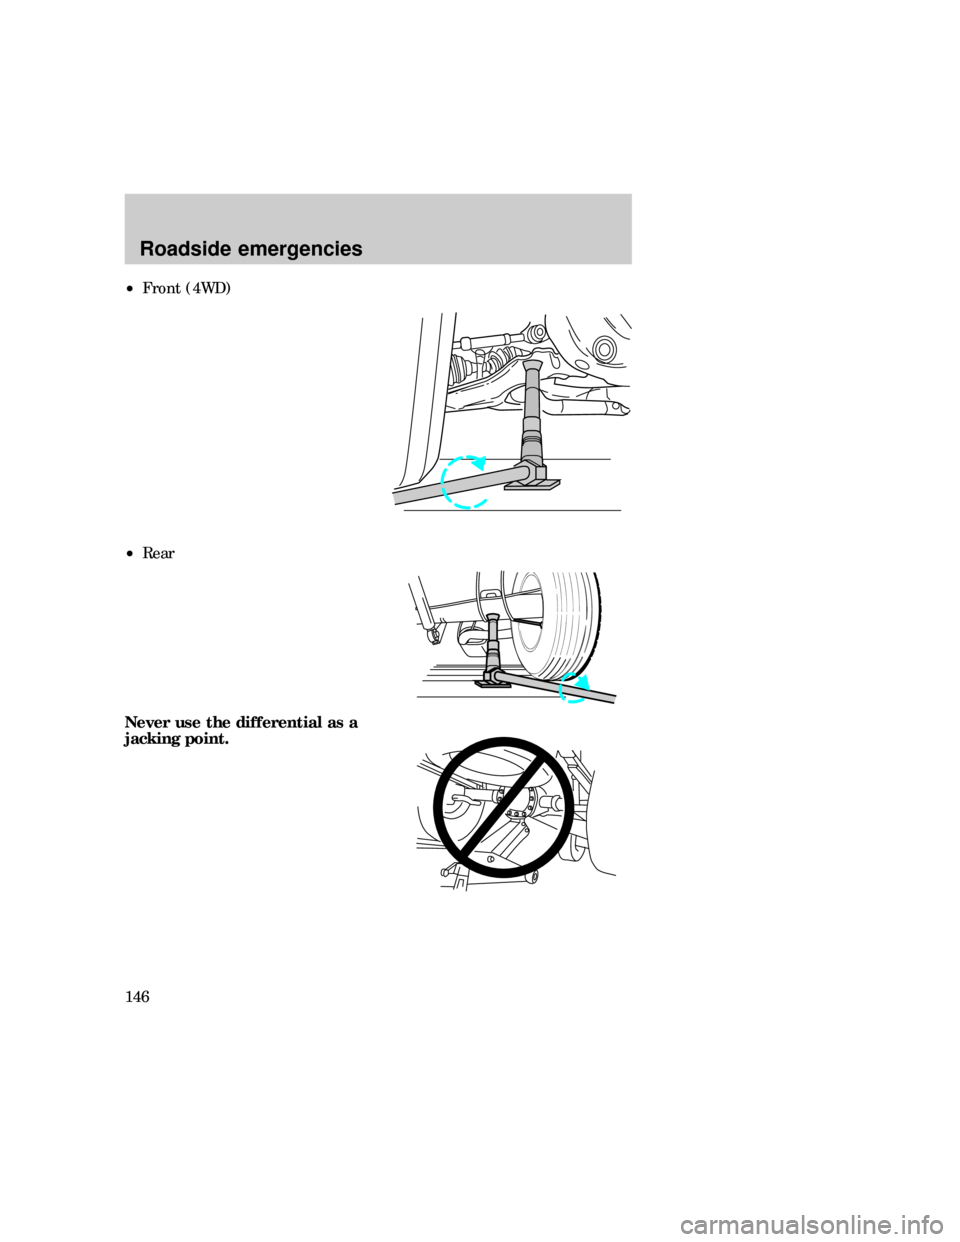
²Front (4WD)
²Rear
Never use the differential as a
jacking point.
Roadside emergencies
146
Page 146 of 219
4. Raise the vehicle high enough
for the spare tire to clear the
ground when installed.
5. Remove the wheel lug nuts.
6. Remove the flat tire and install
the spare.
7. Install the lug nuts and tighten
until the wheel is seated.
Installing wheels without a
good metal-to-metal
contact at the wheel mounting
surface can cause the wheel lug
nuts to loosen and could allow
the wheel to come off while the
vehicle is in motion.
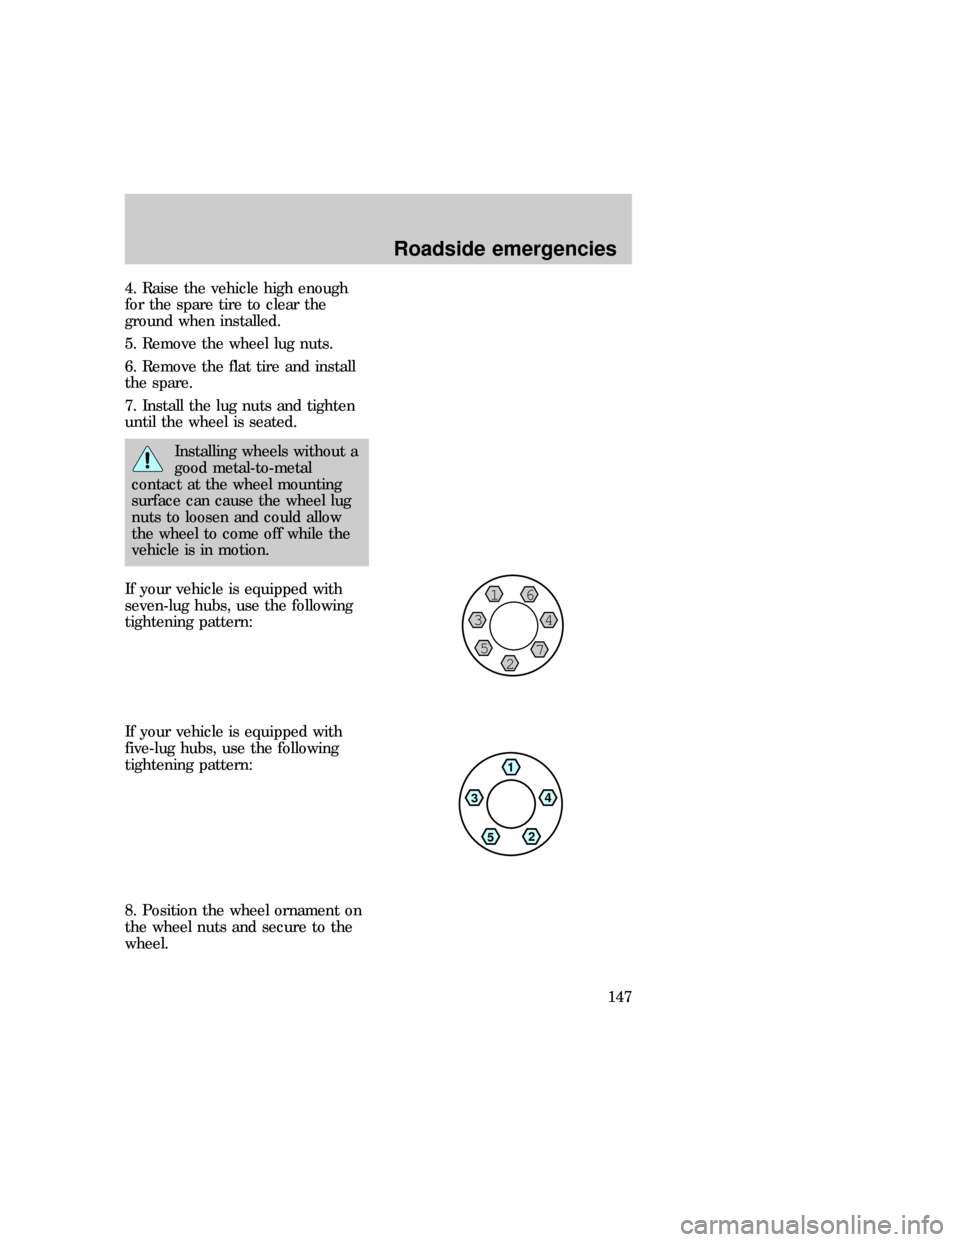
If your vehicle is equipped with
seven-lug hubs, use the following
tightening pattern:
If your vehicle is equipped with
five-lug hubs, use the following
tightening pattern:
8. Position the wheel ornament on
the wheel nuts and secure to the
wheel.
16
34
7 5
2
1
4
2
5 3
Roadside emergencies
147
Page 147 of 219
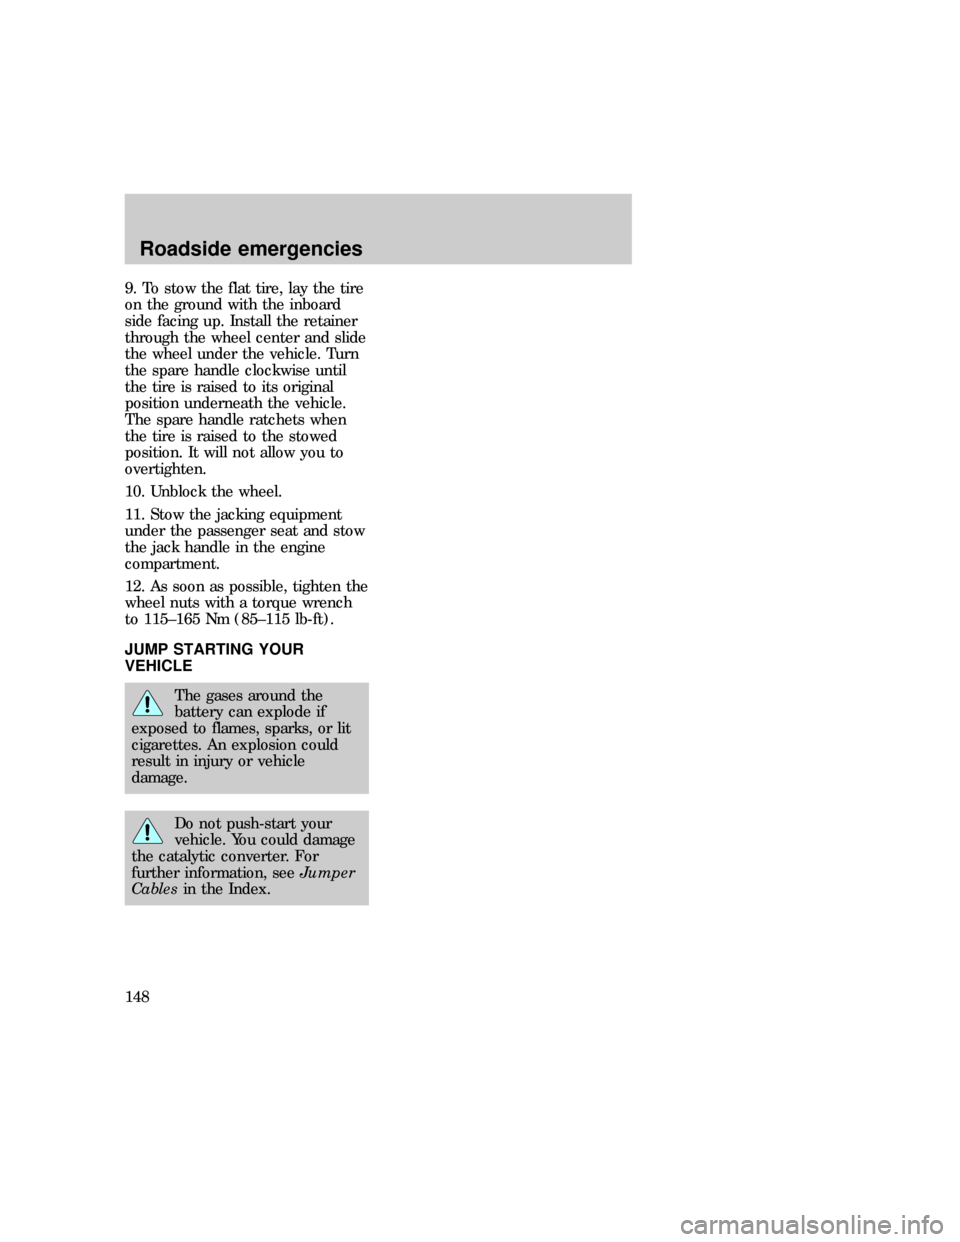
9. To stow the flat tire, lay the tire
on the ground with the inboard
side facing up. Install the retainer
through the wheel center and slide
the wheel under the vehicle. Turn
the spare handle clockwise until
the tire is raised to its original
position underneath the vehicle.
The spare handle ratchets when
the tire is raised to the stowed
position. It will not allow you to
overtighten.
10. Unblock the wheel.
11. Stow the jacking equipment
under the passenger seat and stow
the jack handle in the engine
compartment.
12. As soon as possible, tighten the
wheel nuts with a torque wrench
to 115±165 Nm (85±115 lb-ft).
JUMP STARTING YOUR
VEHICLE
The gases around the
battery can explode if
exposed to flames, sparks, or lit
cigarettes. An explosion could
result in injury or vehicle
damage.
Do not push-start your
vehicle. You could damage
the catalytic converter. For
further information, seeJumper
Cablesin the Index.
com_jump-starting.01
Roadside emergencies
148
Page 148 of 219
Batteries contain sulfuric
acid which burns skin,
eyes, and clothing.
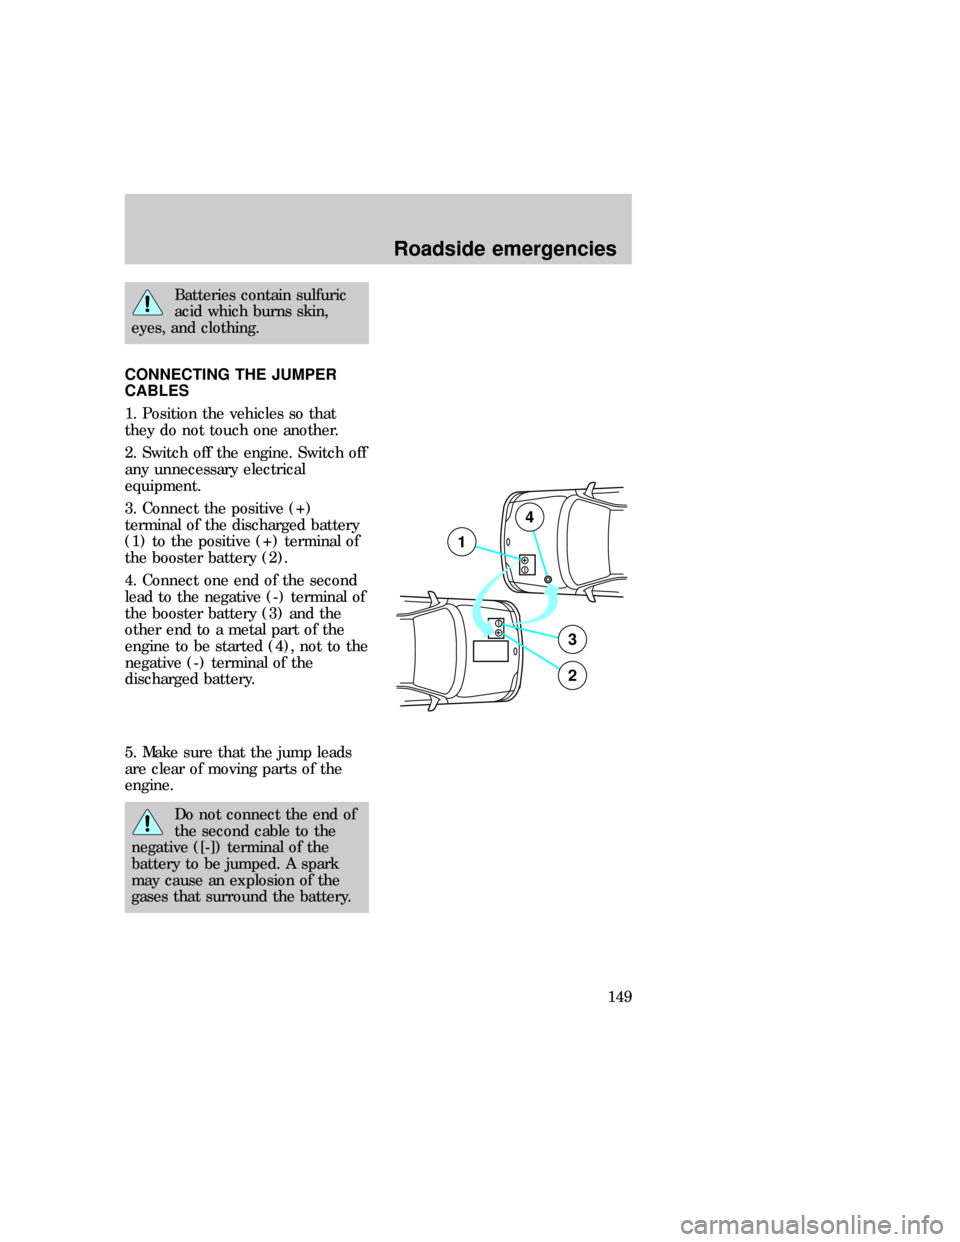
CONNECTING THE JUMPER
CABLES
1. Position the vehicles so that
they do not touch one another.
2. Switch off the engine. Switch off
any unnecessary electrical
equipment.
3. Connect the positive (+)
terminal of the discharged battery
(1) to the positive (+) terminal of
the booster battery (2).
4. Connect one end of the second
lead to the negative (-) terminal of
the booster battery (3) and the
other end to a metal part of the
engine to be started (4), not to the
negative (-) terminal of the
discharged battery.
5. Make sure that the jump leads
are clear of moving parts of the
engine.
Do not connect the end of
the second cable to the
negative ([-]) terminal of the
battery to be jumped. A spark
may cause an explosion of the
gases that surround the battery.
+–
+–
3
2
1
4
com_connecting_cables.01
com_jump_starting.01
Roadside emergencies
149
Page 149 of 219

JUMP STARTING
1. Start the booster vehicle and
run the engine at moderately
increased speed.
2. Start the engine of the vehicle
with the discharged battery.
3. Once the engine has been
started, run both vehicles for a
further three minutes before
disconnecting the leads.
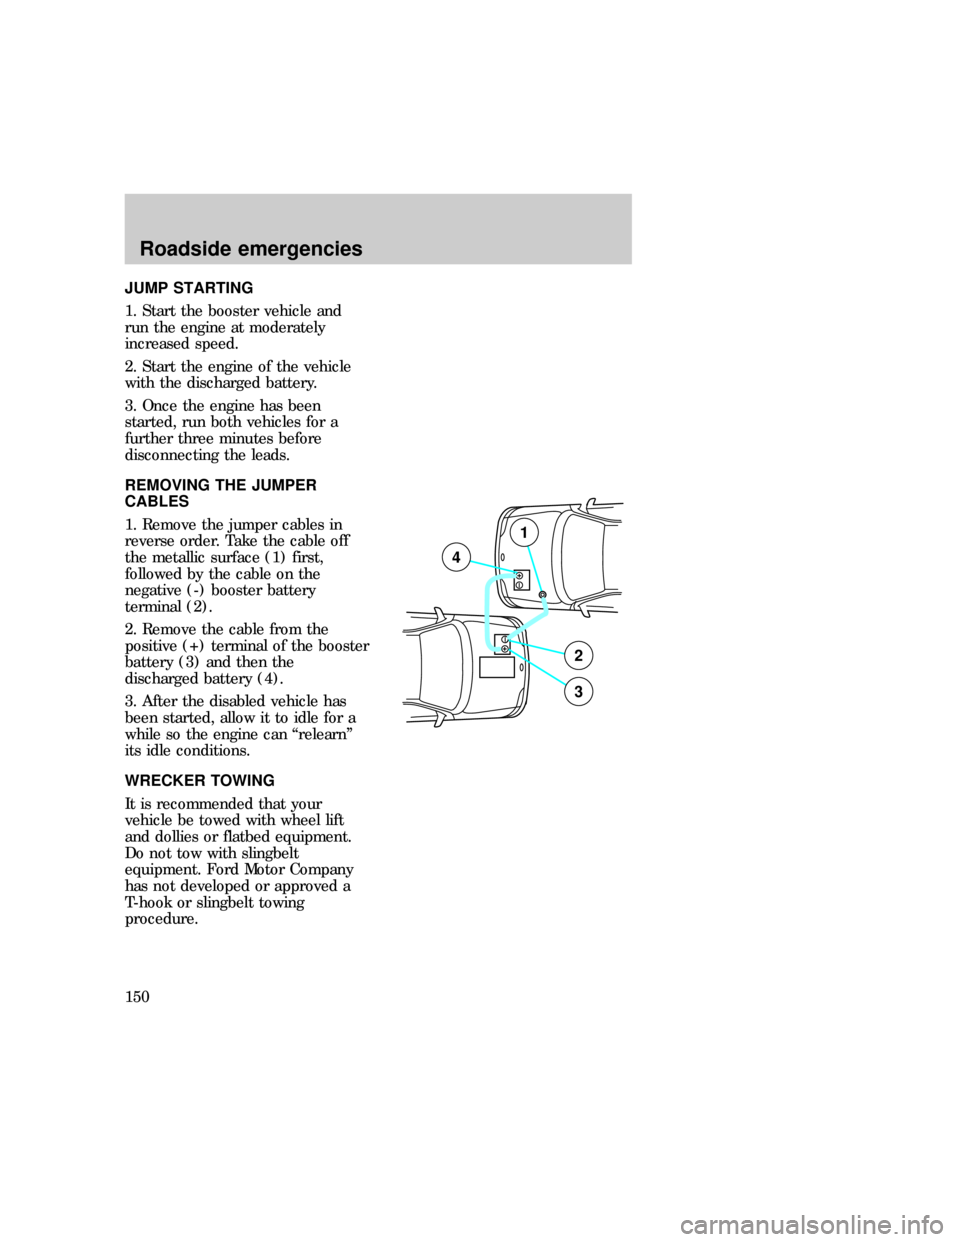
REMOVING THE JUMPER
CABLES
1. Remove the jumper cables in
reverse order. Take the cable off
the metallic surface (1) first,
followed by the cable on the
negative (-) booster battery
terminal (2).
2. Remove the cable from the
positive (+) terminal of the booster
battery (3) and then the
discharged battery (4).
3. After the disabled vehicle has
been started, allow it to idle for a
while so the engine can ªrelearnº
its idle conditions.
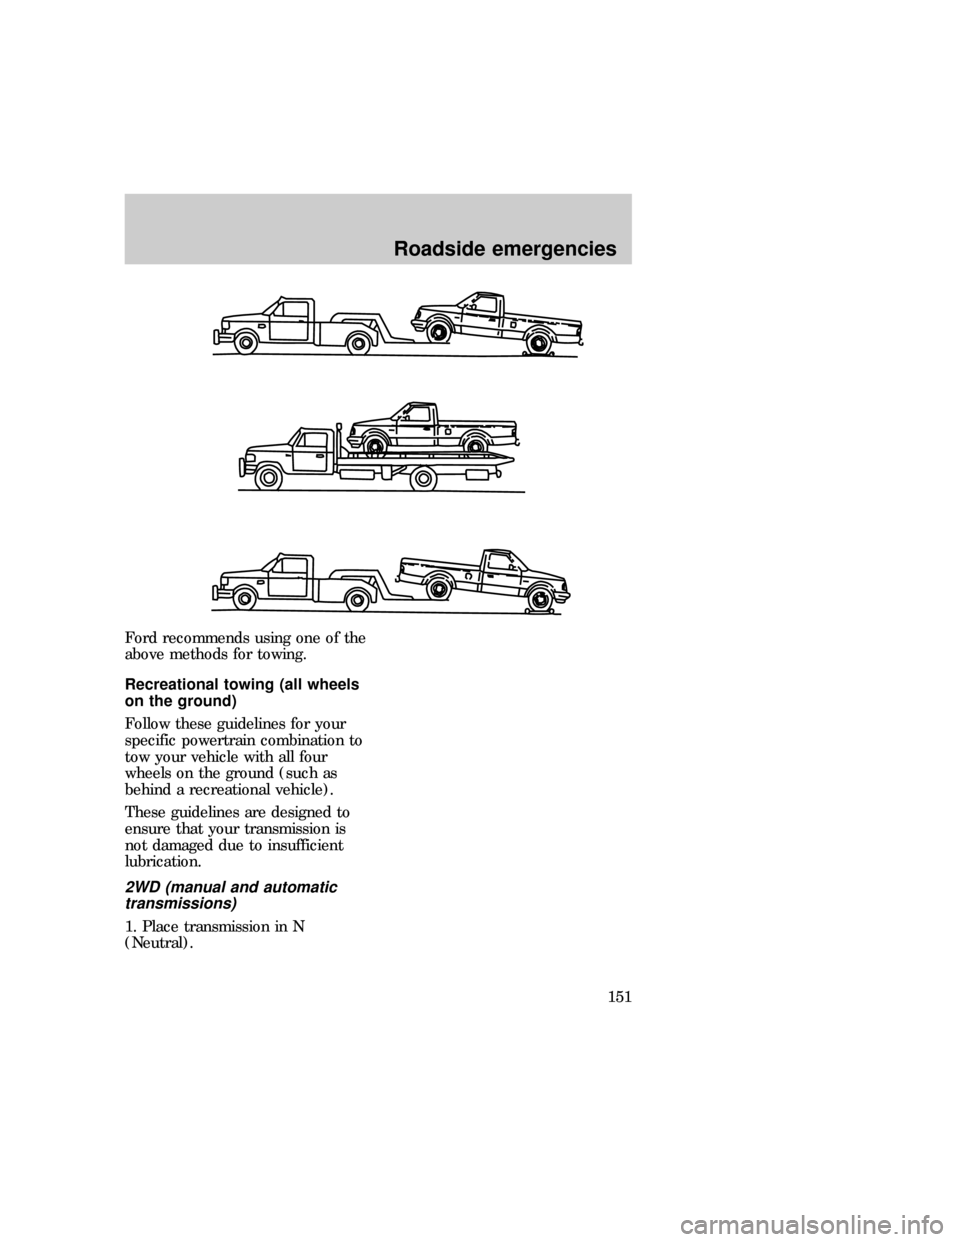
WRECKER TOWING
It is recommended that your
vehicle be towed with wheel lift
and dollies or flatbed equipment.
Do not tow with slingbelt
equipment. Ford Motor Company
has not developed or approved a
T-hook or slingbelt towing
procedure.
+–
+–
2
3
4
1
com_removing_cables.01
f12_wrecker
Roadside emergencies
150
Page 150 of 219
Ford recommends using one of the
above methods for towing.
Recreational towing (all wheels
on the ground)
Follow these guidelines for your
specific powertrain combination to
tow your vehicle with all four
wheels on the ground (such as
behind a recreational vehicle).
These guidelines are designed to
ensure that your transmission is
not damaged due to insufficient
lubrication.
2WD (manual and automatic
transmissions)
1. Place transmission in N
(Neutral).
f12_recreational_towing
Roadside emergencies
151
Page 151 of 219

2. Maximum speed is 56 km/h (35
mph).
3. Maximum distance is 80 km (50
miles).
If a distance of 80 km (50 miles)
or a speed of 56 km/h (35 mph)
must be exceeded, you must
disconnect the rear driveshaft.
With the rear driveshaft
disconnected, the maximum speed
is 88 km/h (55 mph) and there are
no mileage restrictions.
See your dealer for help with
disconnecting the driveshaft.
4WD ± Lever operated transfer
case (manual and automatic
transmissions)
1. Place transmission in P (Park).
2. Shift the transfer case to N
(Neutral).
3. Lockout the center disconnect
by capping off one of the front
axle vacuum motor lines. See your
Ford dealer for assistance.
4. Vehicle speed should not exceed
88 km/h (55 mph) and there are
no mileage restrictions.
4WD ± Electronic shift transfer
case
1. Place transmission in N
(Neutral).
2. Shift the transfer case to 2H
(2WD high).
3. Lockout the center disconnect
by capping off one of the front
axle vacuum motor lines. See your
dealer for assistance.
Roadside emergencies
152
Page 152 of 219
4. Maximum speed is 56 km/h (35
mph).
5. Maximum distance is 80 km (50
miles).
If a distance of 80 km (50 miles)
or a speed of 56 km/h (35 mph)
must be exceeded, you must
disconnect the rear driveshaft.
With the rear driveshaft
disconnected, the maximum speed
is 88 km/h (55 mph) and there are
no mileage restrictions.
See your dealer for help with
disconnecting the driveshaft.
Roadside emergencies
153