Page 137 of 219
Position Amps Description
9 - Not used
10 - Not used
11 30 Wiper system
12 5 On-board diagnostic (OBD II) data link
connector
13 15 Brake ON/OFF switch, rear anti-lock brake
module and brake pressure switch
14 15 Interior lamps and accessory delay relay
15 5 GEM module/CTM module
16 20 High beam headlamps
17 - Not used
18 5 Instrument illumination
19 10 Air bag diagnostic monitor, instrument cluster
20 5 GEM module/CTM module and powertrain
control module (PCM)
21 15 Starter relay
22 10 Air bag diagnostic monitor and passenger air
bag deactivate switch
23 10 4WD clutch relay, electronic flasher, 4WD/2WD
vacuum solenoids and trailer tow battery charge
relay
24 10 I/P blower relay
25 5 4WABS module and relay
26 10 Right low beam headlamp and DRL module
27 5 Foglamp relay
28 10 Left low beam headlamp
29 5 Autolamp, instrument cluster, transmission
control indicator lamp and switch
30 30 Ignition coils and PCM relay
31 - Not used
Roadside emergencies
138
Page 138 of 219
Relays
Position Description
1 Interior lamps relay
2 Battery saver relay
3 Not used
4 One touch down relay
5 Accessory delay relay
Power distribution box
Lift cover towards left of vehicle to
access the power distribution box.
Always disconnect the
battery before servicing
high current fuses.
Always replace the cover
to the Power Distribution
Box before reconnecting the
battery or refilling fluid
reservoirs.
Fuses
Position Amps Description
1 20 Trailer tow back-up and tail lamps
2 10 Air bag diagnostic monitor
3 15 Power locks
4 15 Air suspension
5 20 Horn
6 15 Audio system
29
6
5
4
3
2
1 28
27
26
25
24
2319
18
17
16
15
14
13
22
21
20
12
1197531
12108642
f12_eng_comp_fuses
Roadside emergencies
139
Page 139 of 219
Fuses
Position Amps Description
7 15 Parking and tail lamps
8 30 Headlamps
9 15 Daytime running lamps and fog lamps
10 25 Auxiliary power point
11 - Not used
12 - Not used
13 - Not used
14 60/20 4WABS/rear anti-lock brake
15 50 Air suspension compressor
16 40 Trailer tow battery charge and stop/turn lamps
17 30 4WD transfer case shift motor and clutch
18 30 Driver power seat
19 20 Fuel pump
20 50 Instrument panel fuse panel ignition switch feed
21 50 Instrument panel fuse panel ignition switch feed
22 50 I/P fuse panel battery feed
23 40 I/P blower
24 30 PCM power
25 30 Power windows
26 - Not used
27 - Not used
28 30 Trailer tow electronic brake
29 - Not used
Diodes
Position Description
1 Rear ABS diode
2 PCM diode
Roadside emergencies
140
Page 140 of 219
Relays
Position Description
1 Windshield wipers HI/LO speed
2 Windshield wipers run/park relay
3 Washer pump relay
4 Fuel pump relay
5 Horn relay
6 PCM power relay
Primary battery fuses
(megafuses)
Primary battery fuses are located
under the PRIMARY BATTERY
FUSE cover next to starter relay.
Ford recommends that megafuses
only be serviced by a qualified
service technician.
Location Amperage Description
1 175 Power network box megafuse
2 175 Alternator megafuse
3 20 Alternator field minifuse
1
2
3
f12_megafuse
Roadside emergencies
141
Page 141 of 219
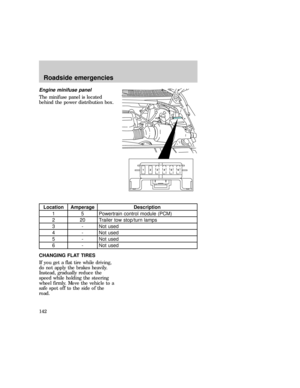
Engine minifuse panel
The minifuse panel is located
behind the power distribution box.
Location Amperage Description
1 5 Powertrain control module (PCM)
2 20 Trailer tow stop/turn lamps
3 - Not used
4 - Not used
5 - Not used
6 - Not used
CHANGING FLAT TIRES
If you get a flat tire while driving,
do not apply the brakes heavily.
Instead, gradually reduce the
speed while holding the steering
wheel firmly. Move the vehicle to a
safe spot off to the side of the
road.
123456
f12_minifuses
f12_flat_tires
f12_change_proc
Roadside emergencies
142
Page 142 of 219
Tire change procedure
1. Park on a level surface.
2. Activate the hazard flashers.
3. Set the parking brake.
4. Place the gearshift in P (Park)
(automatic transmission) or R
(Reverse) (manual transmission).
For 4WD vehicles equipped with
Lever-operated transfer case, make
sure that the lever is not in the N
(Neutral) position.
5. Block the diagonally opposite
wheel.
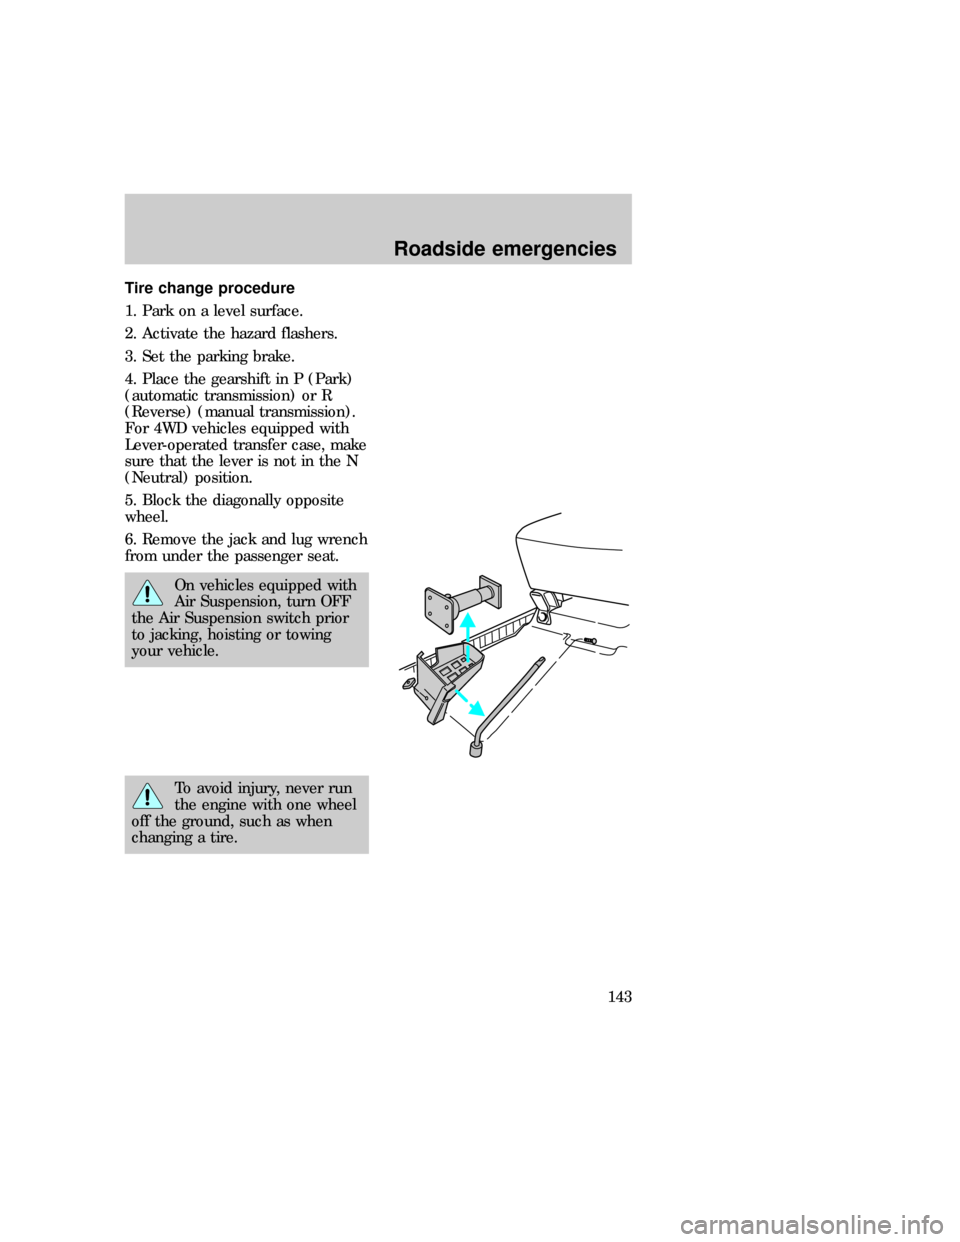
6. Remove the jack and lug wrench
from under the passenger seat.
On vehicles equipped with
Air Suspension, turn OFF
the Air Suspension switch prior
to jacking, hoisting or towing
your vehicle.
To avoid injury, never run
the engine with one wheel
off the ground, such as when
changing a tire.
f12_removing_spare
Roadside emergencies
143
Page 143 of 219
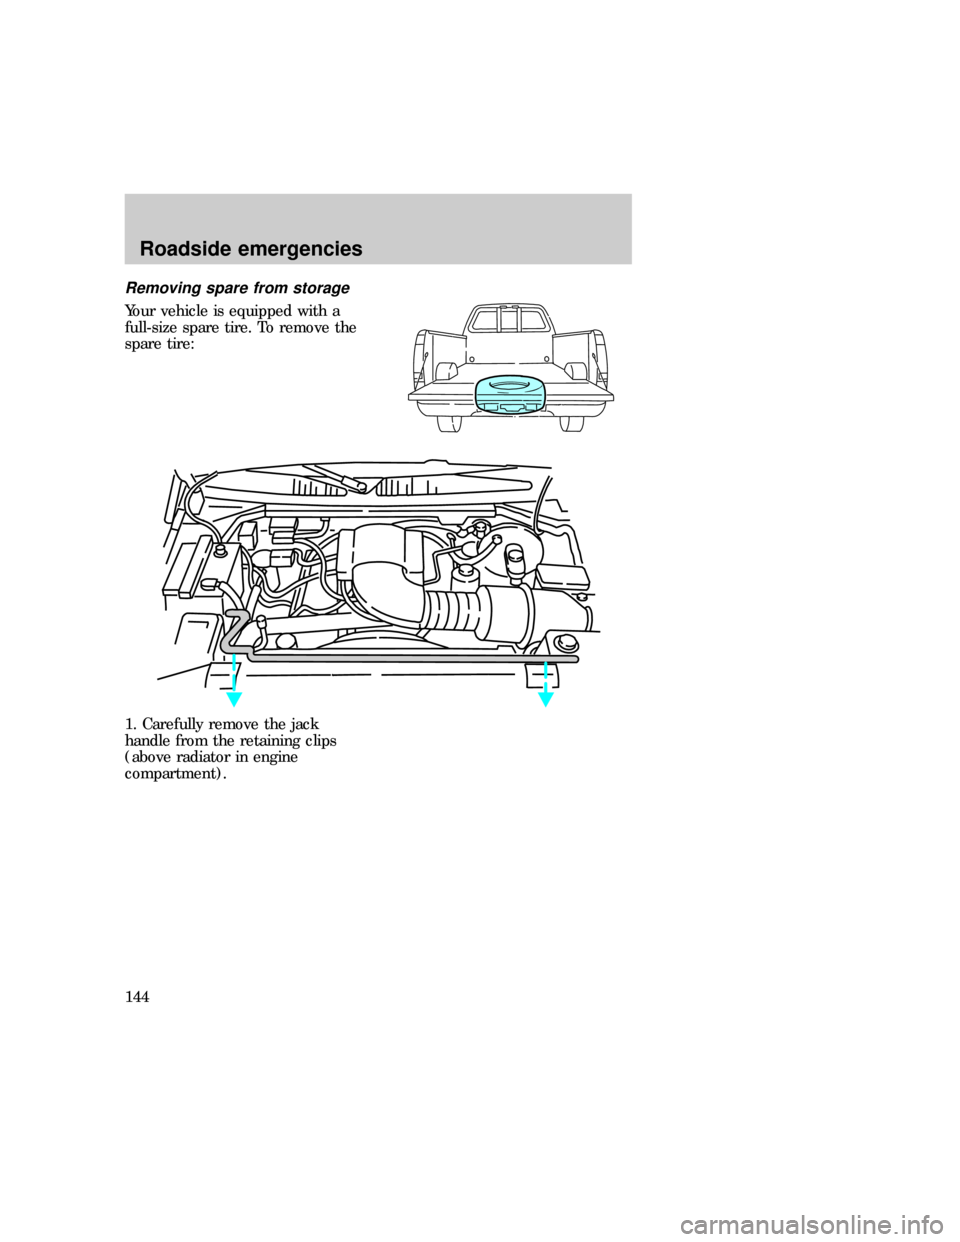
Removing spare from storage
Your vehicle is equipped with a
full-size spare tire. To remove the
spare tire:
1. Carefully remove the jack
handle from the retaining clips
(above radiator in engine
compartment).
Roadside emergencies
144
Page 144 of 219
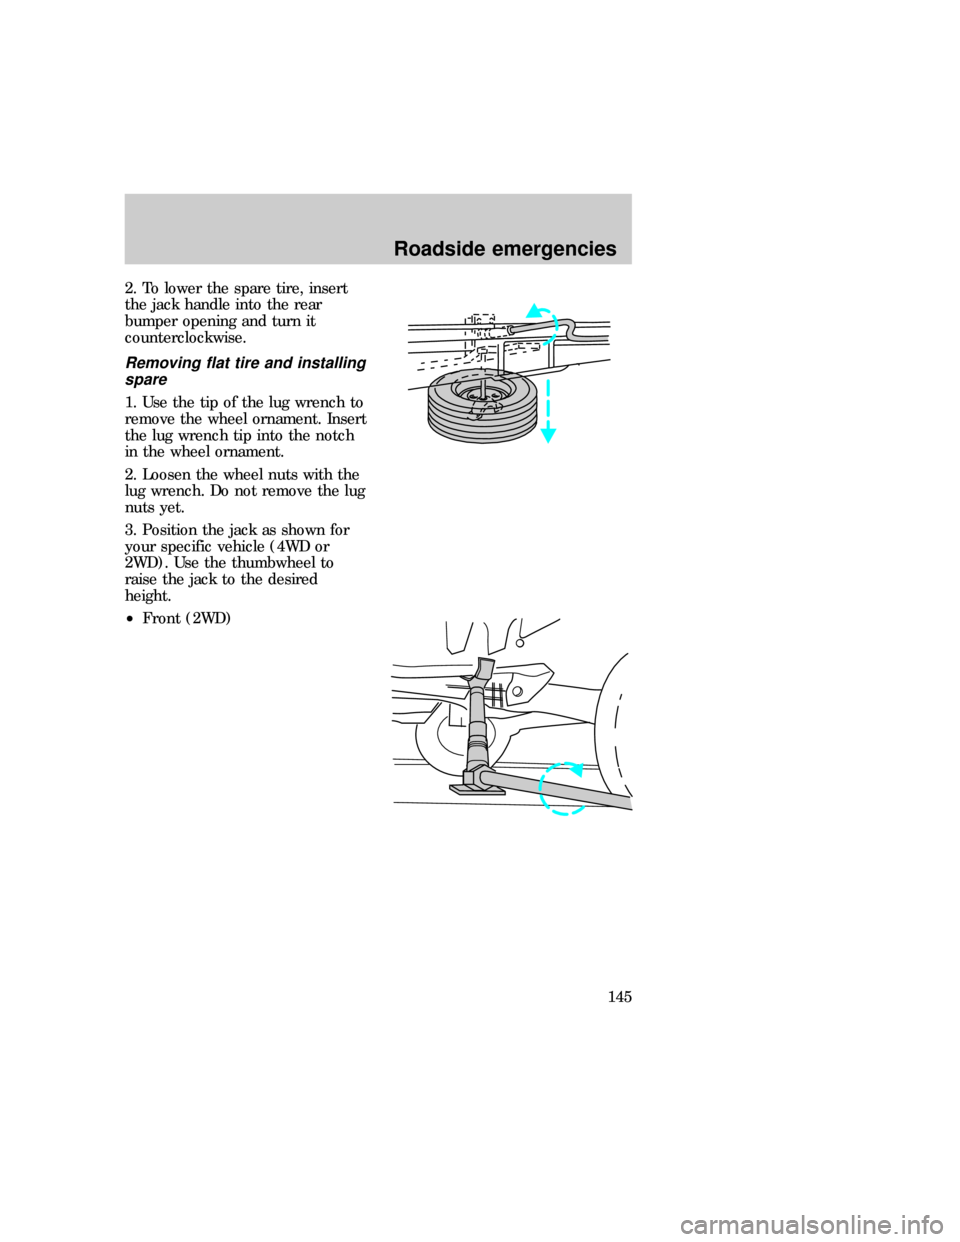
2. To lower the spare tire, insert
the jack handle into the rear
bumper opening and turn it
counterclockwise.
Removing flat tire and installing
spare
1. Use the tip of the lug wrench to
remove the wheel ornament. Insert
the lug wrench tip into the notch
in the wheel ornament.
2. Loosen the wheel nuts with the
lug wrench. Do not remove the lug
nuts yet.
3. Position the jack as shown for
your specific vehicle (4WD or
2WD). Use the thumbwheel to
raise the jack to the desired
height.
²Front (2WD)
f12_removing_flat
Roadside emergencies
145