1997 BUICK CENTURY change time
[x] Cancel search: change timePage 174 of 406
Playing a Compact Disc
Insert a disc partway into the slot, label side up. The
player will pull it in. The disc should begin playing.
If you want to insert a CD while the ignition or the radio
is off, first press EJECT or RECALL.
If you’re driving on a very rough road or if it’s very hot,
the disc may not play and an error code may appear on
the display. When things get back to normal, the disc
should play.
If the disc comes out, it could be that:
0 E20: The disc is upside down.
0 E20: It is dirty, scratched or wet.
0 E20: There’s too much moisture in the air.
(Wait about an hour and try again.)
If any error occurs repeatedly or if an error can’t be
corrected, please contact your dealer.
If your radio
displays an error number, write it down and provide it to
your dealer when reporting the problem.
PREV (1): Press this button to go to the start of the
current track, if more than eight seconds have played. If
you hold the button or press it more than once,
the
player will continue moving back through the disc. The
sound will mute while seeking.
NEXT (2): Press this button to go to the next track. If
you hold the button or press it more than once, the
player will continue moving forward through the disc.
The sound will mute while seeking.
The SEEK down and up arrows will also find the
previous and next selections on the disc.
44 (3): Press and hold this button to quickly reverse
within
a track. You will hear sound.
.. (4): Press and hold this button to quickly advance
within a track. You will hear sound.
RAND (6): Press this button to hear the tracks in
random, rather than sequential, order. Press RAND
again to turn off random play.
RECALL: Press this button to see which track is
playing. Press it again within five seconds to see how
long it has been playing.
To change what is normally
shown on the display (track or elapsed time), press the
RECALL button until you see the display you want,
then hold the RECALL button until the display flashes.
3-30
ProCarManuals.com
Page 175 of 406
AM-FM: Press this button to play the radio when a d
is in the player.
SOURCE: Press this button to change to the disc
function when the radio is on. When a disc is inserted .i
, sc
9
the disc
will play until you press AM-FM. Then the disc
will stop playing and the radio will play. Press SOURCE
again to play a disc again. CD PLAY will show on
the
display.
EJECT Press this button to remove the disc. The radio
will play.
If you turn off the ignition or radio with a disc in the
player, it will stay in the player. When you turn on the
ignition or system, the disc will start playing where it
stopped, if it was the last-selected audio source.
Also,
as a protection feature, if a CD is ejected and left
in the player,
it will be pulled back in the player with the
ignition on or off. If you leave a compact disc in the
player while listening to the radio, it may become warm.
Theft-Deterrent Feature
THEFTLOCK” is designed to discourage theft of your
radio.
It works by using a secret code to disable all radio
functions whenever battery power is removed.
If THEFTLOCK is active, the THEFTLOCK indicator
will
flash when the ignition is off.
The THEFTLOCK feature for the radio may be used
or
ignored. If ignored, the system plays normally and the
radio is not protected by the feature.
If THEFTLOCK is
activated, your radio will
not operate if stolen.
When THEFTLOCK is activated, the radio will display
LOC
to indicate a locked condition anytime battery
power is removed.
If your battery loses power for any
reason,
you must unlock the radio with the secret code
before
it will operate.
Activating the Theft-Deterrent Feature
The instructions which follow, explain how to enter your
secret code to activate the THEFTLOCK system. It is
recommended that you read through all nine steps
before starting the procedure.
3-31
ProCarManuals.com
Page 195 of 406
Remember: Anti-lock doesn’t change the time you need
to get your foot up
to the brake pedal or always decrease
stopping distance. If you get too close to the vehicle in
front of you, you won’t have time to apply your brakes
if that vehicle suddenly slows or stops. Always leave
enough room up ahead to stop, even though you have
anti-lock brakes.
Using Anti-Lock
Don’t pump the brakes. Just hold the brake pedal down
and let anti-lock work for
you. You may feel the system
working, or
you may notice some noise, but this is normal.
LOW TRAC
When your anti-lock system
is adjusting brake pressure
to help avoid a braking skid,
this light will come on. See
“Anti-Lock Brake System
Active Light” in
the Index.
Braking in Emergencies
With anti-lock, you can steer and brake at the same
time. In many emergencies, steering can help you more
than even the very best braking.
Steering
Power Steering
If you lose power steering assist because the engine
stops or the system is not functioning, you can steer but
it will take much more effort.
Magnasteer TM (If Equipped)
This steering system provides lighter steering effort for
parking and when driving at low speeds. Steering effort
will increase at higher speeds for improved road feel.
Steering Tips
Driving on Curves
It’s important to take curves at a reasonable speed.
A lot of the “driver lost control” accidents mentioned on
the news happen on curves. Here’s why:
4-9
ProCarManuals.com
Page 196 of 406
Experienced driver or beginner, each of us is subject to
the same laws of physics when driving on curves. The
traction
of the tires against the road surface makes it
possible for the vehicle to change its path when you turn
the front wheels. If there’s no traction, inertia will keep
the vehicle going in the same direction. If you’ve ever
tried to steer
a vehicle on wet ice, you’ll understand this.
The traction you can get in a curve depends on the
condition of your tires and the road surface, the angle at
which the curve is banked, and your speed. While you’re
in a curve, speed is the one factor you can control.
Suppose you’re steering through a sharp curve. Then you
suddenly accelerate. Both control systems
-- steering and
acceleration
-- have to do their work where the tires meet
the road. Adding the sudden acceleration can demand too
much of those places. You can lose control.
What should you do if this ever happens? Ease up
on the
accelerator pedal, steer the vehicle the way you want it
to go, and slow down.
Speed limit signs near curves warn that you should
adjust your speed. Of course, the posted speeds are
based on good weather and road conditions. Under less favorable conditions you’ll want to go slower.
If you need to reduce your speed as you approach a
curve, do it before you enter the curve, while your front
wheels are straight ahead.
Try to adjust your speed
so you can “drive” through the
curve. Maintain
a reasonable, steady speed. Wait to
accelerate until you are out of the curve, and then
accelerate gently into the straightaway.
Steering in Emergencies
There are times when steering can be more effective than
braking. For example, you come over a hill and find a
truck stopped in your lane, or a car suddenly pulls out
from nowhere, or a child darts out from between parked
cars and stops right in front
of you. You can avoid these
problems by braking
-- if you can stop in time. But
sometimes you can’t; there isn’t room. That’s the time \
for
evasive action
-- steering around the problem.
Your Buick can perform very well in emergencies like
these. First apply your brakes. (See “Braking in
Emergencies” earlier in this section.) It is better to
remove as much speed as you can from a possible
collision. Then steer around the problem, to the left
or
right depending on the space available.
4-10
ProCarManuals.com
Page 199 of 406
Check your mirrors, glance over your shoulder, and
start your left lane change signal before moving out
of the right lane to pass. When you are far enough
ahead of the passed vehicle
to see its front in your
inside mirror, activate your right lane change signal
and move back into the right lane. (Remember that
your right outside mirror
is convex. The vehicle you
just passed may seem to be farther away from you
than it really is.)
Try not to pass more than one vehicre at a time
on two-lane roads. Reconsider before passing the
next vehicle.
Don’t overtake a slowly moving vehicle too rapidly.
Even though the brake lamps are not flashing,
it may
be slowing down or starting to turn.
following driver
to get ahead of you. Perhaps you
can ease
a little to the right.
If you’re being passed, make it easy for the
Loss of Control
Let’s review what driving experts say about what
happens when
the three control systems (brakes, steering
and acceleration) don’t have enough friction where the
tires meet the road to do what
the driver has asked.
In any emergency, don’t give up. Keep trying to steer and
constantly seek an escape route or area of less danger.
Skidding
In a skid, a driver can lose control of the vehicle.
Defensive drivers avoid most skids by taking reasonable
care suited to existing conditions, and by not “overdriving”
those conditions. But skids are always possible.
The three types of skids correspond to your Buick’s
three control systems. In the braking skid, your wheels
aren’t rolling.
In the steering or cornering skid, too
much speed
or steering in a curve causes tires to slip and
lose cornering force. And
in the acceleration skid, too
much throttle causes the driving wheels to spin.
A cornering skid and an acceleration skid are best
handled by easing your foot off the accelerator pedal.
4-13
ProCarManuals.com
Page 217 of 406
Your vehicle can tow a trailer if it is equipped with the
proper trailer towing equipment. To identify what the
vehicle trailering capacity is for your vehicle, you
should read
the information in “Weight of the Trailer”
that appears later in this section. But trailering is
different than just driving your vehicle by itself.
Trailering means changes in handling, durability and
fuel economy. Successful, safe trailering takes correct
equipment, and it has
to be used properly.
That’s the reason for this part.
In it are many
time-tested, important trailering tips and safety rules.
Many of these are important for your safety and that of
your passengers.
So please read this section carefully
before you pull a trailer.
Load-pulling components such as the engine, transaxle,
wheel assemblies and tires are forced to work harder
against the drag of the added weight. The engine is
required to operate at relatively higher speeds and under
greater loads, generating extra heat. What’s more, the
trailer adds considerably
to wind resistance, increasing
the pulling requirements.
If You Do Decide To Pull A Trailer
If you do, here are some important points:
0
0
0
0
0
There are many different laws, including speed limit
restrictions, having to do with trailering. Make sure
your rig will be legal, not only where you live but
also where you’ll be driving.
A good source for this
information can be state or provincial police.
Consider using a sway control. You can ask a hitch
dealer about sway controls.
Don’t tow a trailer at all during the first
1,000 miles
(1 600 km) your new vehicle is driven. Your engine,
axle or other parts could be damaged.
Then, during
the first 500 miles (800 km) that you
tow a trailer, don’t drive over
50 mph (80 kmh) and
don’t make starts at full throttle. This helps your
engine and other parts of your vehicle wear
in at the
heavier loads.
Obey speed limit restrictions when towing a trailer.
Don’t drive faster than the maximum posted speed
for trailers (or no more than
55 mph (90 km/h)) to
save wear
on your vehicle’s parts.
4-31
ProCarManuals.com
Page 258 of 406
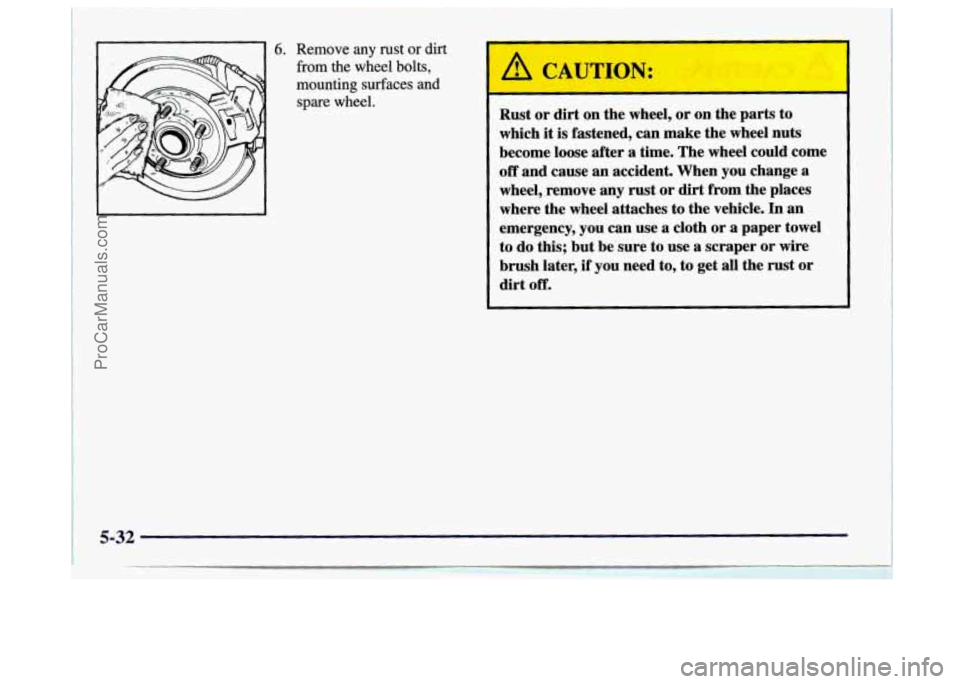
from the wheel bolts,
mounting surfaces and
spare wheel.
Rust or dirt on the wheel, or on the parts to
which it is fastened, can make the wheel nuts
become loose after a time. The wheel could come
off and cause an accident. When you change a
wheel, remove any rust or dirt from the places
where the wheel attaches to the vehicle.
In an
emergency, you can use a cloth or
a paper towel
to do this; but be sure to use
a scraper or wire
brush later, if you need to, to get all the rust or
dirt off.
ProCarManuals.com
Page 283 of 406
Automatic Transaxle Fluid
When to Check and Change
A good time to check your automatic transaxle fluid
level
is when the engine oil is changed.
Change both the fluid and filter every
50,000 miles
(83
000 km) if the vehicle is mainly driven under one or
more of these conditions:
In heavy city traffic where the outside temperature
regularly reaches
90°F (32°C) or higher.
In hilly or mountainous terrain.
When doing frequent trailer towing.
Uses such as found in taxi, police or delivery service.
If you do not use your vehicle under any
of these
conditions, the fluid and filter do not require changing.
See "Scheduled Maintenance Services"
in the Index.
How to Check
Because this operation can be a little difficult, you may
choose
to have this done at your Buick dealership
Service Department.
If you do it yourself, be sure to follow all the instructions
here, or you could get a false reading on
the dipstick.
NOTICE:
Too much or too little fluid can damage your
transaxle.
Too much can mean that some of the
fluid could come out and fall on
hot engine parts
or exhaust system parts, starting a fire. Be sure to get an accurate reading if you check your
transaxle fluid.
Wait at least 30 minutes before checking the transaxle
fluid level
if you have been driving:
When outside temperatures are above 90°F (32°C).
At high speed for quite a while.
In heavy traffic -- especially in hot weather.
While pulling a trailer.
To get the right reading, the fluid should be at normal
operating temperature, which
is 180°F to 200°F (82°C
to 93 " C).
Get the vehicle warmed up by driving about
15 miles
(24 km) when outside temperatures are above 50°F
(10°C). If it's colder than 50°F (lO"C), you may have
to drive longer.
6-17
ProCarManuals.com