Page 49 of 74
- Install noise insulation.
Pa
ge 49 of 74 Lubrication s
ystem com
ponents, removin
g and installin
g
11/21/2002 htt
p://127.0.0.1:8080/audi/servlet/Dis
play?action=Goto&t
yp
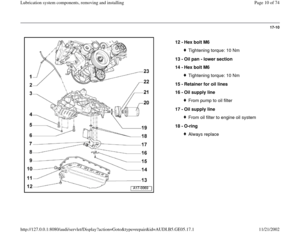
e=re
pair&id=AUDI.B5.GE05.17.1
Page 50 of 74
17-46
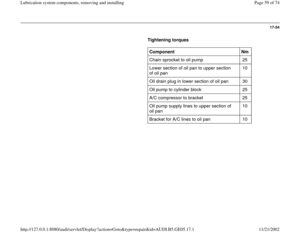
Tightening torques
Component
Nm
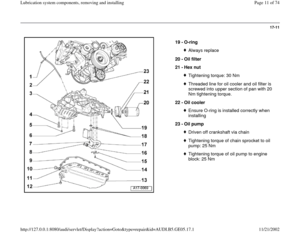
Upper section of oil pan to cylinder
block M6 10
M8 20
Lower section of oil pan to upper
section of oil pan 10
oil pan to transmission M8 25
M10 45
Coolant line to oil pan 10
Oil drain plug in lower section of oil
pan 30
Dipstick guide tube to cylinder head 25
Oil pump to cylinder block 25
Oil pump supply lines to upper
section of oil pan 10
Front sealing flange M6 10
Collar bolt M8 30
Bracket for coolant lines to oil pan 10
Coolant drain screw on engine 20
Pa
ge 50 of 74 Lubrication s
ystem com
ponents, removin
g and installin
g
11/21/2002 htt
p://127.0.0.1:8080/audi/servlet/Dis
play?action=Goto&t
yp
e=re
pair&id=AUDI.B5.GE05.17.1
Page 51 of 74
17-47
Component
Nm
Stop for torque reaction support to
bracket on engine
25
Engine mounting to subframe 25
Torque reaction support to front of oil pan 25
Engine mounting to engine support 25
Chain sprocket to oil pump 25
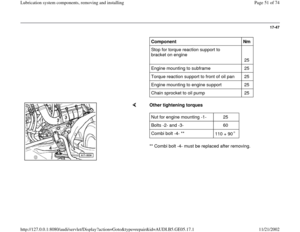
Other tightening torques
** Combi bolt -4- must be replaced after removing. Nut for engine mounting -1- 25
Bolts -2- and -3- 60
Combi bolt -4- **
110 + 90
Pa
ge 51 of 74 Lubrication s
ystem com
ponents, removin
g and installin
g
11/21/2002 htt
p://127.0.0.1:8080/audi/servlet/Dis
play?action=Goto&t
yp
e=re
pair&id=AUDI.B5.GE05.17.1
Page 52 of 74
17-48
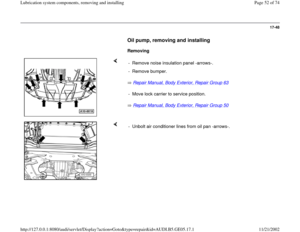
Oil pump, removing and installing
Removing
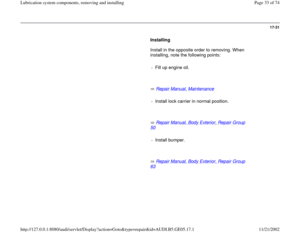
Repair Manual, Body Exterior, Repair Group 63
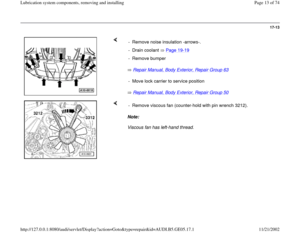
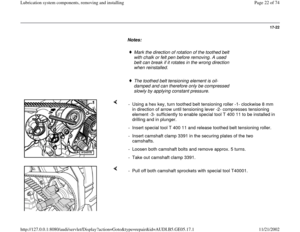
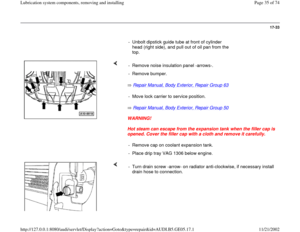
Repair Manual, Body Exterior, Repair Group 50 - Remove noise insulation panel -arrows-.
- Remove bumper.
- Move lock carrier to service position.
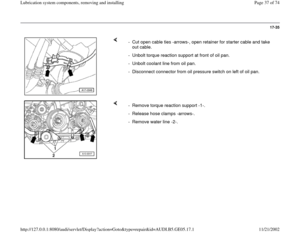
- Unbolt air conditioner lines from oil pan -arrows-.
Pa
ge 52 of 74 Lubrication s
ystem com
ponents, removin
g and installin
g
11/21/2002 htt
p://127.0.0.1:8080/audi/servlet/Dis
play?action=Goto&t
yp
e=re
pair&id=AUDI.B5.GE05.17.1
Page 53 of 74
17-49
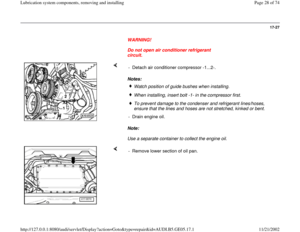
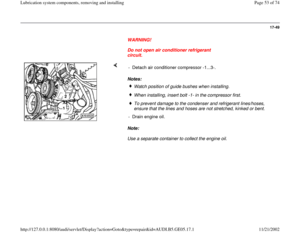
WARNING!
Do not open air conditioner refrigerant
circuit.
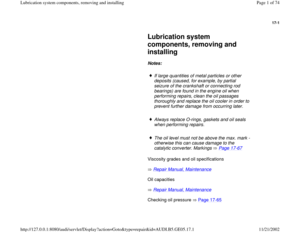
Notes:
Note:
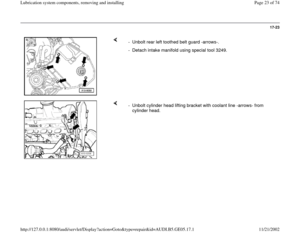
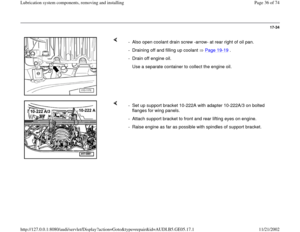
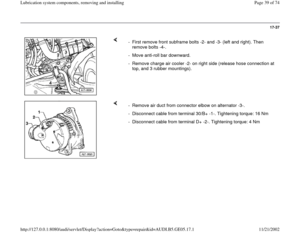
Use a separate container to collect the engine oil. - Detach air conditioner compressor -1...3-.
Watch position of guide bushes when installing.When installing, insert bolt -1- in the compressor first. To prevent damage to the condenser and refrigerant lines/hoses,
ensure that the lines and hoses are not stretched, kinked or bent.
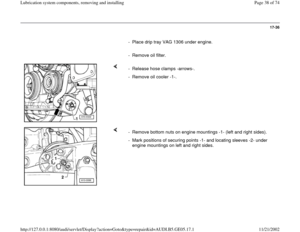
- Drain engine oil.
Pa
ge 53 of 74 Lubrication s
ystem com
ponents, removin
g and installin
g
11/21/2002 htt
p://127.0.0.1:8080/audi/servlet/Dis
play?action=Goto&t
yp
e=re
pair&id=AUDI.B5.GE05.17.1
Page 54 of 74
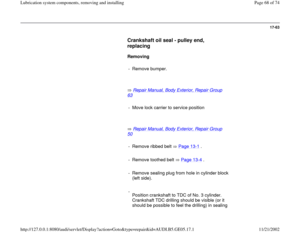
17-50
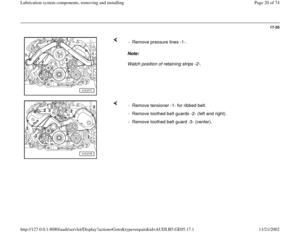
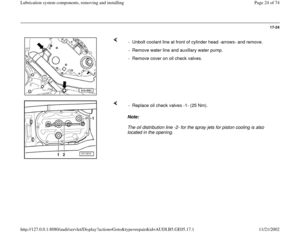
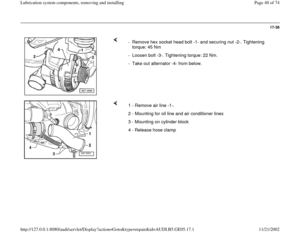
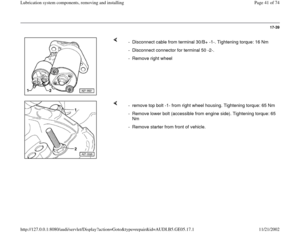
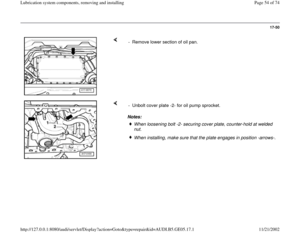
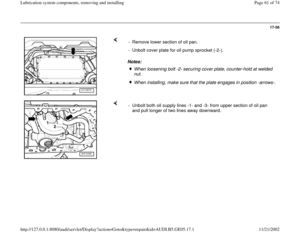
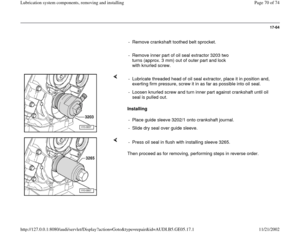
- Remove lower section of oil pan.
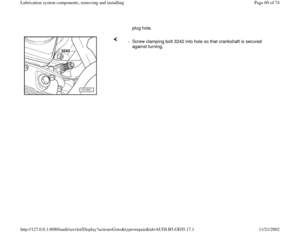
Notes: - Unbolt cover plate -2- for oil pump sprocket.
When loosening bolt -2- securing cover plate, counter-hold at welded
nut. When installing, make sure that the plate engages in position -arrows-.
Pa
ge 54 of 74 Lubrication s
ystem com
ponents, removin
g and installin
g
11/21/2002 htt
p://127.0.0.1:8080/audi/servlet/Dis
play?action=Goto&t
yp
e=re
pair&id=AUDI.B5.GE05.17.1
Page 55 of 74
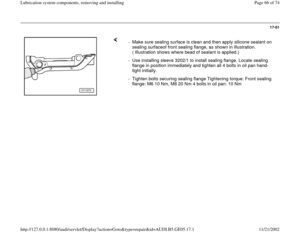
17-51
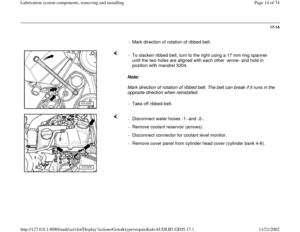
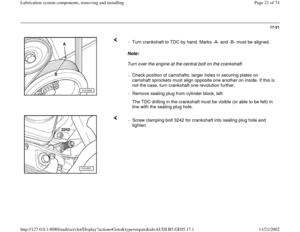
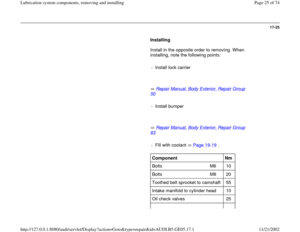
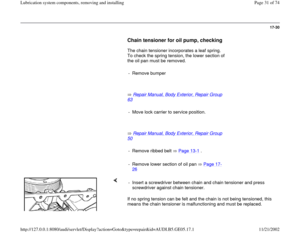
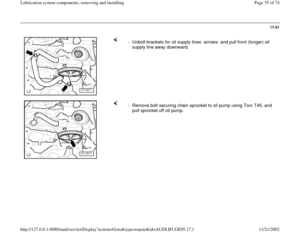
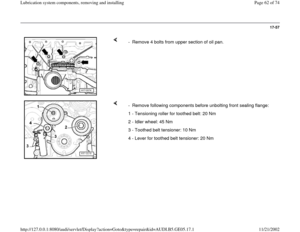
- Unbolt brackets for oil supply lines -arrows- and pull front (longer) oil
supply line away downward.
- Remove bolt securing chain sprocket to oil pump using Torx T45, and
pull sprocket off oil pump.
Pa
ge 55 of 74 Lubrication s
ystem com
ponents, removin
g and installin
g
11/21/2002 htt
p://127.0.0.1:8080/audi/servlet/Dis
play?action=Goto&t
yp
e=re
pair&id=AUDI.B5.GE05.17.1
Page 56 of 74
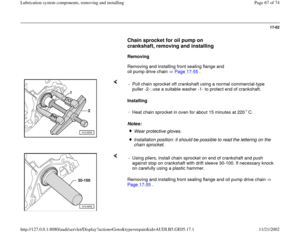
17-52
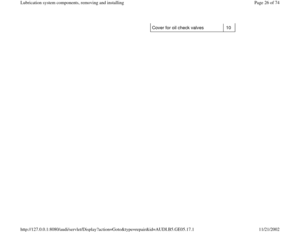
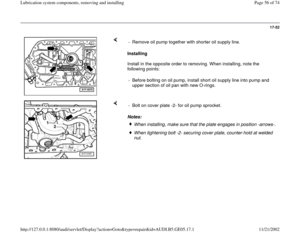
Installing
Install in the opposite order to removing. When installing, note the
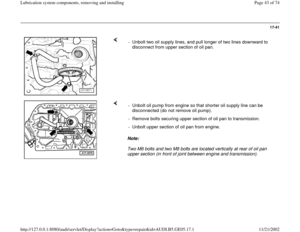
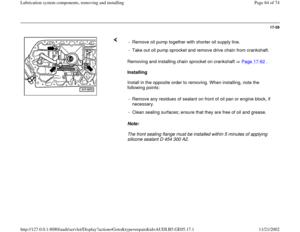
following points: - Remove oil pump together with shorter oil supply line.
- Before bolting on oil pump, install short oil supply line into pump and
upper section of oil pan with new O-rings.
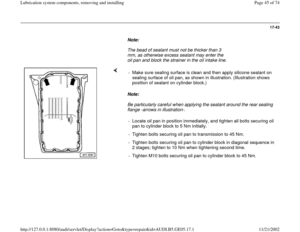
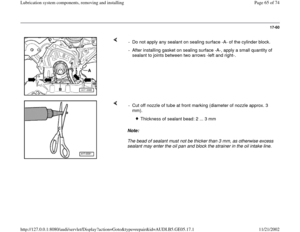
Notes: - Bolt on cover plate -2- for oil pump sprocket.
When installing, make sure that the plate engages in position -arrows-.When tightening bolt -2- securing cover plate, counter-hold at welded
nut.
Pa
ge 56 of 74 Lubrication s
ystem com
ponents, removin
g and installin
g
11/21/2002 htt
p://127.0.0.1:8080/audi/servlet/Dis
play?action=Goto&t
yp
e=re
pair&id=AUDI.B5.GE05.17.1


 oil
supply line away downward.
- Remove bolt securing chain sprocket to oil pump using Torx T45, and
pull")
