Page 9 of 74
17-9
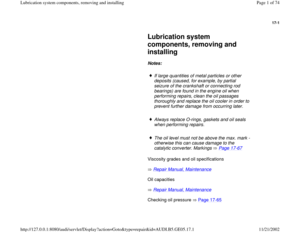
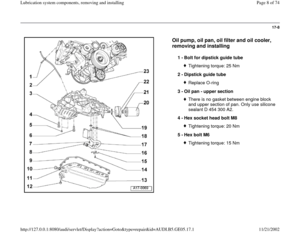
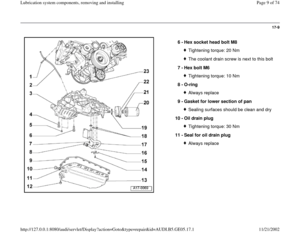
6 -
Hex socket head bolt M8
Tightening torque: 20 NmThe coolant drain screw is next to this bolt
7 -
Hex bolt M6 Tightening torque: 10 Nm
8 -
O-ring Always replace
9 -
Gasket for lower section of pan Sealing surfaces should be clean and dry
10 -
Oil drain plug Tightening torque: 30 Nm
11 -
Seal for oil drain plug Always replace
Pa
ge 9 of 74 Lubrication s
ystem com
ponents, removin
g and installin
g
11/21/2002 htt
p://127.0.0.1:8080/audi/servlet/Dis
play?action=Goto&t
yp
e=re
pair&id=AUDI.B5.GE05.17.1
Page 10 of 74
17-10
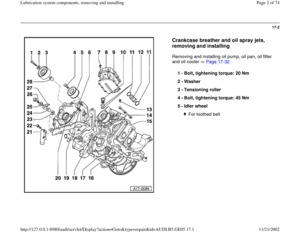
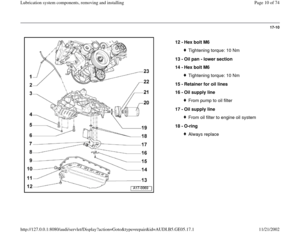
12 -
Hex bolt M6
Tightening torque: 10 Nm
13 -
Oil pan - lower section
14 -
Hex bolt M6 Tightening torque: 10 Nm
15 -
Retainer for oil lines
16 -
Oil supply line From pump to oil filter
17 -
Oil supply line From oil filter to engine oil system
18 -
O-ring Always replace
Pa
ge 10 of 74 Lubrication s
ystem com
ponents, removin
g and installin
g
11/21/2002 htt
p://127.0.0.1:8080/audi/servlet/Dis
play?action=Goto&t
yp
e=re
pair&id=AUDI.B5.GE05.17.1
Page 11 of 74
17-11
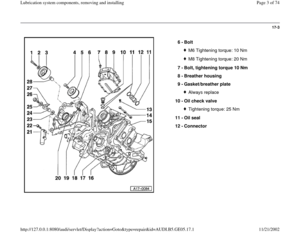
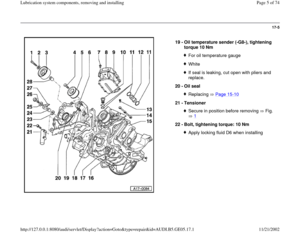
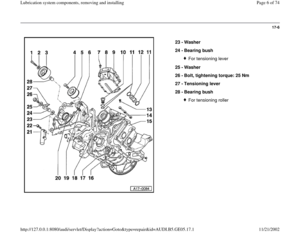
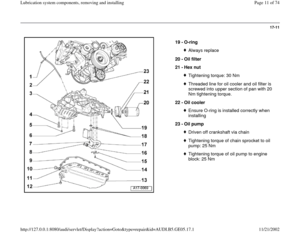
19 -
O-ring
Always replace
20 -
Oil filter
21 -
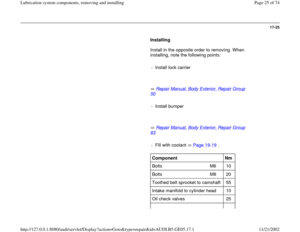
Hex nut Tightening torque: 30 NmThreaded line for oil cooler and oil filter is
screwed into upper section of pan with 20
Nm tightening torque.
22 -
Oil cooler Ensure O-ring is installed correctly when
installing
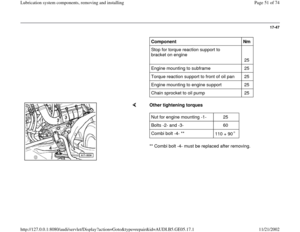
23 -
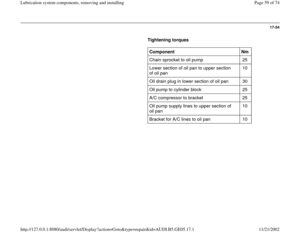
Oil pump Driven off crankshaft via chainTightening torque of chain sprocket to oil
pump: 25 Nm Tightening torque of oil pump to engine
block: 25 Nm
Pa
ge 11 of 74 Lubrication s
ystem com
ponents, removin
g and installin
g
11/21/2002 htt
p://127.0.0.1:8080/audi/servlet/Dis
play?action=Goto&t
yp
e=re
pair&id=AUDI.B5.GE05.17.1
Page 12 of 74
17-12
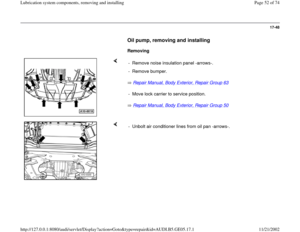
Oil check valves, replacing
Note:
If irregular valve noise occurs repeatedly during
short journeys and disappears after extended
driving, the oil check valves must be replaced.
All cable ties which are released or cut open
when removing the engine must be replaced in
the same position when installing the engine.
Catch drained-off coolant in a clean container
for re-use or disposal.
Replace all gaskets and seals.
Removing
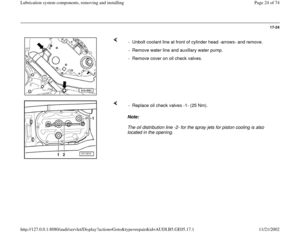
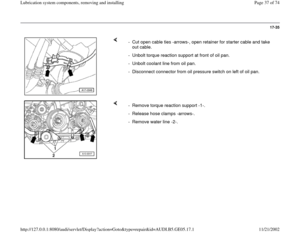
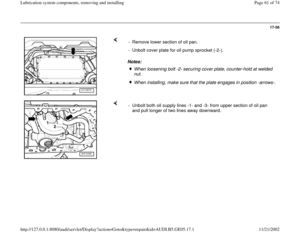
- Remove bolts -arrows- and remove engine cover panels -A...C-.
- Remove cover above air cleaner.
Pa
ge 12 of 74 Lubrication s
ystem com
ponents, removin
g and installin
g
11/21/2002 htt
p://127.0.0.1:8080/audi/servlet/Dis
play?action=Goto&t
yp
e=re
pair&id=AUDI.B5.GE05.17.1
Page 13 of 74
17-13
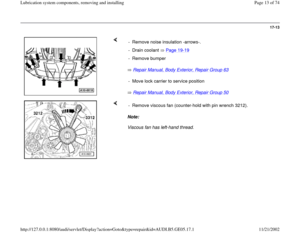
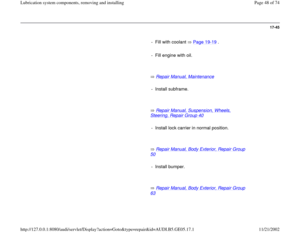
Repair Manual, Body Exterior, Repair Group 63
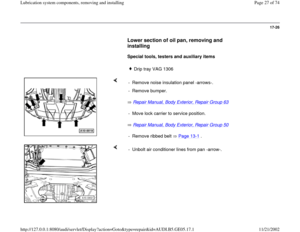
Repair Manual, Body Exterior, Repair Group 50 - Remove noise insulation -arrows-.
- Drain coolant Page 19
-19
- Remove bumper- Move lock carrier to service position
Note:
Viscous fan has left-hand thread. - Remove viscous fan (counter-hold with pin wrench 3212).
Pa
ge 13 of 74 Lubrication s
ystem com
ponents, removin
g and installin
g
11/21/2002 htt
p://127.0.0.1:8080/audi/servlet/Dis
play?action=Goto&t
yp
e=re
pair&id=AUDI.B5.GE05.17.1
Page 14 of 74
17-14
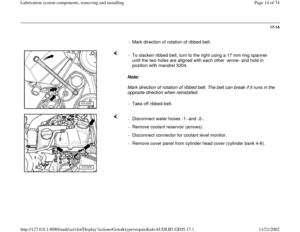
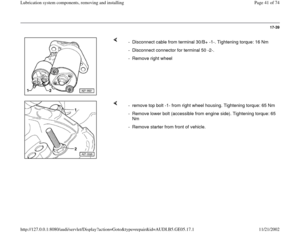
- Mark direction of rotation of ribbed belt.
Note:
Mark direction of rotation of ribbed belt. The belt can break if it runs in the
opposite direction when reinstalled. - To slacken ribbed belt, turn to the right using a 17 mm ring spanner
until the two holes are aligned with each other -arrow- and hold in
position with mandrel 3204.
- Take off ribbed belt.
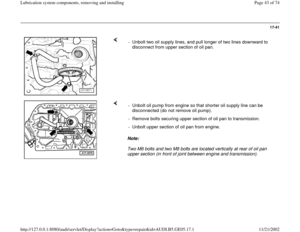
- Disconnect water hoses -1- and -2-.
- Remove coolant reservoir (arrows).
- Disconnect connector for coolant level monitor.
- Remove cover panel from cylinder head cover (cylinder bank 4-6).
Pa
ge 14 of 74 Lubrication s
ystem com
ponents, removin
g and installin
g
11/21/2002 htt
p://127.0.0.1:8080/audi/servlet/Dis
play?action=Goto&t
yp
e=re
pair&id=AUDI.B5.GE05.17.1
Page 15 of 74
17-15
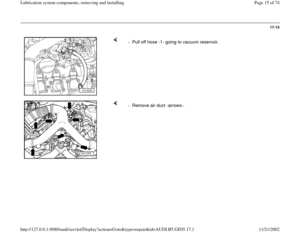
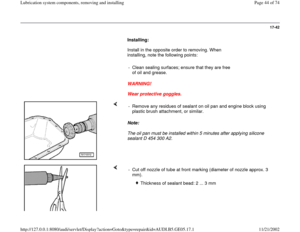
- Pull off hose -1- going to vacuum reservoir.
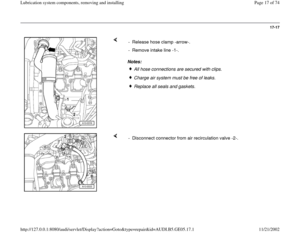
- Remove air duct -arrows-.
Pa
ge 15 of 74 Lubrication s
ystem com
ponents, removin
g and installin
g
11/21/2002 htt
p://127.0.0.1:8080/audi/servlet/Dis
play?action=Goto&t
yp
e=re
pair&id=AUDI.B5.GE05.17.1
Page 16 of 74
17-16
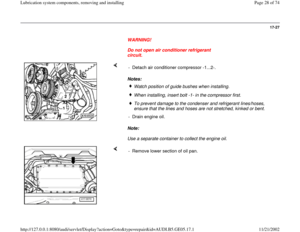
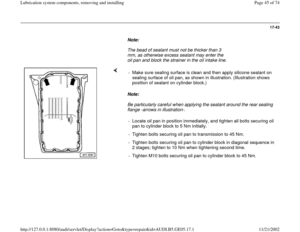
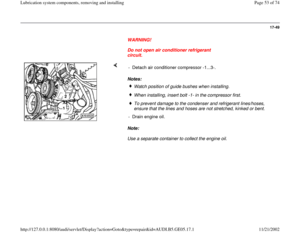
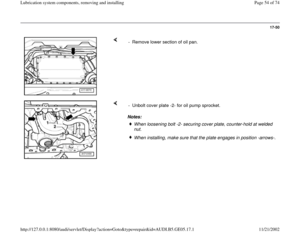
WARNING!
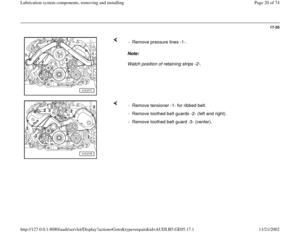
Fuel system is under pressure. Before
opening the system, place a cloth around the
connection. Then release pressure by
carefully loosening the connection.
- Disconnect fuel supply line and fuel return line -1- and -2-, and move
fuel lines clear.
- Pull hose off EVAP valve -3-.
- install clamp (special tool 3094) on hose from power steering reservoir
to power steering pump.
- Disconnect power steering hose -arrow-.
Pa
ge 16 of 74 Lubrication s
ystem com
ponents, removin
g and installin
g
11/21/2002 htt
p://127.0.0.1:8080/audi/servlet/Dis
play?action=Goto&t
yp
e=re
pair&id=AUDI.B5.GE05.17.1