Page 25 of 74
17-25
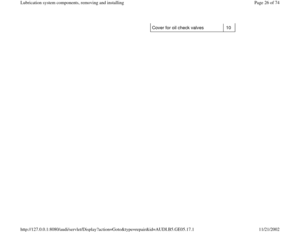
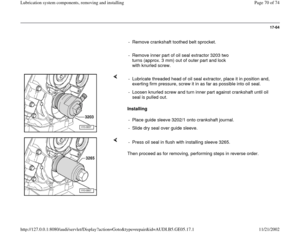
Installing
Install in the opposite order to removing. When
installing, note the following points:
- Install lock carrier
Repair Manual, Body Exterior, Repair Group
50
- Install bumper
Repair Manual, Body Exterior, Repair Group
63
- Fill with coolant Page 19
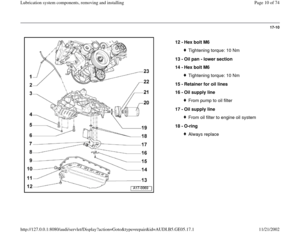
-19
.
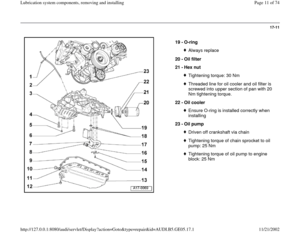
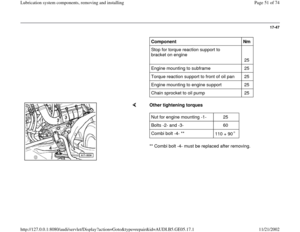
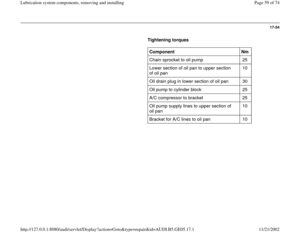
Component
Nm
Bolts M6 10
Bolts M8 20
Toothed belt sprocket to camshaft 55
Intake manifold to cylinder head 10
Oil check valves 25
Pa
ge 25 of 74 Lubrication s
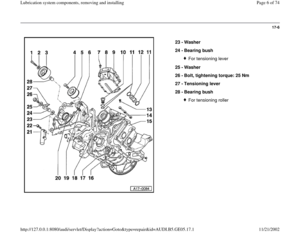
ystem com
ponents, removin
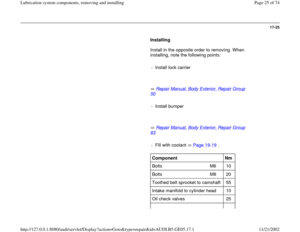
g and installin
g
11/21/2002 htt
p://127.0.0.1:8080/audi/servlet/Dis
play?action=Goto&t
yp
e=re
pair&id=AUDI.B5.GE05.17.1
Page 26 of 74
Cover for oil check valves 10
Pa
ge 26 of 74 Lubrication s
ystem com
ponents, removin
g and installin
g
11/21/2002 htt
p://127.0.0.1:8080/audi/servlet/Dis
play?action=Goto&t
yp
e=re
pair&id=AUDI.B5.GE05.17.1
Page 27 of 74
17-26
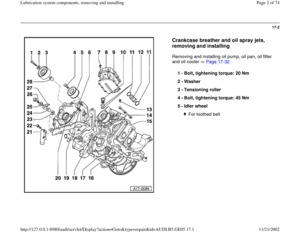
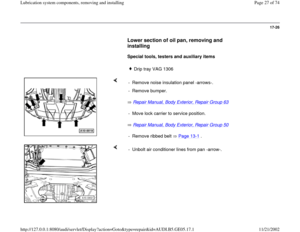
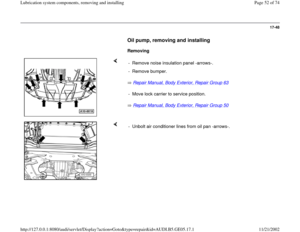
Lower section of oil pan, removing and
installing
Special tools, testers and auxiliary items
Drip tray VAG 1306
Repair Manual, Body Exterior, Repair Group 63
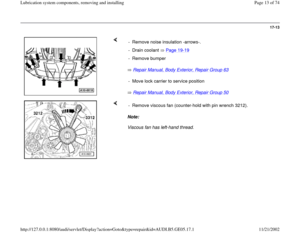
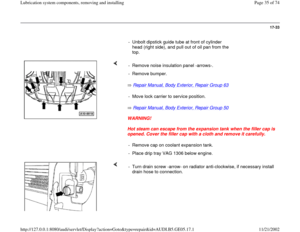
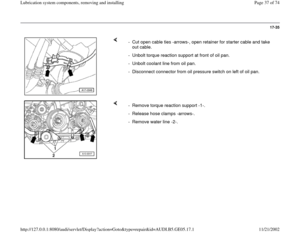
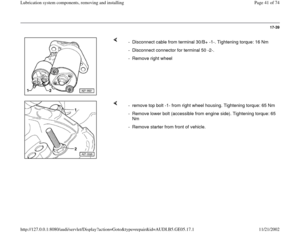
Repair Manual, Body Exterior, Repair Group 50 - Remove noise insulation panel -arrows-.
- Remove bumper.
- Move lock carrier to service position.- Remove ribbed belt Page 13
-1 .
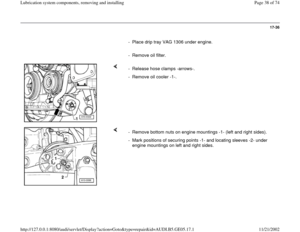
- Unbolt air conditioner lines from pan -arrow-.
Pa
ge 27 of 74 Lubrication s
ystem com
ponents, removin
g and installin
g
11/21/2002 htt
p://127.0.0.1:8080/audi/servlet/Dis
play?action=Goto&t
yp
e=re
pair&id=AUDI.B5.GE05.17.1
Page 28 of 74
17-27
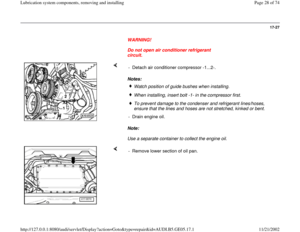
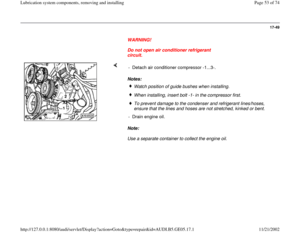
WARNING!
Do not open air conditioner refrigerant
circuit.
Notes:
Note:
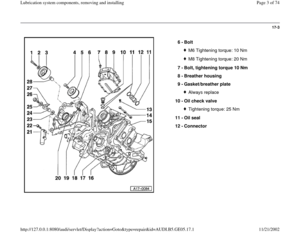
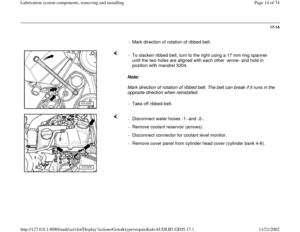
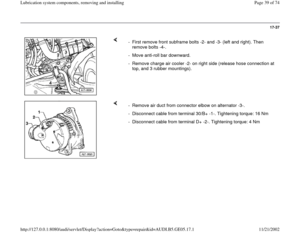
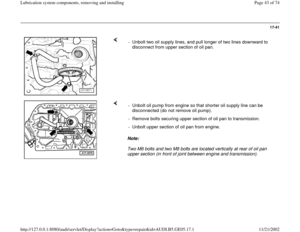
Use a separate container to collect the engine oil. - Detach air conditioner compressor -1...2-.
Watch position of guide bushes when installing.When installing, insert bolt -1- in the compressor first. To prevent damage to the condenser and refrigerant lines/hoses,
ensure that the lines and hoses are not stretched, kinked or bent.
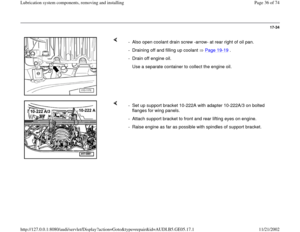
- Drain engine oil.
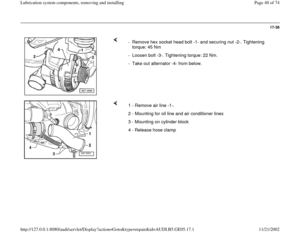
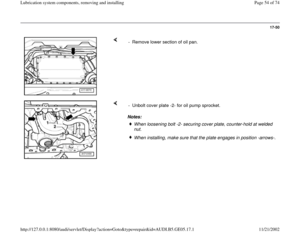
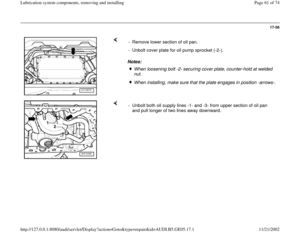
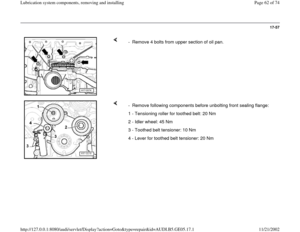
- Remove lower section of oil pan.
Pa
ge 28 of 74 Lubrication s
ystem com
ponents, removin
g and installin
g
11/21/2002 htt
p://127.0.0.1:8080/audi/servlet/Dis
play?action=Goto&t
yp
e=re
pair&id=AUDI.B5.GE05.17.1
Page 29 of 74
17-28
Installing
Install in the opposite order to removing. When
installing, note the following points:
Note:
Do not use any adhesive or sealant.
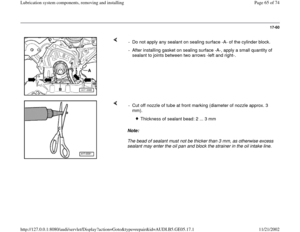
- Clean sealing surfaces; ensure that they are free
of oil and grease.
- Install new gasket on lower section of oil pan
and install on upper section of oil pan with two
diagonally opposite bolts.
- Tighten all securing bolts hand-tight.
- Tighten bolts to 10 Nm with torque wrench,
working from center outward.
- install new seal on oil drain plug and tighten to
30 Nm.
Pa
ge 29 of 74 Lubrication s
ystem com
ponents, removin
g and installin
g
11/21/2002 htt
p://127.0.0.1:8080/audi/servlet/Dis
play?action=Goto&t
yp
e=re
pair&id=AUDI.B5.GE05.17.1
Page 30 of 74
17-29
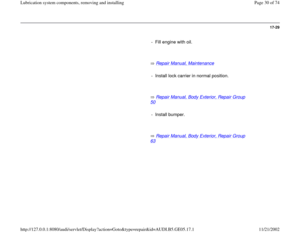
- Fill engine with oil.
Repair Manual, Maintenance
- Install lock carrier in normal position.
Repair Manual, Body Exterior, Repair Group
50
- Install bumper.
Repair Manual, Body Exterior, Repair Group
63
Pa
ge 30 of 74 Lubrication s
ystem com
ponents, removin
g and installin
g
11/21/2002 htt
p://127.0.0.1:8080/audi/servlet/Dis
play?action=Goto&t
yp
e=re
pair&id=AUDI.B5.GE05.17.1
Page 31 of 74
17-30
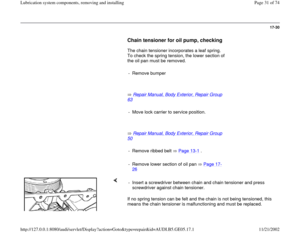
Chain tensioner for oil pump, checking
The chain tensioner incorporates a leaf spring.
To check the spring tension, the lower section of
the oil pan must be removed.
- Remove bumper
Repair Manual, Body Exterior, Repair Group
63
- Move lock carrier to service position.
Repair Manual, Body Exterior, Repair Group
50
- Remove ribbed belt Page 13
-1 .
- Remove lower section of oil pan Page 17
-
26
If no spring tension can be felt and the chain is not being tensioned, this
means the chain tensioner is malfunctioning and must be replaced. - Insert a screwdriver between chain and chain tensioner and press
screwdriver against chain tensioner.
Pa
ge 31 of 74 Lubrication s
ystem com
ponents, removin
g and installin
g
11/21/2002 htt
p://127.0.0.1:8080/audi/servlet/Dis
play?action=Goto&t
yp
e=re
pair&id=AUDI.B5.GE05.17.1
Page 32 of 74
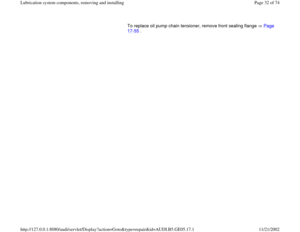
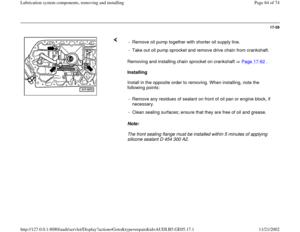
To replace oil pump chain tensioner, remove front sealing flange Page 17
-55
.
Pa
ge 32 of 74 Lubrication s
ystem com
ponents, removin
g and installin
g
11/21/2002 htt
p://127.0.0.1:8080/audi/servlet/Dis
play?action=Goto&t
yp
e=re
pair&id=AUDI.B5.GE05.17.1