Page 17 of 75
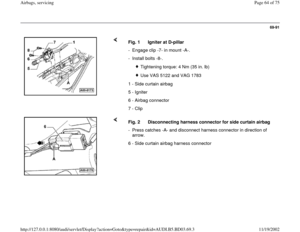
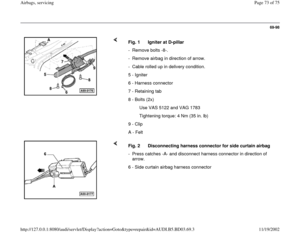
69-50
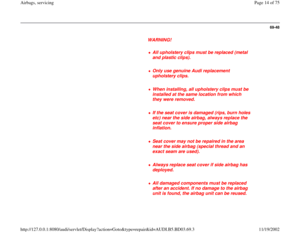
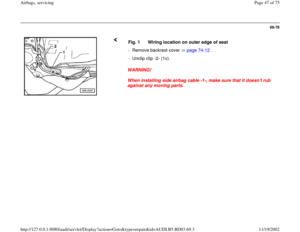
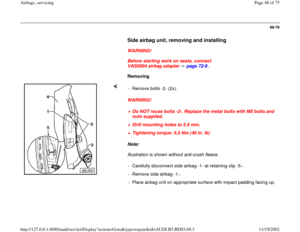
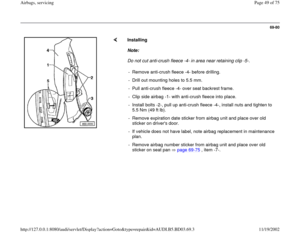
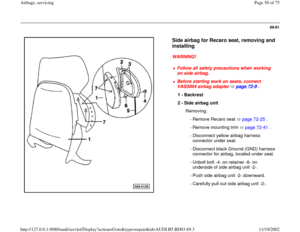
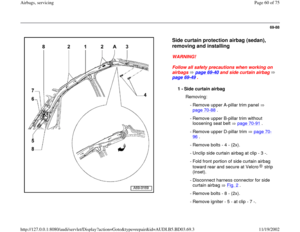
WARNING!
After removal, place the side curtain airbag
into the transport container in the folded
position or lay on a clean, even surface (on a
blanket or in the luggage compartment).
After servicing the body of vehicle in vicinity
of airbag, check the body for welding beads,
deformations and chafe marks (compare to
opposite side of the vehicle).
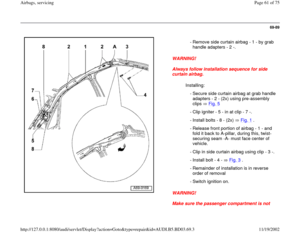
Always hold the side curtain airbag
securely.
After removal, always fold the side curtain
airbag and grasp by the igniter (thumbs
toward E-connection).
Always keep one hand on the igniter.
Never twist, wind, bend, throw, spin, pull,
hang, squeeze, press, pinch or clamp the
side curtain airbag.
If any contamination penetrates into the
fabric (i.e. oil, grease, lacquer, paint or
solvent), the unit must always be replaced.
Pa
ge 17 of 75 Airba
gs, servicin
g
11/19/2002 htt
p://127.0.0.1:8080/audi/servlet/Dis
play?action=Goto&t
yp
e=re
pair&id=AUDI.B5.BD03.69.3
Page 18 of 75
69-51
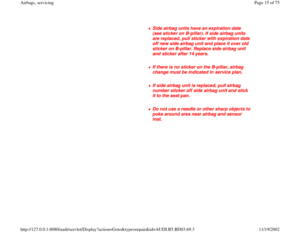
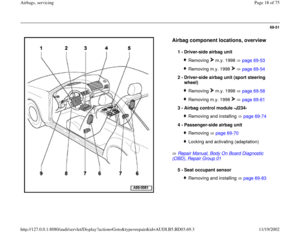
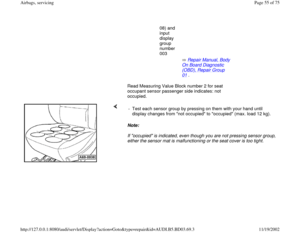
Airbag component locations, overview
Repair Manual, Body On Board Diagnostic
(OBD), Repair Group 01
1 -
Driver-side airbag unit
Removing m.y. 1998 page 69
-53
Removing m.y. 1998 page 69
-54
2 -
Driver-side airbag unit (sport steering
wheel)
Removing m.y. 1998 page 69
-58
Removing m.y. 1998 page 69
-61
3 -
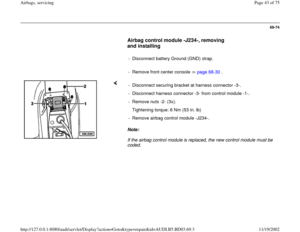
Airbag control module -J234-
Removing and installing page 69
-74
4 -
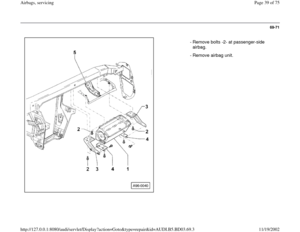
Passenger-side airbag unit
Removing page 69
-70
Locking and activating (adaptation)
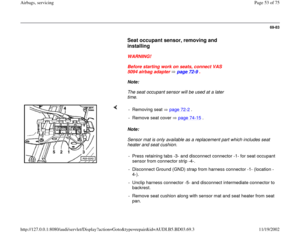
5 -
Seat occupant sensor
Removing and installing page 69
-83
Pa
ge 18 of 75 Airba
gs, servicin
g
11/19/2002 htt
p://127.0.0.1:8080/audi/servlet/Dis
play?action=Goto&t
yp
e=re
pair&id=AUDI.B5.BD03.69.3
Page 19 of 75
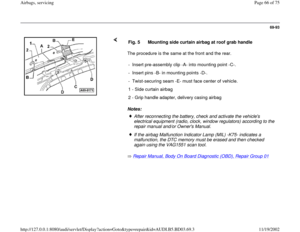
69-52
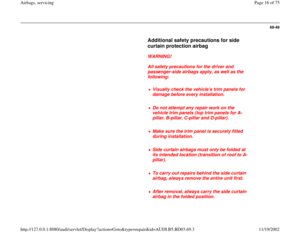
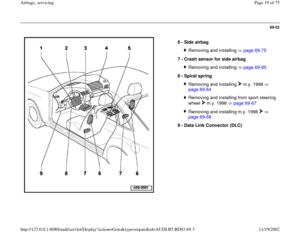
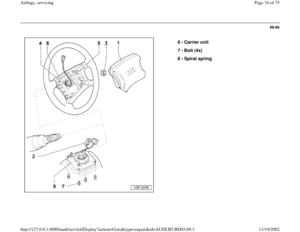
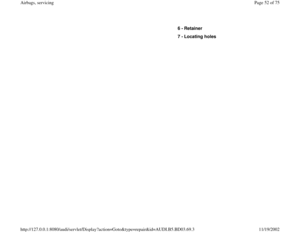
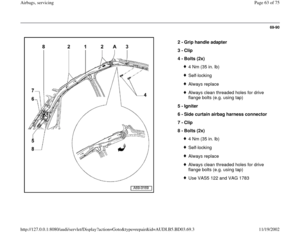
6 -
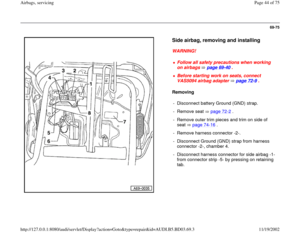
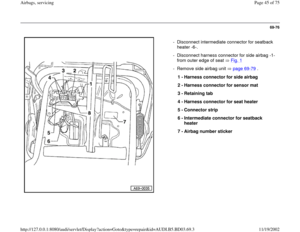
Side airbag
Removing and installing page 69
-75
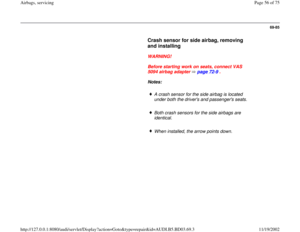
7 -
Crash sensor for side airbag
Removing and installing page 69
-85
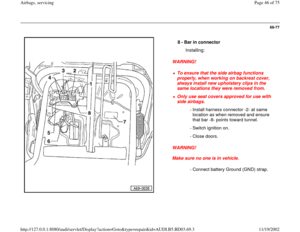
8 -
Spiral spring
Removing and installing m.y. 1998
page 69
-64
Removing and installing from sport steering
wheel m.y. 1998 page 69
-67
Removing and installing m.y. 1998
page 69
-68
9 -
Data Link Connector (DLC)
Pa
ge 19 of 75 Airba
gs, servicin
g
11/19/2002 htt
p://127.0.0.1:8080/audi/servlet/Dis
play?action=Goto&t
yp
e=re
pair&id=AUDI.B5.BD03.69.3
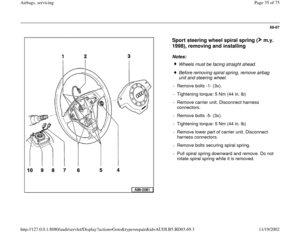
Page 20 of 75
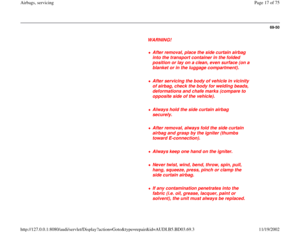
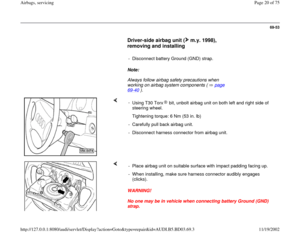
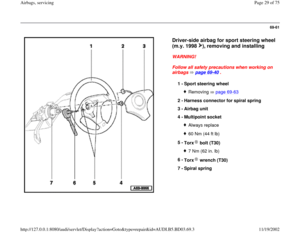
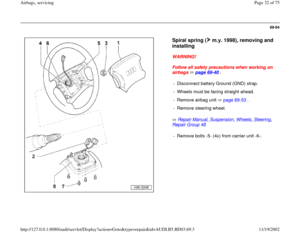
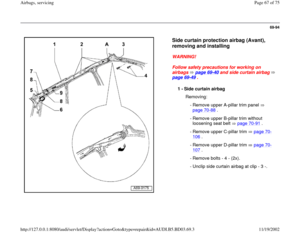
69-53
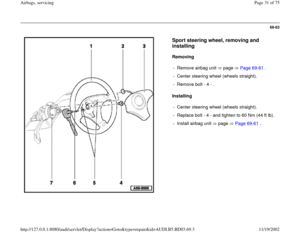
Driver-side airbag unit ( m.y. 1998),
removing and installing
- Disconnect battery Ground (GND) strap.
Note:
Always follow airbag safety precautions when
working on airbag system components ( page
69
-40
).
-
Using T30 Torx bit, unbolt airbag unit on both left and right side of
steering wheel. Tightening torque: 6 Nm (53 in. lb)
- Carefully pull back airbag unit.
- Disconnect harness connector from airbag unit.
WARNING!
No one may be in vehicle when connecting battery Ground (GND)
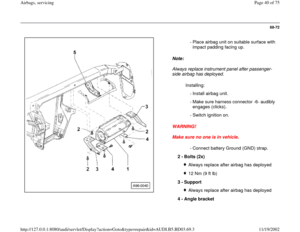
strap. - Place airbag unit on suitable surface with impact padding facing up.
- When installing, make sure harness connector audibly engages
(clicks).
Pa
ge 20 of 75 Airba
gs, servicin
g
11/19/2002 htt
p://127.0.0.1:8080/audi/servlet/Dis
play?action=Goto&t
yp
e=re
pair&id=AUDI.B5.BD03.69.3
Page 21 of 75
- Switch ignition on and connect battery Ground (GND) strap.
Pa
ge 21 of 75 Airba
gs, servicin
g
11/19/2002 htt
p://127.0.0.1:8080/audi/servlet/Dis
play?action=Goto&t
yp
e=re
pair&id=AUDI.B5.BD03.69.3
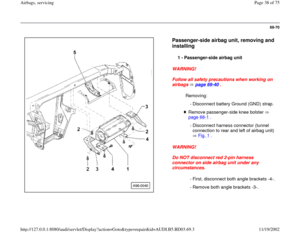
Page 22 of 75
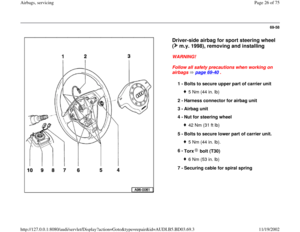
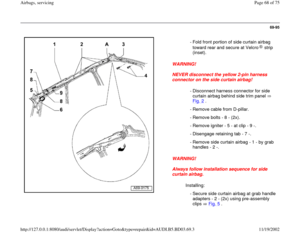
69-54
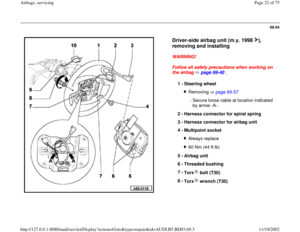
Driver-side airbag unit (m.y. 1998 ),
removing and installing
WARNING!
Follow all safety precautions when working on
the airbag page 69
-40
.
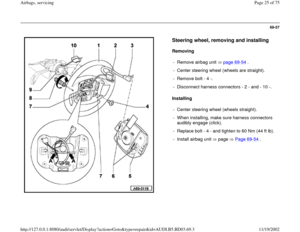
1 -
Steering wheel
Removing page 69
-57
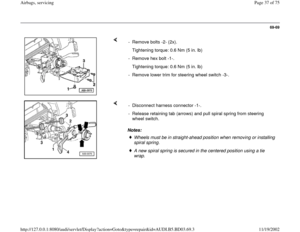
- Secure loose cable at location indicated
by arrow -A-.
2 -
Harness connector for spiral spring
3 -
Harness connector for airbag unit
4 -
Multipoint socket
Always replace60 Nm (44 ft lb)
5 -
Airbag unit
6 -
Threaded bushing
7 -
Torx bolt (T30)
8 -
Torx wrench (T30)
Pa
ge 22 of 75 Airba
gs, servicin
g
11/19/2002 htt
p://127.0.0.1:8080/audi/servlet/Dis
play?action=Goto&t
yp
e=re
pair&id=AUDI.B5.BD03.69.3
Page 23 of 75
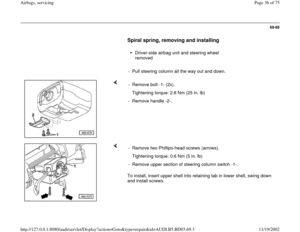
69-55
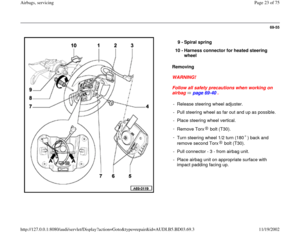
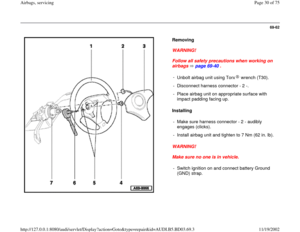
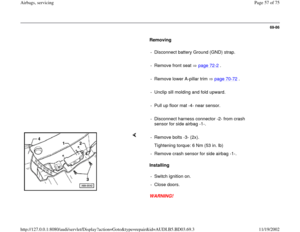
Removing
WARNING!
Follow all safety precautions when working on
airbag page 69
-40
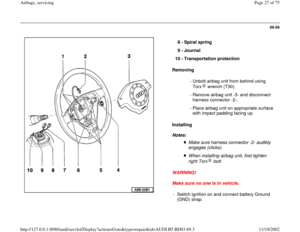
. 9 -
Spiral spring
10 -
Harness connector for heated steering
wheel
- Release steering wheel adjuster.
- Pull steering wheel as far out and up as possible.
- Place steering wheel vertical.
-
Remove Torx bolt (T30).-
Turn steering wheel 1/2 turn (180 ) back and
remove second Torx bolt (T30). - Pull connector - 3 - from airbag unit.
- Place airbag unit on appropriate surface with
impact padding facing up.
Pa
ge 23 of 75 Airba
gs, servicin
g
11/19/2002 htt
p://127.0.0.1:8080/audi/servlet/Dis
play?action=Goto&t
yp
e=re
pair&id=AUDI.B5.BD03.69.3
Page 24 of 75
69-56
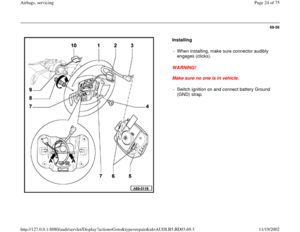
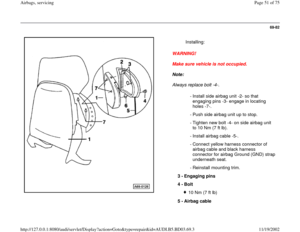
Installing
WARNING!
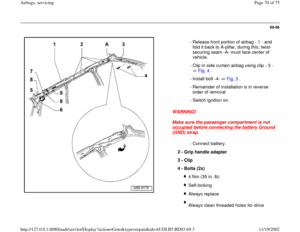
Make sure no one is in vehicle. - When installing, make sure connector audibly
engages (clicks).
- Switch ignition on and connect battery Ground
(GND) strap.
Pa
ge 24 of 75 Airba
gs, servicin
g
11/19/2002 htt
p://127.0.0.1:8080/audi/servlet/Dis
play?action=Goto&t
yp
e=re
pair&id=AUDI.B5.BD03.69.3


, Repair Group 01
1 -
Driver-side airbag unit
Removing m.y. 1998 page 69
-53
Removing m.y. 199")

,
removing and installing
- Disconnect battery Ground (GND) strap.
Note:
Always follow airbag safety precautions when
working")
 strap.
Pa
ge 21 of 75 Airba
gs, servicin
g
11/19/2002 htt
p://127.0.0.1:8080/audi/servlet/Dis
play?action=Goto&t
yp
e=re
pair&id=AUDI.B5.BD03.69.")
,
removing and installing
WARNING!
Follow all safety precautions when working on
the airbag page 69
-40
.
1 -
Steering wheel
Removing page")

.
- Switch ignition on and connect battery Ground
(GND) strap.
P")