69-98
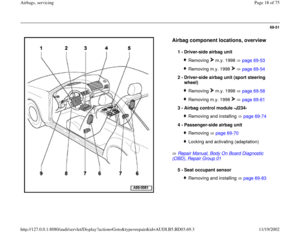
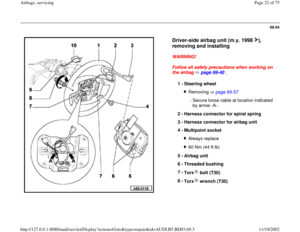
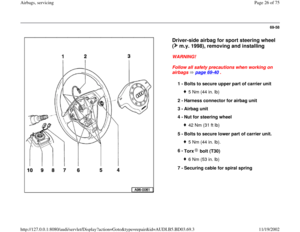
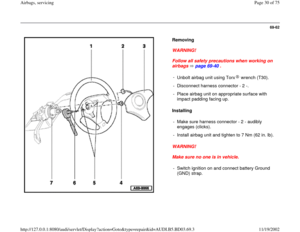
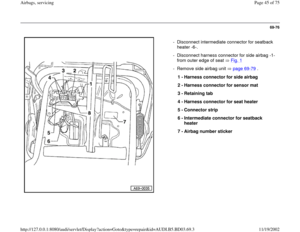
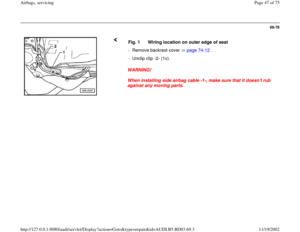
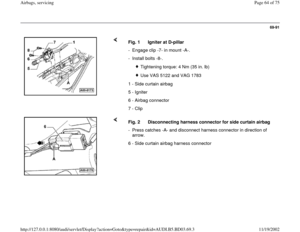
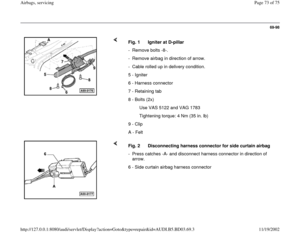
Fig. 1 Igniter at D-pillar
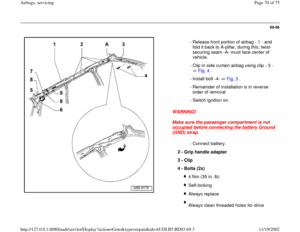
- Remove bolts -8-.
- Remove airbag in direction of arrow.
- Cable rolled up in delivery condition.
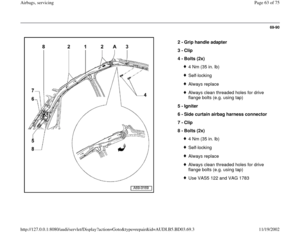
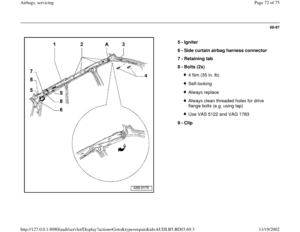
5 - Igniter
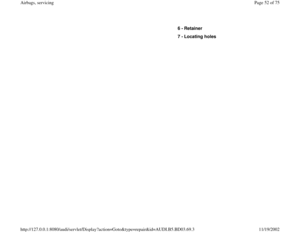
6 - Harness connector
7 - Retaining tab
8 - Bolts (2x)
Use VAS 5122 and VAG 1783
Tightening torque: 4 Nm (35 in. lb)
9 - Clip
A - Felt
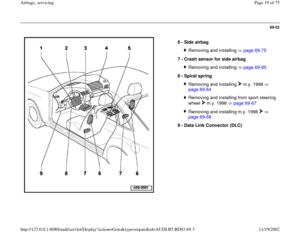
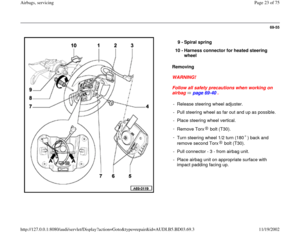
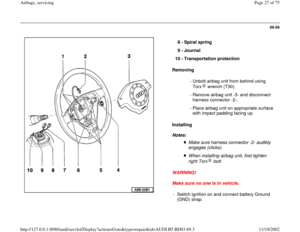
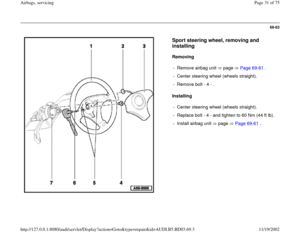
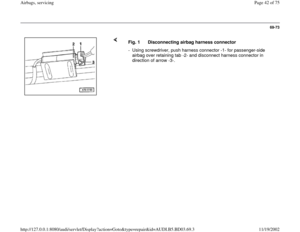
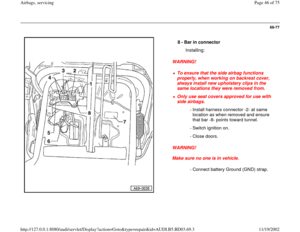
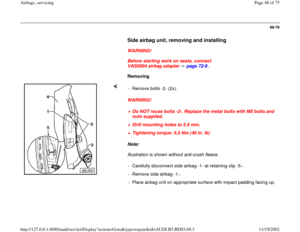
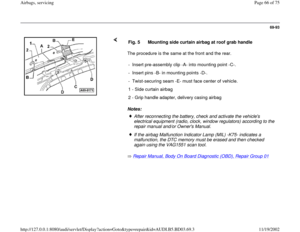
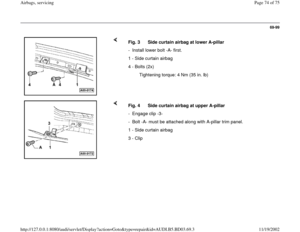
Fig. 2 Disconnecting harness connector for side curtain airbag
- Press catches -A- and disconnect harness connector in direction of
arrow.
6 - Side curtain airbag harness connector
Pa
ge 73 of 75 Airba
gs, servicin
g
11/19/2002 htt
p://127.0.0.1:8080/audi/servlet/Dis
play?action=Goto&t
yp
e=re
pair&id=AUDI.B5.BD03.69.3
69-99
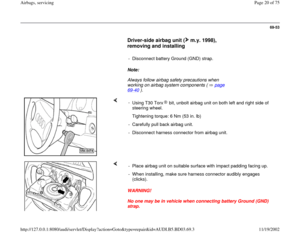
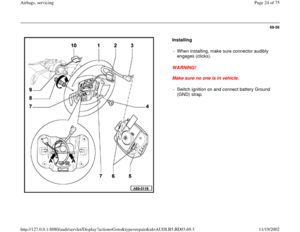
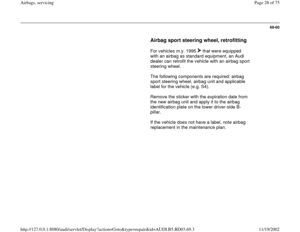
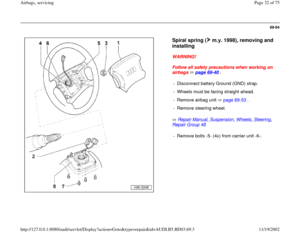
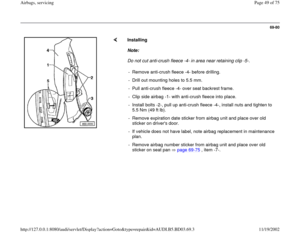
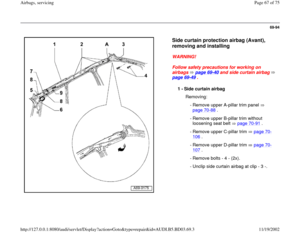
Fig. 3 Side curtain airbag at lower A-pillar
- Install lower bolt -A- first.
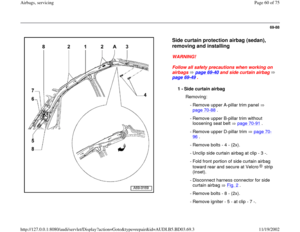
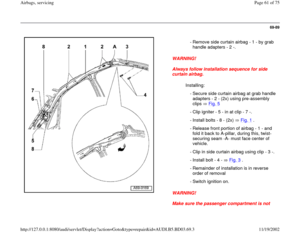
1 - Side curtain airbag
4 - Bolts (2x)
Tightening torque: 4 Nm (35 in. lb)
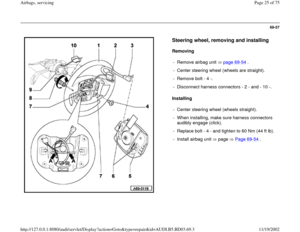
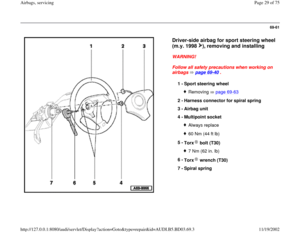
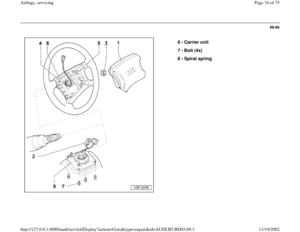
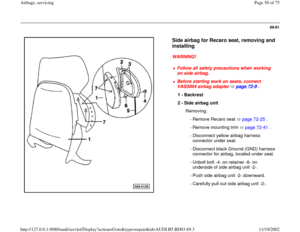
Fig. 4 Side curtain airbag at upper A-pillar
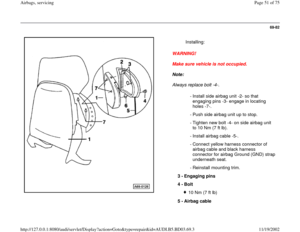
- Engage clip -3-
- Bolt -A- must be attached along with A-pillar trim panel.
1 - Side curtain airbag
3 - Clip
Pa
ge 74 of 75 Airba
gs, servicin
g
11/19/2002 htt
p://127.0.0.1:8080/audi/servlet/Dis
play?action=Goto&t
yp
e=re
pair&id=AUDI.B5.BD03.69.3
69-100
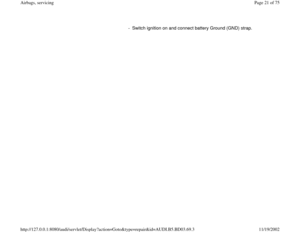
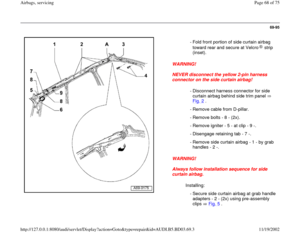
Front and rear roof grab handles are mounted the same way.
Notes:
Repair Manual, Body On Board Diagnostic (OBD), Repair Group 01
Fig. 5 Mounting side curtain airbag at roof grab handle
- Insert pre-assembly clip -A- into mounting point -C-.
- Insert pins -B- in mounting points -D-.
- Twist-securing seam -E- must face center of vehicle.
1 - Side curtain airbag
2 - Grip handle adapter, delivery casing airbag
After reconnecting the battery, check and activate the vehicle's
electrical equipment (radio, clock, window regulators) according to the
repair manual and/or Owner's Manual. If the airbag Malfunction Indicator Lamp (MIL) -K75- indicates a
malfunction, the DTC memory must be erased and then checked
again using the VAG 1551 scan tool.
Pa
ge 75 of 75 Airba
gs, servicin
g
11/19/2002 htt
p://127.0.0.1:8080/audi/servlet/Dis
play?action=Goto&t
yp
e=re
pair&id=AUDI.B5.BD03.69.3


Tightening torque: 4 Nm (35 in. lb)
Fig. 4 Side curtain airb")
, Repair Group 01
Fig. 5 Mounting side curtain airbag at roof grab")