Page 453 of 1354

OR0028
Q06076
AT3417
OK if hot
Add if hot
AT4252
0 − 1 mm
− DIAGNOSTICSAUTOMATIC TRANSAXLE (A241E)
DI−133
1996 RAV4 (RM447U)
Fluid type: ATF DEXRON ®II
NOTICE:
Do not overfill.
(b) Check the fluid condition.
If the fluid smells burnt or is black, replace it.
(c) Replace the fluid.
(1) Remove the drain plug and drain the fluid.
(2) Reinstall the drain plug securely.
(3) With the engine OFF, add new fluid through the oil
filler pipe.
Fluid type: ATF DEXRON ®II
Capacity:
Drain and refill: 3.3 liters (3.5 US qts, 2.9 lmp. qts)
(4) Start the engine and shift the shift lever into all posi-
tions from P to L position and then shift into P posi-
tion.
(5) With the engine idling, check the fluid level. Add
fluid up to the COOL level on the dipstick.
(6) Check the fluid level at the normal operating tem-
perature 70 − 80°C (158 − 176°F) and add as nec-
essary.
NOTICE:
Do not overfill.
(d) Check the fluid leaks.
Check for leaks in the transaxle.
If there are leaks, it is necessary to replace O−rings, gaskets,
oil seals, plugs or other parts.
(e) Inspect and adjust throttle cable.
(1) Check that the throttle valve is fully closed.
(2) Check that the inner cable is not slack.
(3) Measure the distance between the outer cable end
and stopper on the cable.
Standard distance: 0 − 1 mm (0 − 0.04 in.)
If the distance is not within the standard, adjust the cable by the
adjusting nuts.
Page 501 of 1354

Q06065
Q06076
D02315
OK if hot
Add if hot
D00699
D00700
− DIAGNOSTICSAUTOMATIC TRANSAXLE (A540H)
DI−181
1996 RAV4 (RM447U)
(d) Replace the ATF.
NOTICE:
Do not overfill.
(1) Using a 10 mm hexagon wrench, remove the drain
plug, gasket and drain the fluid.
(2) Install a new gasket and the drain plug securely.
(3) Add new fluid through the filler pipe.
Fluid type: ATF type T or equivalent
Drain and refill: 3.3 liters (3.5 US qts, 2.9 lmp. qts)
(4) Start the engine and shift the selector into all the
positions from P through L and then shift into the P
position.
(5) With the engine idling, check the fluid level. Add
fluid up to the COOL level on the dipstick.
(6) Check the fluid level with the normal fluid tempera-
ture 70 − 80°C (158 − 176°F) and add as neces-
sary.
NOTICE:
Do not overfill.
(e) Replace the transfer oil.
(1) Using a 10 mm hexagon wrench, remove the drain
plug and drain the oil.
(2) Install the drain plug.
(3) Add new oil through the filler pipe.
Recommended oil:
Oil grade API GL−5
Viscosity SAE 75W−90
Capacity: 0.7 liters (0.7 US qts, 0.6 lmp. qts)
(4) Check the oil level and add as necessary.
NOTICE:
Do not overfill.
Page 978 of 1354
S01263
SST
3/4
Turn
− LUBRICATIONOIL AND FILTER
LU−3
1996 RAV4 (RM447U)
(e) Using SST, give it an additional 3/4 turn to seat the filter.
SST 09228−06501
3. FILL WITH ENGINE OIL
(a) Clean and install the oil drain plug with a new gasket.
Torque: 37 N·m (375 kgf·cm, 27 ft·lbf)
(b) Fill with new engine oil.
Capacity:
Drain and refill
w/ Oil filter change
3.9 liters (4.1 US qts, 3.4 lmp. qts)
w/o Oil filter change
3.7 liters (3.9 US qts, 3.3 lmp. qts)
Dry fill
4.4 liters (4.7 US qts, 3.9 lmp. qts)
(c) Reinstall the oil filler cap.
4. START ENGINE AND CHECK FOR OIL LEAKS
5. RECHECK ENGINE OIL LEVEL
Page 999 of 1354

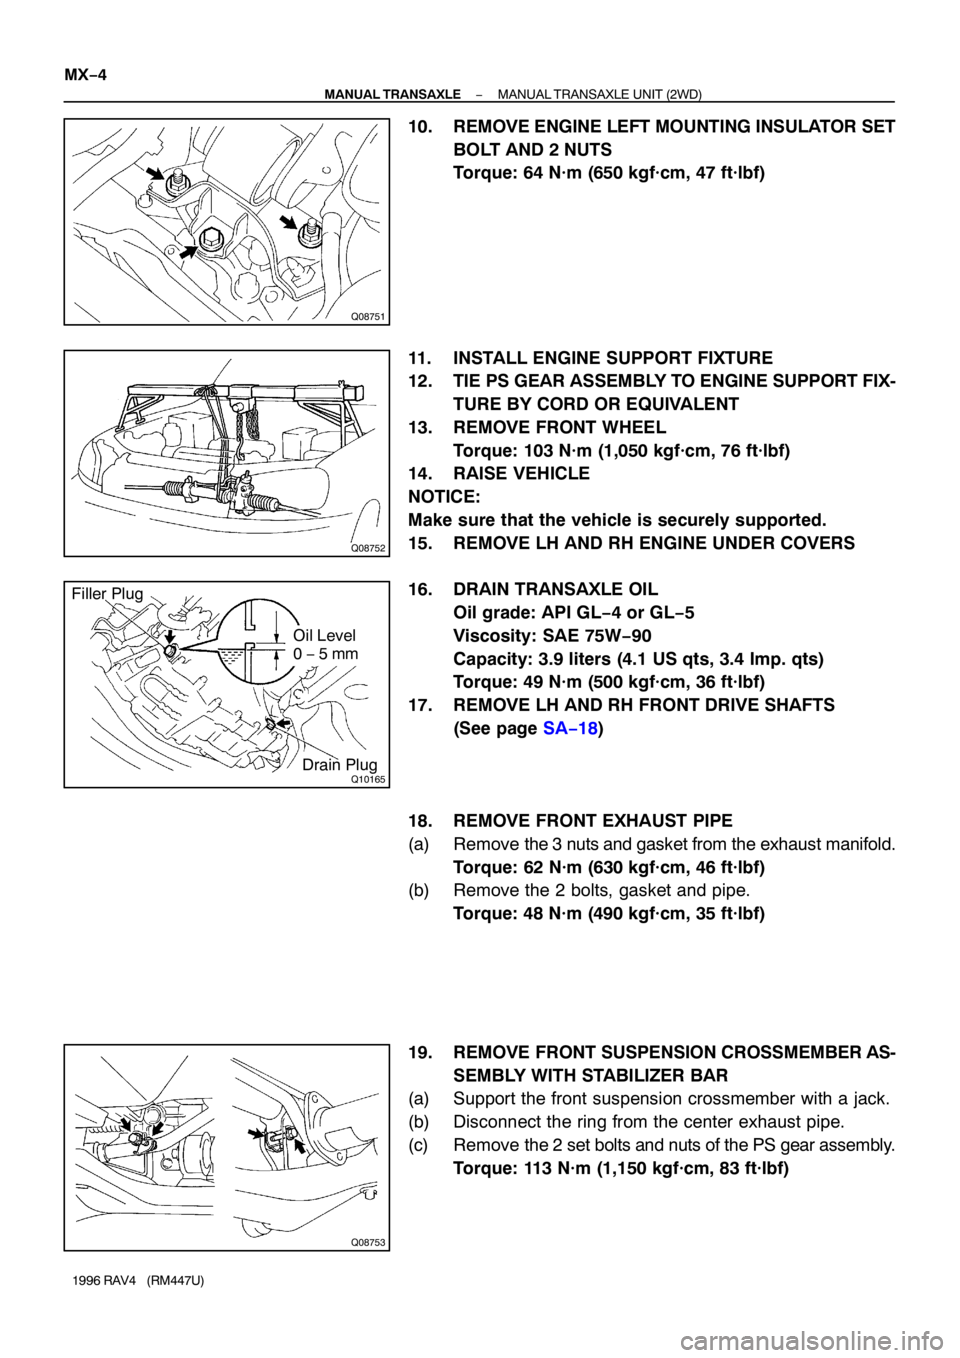
Q08751
Q08752
Q10165
Filler Plug
Oil Level
0 − 5 mm
Drain Plug
Q08753
MX−4
− MANUAL TRANSAXLEMANUAL TRANSAXLE UNIT (2WD)
1996 RAV4 (RM447U)
10. REMOVE ENGINE LEFT MOUNTING INSULATOR SET
BOLT AND 2 NUTS
Torque: 64 N·m (650 kgf·cm, 47 ft·lbf)
11. INSTALL ENGINE SUPPORT FIXTURE
12. TIE PS GEAR ASSEMBLY TO ENGINE SUPPORT FIX-
TURE BY CORD OR EQUIVALENT
13. REMOVE FRONT WHEEL
Torque: 103 N·m (1,050 kgf·cm, 76 ft·lbf)
14. RAISE VEHICLE
NOTICE:
Make sure that the vehicle is securely supported.
15. REMOVE LH AND RH ENGINE UNDER COVERS
16. DRAIN TRANSAXLE OIL
Oil grade: API GL−4 or GL−5
Viscosity: SAE 75W−90
Capacity: 3.9 liters (4.1 US qts, 3.4 Imp. qts)
Torque: 49 N·m (500 kgf·cm, 36 ft·lbf)
17. REMOVE LH AND RH FRONT DRIVE SHAFTS
(See page SA−18)
18. REMOVE FRONT EXHAUST PIPE
(a) Remove the 3 nuts and gasket from the exhaust manifold.
Torque: 62 N·m (630 kgf·cm, 46 ft·lbf)
(b) Remove the 2 bolts, gasket and pipe.
Torque: 48 N·m (490 kgf·cm, 35 ft·lbf)
19. REMOVE FRONT SUSPENSION CROSSMEMBER AS-
SEMBLY WITH STABILIZER BAR
(a) Support the front suspension crossmember with a jack.
(b) Disconnect the ring from the center exhaust pipe.
(c) Remove the 2 set bolts and nuts of the PS gear assembly.
Torque: 113 N·m (1,150 kgf·cm, 83 ft·lbf)