Page 36 of 226

31
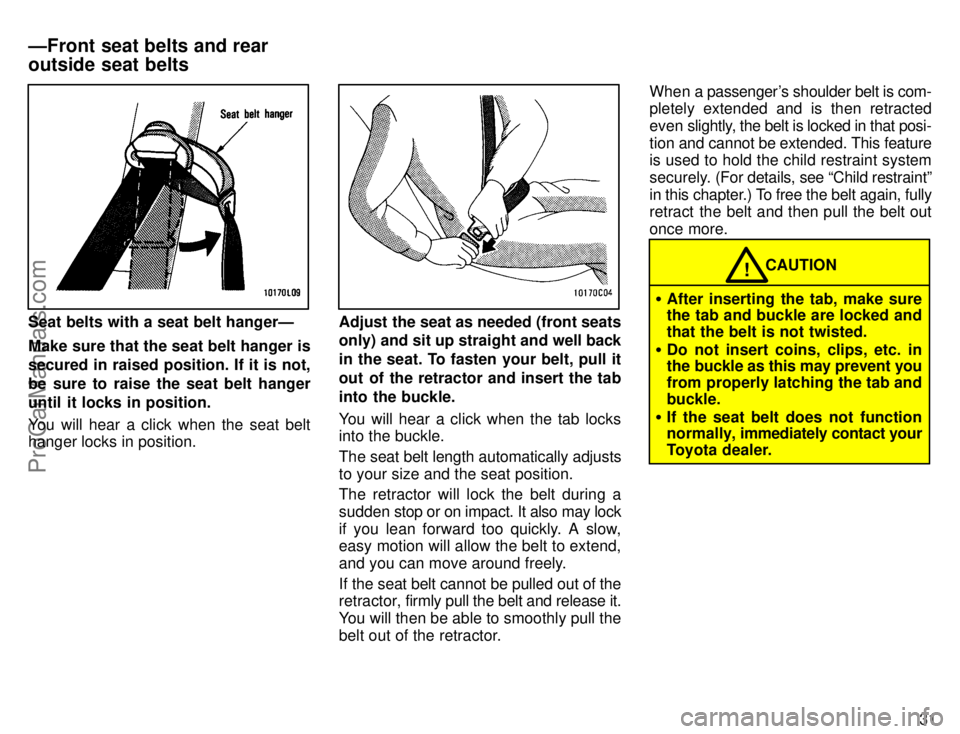
Seat belts with a seat belt hangerÐ
Make sure that the seat belt hanger is
secured in raised position. If it is not,
be sure to raise the seat belt hanger
until it locks in position.
You will hear a click when the seat belt
hanger locks in position.Adjust the seat as needed (front seats
only) and sit up straight and well back
in the seat. To fasten your belt, pull it
out of the retractor and insert the tab
into the buckle.
You will hear a click when the tab locks
into the buckle.
The seat belt length automatically adjusts
to your size and the seat position.
The retractor will lock the belt during a
sudden stop or on impact. It also may lock
if you lean forward too quickly. A slow,
easy motion will allow the belt to extend,
and you can move around freely.
If the seat belt cannot be pulled out of the
retractor, firmly pull the belt and release it.
You will then be able to smoothly pull the
belt out of the retractor.When a passenger's shoulder belt is com-
pletely extended and is then retracted
even slightly, the belt is locked in that posi-
tion and cannot be extended. This feature
is used to hold the child restraint system
securely. (For details, see Child restraintº
in this chapter.) To free the belt again, fully
retract the belt and then pull the belt out
once more.
CAUTION!
�After inserting the tab, make sure
the tab and buckle are locked and
that the belt is not twisted.
�Do not insert coins, clips, etc. in
the buckle as this may prevent you
from properly latching the tab and
buckle.
�If the seat belt does not function
normally, immediately contact your
Toyota dealer.
ÐFront seat belts and rear
outside seat belts
ProCarManuals.com
Page 41 of 226

36
�After inserting the tab, make sure
the tab and buckle are locked and
that the seat belt extender is not
twisted.
�Do not insert coins, clips, etc. in
the buckle as this may prevent you
from properly latching the tab and
buckle.
�If the seat belt does not function
normally, immediately contact
your Toyota dealer.
CAUTION!
The SRS (Supplemental Restraint Sys-
tem) airbags are designed to provide
further protection to the driver and
front passenger when added to the pri-
mary protection provided by the seat
belts.
In response to a severe frontal impact, the
SRS airbags work together with the seat
belts to prevent or reduce injury by inflat-
ing, in order to decrease the likelihood of
the driver's or front passenger's head or
chest directly hitting the steering wheel or
dashboard. The passenger airbag is acti-
vated even with no passenger in the front
seat.This indicator comes on when the
ignition key is turned to the ACCº or
ONº position. It goes off after about 6
seconds. This means the SRS airbags
are operating properly.
The SRS airbag warning light system
monitors the front airbag sensors, center
airbag sensor assembly, inflators, warn-
ing light, interconnecting wiring and power
sources.
SRS airbags
ProCarManuals.com
Page 46 of 226

41
Do not perform any of the following
changes without consulting your
Toyota dealer. Such changes can
interfere with proper operation of
the SRS airbag system in some
cases.
�Installation of electronic items
such as a mobile two-way radio,
cassette tape player or compact
disc player
�Modification of the suspension
system
�Modification of the front end
structure
�Attachment of a grille guard (bull
bar, kangaroo bar, etc.), snow-
plow, winches or any other equip-
ment to the front end
�Repairs made on or near the front
fenders, front and rear console,
steering column, steering wheel
or dashboard near the front pas-
senger 's airbag
NOTICE
This SRS airbag system has a service re-
minder indicator to inform the driver of op-
erating problems. If either of the following
conditions occurs, this indicates a mal-
function of the airbags. Contact your To-
yota dealer as soon as possible to service
the vehicle.
�The light does not come on when the
ignition key is turned to the ACCº or
ONº position, or remains on.
�The light comes on while driving.In the following cases, contact your Toyo-
ta dealer as soon as possible:
�The SRS airbags have been inflated.
�The front part of the vehicle (shaded in
the illustration) was involved in an ac-
cident not of the extent to cause the
SRS airbags to inflate.
�The pad section of the steering wheel
or front passenger airbag cover
(shaded in the illustration) is scratched,
cracked, or otherwise damaged.
ProCarManuals.com
Page 54 of 226
49 To comply with Canada Motor Vehicle
Safety Standards, vehicles sold in Cana-
da are provided with a bracket set in the
glovebox, designed for use with any of the
3 anchor locations shown in the illustra-
tion.
WagonÐOn the rear trim
a. Remove the rear trim and unplug the
connector of luggage compartment light.
b. Using the illustration as a guide, make
hole on the center of the cross mark in the
trim. Connect the connector of the lug-
gage compartment light and install the
trim.c. Insert a 15 mm (0.6 in.) spacer and
tighten down the anchor bracket for your
child restraint system with a bolt. Torque
the bolt to 16.5Ð24.7 NVm (1.68Ð2.52
kgfVm, 12.2Ð18.2 ftVlbf).
To comply with Canada Motor Vehicle
Safety Standards, vehicles sold in Cana-
da are provided with a bracket set in the
glovebox, designed for use with any of the
3 anchor locations shown in the illustra-
tion.
ProCarManuals.com
Page 60 of 226
54
Pull the lever toward you to reduce
glare from the headlights of the ve-
hicle behind you during night driving.
Before adjusting the mirror to the position
with most clarity, push the day-night
change lever away from you (daylight
driving position).
Remember that by reducing glare you
also lose some rear view clarity.To use the vanity mirrors, swing down
the sun visor and open the cover.
On some models, the vanity light comes
on when you open the cover.
Vanity mirrors Anti-glare inside rear view
mirror
ProCarManuals.com
Page 61 of 226

Part 1Headlights and turn signals
55
OPERATION OF
INSTRUMENTS AND
CONTROLSÐ
Chapter 1-4
Lights, Wipers and Defogger
�Headlights and turn signals
�Emergency flashers
�Instrument panel light control
�Interior light
�Ignition switch light
�Personal light
�Luggage compartment light
�Windshield wipers and washer
�Rear window wipers and washer
�Rear window defogger
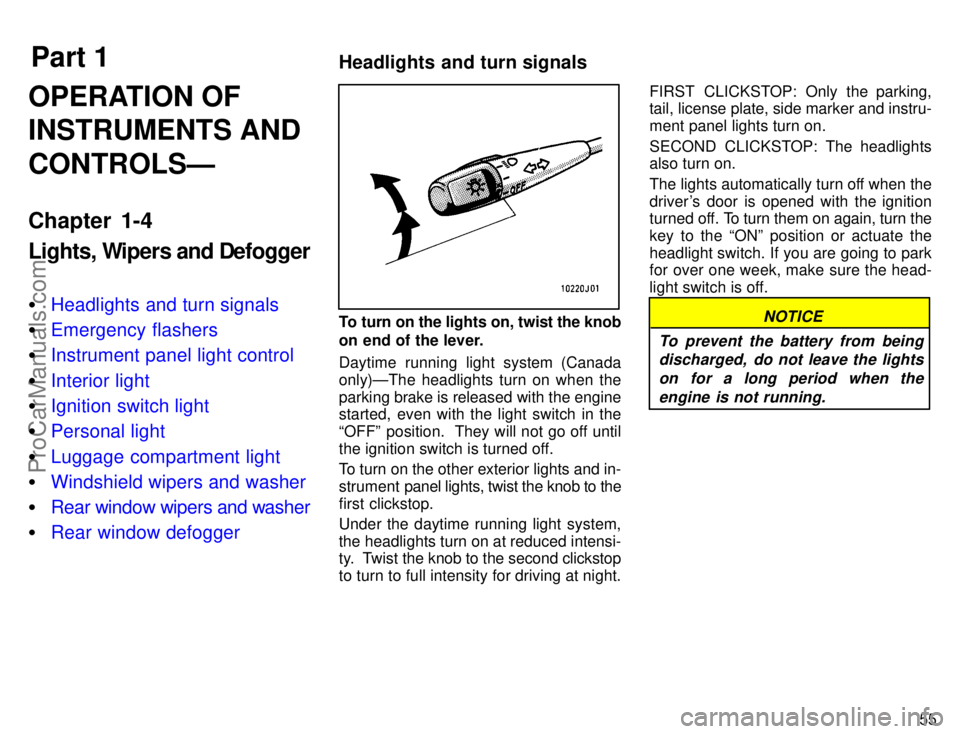
To turn on the lights on, twist the knob
on end of the lever.
Daytime running light system (Canada
only)ÐThe headlights turn on when the
parking brake is released with the engine
started, even with the light switch in the
OFFº position. They will not go off until
the ignition switch is turned off.
To turn on the other exterior lights and in-
strument panel lights, twist the knob to the
first clickstop.
Under the daytime running light system,
the headlights turn on at reduced intensi-
ty. Twist the knob to the second clickstop
to turn to full intensity for driving at night.FIRST CLICKSTOP: Only the parking,
tail, license plate, side marker and instru-
ment panel lights turn on.
SECOND CLICKSTOP: The headlights
also turn on.
The lights automatically turn off when the
driver's door is opened with the ignition
turned off. To turn them on again, turn the
key to the ONº position or actuate the
headlight switch. If you are going to park
for over one week, make sure the head-
light switch is off.NOTICE
To prevent the battery from being
discharged, do not leave the lights
on for a long period when the
engine is not running.
ProCarManuals.com
Page 62 of 226

56
For high beam, push the lever away
from you. Pull it toward you for low
beam. For the headlight flasher, pull it
further back.
A blue light in the instrument panel indi-
cates high beam is on.
The headlight flasher works even when
the headlight switch is off.For signaling turns, move the lever up
or down in the conventional manner.
The key must be in the ONº position.
The turn signal is self-cancelling after a
turn, but after a lane change, you may
have to cancel it by hand. You can signal
a lane change by moving the turn signal
lever partway and holding it there. If the
green light in the instrument panel flashes
faster than normal, it indicates that the
front or rear turn signal bulb has burned
out.To turn on the emergency flashers,
push the switch.
All the turn signal lights will flash.
Turn on the emergency flashers to warn
other drivers if your vehicle must be
stopped where it might be a traffic hazard.
Always pull as far off the road as possible.
The turn signal light switch will not work
when the emergency flashers are operat-
ing.
NOTICE
To prevent the battery from being
discharged, do not leave the switch
on longer than necessary when the
engine is not running.
Emergency flashers
ProCarManuals.com
Page 63 of 226
57
To adjust the brightness of the instru-
ment panel lights, turn the knob.To turn on the interior light, slide the
switch.
With the switch in the DOORº position,
the light comes on when any of the side
doors are opened and goes out when they
are closed. On some models, the light re-
mains on for a certain time after all of the
side doors are closed.For easy access to the ignition switch,
the ignition switch light comes on
when any of the side doors are
opened.
The light remains on for a certain time af-
ter all of the side doors are closed.
Instrument panel light control Interior light Ignition switch light
ProCarManuals.com