Page 12 of 226
Part 1Keys
7
OPERATION OF
INSTRUMENTS AND
CONTROLSÐ
Chapter 1-2
Keys and Doors
�Keys
�Side doors
�Power windows
�Trunk lid
�Back door
�Hood
�Fuel tank cap
�Electric moon roof
The master key works in every lock.
The subkey will not work in the trunk
and glovebox.
To protect things locked in the trunk or
glvebox when you have your vehicle
parked, leave the subkey with the atten-
dant.
Since the side doors, back door and trunk
lid can be locked without a key, you should
always carry a spare master key in case
you accidentally lock your keys inside the
vehicle.Keep the key number plate in a safe
place such as your wallet, not in the
vehicle.
If you should lose your keys or if you need
additional keys, duplicates can be made
by a Toyota dealer using the key number.
You should also put a copy of the key
number with your important papers.
ProCarManuals.com
Page 54 of 226
49 To comply with Canada Motor Vehicle
Safety Standards, vehicles sold in Cana-
da are provided with a bracket set in the
glovebox, designed for use with any of the
3 anchor locations shown in the illustra-
tion.
WagonÐOn the rear trim
a. Remove the rear trim and unplug the
connector of luggage compartment light.
b. Using the illustration as a guide, make
hole on the center of the cross mark in the
trim. Connect the connector of the lug-
gage compartment light and install the
trim.c. Insert a 15 mm (0.6 in.) spacer and
tighten down the anchor bracket for your
child restraint system with a bolt. Torque
the bolt to 16.5Ð24.7 NVm (1.68Ð2.52
kgfVm, 12.2Ð18.2 ftVlbf).
To comply with Canada Motor Vehicle
Safety Standards, vehicles sold in Cana-
da are provided with a bracket set in the
glovebox, designed for use with any of the
3 anchor locations shown in the illustra-
tion.
ProCarManuals.com
Page 129 of 226

Part 1Cigarette lighter and ashtray Clock
123
OPERATION OF
INSTRUMENTS
AND CONTROLSÐ
Chapter 1-8
Other equipment
�Clock
�Cigarette lighter and ashtray
�Glovebox
�Miscellany holder
�Cup holder
�Luggage cover
�Parcel straps
�Floor mat
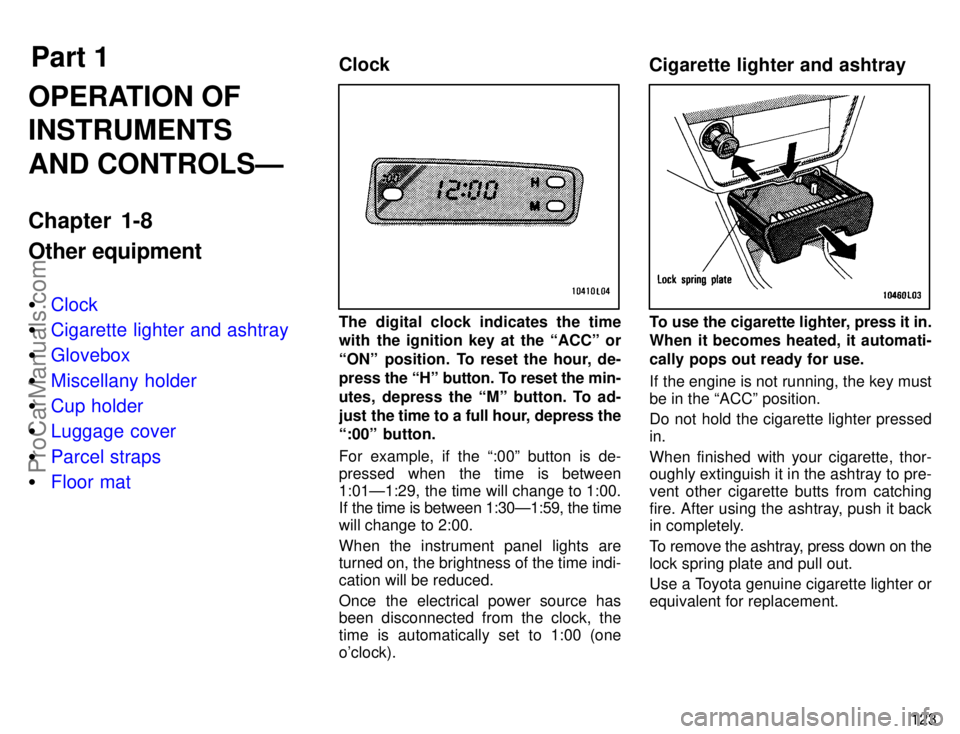
The digital clock indicates the time
with the ignition key at the ACCº or
ONº position. To reset the hour, de-
press the Hº button. To reset the min-
utes, depress the Mº button. To ad-
just the time to a full hour, depress the
:00º button.
For example, if the :00º button is de-
pressed when the time is between
1:01Ð1:29, the time will change to 1:00.
If the time is between 1:30Ð1:59, the time
will change to 2:00.
When the instrument panel lights are
turned on, the brightness of the time indi-
cation will be reduced.
Once the electrical power source has
been disconnected from the clock, the
time is automatically set to 1:00 (one
o'clock).To use the cigarette lighter, press it in.
When it becomes heated, it automati-
cally pops out ready for use.
If the engine is not running, the key must
be in the ACCº position.
Do not hold the cigarette lighter pressed
in.
When finished with your cigarette, thor-
oughly extinguish it in the ashtray to pre-
vent other cigarette butts from catching
fire. After using the ashtray, push it back
in completely.
To remove the ashtray, press down on the
lock spring plate and pull out.
Use a Toyota genuine cigarette lighter or
equivalent for replacement.
ProCarManuals.com
Page 130 of 226
124
To reduce the chance of injury in
case of an accident or sudden stop
while driving, always push the ash-
tray back in completely after using.CAUTION
!
To open the glovebox door, pull the le-
ver. To lock the glovebox door, insert
the master key and turn it clockwise.
With the instrument panel lights on, the
glovebox light will come on when the door
is open.
To reduce the chance of injury in
case of an accident or a sudden
stop, always keep the glovebox
door closed while driving.CAUTION
!
To open the holder, pull the lever as
shown above.
To reduce the chance of injury in
case of an accident or a sudden
stop, always keep the miscellany
holder closed while driving.CAUTION
! Miscellany holder Glovebox
ProCarManuals.com
Page 195 of 226

189 Clean all dirt from outside of the reservoir
tank and look at the fluid level. If the fluid
is cold, the level should be in the COLDº
range. Similarly, if it is hot, the fluid level
should be in the HOTº range. If the level
is at the low side of either range, add auto-
matic transmission fluid DEXRON
[-II or
-III to bring the level within the range.
To remove the filler cap, turn it counter-
clockwise and lift up. To reinstall it, turn it
clockwise. After replacing the filler cap,
visually check the steering box case, vane
pump and hose connections for leaks or
damage.
CAUTION!
The reservoir tank may be hot so be
careful not to burn yourself.
NOTICE
Avoid overfilling, or the power
steering could be damaged.
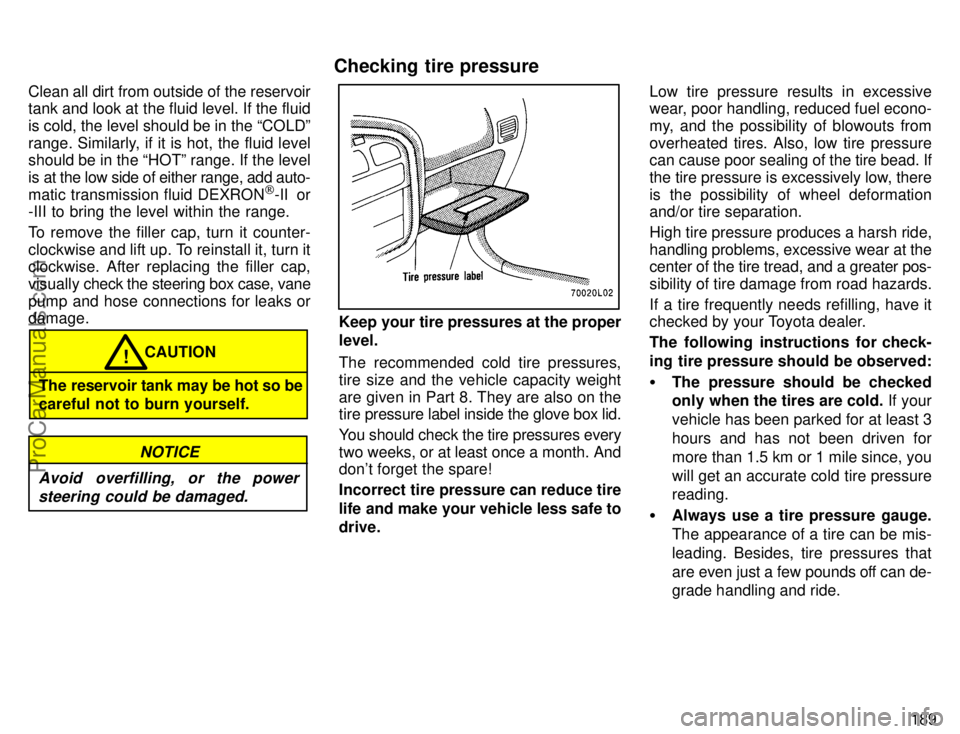
Keep your tire pressures at the proper
level.
The recommended cold tire pressures,
tire size and the vehicle capacity weight
are given in Part 8. They are also on the
tire pressure label inside the glove box lid.
You should check the tire pressures every
two weeks, or at least once a month. And
don't forget the spare!
Incorrect tire pressure can reduce tire
life and make your vehicle less safe to
drive.Low tire pressure results in excessive
wear, poor handling, reduced fuel econo-
my, and the possibility of blowouts from
overheated tires. Also, low tire pressure
can cause poor sealing of the tire bead. If
the tire pressure is excessively low, there
is the possibility of wheel deformation
and/or tire separation.
High tire pressure produces a harsh ride,
handling problems, excessive wear at the
center of the tire tread, and a greater pos-
sibility of tire damage from road hazards.
If a tire frequently needs refilling, have it
checked by your Toyota dealer.
The following instructions for check-
ing tire pressure should be observed:
�The pressure should be checked
only when the tires are cold. If your
vehicle has been parked for at least 3
hours and has not been driven for
more than 1.5 km or 1 mile since, you
will get an accurate cold tire pressure
reading.
�Always use a tire pressure gauge.
The appearance of a tire can be mis-
leading. Besides, tire pressures that
are even just a few pounds off can de-
grade handling and ride.
Checking tire pressure
ProCarManuals.com
Page 207 of 226
201
Light BulbsBulb No.WType
Stop and tail lights115727/
8C
Back-up lights115627C
License plate lights1685D
High mounted stop
light92118D
Interior lightÐ10E
Personal lightÐ10C
Vanity lightsÐ3E
Glovebox lightÐ1.2D
Door courtesy lights3.8D
Trunk lightÐ3.8E
Luggage compartment
lightÐ5E
A: HB4 halogen bulbs
B: HB3 halogen bulbs
C: Single end bulbs
D: Wedge base bulbs
E: Double end bulbs
1. Open the hood. Unplug the connec-
tor while depressing the lock release.
If the connector is tight, wiggle it.2. Turn the bulb and remove it. Install
the new bulb and install the connector.
To install a bulb, align the tabs of the bulb
socket with the cutouts of the mounting
hole.
Aiming is not necessary after replacing
the bulb. When aiming adjustment is nec-
essary, contact your Toyota dealer.
ÐHeadlights
ProCarManuals.com