Page 6 of 226
Part 1
1
OPERATION OF
INSTRUMENTS
AND CONTROLSÐ
Chapter 1-1
Overview of instruments
and controls
�Instrument panel overview
�Instrument cluster overview
�Indicator symbols on the
instrument panel
ProCarManuals.com
Page 7 of 226
2
Instrument panel overview
ProCarManuals.com
Page 10 of 226
Indicator symbols on the instrument panel
5
Brake system warning light*1
Seat belt reminder light*1
Discharge warning light*1
Malfunction indicator lamp*1
Low fuel level warning light*1
Low oil pressure warning light*1
Anit-lock brake system warning light*1
Open door warning light*1
Rear light failure warning light*1
SRS airbag warning light*1
Turn signal indicator lights
Headlight high beam indicator light
Overdrive-of f indicator light
PWRº mode indicator light
Cruise control indicator light*
2
Automatic transmission indicator lights
*
1: For details, see Service reminder indicators and warn-
ing buzzersº in Chapter 1-5.
*
2: If this light flashes, see Cruise controlº in Chapter 1-6.
ProCarManuals.com
Page 24 of 226

Part 1SeatsFront seatsÐ
ÐSeat adjustment precautions
19
OPERATION OF
INSTRUMENTS AND
CONTROLSÐ
Chapter 1-3
Seats, Seat belts,
Steering wheel
and Mirrors
�Seats
�Front seats
�Rear seats
�Head restraints
�Seat belts
�SRS airbags
�Child restraint
�Tilt steering wheel
�Outside rear view mirrors
�Anti-glare inside rear view
mirror
�Vanity mirrors
While the vehicle is being driven, all ve-
hicle occupants should have the seatback
upright, sit well back in the seat and prop-
erly wear the seat belts provided.
CAUTION!
�Do not drive with the vehicle occu-
pants not properly seated, such as
sitting on top of a folded-down
seatback, or in the luggage
compartment. Persons not proper-
ly seated and restrained by seat
belts can be severely injured in the
event of emergency braking or a
collision.
�During driving, do not let passen-
gers stand up or move around be-
tween seats. Balance can be un-
steady and severe injuries can oc-
cur in the event of emergency brak-
ing or a collision.Adjust the driver's seat so that the foot
pedals, steering wheel and instrument
panel controls are within easy reach of the
driver.
CAUTION!
�Adjustments should not be made
while the vehicle is moving, as the
seat may unexpectedly move and
cause the driver to lose control of
the vehicle.
�When adjusting the seat, be care-
ful not to hit the seat against a pas-
senger or luggage.
�After adjusting the seat position,
try sliding it forward and backward
to make sure it is locked in posi-
tion.
�After adjusting the seatback, exert
body pressure to make sure it is
locked in position.
�Do not put objects under the seats
as they may interfere with the seat-
lock mechanism or unexpectedly
push up the seat position adjust-
ing lever; the seat may suddenly
move, causing the driver to lose
control of the vehicle.
�While adjusting the seat, do not
put your hands under the seat or
near the moving parts. You may
jam your hands or fingers.
ProCarManuals.com
Page 44 of 226
39
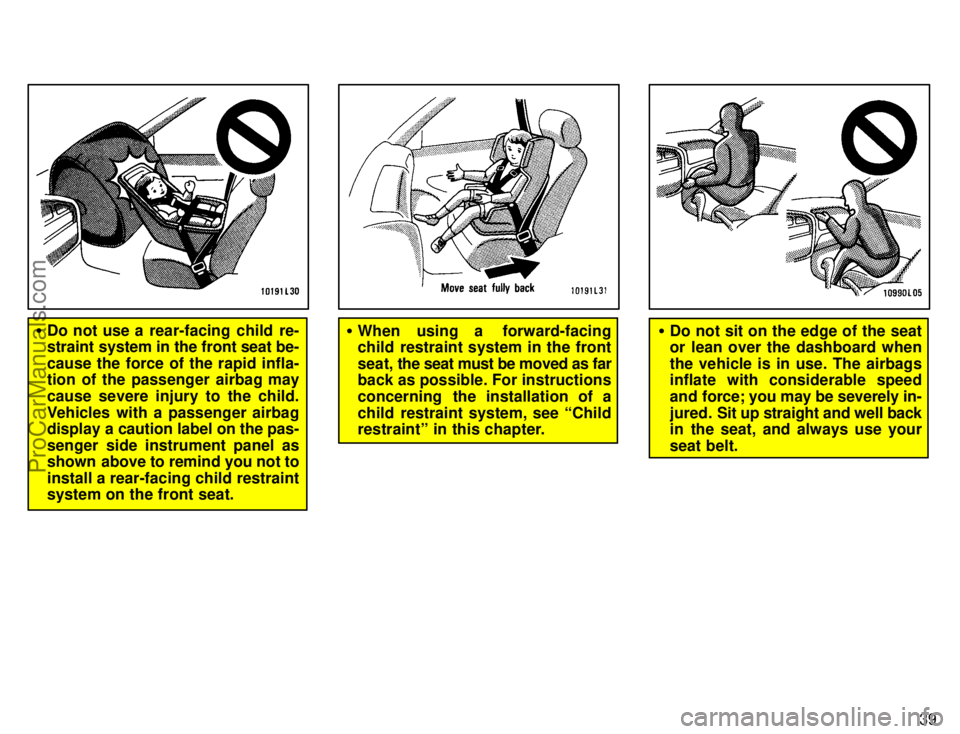
�Do not use a rear-facing child re-
straint system in the front seat be-
cause the force of the rapid infla-
tion of the passenger airbag may
cause severe injury to the child.
Vehicles with a passenger airbag
display a caution label on the pas-
senger side instrument panel as
shown above to remind you not to
install a rear-facing child restraint
system on the front seat.�When using a forward-facing
child restraint system in the front
seat, the seat must be moved as far
back as possible. For instructions
concerning the installation of a
child restraint system, see Child
restraintº in this chapter.�Do not sit on the edge of the seat
or lean over the dashboard when
the vehicle is in use. The airbags
inflate with considerable speed
and force; you may be severely in-
jured. Sit up straight and well back
in the seat, and always use your
seat belt.
ProCarManuals.com
Page 55 of 226
50
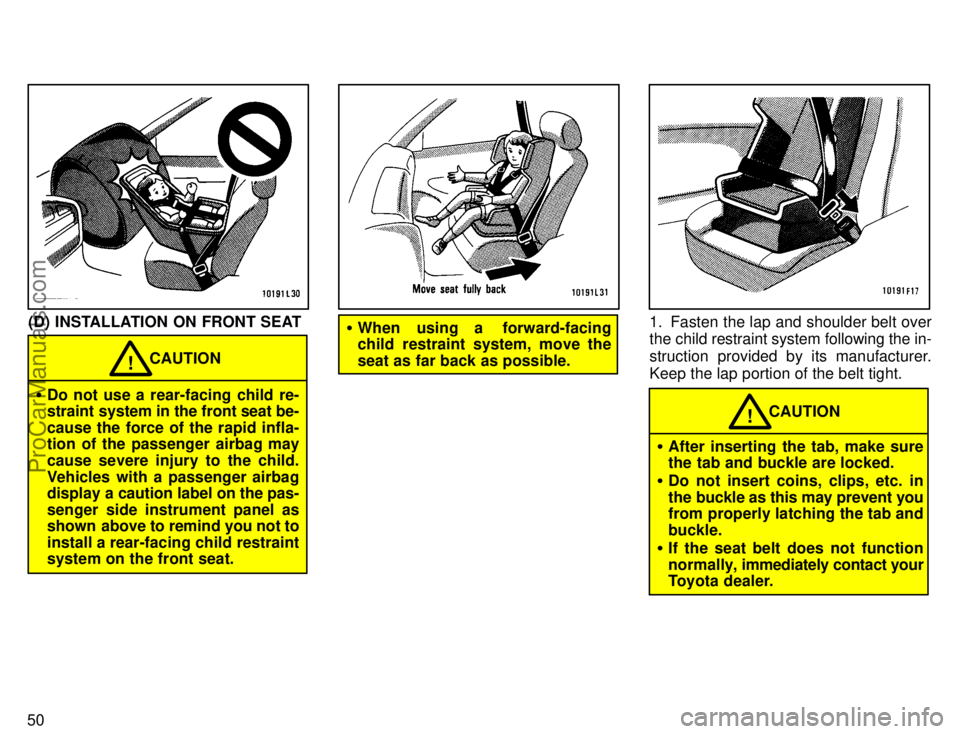
(D) INSTALLATION ON FRONT SEAT
�Do not use a rear-facing child re-
straint system in the front seat be-
cause the force of the rapid infla-
tion of the passenger airbag may
cause severe injury to the child.
Vehicles with a passenger airbag
display a caution label on the pas-
senger side instrument panel as
shown above to remind you not to
install a rear-facing child restraint
system on the front seat.
CAUTION!
�When using a forward-facing
child restraint system, move the
seat as far back as possible.1. Fasten the lap and shoulder belt over
the child restraint system following the in-
struction provided by its manufacturer.
Keep the lap portion of the belt tight.
CAUTION!
�After inserting the tab, make sure
the tab and buckle are locked.
�Do not insert coins, clips, etc. in
the buckle as this may prevent you
from properly latching the tab and
buckle.
�If the seat belt does not function
normally, immediately contact your
Toyota dealer.
ProCarManuals.com
Page 61 of 226

Part 1Headlights and turn signals
55
OPERATION OF
INSTRUMENTS AND
CONTROLSÐ
Chapter 1-4
Lights, Wipers and Defogger
�Headlights and turn signals
�Emergency flashers
�Instrument panel light control
�Interior light
�Ignition switch light
�Personal light
�Luggage compartment light
�Windshield wipers and washer
�Rear window wipers and washer
�Rear window defogger
To turn on the lights on, twist the knob
on end of the lever.
Daytime running light system (Canada
only)ÐThe headlights turn on when the
parking brake is released with the engine
started, even with the light switch in the
OFFº position. They will not go off until
the ignition switch is turned off.
To turn on the other exterior lights and in-
strument panel lights, twist the knob to the
first clickstop.
Under the daytime running light system,
the headlights turn on at reduced intensi-
ty. Twist the knob to the second clickstop
to turn to full intensity for driving at night.FIRST CLICKSTOP: Only the parking,
tail, license plate, side marker and instru-
ment panel lights turn on.
SECOND CLICKSTOP: The headlights
also turn on.
The lights automatically turn off when the
driver's door is opened with the ignition
turned off. To turn them on again, turn the
key to the ONº position or actuate the
headlight switch. If you are going to park
for over one week, make sure the head-
light switch is off.NOTICE
To prevent the battery from being
discharged, do not leave the lights
on for a long period when the
engine is not running.
ProCarManuals.com
Page 62 of 226

56
For high beam, push the lever away
from you. Pull it toward you for low
beam. For the headlight flasher, pull it
further back.
A blue light in the instrument panel indi-
cates high beam is on.
The headlight flasher works even when
the headlight switch is off.For signaling turns, move the lever up
or down in the conventional manner.
The key must be in the ONº position.
The turn signal is self-cancelling after a
turn, but after a lane change, you may
have to cancel it by hand. You can signal
a lane change by moving the turn signal
lever partway and holding it there. If the
green light in the instrument panel flashes
faster than normal, it indicates that the
front or rear turn signal bulb has burned
out.To turn on the emergency flashers,
push the switch.
All the turn signal lights will flash.
Turn on the emergency flashers to warn
other drivers if your vehicle must be
stopped where it might be a traffic hazard.
Always pull as far off the road as possible.
The turn signal light switch will not work
when the emergency flashers are operat-
ing.
NOTICE
To prevent the battery from being
discharged, do not leave the switch
on longer than necessary when the
engine is not running.
Emergency flashers
ProCarManuals.com