1996 NISSAN QUEST ECO mode
[x] Cancel search: ECO modePage 1 of 235

Foreword
Welcome to the growing family of new NISSAN owners. This vehicle is delivered to you with confidence. It was produced using the latest
techniques and strict quality control.
This manual was prepared to help you understand the operation and maintenance of your vehicle so that you may enjoy many miles of
driving pleasure. Please read through this manual before operating your vehicle.
A separate ``Warranty Information Booklet'' explains details about the warranties covering your vehicle.
Your NISSAN dealer knows your vehicle best. When you require any service or have any questions, he will be glad to assist you with the
extensive resources available to him.
IMPORTANT SAFETY INFORMATION
REMINDERS FOR SAFETY!
Follow these five important driving rules to help ensure a safe and
complete trip for you and your passengers:
cNEVER drive under the influence of alcohol or drugs.
cALWAYS observe posted speed limits and never drive too
fast for conditions.
cALWAYS use your seat belts and appropriate child restraint
systems.
cALWAYS provide information about the proper use of ve-
hicle safety features to all occupants of the vehicle.
cALWAYS review this Owner's Manual for important safety
information.
1995 NISSAN NORTH AMERICA, INC.
TORRANCE, CALIFORNIA
All rights reserved. No part of this Owner's Manual may be reproduced
or stored in a retrieval system, or transmitted in any form, or by any
means, electronic, mechanical, photocopying, recording or otherwise,
without the prior written permission of Nissan North America, Inc.
NOTES ON THE INFORMATION CONTAINED IN
THIS OWNER'S MANUAL
This owner's manual contains descriptions and operating
instructions for all systems, features and optional equipment
that might appear in any model of this vehicle built for any
destination in North America, including the continental United
States, Canada and Hawaii. Therefore, you may very well find
information in this manual that does not apply to your vehicle.
MODIFICATION OF YOUR VEHICLE
This vehicle should not be modified. Modification could affect its
performance, safety or durability, and may even violate govern-
mental regulations. In addition, damage or performance prob-
lems resulting from modifications may not be covered under
NISSAN warranties.
All information, specifications and illustrations in this manual are
those in effect at the time of printing. NISSAN reserves the right to
change specifications or design without notice and without obligation.
The inside pages of this manual contain
a minimum of 50% recycled fibers,
including 10% post-consumer fibers.
ZX
Page 2 of 235

Welcome To The World Of NISSAN
Your new Nissan is the result of our dedication to
produce the finest in safe, reliable and economi-
cal transportation. Your vehicle is the product of
a successful worldwide company that manufac-
tures cars and trucks in over 20 countries and
distributes them in 150 nations.
Nissan vehicles are designed and manufactured
by Nissan Motor Co., Ltd. which was founded in
Tokyo, Japan in 1933, and Nissan affiliates
worldwide, collectively growing to become the
fourth largest automaker in the world. In addition
to cars and trucks, Nissan also makes textile
machinery, forklift trucks, marine engines, boats
and other products.
Nissan has made a substantial and growing
investment in North America, starting with the
opening of Nissan Motor Corporation U.S.A. in
1960, continuing with the production of some
cars and trucks at one of the world's mostmodern manufacturing facilities in Smyrna, Ten-
nessee, vehicle styling at Nissan Design Interna-
tional in San Diego, California, and engineering
at Nissan Research and Development in Farm-
ington Hills, Michigan.
Nissan Motor Corporation U.S.A. and its dealers
employ about 50,000 Americans.
Nissan is also a substantial contributor to the
Canadian economy. Nissan Canada Inc. and its
200 dealers and suppliers employ approximately
4,000 people. These include company employ-
ees and the staffs of Nissan dealers all across
Canada. In addition, many Canadians work for
companies that supply Nissan and Nissan deal-
ers with materials and services ranging from the
operation of port facilities and transportation ser-
vices, to the supply of lubricants, parts and
accessories.Nissan pioneered the use of electronics and
computers in automobiles, and has led the indus-
try in improving both performance and fuel effi-
ciency through new engine designs and the use
of synthetic materials to reduce vehicle weight.
The company has also developed ways to build
quality into its vehicles at each stage of the
production process, both through extensive use
of automation and Ð most importantly Ð
through an awareness thatpeopleare the cen-
tral element in quality control.
From the time the parts arrived from our suppli-
ers until you took delivery of your new Nissan,
dozens of checks were made to ensure that only
the best job was being done in producing and
delivering your vehicle. Nissan also takes great
care to ensure that when you take your Nissan to
your dealer for maintenance, the service techni-
cian will perform his work according to the quality
standards that have been established by the
factory.
Safety has also been built into your Nissan. As
you know, seat belts are an integral part of the
safety systems that will help protect you and your
passengers in the event of a sudden stop or an
accident. We urge you to use the belts every time
you drive the vehicle.
The Nissan story of growth and achievement
reflects our major goal: to provide you, our
customer, with a vehicle that is built with quality
and craftsmanship Ð a product that we can be
proud to build and you can be proud to own.
AFW0001
The inside pages of this manual contain
a minimum of 50% recycled fibers,
including 10% post-consumer fibers.
ZX
Page 13 of 235

WARNING
cIf you judge it to be safe, drive care-
fully to the nearest service station
for repairs. Otherwise, have your ve-
hicle towed because driving it could
be dangerous.
cPressing the brake pedal with the
engine stopped and/or low brake
fluid level may increase your stop-
ping distance and braking will re-
quire greater pedal effort as well as
pedal travel.
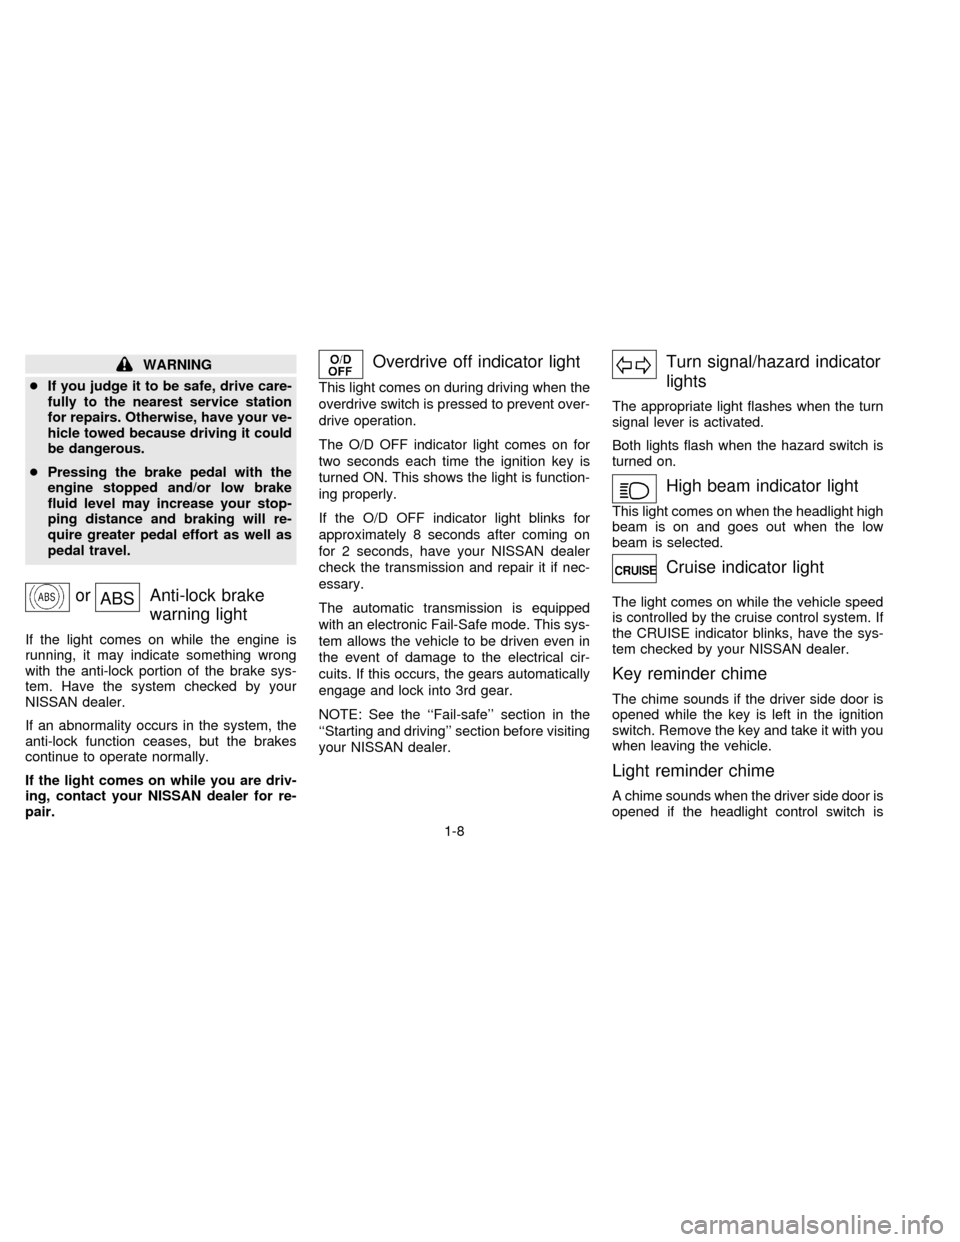
orABSAnti-lock brake
warning light
If the light comes on while the engine is
running, it may indicate something wrong
with the anti-lock portion of the brake sys-
tem. Have the system checked by your
NISSAN dealer.
If an abnormality occurs in the system, the
anti-lock function ceases, but the brakes
continue to operate normally.
If the light comes on while you are driv-
ing, contact your NISSAN dealer for re-
pair.
Overdrive off indicator light
This light comes on during driving when the
overdrive switch is pressed to prevent over-
drive operation.
The O/D OFF indicator light comes on for
two seconds each time the ignition key is
turned ON. This shows the light is function-
ing properly.
If the O/D OFF indicator light blinks for
approximately 8 seconds after coming on
for 2 seconds, have your NISSAN dealer
check the transmission and repair it if nec-
essary.
The automatic transmission is equipped
with an electronic Fail-Safe mode. This sys-
tem allows the vehicle to be driven even in
the event of damage to the electrical cir-
cuits. If this occurs, the gears automatically
engage and lock into 3rd gear.
NOTE: See the ``Fail-safe'' section in the
``Starting and driving'' section before visiting
your NISSAN dealer.
Turn signal/hazard indicator
lights
The appropriate light flashes when the turn
signal lever is activated.
Both lights flash when the hazard switch is
turned on.
High beam indicator light
This light comes on when the headlight high
beam is on and goes out when the low
beam is selected.
Cruise indicator light
The light comes on while the vehicle speed
is controlled by the cruise control system. If
the CRUISE indicator blinks, have the sys-
tem checked by your NISSAN dealer.
Key reminder chime
The chime sounds if the driver side door is
opened while the key is left in the ignition
switch. Remove the key and take it with you
when leaving the vehicle.
Light reminder chime
A chime sounds when the driver side door is
opened if the headlight control switch is
1-8
ZX
Page 27 of 235

The digital clock displays time when the
ignition key is in ACC or ON.
If the power supply is disconnected, the
clock does not indicate the correct time.
Readjust the time.How to view the clock mode
Push the CLK button to alternate the radio
frequency and the time in the display. In the
clock mode, press any radio function to
automatically display the radio frequency forapproximately ten seconds before changing
back to the clock mode.
How to set the clock
1. Turn the radio on. (Time is displayed
while the radio is off).
2. Push and hold the CLK button; then,
press the SEEK button either
orto adjust the hours, and press the
TUNE button eitherorto
adjust the minutes.
NOTE: The clock displays 12-hour time with
no A.M./P.M. indications.
AIC0580
CLOCK
1-22
ZX
Page 38 of 235

approved by the party responsible for
compliance could void the user's author-
ity to operate the device.
Illuminated entry system
All models
The interior lights, the cargo light, the step-
well lights near the sliding door and on the
front doors, and the footwell lights near the
driver's and front passenger's feet illumi-
nate when the front and sliding doors are
opened. These lights gradually dim to off
within 30 seconds or turn off immediately
when the key is turned to ON.
Battery saver
If the vehicle doors are not fully closed and
the interior lights remain illuminated, they
eventually turn off automatically to prevent
the battery from becoming discharged.
Lights that illuminate when the front doors
and/or the sliding door are open turn off
after approximately 30 minutes. Lights that
illuminate when the back door is open turn
off after approximately 60 minutes.
If the personal reading lamp is left on when
the key is removed from the ignition, it turns
off automatically in 30 minutes.
2-9
ZX
Page 89 of 235

INSTALLATION AT SECOND
AND THIRD ROW OUTBOARD
POSITIONS
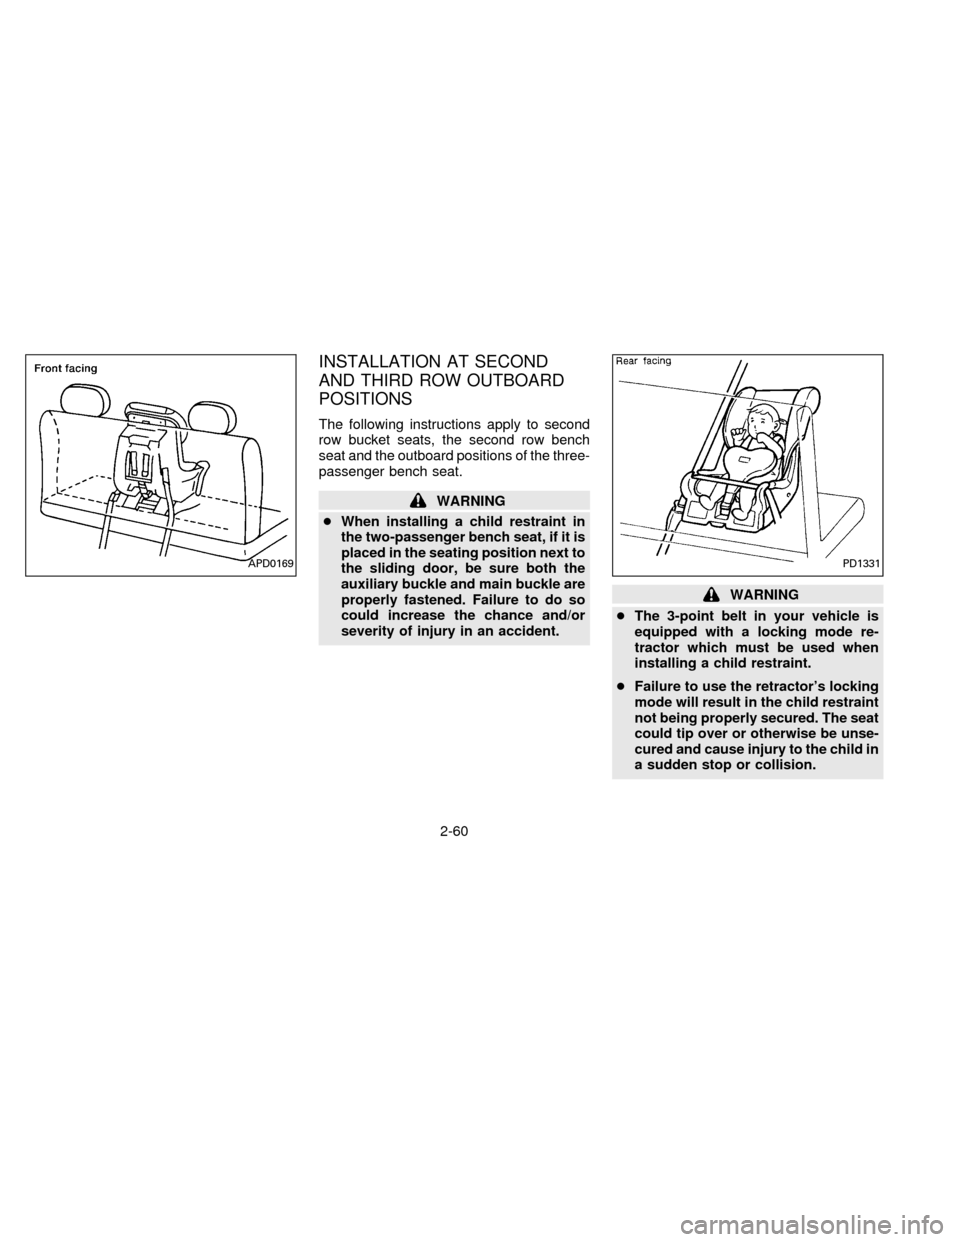
The following instructions apply to second
row bucket seats, the second row bench
seat and the outboard positions of the three-
passenger bench seat.
WARNING
cWhen installing a child restraint in
the two-passenger bench seat, if it is
placed in the seating position next to
the sliding door, be sure both the
auxiliary buckle and main buckle are
properly fastened. Failure to do so
could increase the chance and/or
severity of injury in an accident.
WARNING
cThe 3-point belt in your vehicle is
equipped with a locking mode re-
tractor which must be used when
installing a child restraint.
cFailure to use the retractor's locking
mode will result in the child restraint
not being properly secured. The seat
could tip over or otherwise be unse-
cured and cause injury to the child in
a sudden stop or collision.
PD1331APD0169
2-60
ZX
Page 92 of 235

INSTALLATION ON SECOND
ROW BENCH OR BUCKET SEAT
A child restraint with a top tether strap may
be placed on the second row bench or
bucket seats. Once the child restraint is
properly secured to the seat (see ``Installa-
tion at second and third row outboard posi-
tions'' earlier in this section), follow the
directions below to attach the tether strap to
the third row lap/shoulder belt tongue lo-
cated on the same side of the vehicle as the
child restraint.
Tethering to lap/shoulder belt
tongue
To attach a tether strap to a third row
lap/shoulder belt:
1. Route the tether strap under the head
restraint and between the head restraint
supports.
2. Hook the tether strap into the large hole
on the tongue of the third row
lap/shoulder belt (located near the upper
and lower rear corners of the vehicle).
3. Adjust the tether strap until the hook is
about one foot behind the seatback.4. Pull on the third row shoulder belt until all
of the belt is fully extended and a click is
heard. At this time, the belt retractor is in
the automatic locking mode (child re-
straint mode). (The lap/shoulder belt re-
verts back to emergency locking mode
when it is disconnected from the tether
strap and fully retracted.)
5. Allow the belt to retract. A clicking sound
is heard as the belt retracts. This indi-
cates that the retractor is in the automatic
locking mode. Tighten the tether strap
and remove any slack.
APD0832APD0833APD0834
2-63
ZX
Page 93 of 235

6. Before placing the child in the child re-
straint, use force to tilt the child restraint
from side to side, and tug it forward to
make sure it is securely held in place.
7. Check that the retractor is in the auto-
matic locking mode by trying to pull more
belt out of the retractor. If you cannot pull
any more belt webbing out of the retrac-
tor, the belt is in the automatic locking
mode.
8. Check to make sure the child restraint is
properly secured prior to each use. If the
belt is not locked, repeat steps 4 through
7.
WARNING
A third seat occupant should never sit
at a seating location where the lap/
shoulder belt is being used to attach
the child seat. Occupants should sit at
locations where seat belts can be used.
Remember always wear your seat belt.
INSTALLATION ON THREE-
PASSENGER BENCH SEAT IN
SECOND ROW
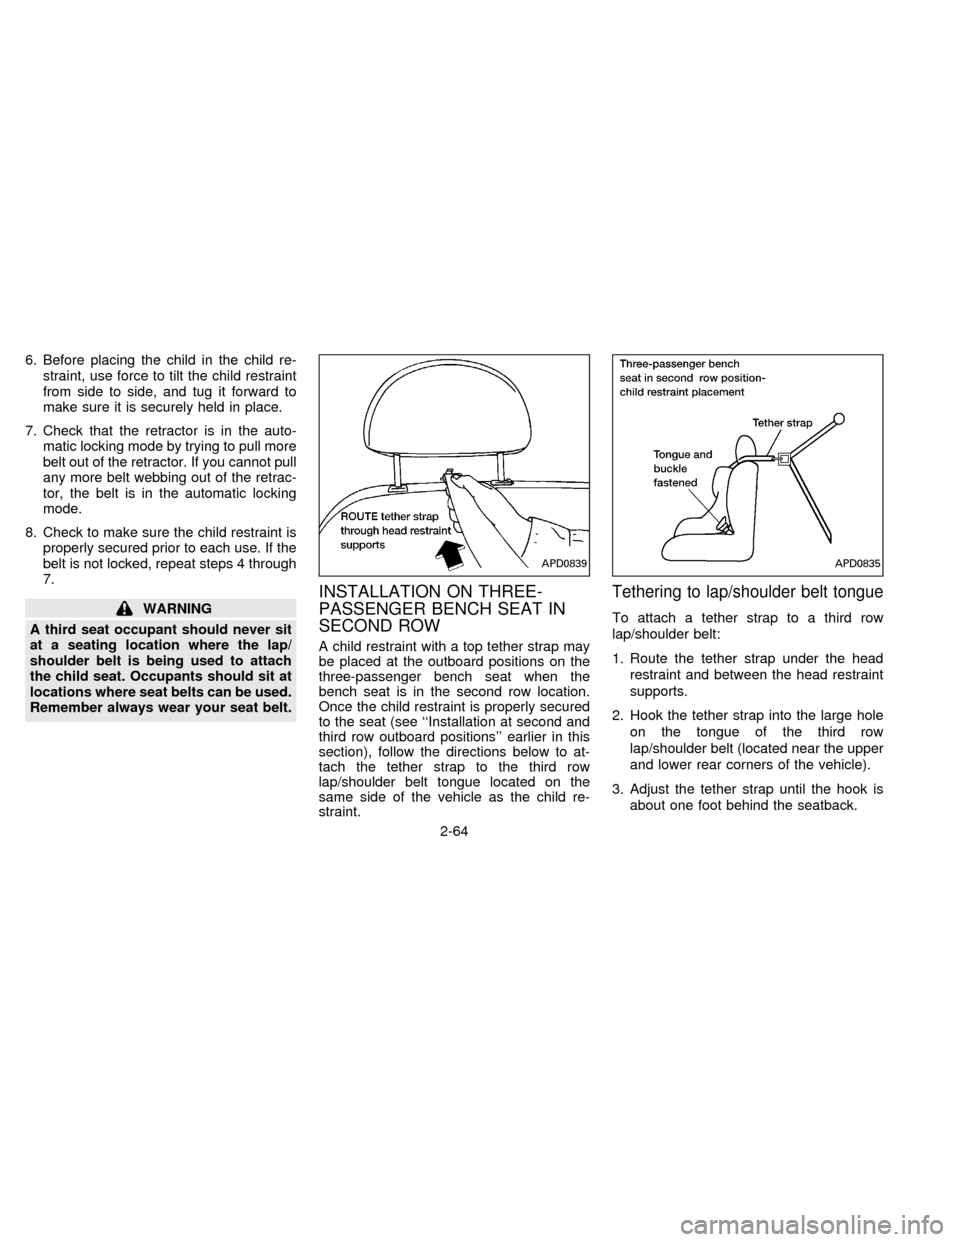
A child restraint with a top tether strap may
be placed at the outboard positions on the
three-passenger bench seat when the
bench seat is in the second row location.
Once the child restraint is properly secured
to the seat (see ``Installation at second and
third row outboard positions'' earlier in this
section), follow the directions below to at-
tach the tether strap to the third row
lap/shoulder belt tongue located on the
same side of the vehicle as the child re-
straint.
Tethering to lap/shoulder belt tongue
To attach a tether strap to a third row
lap/shoulder belt:
1. Route the tether strap under the head
restraint and between the head restraint
supports.
2. Hook the tether strap into the large hole
on the tongue of the third row
lap/shoulder belt (located near the upper
and lower rear corners of the vehicle).
3. Adjust the tether strap until the hook is
about one foot behind the seatback.
APD0839APD0835
2-64
ZX