1996 NISSAN QUEST engine
[x] Cancel search: enginePage 44 of 235

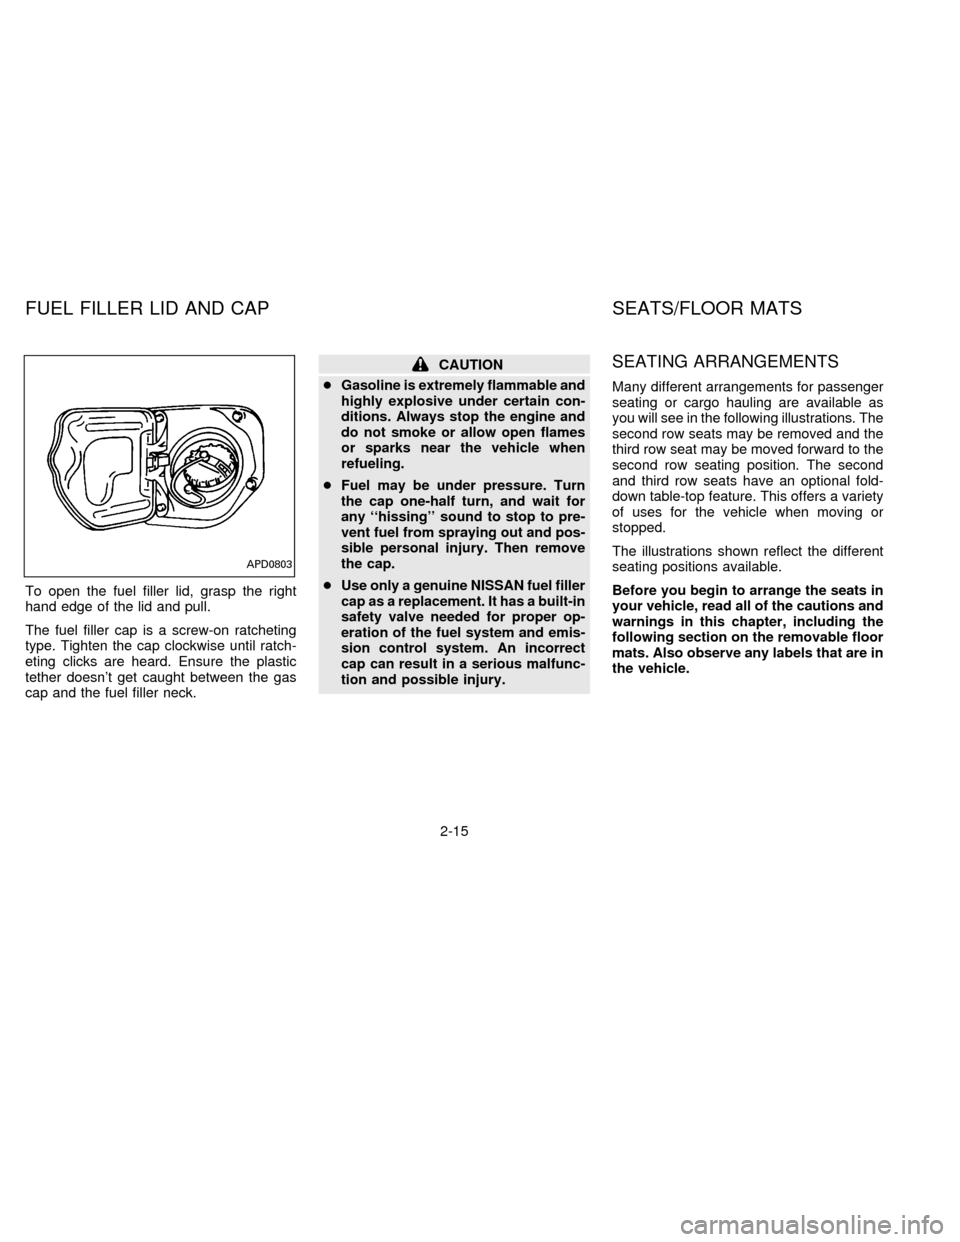
To open the fuel filler lid, grasp the right
hand edge of the lid and pull.
The fuel filler cap is a screw-on ratcheting
type. Tighten the cap clockwise until ratch-
eting clicks are heard. Ensure the plastic
tether doesn't get caught between the gas
cap and the fuel filler neck.
CAUTION
cGasoline is extremely flammable and
highly explosive under certain con-
ditions. Always stop the engine and
do not smoke or allow open flames
or sparks near the vehicle when
refueling.
cFuel may be under pressure. Turn
the cap one-half turn, and wait for
any ``hissing'' sound to stop to pre-
vent fuel from spraying out and pos-
sible personal injury. Then remove
the cap.
cUse only a genuine NISSAN fuel filler
cap as a replacement. It has a built-in
safety valve needed for proper op-
eration of the fuel system and emis-
sion control system. An incorrect
cap can result in a serious malfunc-
tion and possible injury.SEATING ARRANGEMENTS
Many different arrangements for passenger
seating or cargo hauling are available as
you will see in the following illustrations. The
second row seats may be removed and the
third row seat may be moved forward to the
second row seating position. The second
and third row seats have an optional fold-
down table-top feature. This offers a variety
of uses for the vehicle when moving or
stopped.
The illustrations shown reflect the different
seating positions available.
Before you begin to arrange the seats in
your vehicle, read all of the cautions and
warnings in this chapter, including the
following section on the removable floor
mats. Also observe any labels that are in
the vehicle.
APD0803
FUEL FILLER LID AND CAP SEATS/FLOOR MATS
2-15
ZX
Page 56 of 235

POWER SUPPORT FRONT SEAT
WARNING
cDo not adjust the driver's seat while
driving.
cThe seatback should not be reclined
any more than needed for comfort
when the vehicle is moving. Seat
belts are most effective when the
passenger sits well back and
straight up in the seat. If the seat is
reclined, the risk of sliding under the
lap belt and being injured is
increased.cDo not leave children unattended in-
side the vehicle. They may inadvert-
ently activate switches.
Operating tips
cThe motor has an auto-reset overload
protection circuit. If the motor stops dur-
ing operation, wait 30 seconds, then re-
activate the switch.
cDo not operate the power support seat
for a long period of time when the engine
is off. This discharges the battery.The passenger seat only has the power
slide switch and the power recliner switch.
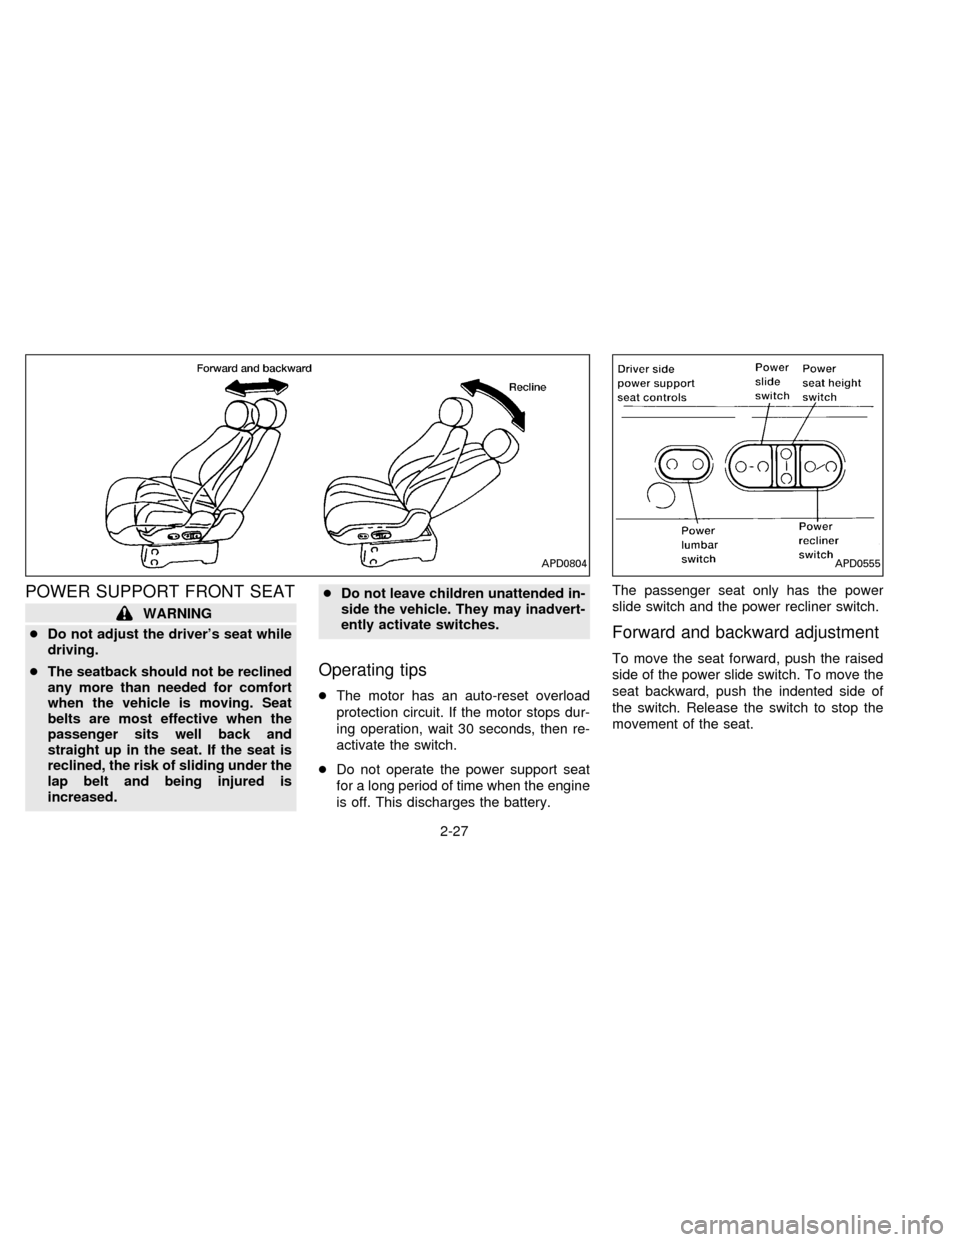
Forward and backward adjustment
To move the seat forward, push the raised
side of the power slide switch. To move the
seat backward, push the indented side of
the switch. Release the switch to stop the
movement of the seat.
APD0804APD0555
2-27
ZX
Page 108 of 235

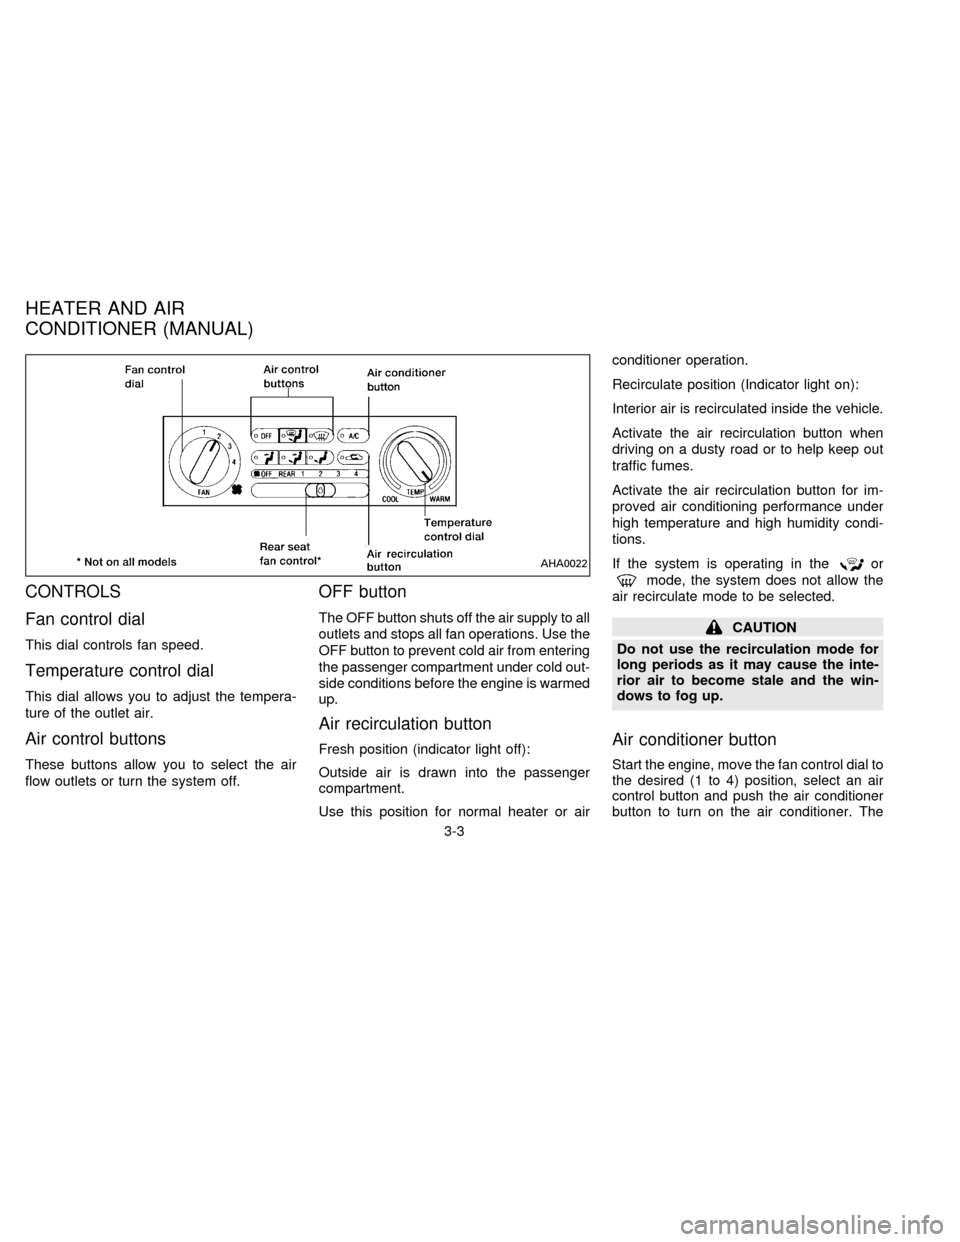
CONTROLS
Fan control dial
This dial controls fan speed.
Temperature control dial
This dial allows you to adjust the tempera-
ture of the outlet air.
Air control buttons
These buttons allow you to select the air
flow outlets or turn the system off.
OFF button
The OFF button shuts off the air supply to all
outlets and stops all fan operations. Use the
OFF button to prevent cold air from entering
the passenger compartment under cold out-
side conditions before the engine is warmed
up.
Air recirculation button
Fresh position (indicator light off):
Outside air is drawn into the passenger
compartment.
Use this position for normal heater or airconditioner operation.
Recirculate position (Indicator light on):
Interior air is recirculated inside the vehicle.
Activate the air recirculation button when
driving on a dusty road or to help keep out
traffic fumes.
Activate the air recirculation button for im-
proved air conditioning performance under
high temperature and high humidity condi-
tions.
If the system is operating in the
or
mode, the system does not allow the
air recirculate mode to be selected.
CAUTION
Do not use the recirculation mode for
long periods as it may cause the inte-
rior air to become stale and the win-
dows to fog up.
Air conditioner button
Start the engine, move the fan control dial to
the desired (1 to 4) position, select an air
control button and push the air conditioner
button to turn on the air conditioner. The
AHA0022
HEATER AND AIR
CONDITIONER (MANUAL)
3-3
ZX
Page 109 of 235

indicator light comes on when the air condi-
tioner is on. To stop the air conditioner,
push the button again; the indicator light
goes off.
The air conditioner cooling function op-
erates only when the engine is running.
WARNING
Positioning of the heating or air condi-
tioning controls should not be done
while driving, in order that full attention
may be given to the driving operation.
HEATER OPERATION
Heating
This mode is used to direct most of the hot
air to the floor outlets.
The air recirculation button light shouldnot
be on for normal heating.
1. Push the
button in.
2. Turn the fan control dial to select speed.
3. Move the temperature control dial to the
desired position.
Ventilation
This mode directs air to the side and center
vents.
1. Push the
button in.
2. Turn the fan control dial to select speed.
3. Move the temperature control dial to the
desired position.
NOTE: The recirculate position can be
used.
Defrosting or defogging
This mode is used to defrost/defog the
windows.
1. Push the
button in.
2. Turn the fan control dial to select speed.
3. Move the temperature control dial to the
desired position.
When the
button is pushed, the air
conditioner automatically turns on to de-
fog the windshield. The recirculated air
mode automatically turns off to reduce
window fogging.
When
is selected, the air condi-
tioner indicator light does not illuminateunless illuminated in the previously se-
lected mode. However, the air condi-
tioner operates to dehumidify if the out-
side temperature is more than 40ÉF
(4ÉC), whether or not the A/C button has
been pressed. Manual selection and illu-
mination of the A/C button does not
override the automatic dehumidifying
which occurs when
is selected.
Operating Tips
Clear snow and ice from the wiper
blades and air inlet in front of the wind-
shield. This improves defrosting/-
defogging operation.
Bi-level heating/cooling
The bi-level mode directs air to the side and
center vents and to the floor outlets.
Bi-level is also a cooling mode when high
sun load conditions are present with cool
temperatures.
With the A/C system in operation, this mode
can be used to cool the passenger's or
driver's feet under high temperature condi-
tions.
With the A/C system in operation under high
3-4
ZX
Page 110 of 235

temperature conditions, improved cooling
can be obtained by pushing the recirculation
button to the on position.
Push the air recirculation button to the off
position when heating is required.
1. Push the
button in.
2. Turn the fan control dial to the desired
position.
3. Move the temperature control dial to the
desired position.
Heating and demisting
This mode heats the interior and demists
the windshield.
1. Push the
button in.
2. Turn the fan control dial to the desired
position.
3. Move the temperature control dial to the
desired position.
When the
button is pushed, the air
recirculate mode automatically turns off.
Outside air is drawn into the passenger
compartment to improve the defogging
performance.
Operating tips
cClear snow and ice from the wiper
blades and air inlet in front of the
windshield. This improves heater op-
eration.
cTo defog the side windows more effec-
tively when in bi-level or ventilation
mode, close the center vent and direct
the side vents toward the side windows.
cA slight delay may be experienced when
changing air control buttons. This is not a
problem, it is only the system motors and
solenoids switching from one outlet to
another.
AIR CONDITIONER OPERATION
Start the engine, move the fan control dial to
the desired (1 to 4) position, and select an
air control button before pushing in the air
conditioner button to activate the air condi-
tioner. When the air conditioner is on, cool-
ing and dehumidifying functions are added
to the system operation.
The air conditioner cooling function op-
erates only when the engine is running.
NOTE: When switching air flow outlets, the
A/C system remains activated unless theA/C button is pressed again to turn it off.
The indicator light on the A/C button re-
mains illuminated unless the button is
pressed to turn it off, or the OFF air control
button is pressed.
Cooling
This mode is used to cool and dehumidify.
1. Push the
button in.
2. Turn the fan control dial to select speed.
3. Push the air conditioner button. The indi-
cator light comes on.
4. Move the temperature control dial to the
desired position.
cFor quick cooling when the outside tem-
perature is high, move the air recircula-
tion button to the on position. Be sure to
return the air recirculation button to the
off position for normal cooling.
cOpening the windows helps to vent heat
buildup when parked in the sun.
Dehumidified heating
This mode is used to heat and dehumidify.
1. Push the air recirculation button to the off
position.
3-5
ZX
Page 116 of 235

The Electronic Automatic Temperature
Control (EATC) is located at the center of
the instrument panel, above the radio. The
EATC operates only when the ignition is
turned to the ON position.
The EATC maintains the temperature you
select and controls the airflow for your com-
fort. It also allows you to override the auto-
matic operation with manual function selec-
tor buttons.
To turn the EATC on, push either the AU-
TOMATIC button or any of the five function
selector buttons:
,,,,or. To turn the EATC off,press the OFF button.
When you select AUTOMATIC the system
determines fan speed, airflow location and
discharge air temperature. When one of the
function selector buttons is pressed, your
selection determines airflow location only.
Fan speed and discharge air temperature
remain automatic. You can override fan
speed by rotating the vertical thumbwheel
located at the extreme right of the
control panel.
The display window indicates the status of
the system. It shows the selected tempera-
ture and AUTO when in the AUTOMATICmode. It also indicates manual (thumb-
wheel) control of the fan speed when a
is shown.
AUTOMATIC OPERATION
Push the AUTOMATIC button and select
the desired temperature. The selected tem-
perature and AUTO show in the display
window. The EATC heats or cools to
achieve the set temperature.
When in AUTOMATIC and weather condi-
tions require heat, air is sent to the floor.
However, a feature is included in the EATC
to prevent blowing cold air to the floor if the
engine coolant is not warm enough to allow
heating. In three or four minutes the fan
speed gradually increases and airflow
changes to the floor.
If unique conditions exist, such as window
fogging, the five override buttons allow spe-
cific airflow selection. The thumbwheel al-
lows you to adjust the fan speed to suit your
needs.
Temperature selection
TheTEMPbutton on the left
side of the control panel is for temperature
selection. The
side lowers the set
AHA0592
HEATER AND AIR CONDITIONER
(AUTOMATIC) (If so equipped)
3-11
ZX
Page 119 of 235

To operate the rear seat heater and air
conditioner, the engine must be running.
The rear seat heater and air conditioner can
be turned on and off from the front controls. If
the rear seat fan control lever on the front
panel is set to OFF, the rear heater and air
conditioner is turned off. If it is set to any of
the fan speed positions, air is discharged
from the rear vents at the corresponding
speed. When the rear seat fan control lever
on the front panel is set to REAR, the rear
seat passengers control their own fan speed.
The rear seat air conditioner only works when
the front seat air conditioner is operating.
CONTROLS
Fan control dial
This dial turns the fan on and off, and
controls fan speed.
Temperature control dial
This dial allows you to adjust the tempera-
ture of the outlet air. A slight delay in
temperature change may be experienced
while the climate control system warms up.
c
On vehicles equipped with Electronic Au-
tomatic Temperature Control (EATC), out-
let air temperature is automatically con-trolled when the rear seat fan control lever
on the front panel is set to 1, 2, 3, or 4.
Vent switch
The vent switch allows you to select air flow
from the upper or lower vents.
cA slight delay may be experienced when
changing the vent selection. This is not a
problem; the delay is only the system
motors and solenoids switching from one
outlet to another.
AHA0555
REAR SEAT HEATER AND AIR
CONDITIONER (If so equipped)
3-14
ZX
Page 120 of 235

To turn the radio on, turn the ignition key to
ACC or ON. If you listen to the radio with the
engine not running, turn the key to the ACC
position.
Radio reception is affected by station signal
strength, distance from radio transmitter,
buildings, bridges, mountains and other ex-
ternal influences. Intermittent changes in
reception quality normally are caused by
these external influences.
Clock
For information on setting the clock, refer to
the section ``Instruments and controls''.
AM-FM RADIO WITH CASSETTE
PLAYER
Radio operation
Push the VOL-PUSH ON knob to turn the
radio on. Push the VOL-PUSH ON knob
once more to turn the radio off.
Turn the knob to adjust the volume.
Inserting a cassette tape into the cassette
player while the radio is on turns the radio
off and turns the cassette player on.
RADIO
3-15
ZX