Page 169 of 183

1. Insert J-bolts into the U-shaped grooves.
2. Temporarily place the bracket in position
on the front bumper.Be sure to align
the curve of the bracket with the curve
in the bumper.cTo determine where to drill the hole, shift
the bracket to the right and use a felt-tip
pen to draw an arc along the right side of
each mounting hole. Next, shift the
bracket to the left and draw an arc along
the left side of each mounting hole.cRemove the bracket and connect the
arcs to form ovals. Mark the point in the
center of each oval. These are the ``pilot''
drilling locations.
3. Carefully drill two ``pilot'' holes using a
1/8 inch (3 mm) drill bit at the marked
locations.Be sure that the drill only
goes through the fascia, or damage to
the nut may occur.
cCheck to be sure that the holes are
aligned with the nuts located behind the
fascia. If you are satisfied that the holes
are properly placed, use a 5/16 inch (8
mm) drill bit to enlarge the holes. Use
care to only drill through the fascia.
4. Install the bracket. Install the license
plate with bolts that are no longer than
0.55 inch (14 mm). The bolts used to
fasten the license plate to the bracket are
not included in the attaching hardware
that comes with the bracket.
ATI0503
INSTALLING FRONT LICENSE
PLATE
9-12
ZX
Page 170 of 183

VEHICLE LOADING INFORMATION
WARNING
cIt is extremely dangerous to ride in a
cargo area inside of a vehicle. In a
collision, people riding in these ar-
eas are more likely to be seriously
injured or killed.
cDo not allow people to ride in any
area of your vehicle that is not
equipped with seats and seat belts.
c
Be sure everyone in your vehicle is in
a seat and using a seat belt properly.
Terms
It is important to familiarize yourself with the
following terms before loading your vehicle:
cCurb Weight (actual weight of your ve-
hicle) - vehicle weight including: standard
and optional equipment, fluids, emer-
gency tools, and spare tire assembly.
This weightdoes notinclude passen-
gers and cargo.
cGVW (Gross Vehicle Weight) - curb
weight plus the combined weight of pas-
sengers and cargo.cGVWR (Gross Vehicle Weight Rating) -
maximum total weight (load) limit speci-
fied for the vehicle.
cGAWR (Gross Axle Weight Rating) -
maximum weight (load) limit specified for
the front or rear axle.
Determining Vehicle Load Capacity
The load capacity of this vehicle is determined
by weight, not by available cargo space. For
example, a luggage rack, bike carrier, cartop
carrier or similar equipment does not increase
load carrying capacity of your vehicle.
To determine vehicle load capacity:
Vehicle weight can be determined by using
a commercial-grade scale, found at places
such as a truck stop, gravel quarry, grain
elevator, or a scrap metal recycling facility.
1)
Determine the curb weight of your vehicle.
2) Compare the curb weight amount to the
GVWR specified for your vehicle to de-
termine how much more weight your
vehicle can carry.
3) After loading (cargo and passengers),
re-weigh your vehicle to determine if
either GVWR or GAWR for your vehicle
is exceeded. If GVWR is exceeded, re-move cargo as necessary. If either the
front or rear GAWR is exceeded, shift the
load or remove cargo as necessary.
Loading Tips
cThe GVW must not exceed GVWR or
GAWR as specified on the FMVSS Cer-
tification Label.
cDo not load the front and rear axle to the
GAWR. Doing so will exceed the GVWR.
CAUTION
c
Properly secure all cargo to help pre-
vent it from sliding or shifting. In a
sudden stop or collision, unsecured
cargo could cause personal injury.
cDo not load your vehicle any heavier
than the GVWR or the maximum
front and rear GAWRs. If you do,
parts on your vehicle can break, or it
can change the way your vehicle
handles. This could result in loss of
control and cause personal injury.
cOverloading can shorten the life of
your vehicle. Failures caused by
overloading are not covered by your
warranty.
9-13
ZX
Page 171 of 183

Your new vehicle was designed to be used
primarily to carry passengers and cargo.
Remember that towing a trailer will place
additional loads on your vehicle's engine,
drive train, steering, braking and other sys-
tems.
Information on trailer towing ability and the
special equipment required should be ob-
tained from your NISSAN dealer. He can
obtain aNissan Trailer Towing Guidefor
you.
Maximum load limits
Maximum trailer loads:
Never allow the total trailer load to exceed
1,000 lb (454 kg). The total trailer load
equals trailer weight plus its cargo weight.
Towing loads greater than 1,000 lb (454 kg)
or using improper towing equipment could
adversely affect vehicle handling, braking
and performance.
WARNING
Vehicle damage and/or personal injury
resulting from improper towing proce-
dures is not covered by NISSAN warran-
ties. Information on trailer towing and
required towing equipment should be ob-
tained from dealers who specialize in pro-
viding trailers or other towing equipment.
Tongue load:
Keep the tongue load between 9 and 11%
of the total trailer load. If the tongue load
becomes excessive, rearrange cargo to al-
low for proper tongue load.
Maximum gross vehicle weight/maximum
gross axle weight:
The gross vehicle weight of the towing
vehicle must not exceed the gross vehicle
weight rating (GVWR) shown on the
F.M.V.S.S. certification label. The gross ve-
hicle weight equals the combined weight of
the unloaded vehicle, passengers, luggage,
TI1011MTI1012M
TRAILER TOWING
9-14
ZX
Page 172 of 183
 shown on
the F.M.V.S.S. certification labe")
hitch, trailer tongue load and any other
optional equipment. In addition, front or rear
gross axle weight must not exceed the
gross axle weight rating (GAWR) shown on
the F.M.V.S.S. certification label.
TOWING LOAD/SPECIFICATION CHART
UNIT: lb (kg)
MAXIMUM
TOWING LOAD1,000 (454)
MAXIMUM
TONGUE LOAD110 (49)
Trailer hitch
Choose a proper hitch for your vehicle and
trailer. Make sure the trailer hitch is securely
attached to the vehicle, to help avoid per-
sonal injury or property damage due to
sway caused by crosswinds, rough road
surfaces or passing trucks.
cDo not use axle-mounted hitches.
cThe hitch should not be attached to or
affect the operation of the impact-
absorbing bumper.
cDo not modify the vehicle exhaust sys-tem, brake system, etc. when the hitch is
installed.
cTo reduce the possibility of additional
damage if your vehicle is struck from the
rear, remove the hitch when not in use.
After the hitch is removed, seal the bolt
holes to prevent exhaust fumes, water or
dust from entering the passenger com-
partment.
cRegularly check that all hitch mounting
bolts are securely mounted.
Tire pressures
cWhen towing a trailer, inflate the vehicle
tires to the recommended cold tire pres-
sure indicated on the tire placard (located
on the inside of the center console lid).
cTrailer tire condition, size, load rating and
proper inflation pressure should be in
accordance with the trailer and tire
manufacturer's specifications.
Safety chain
Always use a suitable chain between your
vehicle and the trailer. The chain should be
crossed and should be attached to the hitch,
not to the vehicle bumper or axle. Be sure toleave enough slack in the chain to permit
turning corners.
Trailer lights
Trailer lights should comply with federal
and/ or local regulations. When wiring the
vehicle for towing, connect the stop and tail
light pickup into the vehicle electrical circuit.
Trailer brakes
If your trailer is equipped with a braking
system, make sure it conforms to Federal
and/or local regulations and that it is prop-
erly installed.
CAUTION
Never connect a trailer brake system
directly to the vehicle brake system.
Pre-towing tips
cBe certain your vehicle maintains a level
position when a loaded and/or unloaded
trailer is hitched. Do not drive the vehicle
if it has an abnormal nose-up or nose-
down condition; check for improper
tongue load, overload, worn suspension
9-15
ZX
Page 173 of 183

or other possible causes of either condi-
tion.
cAlways secure items in the trailer to
prevent load shifts while driving.
cBe certain your rear view mirrors conform
to all federal, state or local regulations. If
not, install any mirrors required for towing
before driving the vehicle.
Trailer towing tips
In order to gain skill and an understanding
of the vehicle's behavior, you should prac-
tice turning, stopping and backing up in an
area which is free from traffic. Steering
stability and braking performance will be
somewhat different than under normal driv-
ing conditions.
cAlways secure items in the trailer to
prevent load shift while driving.
cAvoid abrupt starts, acceleration or
stops.
cAvoid sharp turns or lane changes.
cAlways drive your vehicle at a moderate
speed.
cAlways block the wheels on both vehicle
and trailer when parking. Parking on a
slope is not recommended; however, ifyou must do so, and if your vehicle is
equipped with an automatic transmis-
sion, first block the wheels and apply the
parking brake, and then move the shift
lever into the ``P'' position. If you move
the shift lever to the ``P'' position before
blocking the wheels and applying the
parking brake, transmission damage
could occur.
cWhen going down a hill, shift into a lower
gear and use the engine braking effect.
When ascending a long grade, downshift
the transmission to a lower gear and
reduce speed to reduce chances of en-
gine overloading and/or overheating.
cIf the engine coolant rises to an ex-
tremely high temperature when the air
conditioning system is on, turn off the air
conditioner. Coolant heat can be addi-
tionally vented by opening the windows,
switching the fan control to high and
setting the temperature control to the
``HOT'' position.
cTrailer towing requires more fuel than
normal circumstances.
cAvoid towing a trailer for the first 500
miles (800 km).
cHave your vehicle serviced more oftenthan at intervals specified in the recom-
mended Maintenance Schedule.
cWhen making a turn, your trailer wheels
will be closer to the inside of the turn than
your vehicle wheels. To compensate for
this, make a larger than normal turning
radius during the turn.
cCrosswinds and rough roads will ad-
versely affect vehicle/trailer handling,
possibly causing vehicle sway. When
being passed by larger vehicles, be pre-
pared for possible changes in crosswinds
that could affect vehicle handling. If
swaying does occur, firmly grip the steer-
ing wheel, steer straight ahead, and im-
mediately (but gradually) reduce vehicle
speed. This combination will help stabi-
lize the vehicle. Never increase speed.
cBe careful when passing other vehicles.
Passing while towing a trailer requires
considerably more distance than normal
passing. Remember the length of the
trailer must also pass the other vehicle
before you can safely change lanes.
cTo maintain engine braking efficiency
and electrical charging performance, do
not use fifth gear (manual transmission)
9-16
ZX
Page 174 of 183
.
cAvoid holding the brake pedal down too
long or too frequently. This could cause
the brakes to overheat, resulting in re-
duced braking efficiency.
When towing a")
or overdrive (automatic transmission).
cAvoid holding the brake pedal down too
long or too frequently. This could cause
the brakes to overheat, resulting in re-
duced braking efficiency.
When towing a trailer, change the trans-
mission fluid more frequently.
See the Maintenance schedule.DOT (Department of Transportation) Qual-
ity Grades: All passenger car tires must
conform to federal safety requirements in
addition to these grades.
Treadwear
Treadwear grade is a comparative rating
based on tire wear rate when tested under
controlled conditions on specified govern-
ment test courses. For example, a tire
graded 150 would wear one and a half
(1-1/2) times as well on the government
course as a tire graded 100. However,
relative tire performance depends on actual
driving conditions, and may vary signifi-
cantly from the norm due to variations in
driving habits, service practices and differ-
ences in road characteristics and climate.
Traction A, B and C
Traction grades are A (the highest), B and
C. They represent a tire's ability to stop on
wet pavement as measured under con-
trolled conditions, on specified government
test surfaces of asphalt and concrete. A tire
marked with a C may have poor traction
performance.
WARNING
The traction grade assigned to your
vehicle tires is based on straight line
braking traction tests and does not
include cornering (turning) traction.
Temperature A, B and C
Temperature grades are A (the highest), B,
and C. They represent a tire's resistance to
heat build-up, and its ability to dissipate
heat when tested under controlled condi-
tions on a specified indoor laboratory test
wheel. Sustained high temperature can
cause tire material to degenerate, reducing
tire life. Excessive temperatures can lead to
sudden tire failure. Grade C corresponds to
a performance level which all passenger car
tires must meet under the Federal Motor
Vehicle Safety Standard No. 109. Grades A
and B represent higher levels of perfor-
mance on laboratory test wheels than the
minimum required by law.
WARNING
The temperature grade for this tire is
established for a tire that is properly
UNIFORM TIRE QUALITY
GRADING
9-17
ZX
Page 175 of 183

inflated and not overloaded. Excessive
speed, underinflation, or excessive
loading, either separately or in combi-
nation, can cause heat buildup and
possible tire failure problems.Your NISSAN vehicle is covered by the
following emission warranties:
For USA
1) Emission Defects Warranty
2) Emissions Performance Warranty
For Canada
Emission Control System Warranty
Details of these warranties may be found
with other vehicle warranties in your war-
ranty information booklet that comes with
your NISSAN vehicle. If you did not receive
a warranty booklet, or it has become lost,
you may obtain a replacement by writing to:
cNissan Motor Corporation, in USA
Consumer Affairs Department
P.O. Box 191
Gardena, CA 90247
cNissan Canada Inc.
P.O. Box 1709,
Station ``B''
Mississauga, Ontario,
L4Y 4H6If you believe that your vehicle has a defect
which could cause a crash or could cause
injury or death, you should immediately
inform the National Highway Traffic Safety
Administration (NHTSA) in addition to noti-
fying NISSAN.
If NHTSA receives similar complaints, it
may open an investigation, and if it finds
that a safety defect exists in a group of
vehicles, it may order a recall and remedy
campaign. However, NHTSA cannot be-
come involved in individual problems be-
tween you, your dealer, or NISSAN.
To contact NHTSA, you may either call the
Auto Safety Hotline toll-free at 1-800-424-
9393 (or 366-0123 in Washington, D.C.
area) or write to: NHTSA, U.S. Department
of Transportation, Washington, D.C. 20590.
You can also obtain other information about
motor vehicle safety from the Hotline.
You may notify NISSAN by contacting our
Consumer Affairs Department, toll-free, at
1-800-NISSAN-1.
In Hawaii call (808) 531-0231.
EMISSION CONTROL
SYSTEM WARRANTYREPORTING SAFETY
DEFECTS (USA)
9-18
ZX
Page 176 of 183

A Genuine Nissan Service Manual is the best
source of service and repair information for
your vehicle. Filled with wiring diagrams, illus-
trations and step-by-step diagnostic and ad-
justment procedures, this manual is the same
one used by the factory trained technicians
working at your Nissan dealership. Also avail-
able are Genuine NISSAN Owner's Manuals.
For current pricing and availability of a Genu-
ine NISSAN Service Manual or Genuine NIS-
SAN Owner's Manual, contact:
In the USA:
See your NISSAN dealer or contact:
Dyment Distribution Services
20770 Westwood Dr.
Strongsville OH 44136
In a hurry? Call 1-800-247-5321 and charge
your purchase to Visa/Master Card.
In Canada:
To purchase a copy of a Genuine NISSAN
Service Manual or Owner's Manual please
contact your nearest NISSAN Dealer. For the
phone number and location of a NISSAN
Dealer in your area call the Nissan Satisfaction
Center at 1-800-387-0122 and a bilingual NIS-
SAN representative will assist you.
Also available are Genuine NISSAN Service
and Owner's Manuals for older Nissan models.
9-19
ZX
 1
1 2
2 3
3 4
4 5
5 6
6 7
7 8
8 9
9 10
10 11
11 12
12 13
13 14
14 15
15 16
16 17
17 18
18 19
19 20
20 21
21 22
22 23
23 24
24 25
25 26
26 27
27 28
28 29
29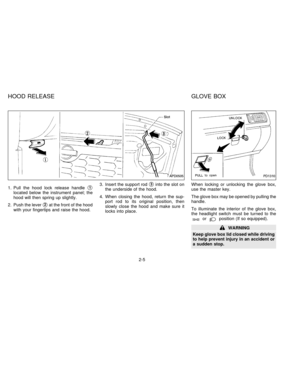 30
30 31
31 32
32 33
33 34
34 35
35 36
36 37
37 38
38 39
39 40
40 41
41 42
42 43
43 44
44 45
45 46
46 47
47 48
48 49
49 50
50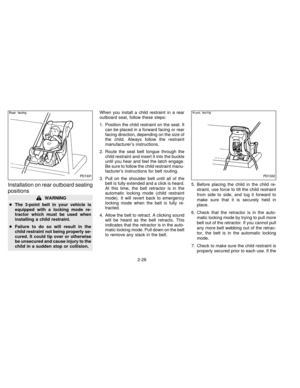 51
51 52
52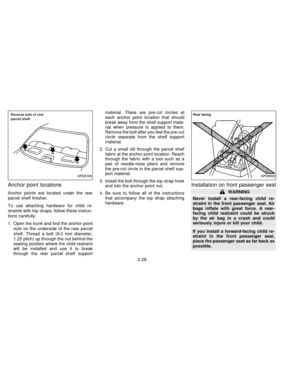 53
53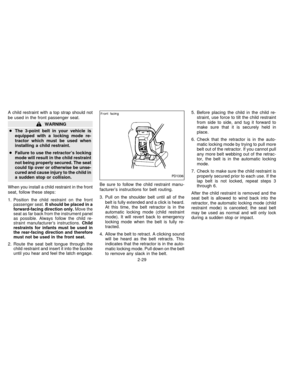 54
54 55
55 56
56 57
57 58
58 59
59 60
60 61
61 62
62 63
63 64
64 65
65 66
66 67
67 68
68 69
69 70
70 71
71 72
72 73
73 74
74 75
75 76
76 77
77 78
78 79
79 80
80 81
81 82
82 83
83 84
84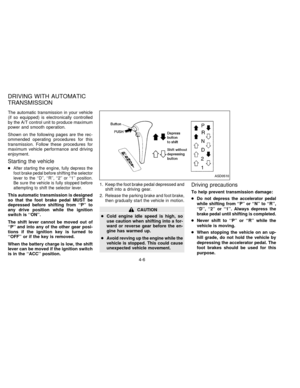 85
85 86
86 87
87 88
88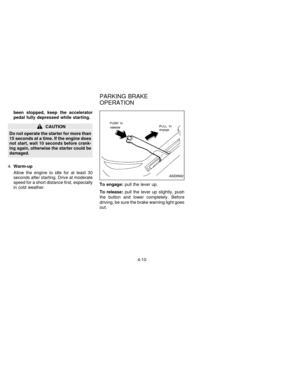 89
89 90
90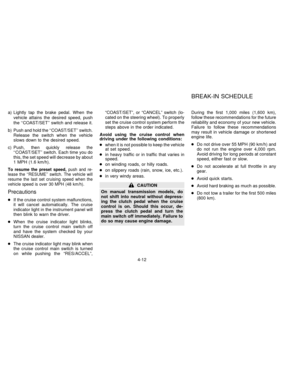 91
91 92
92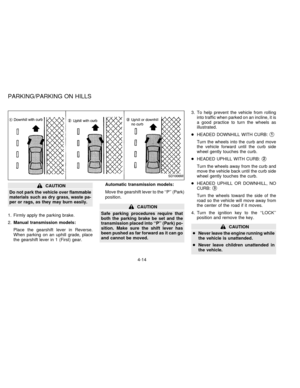 93
93 94
94 95
95 96
96 97
97 98
98 99
99 100
100 101
101 102
102 103
103 104
104 105
105 106
106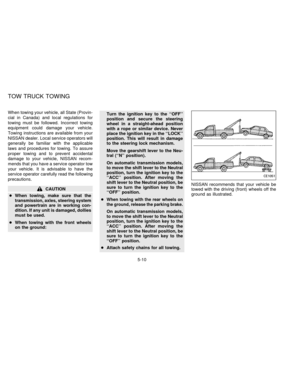 107
107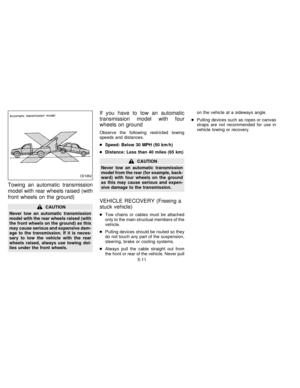 108
108 109
109 110
110 111
111 112
112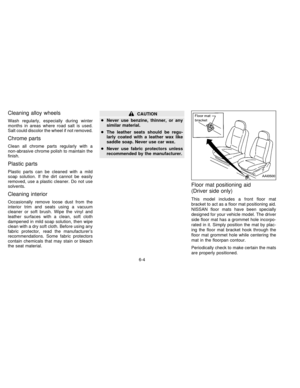 113
113 114
114 115
115 116
116 117
117 118
118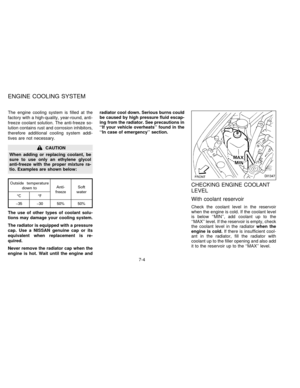 119
119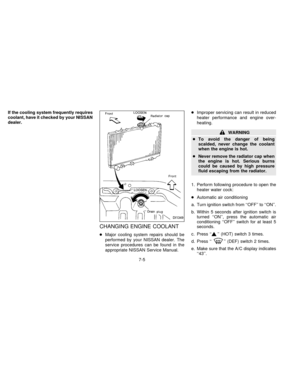 120
120 121
121 122
122 123
123 124
124 125
125 126
126 127
127 128
128 129
129 130
130 131
131 132
132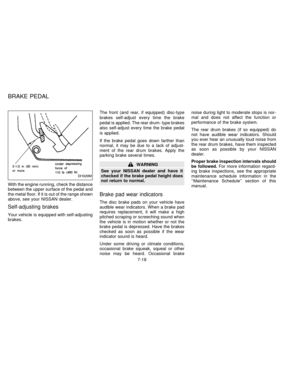 133
133 134
134 135
135 136
136 137
137 138
138 139
139 140
140 141
141 142
142 143
143 144
144 145
145 146
146 147
147 148
148 149
149 150
150 151
151 152
152 153
153 154
154 155
155 156
156 157
157 158
158 159
159 160
160 161
161 162
162 163
163 164
164 165
165 166
166 167
167 168
168 169
169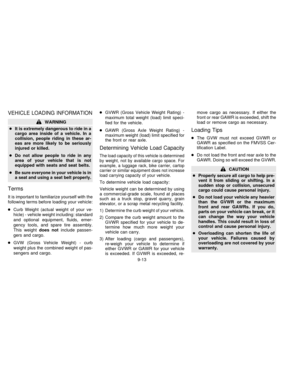 170
170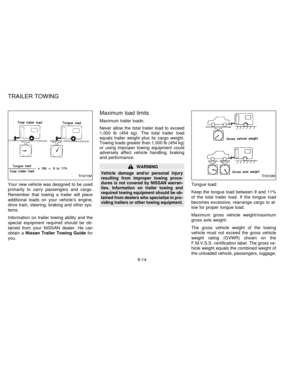 171
171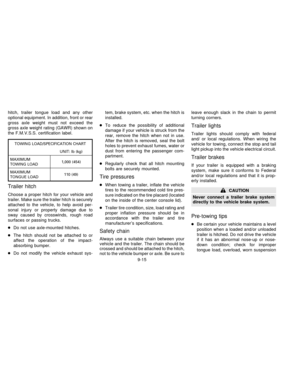 172
172 173
173 174
174 175
175 176
176 177
177 178
178 179
179 180
180 181
181 182
182