Page 65 of 183

Controls
Start the engine and operate the controls to
activate the climate control system.
WARNING
The air conditioning cooling function op-
erates only when the engine is running.
Cooling and/or dehumidified heat-
ing (Auto mode)
This mode may be used throughout the year
as the system automatically works to main-
tain the customer-selected temperature. Airflow distribution and fan speed are also
controlled automatically.
cUSA models will display set temperature
in ÉF. Canadian models will display set
temperature in ÉC.
1. Push the AUTO switch on. ``AUTO'' will
be displayed as well as the previously
selected temperature in the passenger
compartment.
2. Push the temperature set button ``
'' or
``'' to set the desired temperature.
cAdjust the temperature set button to
about 75ÉF (24ÉC) for normal operation.cThe temperature of the passenger com-
partment will be maintained automati-
cally. Air flow distribution and fan speed
are also controlled automatically.
Heating (ECON mode)
The ECON (economy) mode provides cli-
mate control without activating the air con-
ditioning. When only heating of the passen-
ger compartment is desired, use this mode.
1. Push the ECON switch on. ``ECON'' will
be displayed.
2. Push the temperature set button ``
'' or
``'' to set the desired temperature.
cThe temperature of the passenger com-
partment will be maintained as selected
by the temperature set button. Air flow
distribution and fan speed are also con-
trolled automatically in an effort to reach
the desired termperature.
cDo not select a temperature setting lower
than the outside air temperature. Due to
the absence of air conditioning operation,
it is possible that the selected interior
temperature may not be achieved.
cECON mode is not recommended if win-
dows are fogging up. If the windows
AHA0523
HEATER AND AIR CONDITIONER (AUTOMATIC)
(If so equipped)
3-8
ZX
Page 66 of 183

begin to fog up while using the ECON
mode, use the procedures outlined in
Dehumified defogging.
Dehumidified defogging
1. Push the DEF switch on. The indicator
light will come on.
2. Push the temperature set button ``
'' or
``
'' to set the desired temperature.
cTo quickly remove ice or fog from the
outside of the windows, push the manual
fan control switch
and set to the
maximum position
.
cAs soon as possible after the windshield
is clean, push the AUTO switch to return
to the auto mode.
cWhen the DEF switch is pushed, the air
conditioning will automatically be turned
on at outside temperatures above 35ÉF
(2ÉC) to defog the windshield, and the air
recirculate mode will automatically be
turned off.
Outside air is drawn into the passenger
compartment to improve the defogging
performance.
Manual fan speed control
Push the fan control switchto manu-
ally control the fan speed. Each fan speed is
indicated by the shading of a fan blade on
the display. For example,
indicates
that the fan is operating at low speed and
indicates that the fan is operating at
medium-high speed.
cPush the AUTO switch to return to auto-
matic control of the fan speed.
Air recirculation switch
Push the air recirculation switch to recircu-
late interior air inside the vehicle. The indi-
cator light will come on.
Push it again to draw outside air into the
passenger compartment. The indicator will
go out.
cThe air recirculation mode will not be and
cannot be activated when the DEF mode
has been selected.
Manual air flow control
Pushing the manual air flow control switch
selects the air outlet.
Ð Air flows from center and side
ventilators.
Ð Air flows from center and side
ventilators and foot outlets.
Ð Air flows mainly from foot outlets.
Ð Air flows from defroster outlets
and foot outlets.
Ð Air flows mainly from defroster
outlets.
To turn the system off
Push the OFF switch.
Operating tips
cWhen the engine coolant temperature
and outside air temperature are low, the
air flow from the foot outlets may not
operate for a maximum of 150 seconds.
However, this is not a malfunction. After
the coolant temperature warms up, the
air flow from the foot outlets will operate
normally.
3-9
ZX
Page 67 of 183

The sensor on the instrument panel helps
maintain a constant temperature; do not put
anything on or around this sensor.
Servicing air conditioning
The air conditioning system in your NISSAN
vehicle is charged with a new refrigerant
designed with the environment in mind.
This new refrigerant will not harm the
earth's ozone layer.
Special charging equipment and lubricant is
required when servicing your NISSAN air
conditioner. Using improper refrigerants or
lubricants will cause severe damage to your
air conditioning system. See ``Air condition-
ing system refrigerant and lubricant recom-
mendations'' in the ``Technical and con-
sumer information'' section of this manual.
Your NISSAN dealer will be able to service
your environmentally conscious air condi-
tioning system.To turn the radio on, turn the ignition key to
``ACC'' or ``ON''. If you listen to the radio with
the engine not running, turn the key to the
``ACC'' position.
Radio reception is affected by station signal
strength, distance from radio transmitter,
buildings, bridges, mountains and other ex-
ternal influences. Intermittent changes in
reception quality normally are caused by
these external influences.
CLOCK-RADIO (If so equipped)
On vehicles equipped with an AM-FM radio
and cassette player, a clock is integrated
into the audio system. For further details,
refer to Clock Operation later in this section.AHA0501
RADIO
3-10
ZX
Page 68 of 183
AM-FM RADIO WITH CASSETTE
PLAYER
Radio operation
Push the ON-OFF/VOL knob to turn the
radio on. Push the ON-OFF/VOL knob once
more to turn the radio off.
Turn the knob to adjust the volume.
Inserting a cassette tape into the cassette
player while the radio is on will turn the radio
off and turn the cassette player on.
Pushing the ON-OFF/VOL knob while the
cassette tape is playing will turn off the
cassette player.
Clock Operation
By pressing the ªCLOCKº button, you can
alternate the clock and the radio/cassette
tape options in the display.
Clock Set
Depressing the ``CLOCK'' and the ``''
buttons together will set hours. Depressing
the ``CLOCK'' and ``
'' buttons together
will set minutes.
AHA0524
3-11
ZX
Page 69 of 183
 display will illuminate for ten seconds
t")
Clock Priority Mode
In this mode the clock will be shown in the
display. If any radio or cassette tape func-
tions are activated, the radio (or cassette
tape) display will illuminate for ten seconds
then return to the clock mode.
NOTE:
After clock adjustment, the radio is in the
clock priority mode.
Radio/Cassette Tape Priority Mode
In this mode, the radio station will illuminate
in the display during radio operation. During
cassette tape operation, ªTAPEº will illumi-
nate in the display.
Selecting the desired band
Push the band select button (FM/AM) to
change from AM to FM reception.
The stereo indicator will glow during FM
stereo reception. When the stereo broadcast
signal is weak, the radio will automatically
change from stereo to monaural reception.
Tuning
WARNING
The radio should not be tuned while
driving in order that full attention may
be given to the driving operation.
Manual tuning
Push down either manual tuning ``
'' or
``
'' button.
SEEK tuning
Push the SEEK/SCAN tuning button ``''
for less than 1.5 seconds. SEEK tuning be-
gins from low to high frequencies and stops
at the next broadcasting station. Once the
highest broadcasting station is reached, the
radio will continue in the ªSEEKº mode at the
lowest broadcast station. Pushing the button
again will continue the ªSEEKº function.
SCAN tuning
Push the SEEK/SCAN tuning button ``''
for more than 1.5 seconds. ªSCANº will illu-
minate in the display window. SCAN tuning
begins from low to high frequencies and
stops at each broadcasting station for five
seconds. Pushing the button again during this
five second period will stop SCAN tuning and
the radio will remain tuned to that station.
Station memory operations
Six stations can be set for each band.
1. Tune to the desired station.
2. Push the desired select button for more
AHA0525
3-12
ZX
Page 70 of 183

than 2 seconds. For example, in the
diagram ch2 is to be memorized. The
radio mutes when the select button is
pushed.
3. The indicator ``ch2'' will then come on
and the sound will resume. Memorizing is
now complete.
4. Other select buttons can be set in the
same manner.
If the battery cable is disconnected, or if the
fuse blows, the radio memory will be can-
celled. In that case, reset the desired sta-
tions.
Adjusting tone quality and speaker
balance
To adjust BASS, TREB (treble), FADER,
and BAL (balance) the control knobs must
be released from their stowed positions.
Pushing the knobs once moves them to the
released position.
In the released position, the knobs control
tone quality. Turn the control knobs to adjust
BASS and TREB to the most pleasing level.
From the released position, the knobs must
be pulled out in order to control FADER and
BAL. FADER adjusts the sound level be-tween the front and rear speakers, and BAL
adjusts the sound level between the right
and left speakers.
Once sound quality is set to the desired
levels, return the control knobs to the
stowed position by pushing them in com-
pletely and releasing.
Cassette tape operation
Turn the ignition key to ``ACC'' or ``ON'', then
carefully insert the cassette tape into the
tape door.
The cassette tape will automatically pull into
the player. The word ªTAPEº and an arrow
AHA0522
3-13
ZX
Page 71 of 183

indicating tape side will illuminate in the
display window.
Do not force the cassette tape into the
tape door.
Pressing strongly could cause player
damage.
The cassette tape will automatically change
directions to play the other side when the
first side is completed. At this time, the
arrow in the display window will change
direction.
cTo maintain good quality sound, NIS-
SAN recommends that you use cas-
sette tapes of 60 minutes or shorter in
length.
cCassette tapes should be removed
from the player when not in use. Store
cassettes in their protective cases
and away from direct sunlight, heat,
moisture and magnetic sources.
cDirect sunlight can cause the cassette
to become deformed. The use of de-
formed cassettes may cause the cas-
sette to jam in the player.
cDo not use cassettes that have labels
which are peeling and loose. If used,the label could jam in the player.
cIf a cassette has loose tape, insert a
pencil through one of the cassette
hubs and rewind the tape firmly
around the hubs. Loose tape may
cause tape jamming and wavering
sound quality.
cOver a period of time, the playback
head, capstan and pinch roller may
collect a tape coating residue as the
tape passes over the head. This resi-
due accumulation can cause weak or
wavering sound, and should be re-
moved periodically with a head clean-
ing tape. If the residue is not removed
periodically, the player may need to
be disassembled for cleaning.
Fast forwarding or rewinding the
tape
Push either the FF (fast forward) or REW
(rewind) button for the desired direction.
The
orsymbol will illuminate in
the display.
To stop the FF or REW function, press the
``PLAY/STOP'' button.
Automatic Program Search (APS)
fast forwarding or APS rewinding
the tape
Push either the APS FF or APS REW button
while the cassette tape is playing. The tape
will run quickly, and stop and play at the
next program. The indicator light flashes on
and off while searching the program. The
orsymbol will illuminate in
the display.
This system searches for the blank intervals
between selections. If there is a blank inter-
val within one program or there is no interval
between programs, the system may not
stop in the desired or expected location.
Changing the direction of tape play
Push the PROG (program) select button.
The
orsymbol will illuminate in
the display to indicate side of program play.
Playing and stopping the cassette
tape
Push the PLAY/STOP button while the cas-
sette tape is playing to stop the tape. Push
the button again to play the tape.
3-14
ZX
Page 72 of 183
Dolby NR (noise reduction)
Push the``DOLBY NR'' button for
Dolby NR encoded tapes to reduce high
frequency tape noise. The indicator will
come on.
Dolby NR is manufactured under license
from Dolby Laboratories Licensing Corpora-
tion. ``DOLBY NR'' and the double-D symbol
are trademarks of Dolby Laboratories Li-
censing Corporation.
If in the clock priority mode when the
button is pressed,and
ªTAPEº will illuminate in the display window
for about ten seconds. The clock mode will
then return to the display window.
Metal or chrome tape usage
The cassette player will be automatically set
to high performance play when playing a
metal or chrome cassette tape.
Ejecting the cassette tape
Push the eject button.
The cassette tape will automatically come
out.
3-15
ZX
 1
1 2
2 3
3 4
4 5
5 6
6 7
7 8
8 9
9 10
10 11
11 12
12 13
13 14
14 15
15 16
16 17
17 18
18 19
19 20
20 21
21 22
22 23
23 24
24 25
25 26
26 27
27 28
28 29
29 30
30 31
31 32
32 33
33 34
34 35
35 36
36 37
37 38
38 39
39 40
40 41
41 42
42 43
43 44
44 45
45 46
46 47
47 48
48 49
49 50
50 51
51 52
52 53
53 54
54 55
55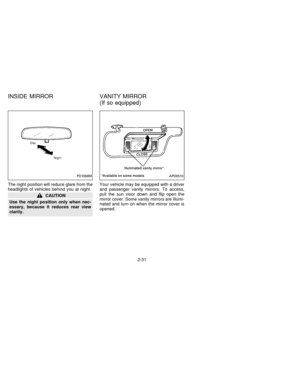 56
56 57
57 58
58 59
59 60
60 61
61 62
62 63
63 64
64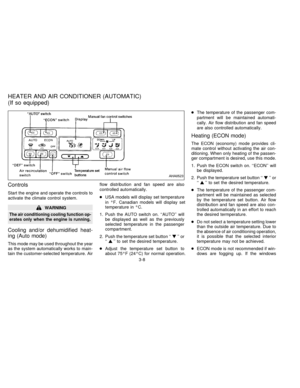 65
65 66
66 67
67 68
68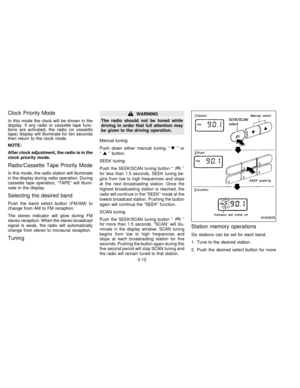 69
69 70
70 71
71 72
72 73
73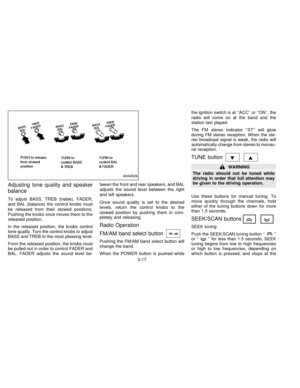 74
74 75
75 76
76 77
77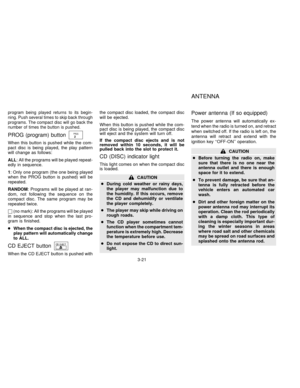 78
78 79
79 80
80 81
81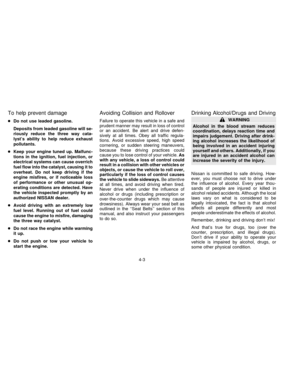 82
82 83
83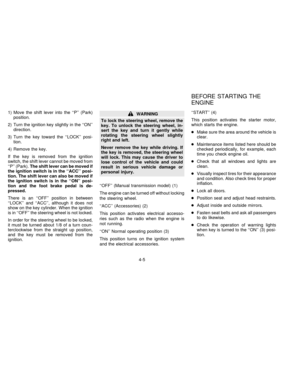 84
84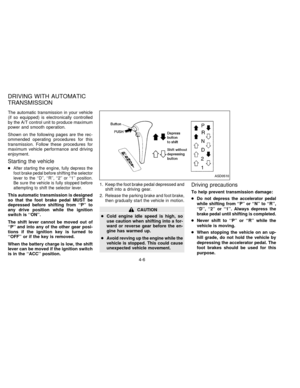 85
85 86
86 87
87 88
88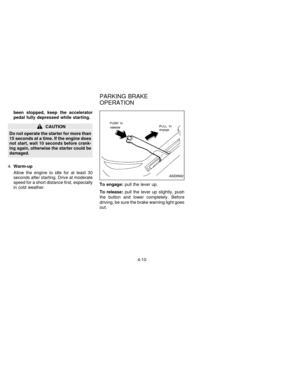 89
89 90
90 91
91 92
92 93
93 94
94 95
95 96
96 97
97 98
98 99
99 100
100 101
101 102
102 103
103 104
104 105
105 106
106 107
107 108
108 109
109 110
110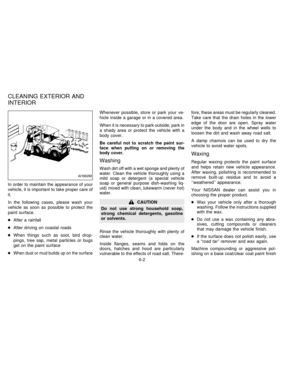 111
111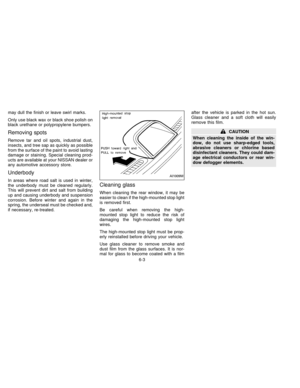 112
112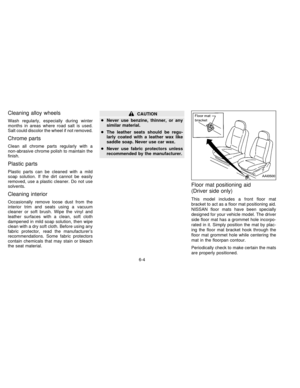 113
113 114
114 115
115 116
116 117
117 118
118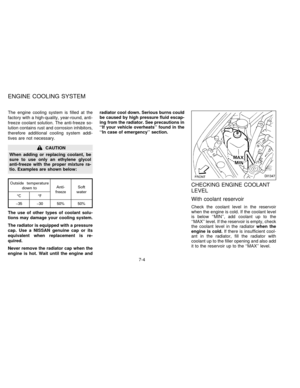 119
119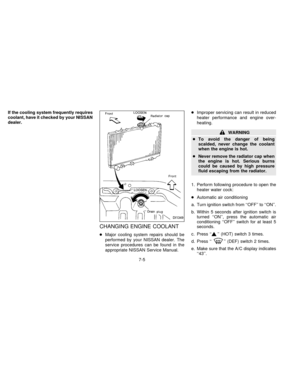 120
120 121
121 122
122 123
123 124
124 125
125 126
126 127
127 128
128 129
129 130
130 131
131 132
132 133
133 134
134 135
135 136
136 137
137 138
138 139
139 140
140 141
141 142
142 143
143 144
144 145
145 146
146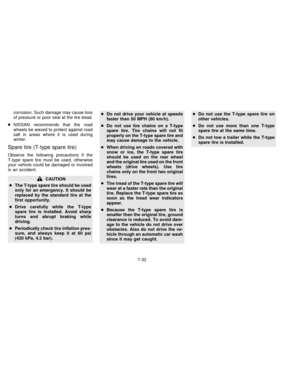 147
147 148
148 149
149 150
150 151
151 152
152 153
153 154
154 155
155 156
156 157
157 158
158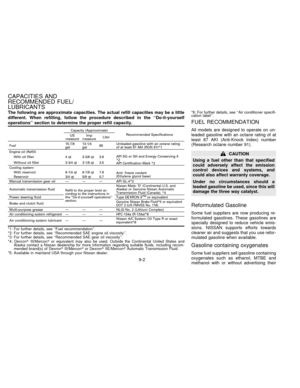 159
159 160
160 161
161 162
162 163
163 164
164 165
165 166
166 167
167 168
168 169
169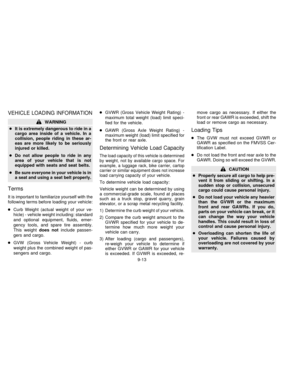 170
170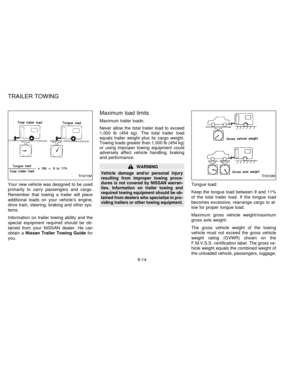 171
171 172
172 173
173 174
174 175
175 176
176 177
177 178
178 179
179 180
180 181
181 182
182

Push the``DOLBY NR button for
Dolby NR encoded tapes to reduce high
frequency tape noise. The indicator will
come on.
Dolby NR is manufactured under license
from Dolby Lab")