1996 NISSAN ALTIMA warning light
[x] Cancel search: warning lightPage 18 of 183
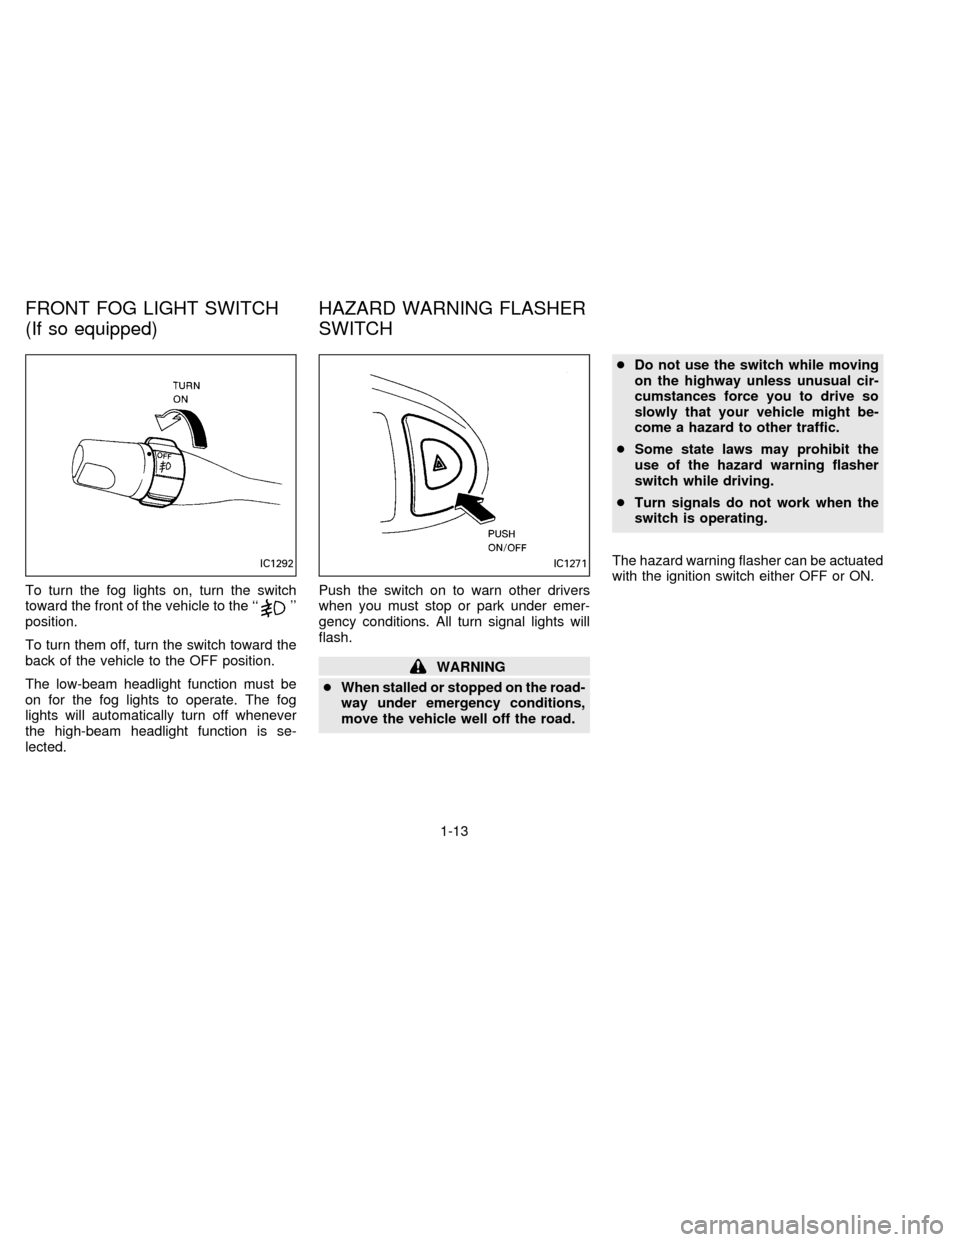
To turn the fog lights on, turn the switch
toward the front of the vehicle to the ``''
position.
To turn them off, turn the switch toward the
back of the vehicle to the OFF position.
The low-beam headlight function must be
on for the fog lights to operate. The fog
lights will automatically turn off whenever
the high-beam headlight function is se-
lected.Push the switch on to warn other drivers
when you must stop or park under emer-
gency conditions. All turn signal lights will
flash.
WARNING
cWhen stalled or stopped on the road-
way under emergency conditions,
move the vehicle well off the road.cDo not use the switch while moving
on the highway unless unusual cir-
cumstances force you to drive so
slowly that your vehicle might be-
come a hazard to other traffic.
cSome state laws may prohibit the
use of the hazard warning flasher
switch while driving.
cTurn signals do not work when the
switch is operating.
The hazard warning flasher can be actuated
with the ignition switch either OFF or ON.
IC1292IC1271
FRONT FOG LIGHT SWITCH
(If so equipped)HAZARD WARNING FLASHER
SWITCH
1-13
ZX
Page 19 of 183
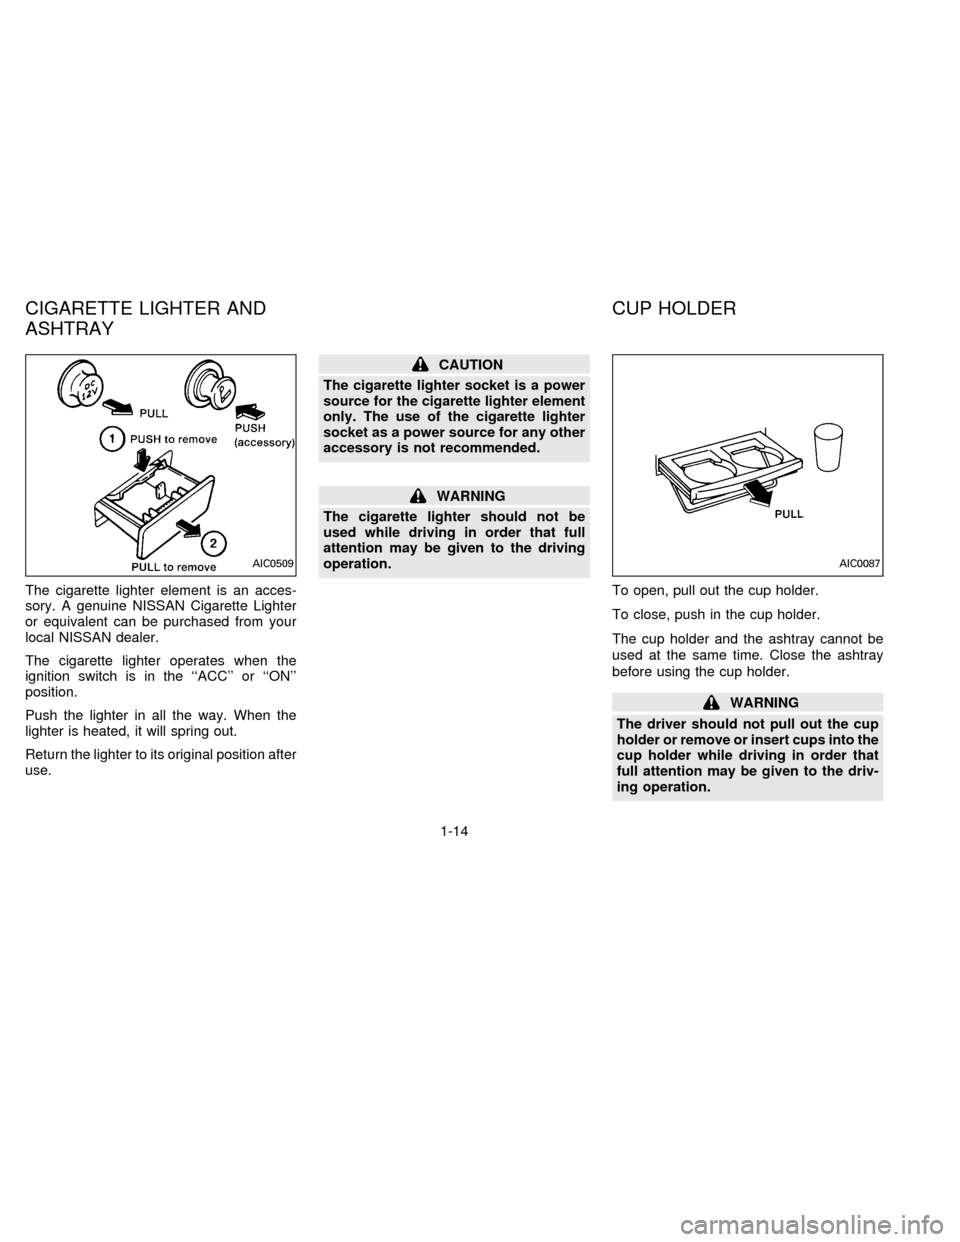
The cigarette lighter element is an acces-
sory. A genuine NISSAN Cigarette Lighter
or equivalent can be purchased from your
local NISSAN dealer.
The cigarette lighter operates when the
ignition switch is in the ``ACC'' or ``ON''
position.
Push the lighter in all the way. When the
lighter is heated, it will spring out.
Return the lighter to its original position after
use.
CAUTION
The cigarette lighter socket is a power
source for the cigarette lighter element
only. The use of the cigarette lighter
socket as a power source for any other
accessory is not recommended.
WARNING
The cigarette lighter should not be
used while driving in order that full
attention may be given to the driving
operation.
To open, pull out the cup holder.
To close, push in the cup holder.
The cup holder and the ashtray cannot be
used at the same time. Close the ashtray
before using the cup holder.
WARNING
The driver should not pull out the cup
holder or remove or insert cups into the
cup holder while driving in order that
full attention may be given to the driv-
ing operation.
AIC0509AIC0087
CIGARETTE LIGHTER AND
ASHTRAYCUP HOLDER
1-14
ZX
Page 26 of 183

2 Pre-driving checks and adjustments
Key ....................................................................... 2-2
Door locks ............................................................ 2-2
Hood release ........................................................ 2-5
Glove box ............................................................. 2-5
Trunk lid lock operation ........................................ 2-6
Fuel filler lid lock operation .................................. 2-7
Front seats ........................................................... 2-9
Rear seat ............................................................ 2-11
Supplemental restraint system (air bag system). 2-12
Warning labels.................................................... 2-15
Air bag warning light .......................................... 2-16
Seat belts ........................................................... 2-17
Child restraints for infants and small children.... 2-23
Tilting steering wheel ......................................... 2-30
Outside mirror remote control ............................ 2-30
Outside mirrors ................................................... 2-30
Inside mirror ....................................................... 2-31
Vanity mirror (If so equipped) ............................ 2-31
ZX
Page 30 of 183
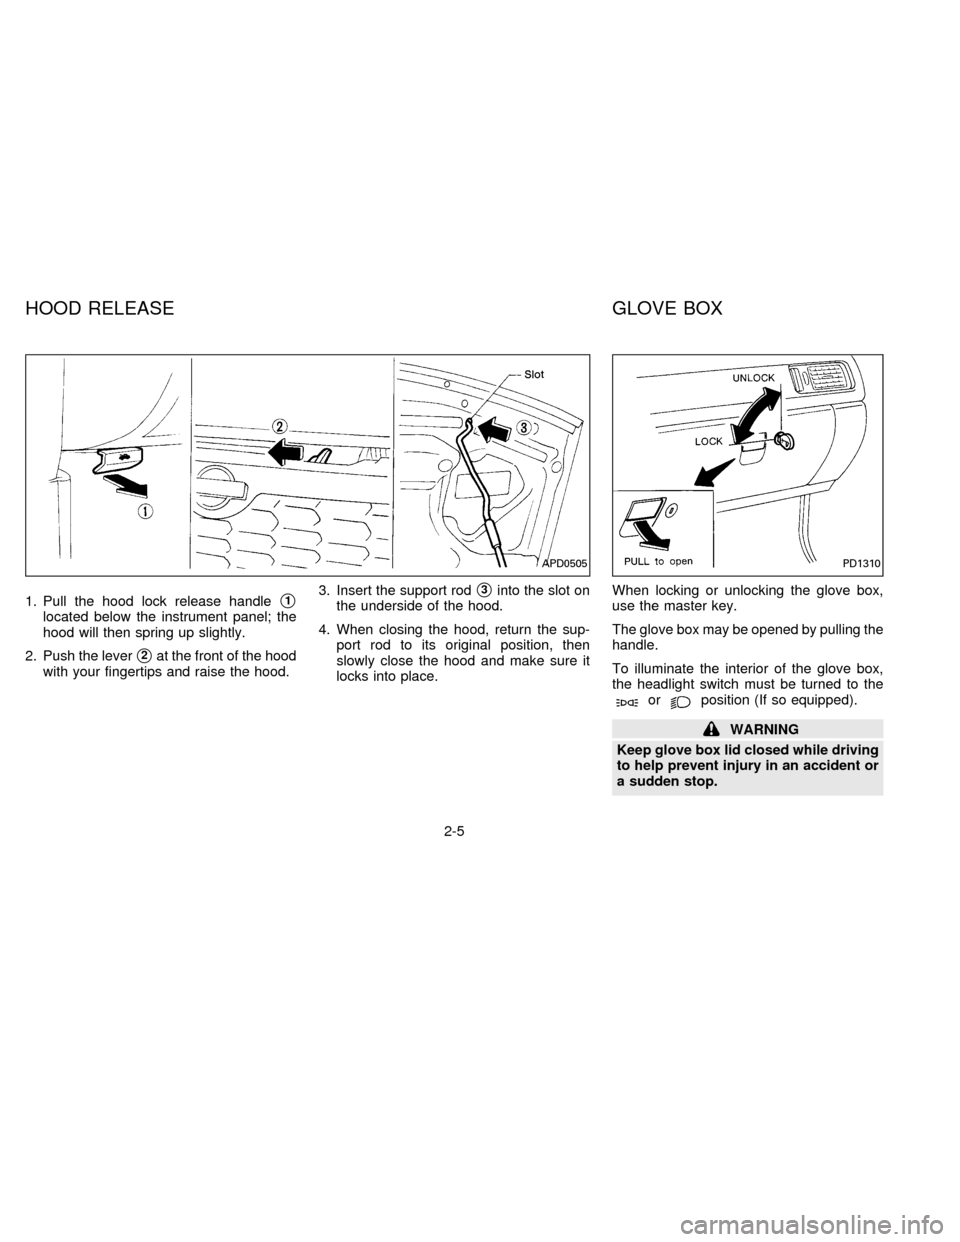
1. Pull the hood lock release handles1
located below the instrument panel; the
hood will then spring up slightly.
2. Push the lever
s2at the front of the hood
with your fingertips and raise the hood.3. Insert the support rod
s3into the slot on
the underside of the hood.
4. When closing the hood, return the sup-
port rod to its original position, then
slowly close the hood and make sure it
locks into place.When locking or unlocking the glove box,
use the master key.
The glove box may be opened by pulling the
handle.
To illuminate the interior of the glove box,
the headlight switch must be turned to the
orposition (If so equipped).
WARNING
Keep glove box lid closed while driving
to help prevent injury in an accident or
a sudden stop.
APD0505PD1310
HOOD RELEASE GLOVE BOX
2-5
ZX
Page 41 of 183
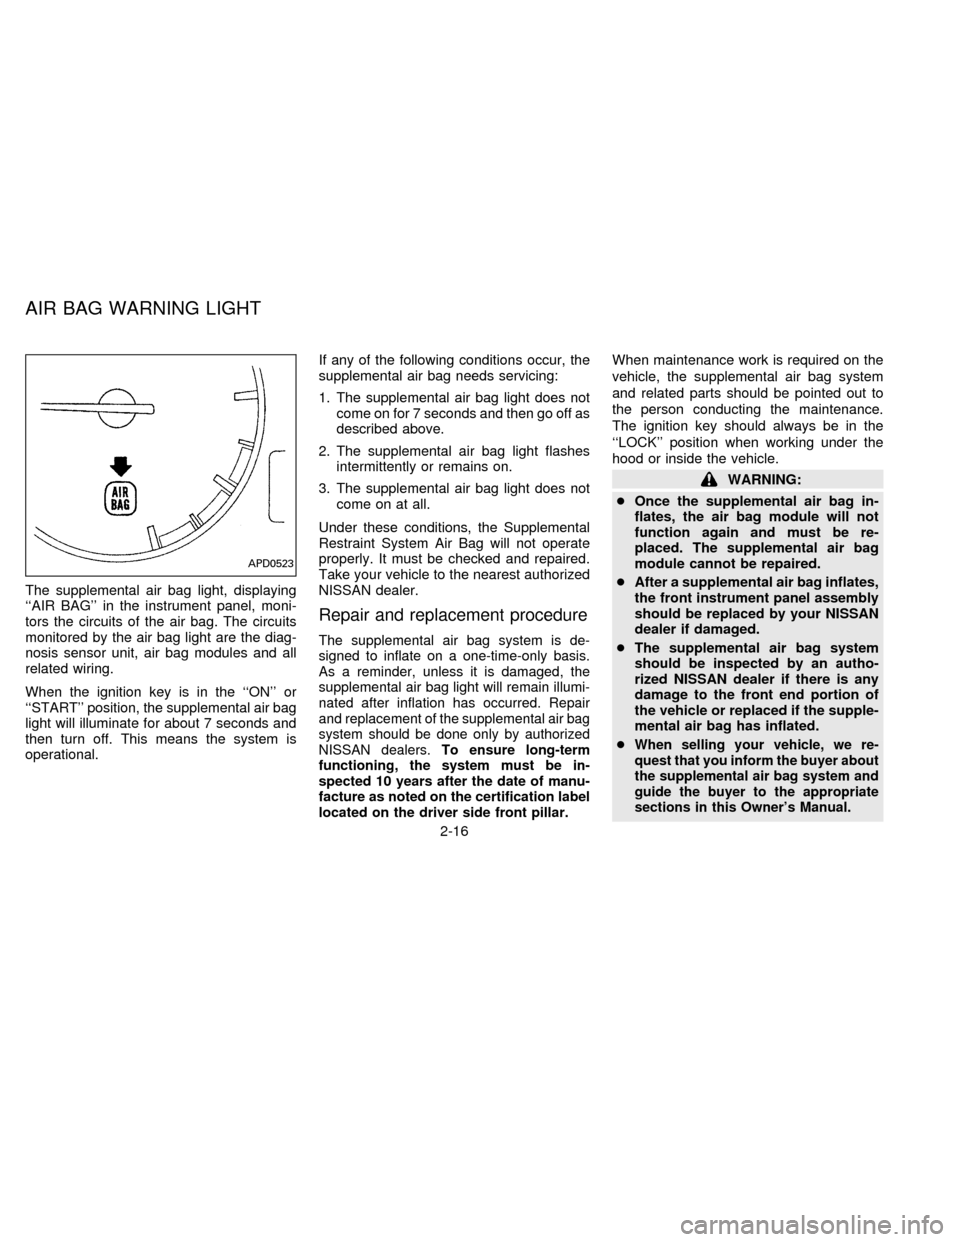
The supplemental air bag light, displaying
``AIR BAG'' in the instrument panel, moni-
tors the circuits of the air bag. The circuits
monitored by the air bag light are the diag-
nosis sensor unit, air bag modules and all
related wiring.
When the ignition key is in the ``ON'' or
``START'' position, the supplemental air bag
light will illuminate for about 7 seconds and
then turn off. This means the system is
operational.If any of the following conditions occur, the
supplemental air bag needs servicing:
1. The supplemental air bag light does not
come on for 7 seconds and then go off as
described above.
2. The supplemental air bag light flashes
intermittently or remains on.
3. The supplemental air bag light does not
come on at all.
Under these conditions, the Supplemental
Restraint System Air Bag will not operate
properly. It must be checked and repaired.
Take your vehicle to the nearest authorized
NISSAN dealer.
Repair and replacement procedure
The supplemental air bag system is de-
signed to inflate on a one-time-only basis.
As a reminder, unless it is damaged, the
supplemental air bag light will remain illumi-
nated after inflation has occurred. Repair
and replacement of the supplemental air bag
system should be done only by authorized
NISSAN dealers.To ensure long-term
functioning, the system must be in-
spected 10 years after the date of manu-
facture as noted on the certification label
located on the driver side front pillar.
When maintenance work is required on the
vehicle, the supplemental air bag system
and related parts should be pointed out to
the person conducting the maintenance.
The ignition key should always be in the
``LOCK'' position when working under the
hood or inside the vehicle.
WARNING:
cOnce the supplemental air bag in-
flates, the air bag module will not
function again and must be re-
placed. The supplemental air bag
module cannot be repaired.
cAfter a supplemental air bag inflates,
the front instrument panel assembly
should be replaced by your NISSAN
dealer if damaged.
cThe supplemental air bag system
should be inspected by an autho-
rized NISSAN dealer if there is any
damage to the front end portion of
the vehicle or replaced if the supple-
mental air bag has inflated.
c
When selling your vehicle, we re-
quest that you inform the buyer about
the supplemental air bag system and
guide the buyer to the appropriate
sections in this Owner's Manual.
APD0523
AIR BAG WARNING LIGHT
2-16
ZX
Page 42 of 183
cIf you need to dispose of a supple-
mental air bag or scrap the vehicle,
contact an authorized NISSAN dealer.
Correct supplemental air bag dis-
posal procedures are set forth in the
appropriate NISSAN Service Manual.
Incorrect disposal procedures could
cause personal injury.PRECAUTIONS ON SEAT BELT
USAGE
If you are wearing your seat belt properly
adjusted, your chances of being injured or
killed in an accident and/or the severity of
injury may be greatly reduced. NISSAN
strongly encourages you and all of your
passengers to buckle up every time you
drive, even if your seating position includes
an air bag.
Some states, provinces or territories re-
quire that seat belts be worn at all times
when a vehicle is being driven.
WARNING
cEvery person who drives or rides in
this vehicle should use a seat belt at
all times. Children should be in ap-
propriate child restraints.
cThe belt should be properly adjusted
to a snug fit. Failure to do so will
reduce the effectiveness of the en-
tire restraint system and increases
the chance or severity of injury in an
accident.cDo not wear the belt inside out or
twisted. Be sure the seat belt tongue
is securely fastened to the proper
buckle.
cDo not allow more than one person
to use the same belt.
cAll seat belt assemblies including
retractors and attaching hardware
should be inspected after any colli-
sion at your NISSAN dealer. NISSAN
recommends that all seat belt as-
semblies in use during a collision be
replaced unless the collision was
minor and the belts show no damage
and continue to operate properly.
Seat belt assemblies not in use dur-
ing a collision should also be in-
spected and replaced if either dam-
age or improper operation is noted.
cNever carry more people in the ve-
hicle than there are seat belts.
If the seat belt warning light glows con-
tinuously while the ignition is turned
``ON'' with all doors closed and all seat
belts fastened, it may indicate a mal-
function in the system. Have the system
checked by your NISSAN dealer.
SEAT BELTS
2-17
ZX
Page 60 of 183
Ð Air flows from center and side
ventilators and foot outlets.
Ð Air flows mainly from foot outlets.
Ð Air flows from defroster outlets
and foot outlets.
Ð Air flows mainly from defroster
outlets.
Temperature control lever
This lever allows you to adjust the tempera-
ture of the outlet air.
Air recirculation button
OFF position:
Outside air is drawn into the passenger
compartment and distributed through the
selected outlet.
Use this position for normal heater or air
conditioning operation.
ON position (Indicator light on):
Interior air is recirculated inside the vehicle.
Push the air recirculation button to the ``ON''
position when driving on a dusty road or to
avoid traffic fumes and for maximum cooling
when using the air conditioning.
WARNING
Do not use the recirculation mode for
long periods as it may cause the inte-
rior air to become stale and the win-
dows to fog up.
Air conditioning button
(If so equipped)
This button is provided only on vehicles
equipped with air conditioning.
Start the engine, move the fan control dial to
the desired (1 to 4) position and push the
A/C button to turn on the air conditioning.
The indicator light will come on when the air
conditioning is on. To stop the air condition-
ing, push the switch again to return it to its
original position.
The air conditioning cooling function op-
erates only when the engine is running.
WARNING
Positioning of the heating or air condi-
tioning controls should not be done
while driving, in order that full attention
may be given to the driving operation.
HEATER OPERATION
Heating
This mode is used to direct heated air from
the floor outlets. Some air will also come
from the defrost vents.
1. Push the air recirculation button to the
``OFF'' position for normal heating.
2. Push the ``
'' button in.
3. Move the fan control dial to the desired
position.
4. Move the temperature control lever to the
desired position between the middle and
the ``HOT'' position.
Ventilation
This mode directs outside air from the side
and center vents.
1. Push the air recirculation button to the
``OFF'' position.
2. Push the ``
'' button in.
3. Move the fan control dial to the desired
position.
4. Move the temperature control lever to the
desired position.
3-3
ZX
Page 84 of 183
1) Move the shift lever into the ``P'' (Park)
position.
2) Turn the ignition key slightly in the ``ON''
direction.
3) Turn the key toward the ``LOCK'' posi-
tion.
4) Remove the key.
If the key is removed from the ignition
switch, the shift lever cannot be moved from
``P'' (Park).The shift lever can be moved if
the ignition switch is in the ``ACC'' posi-
tion. The shift lever can also be moved if
the ignition switch is in the ``ON'' posi-
tion and the foot brake pedal is de-
pressed.
There is an ``OFF'' position in between
``LOCK'' and ``ACC'', although it does not
show on the key cylinder. When the ignition
is in ``OFF'' the steering wheel is not locked.
In order for the steering wheel to be locked,
it must be turned about 1/8 of a turn coun-
terclockwise from the straight up position,
and the key must be removed from the
ignition.WARNING
To lock the steering wheel, remove the
key. To unlock the steering wheel, in-
sert the key and turn it gently while
rotating the steering wheel slightly
right and left.
Never remove the key while driving. If
the key is removed, the steering wheel
will lock. This may cause the driver to
lose control of the vehicle and could
result in serious vehicle damage or
personal injury.
``OFF'' (Manual transmission model) (1)
The engine can be turned off without locking
the steering wheel.
``ACC'' (Accessories) (2)
This position activates electrical accesso-
ries such as the radio when the engine is
not running.
``ON'' Normal operating position (3)
This position turns on the ignition system
and the electrical accessories.``START'' (4)
This position activates the starter motor,
which starts the engine.
cMake sure the area around the vehicle is
clear.
cMaintenance items listed here should be
checked periodically, for example, each
time you check engine oil.
cCheck that all windows and lights are
clean.
cVisually inspect tires for their appearance
and condition. Also check tires for proper
inflation.
cLock all doors.
cPosition seat and adjust head restraints.
cAdjust inside and outside mirrors.
cFasten seat belts and ask all passengers
to do likewise.
cCheck the operation of warning lights
when key is turned to the ``ON'' (3) posi-
tion.
BEFORE STARTING THE
ENGINE
4-5
ZX