1996 NISSAN ALTIMA warning light
[x] Cancel search: warning lightPage 89 of 183
been stopped, keep the accelerator
pedal fully depressed while starting.
CAUTION
Do not operate the starter for more than
15 seconds at a time. If the engine does
not
start, wait 10 seconds before crank-
ing again, otherwise the starter could be
damaged.
4.Warm-up
Allow the engine to idle for at least 30
seconds after starting. Drive at moderate
speed for a short distance first, especially
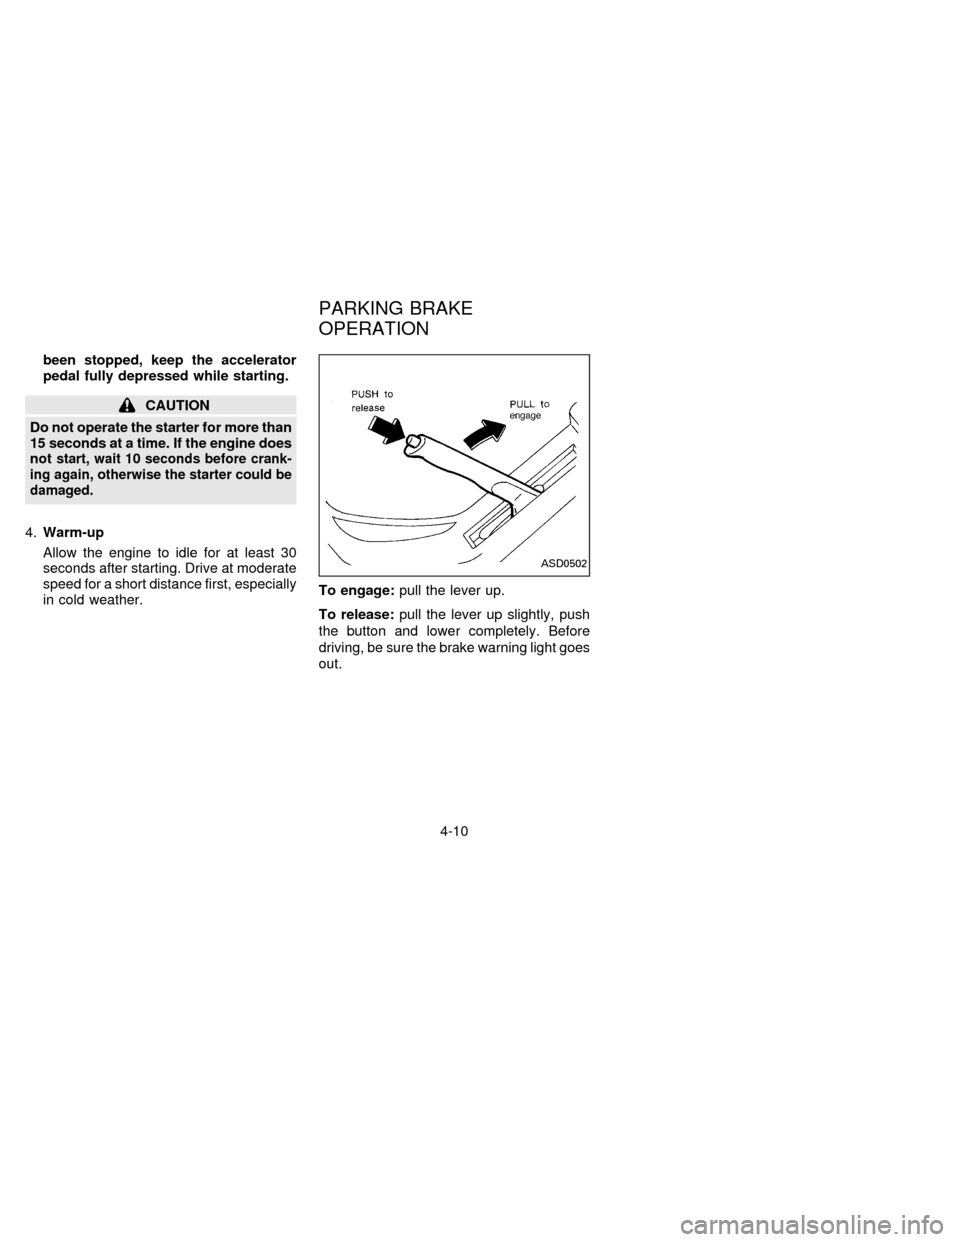
in cold weather.To engage:pull the lever up.
To release:pull the lever up slightly, push
the button and lower completely. Before
driving, be sure the brake warning light goes
out.
ASD0502
PARKING BRAKE
OPERATION
4-10
ZX
Page 95 of 183
and releases hydraulic pressure (like pump-
ing the brakes very quickly). While the ac-
tuator is working, you may feel a pulsation in
the brake pedal and hear a noise or vibra-
tion from the actuator under the hood. This
is normal and indicates that the anti-lock
system is working properly. However, the
pulsation may indicate that road conditions
are hazardous and extra care is required
while driving.
Self-test feature
The anti-lock brake system is sophisticated,
with electronic sensors, electric pumps, and
hydraulic solenoids controlled by a com-
puter. The computer has a built-in diagnos-
tic feature that tests the system each time
you start the engine and move the vehicle at
a low speed in forward or reverse. When the
self-test occurs, you may hear a ``clunk''
noise and/or feel a pulsation in the brake
pedal. This is normal and is not an indica-
tion of any malfunction. If the computer
senses any malfunction, it switches the anti-
lock brake system OFF and turns on the
ABS brake warning light in the dashboard.
The brake system will then behave nor-
mally, but without anti-lock assistance.
If the light comes on during the self-test orwhile you are driving, you should take your
car to your NISSAN dealer for repair at your
earliest convenience.
WARNING
The anti-lock brake system is a sophis-
ticated device, but it cannot prevent
accidents resulting from careless or
dangerous driving techniques. It can
help maintain vehicle control during
braking on slippery surfaces, but re-
member that the stopping distance on
slippery surfaces will be longer than on
normal surfaces, even with the anti-
lock system. Stopping distances may
also be longer on rough, gravel or
snow covered roads, or if you are using
tire chains. Always maintain a safe dis-
tance from the vehicle in front of you.
Ultimately, the responsibility for safety
of self and others rests in the hands of
the driver.
Tire type and condition of tires may
also affect braking effectiveness.
cWhen replacing tires, install the
specified size of tire on all 4 wheels.cWhen installing a spare tire, make
sure it is the proper size and type as
specified on the tire placard. For tire
placard location information, refer to
ªTire placardº in the Owner's Manual
index.
Refer to ``Wheels and Tires'' in the
``Do-it-yourself operations'' section of
this manual.
4-16
ZX
Page 124 of 183
CHANGING ENGINE OIL FILTER
1. Park the vehicle on a level surface and
apply the parking brake.
2. Turn the engine off.
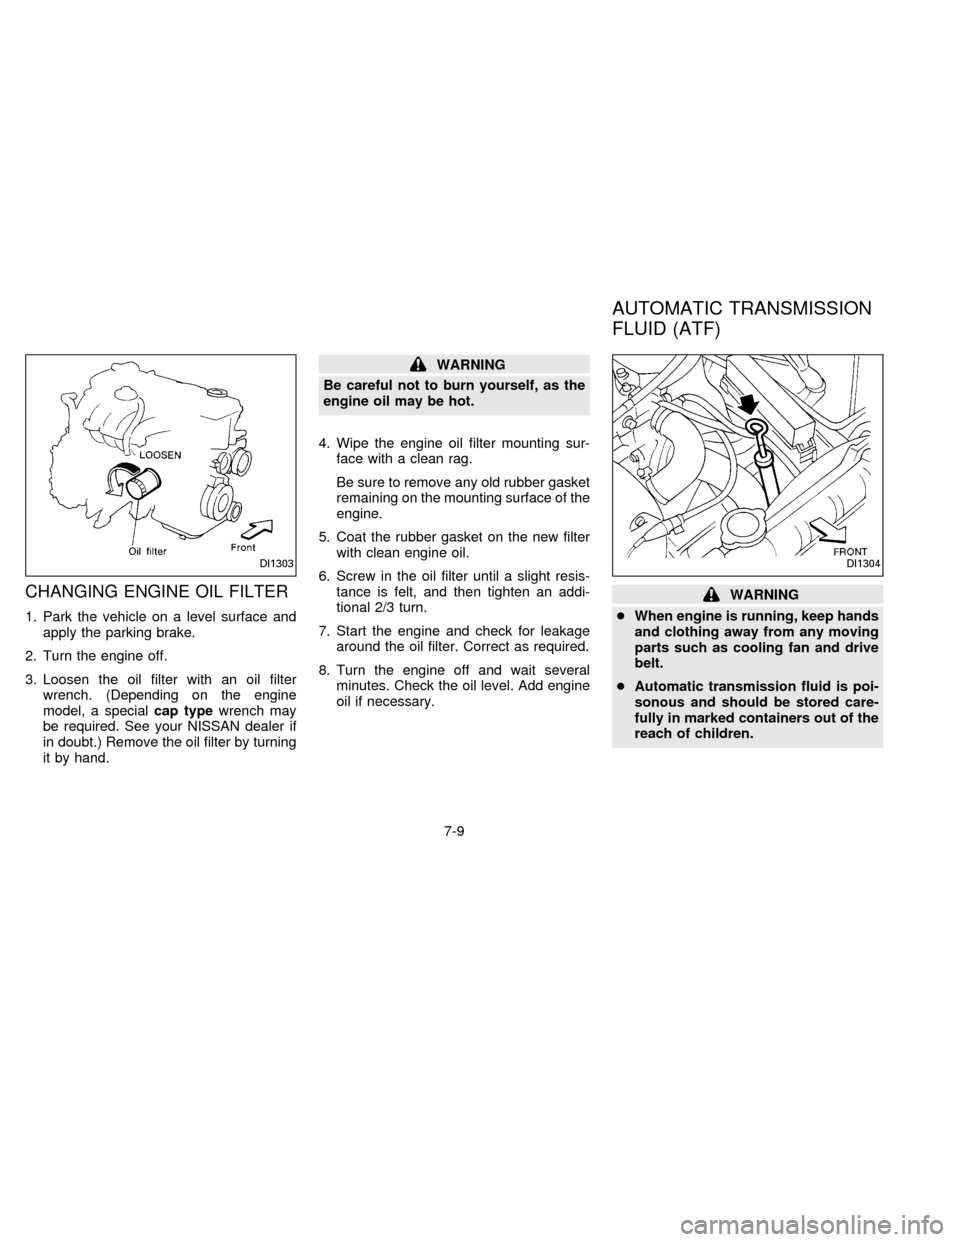
3. Loosen the oil filter with an oil filter
wrench. (Depending on the engine
model, a specialcap typewrench may
be required. See your NISSAN dealer if
in doubt.) Remove the oil filter by turning
it by hand.
WARNING
Be careful not to burn yourself, as the
engine oil may be hot.
4. Wipe the engine oil filter mounting sur-
face with a clean rag.
Be sure to remove any old rubber gasket
remaining on the mounting surface of the
engine.
5. Coat the rubber gasket on the new filter
with clean engine oil.
6. Screw in the oil filter until a slight resis-
tance is felt, and then tighten an addi-
tional 2/3 turn.
7. Start the engine and check for leakage
around the oil filter. Correct as required.
8. Turn the engine off and wait several
minutes. Check the oil level. Add engine
oil if necessary.
WARNING
cWhen engine is running, keep hands
and clothing away from any moving
parts such as cooling fan and drive
belt.
cAutomatic transmission fluid is poi-
sonous and should be stored care-
fully in marked containers out of the
reach of children.
DI1303DI1304
AUTOMATIC TRANSMISSION
FLUID (ATF)
7-9
ZX
Page 126 of 183
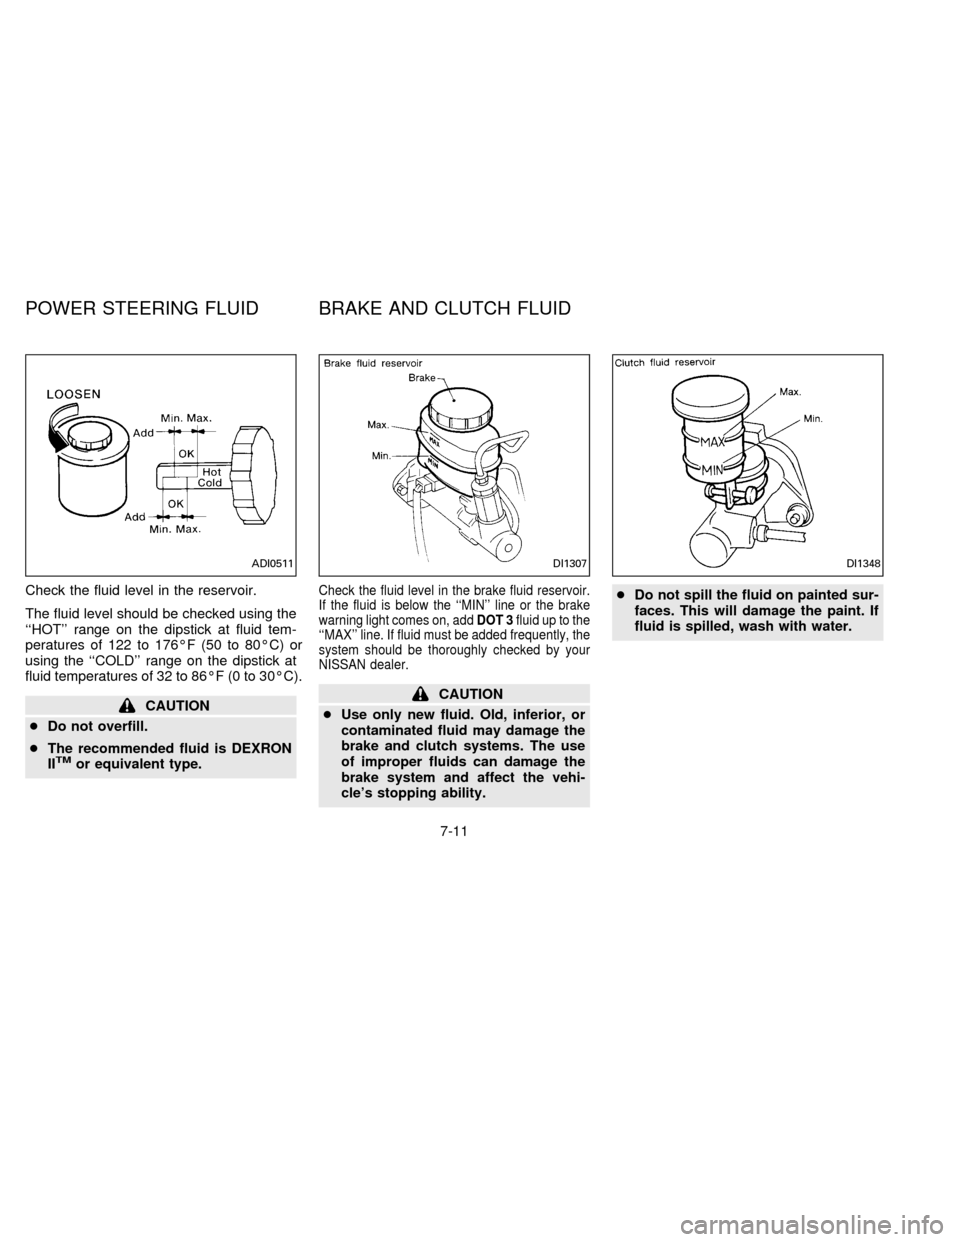
Check the fluid level in the reservoir.
The fluid level should be checked using the
``HOT'' range on the dipstick at fluid tem-
peratures of 122 to 176ÉF (50 to 80ÉC) or
using the ``COLD'' range on the dipstick at
fluid temperatures of 32 to 86ÉF (0 to 30ÉC).
CAUTION
cDo not overfill.
cThe recommended fluid is DEXRON
II
TMor equivalent type.
Check the fluid level in the brake fluid reservoir.
If the fluid is below the ``MIN'' line or the brake
warning light comes on, addDOT 3fluid up to the
``MAX'' line. If fluid must be added frequently, the
system should be thoroughly checked by your
NISSAN dealer.
CAUTION
cUse only new fluid. Old, inferior, or
contaminated fluid may damage the
brake and clutch systems. The use
of improper fluids can damage the
brake system and affect the vehi-
cle's stopping ability.cDo not spill the fluid on painted sur-
faces. This will damage the paint. If
fluid is spilled, wash with water.
ADI0511DI1307DI1348
POWER STEERING FLUID BRAKE AND CLUTCH FLUID
7-11
ZX
Page 127 of 183
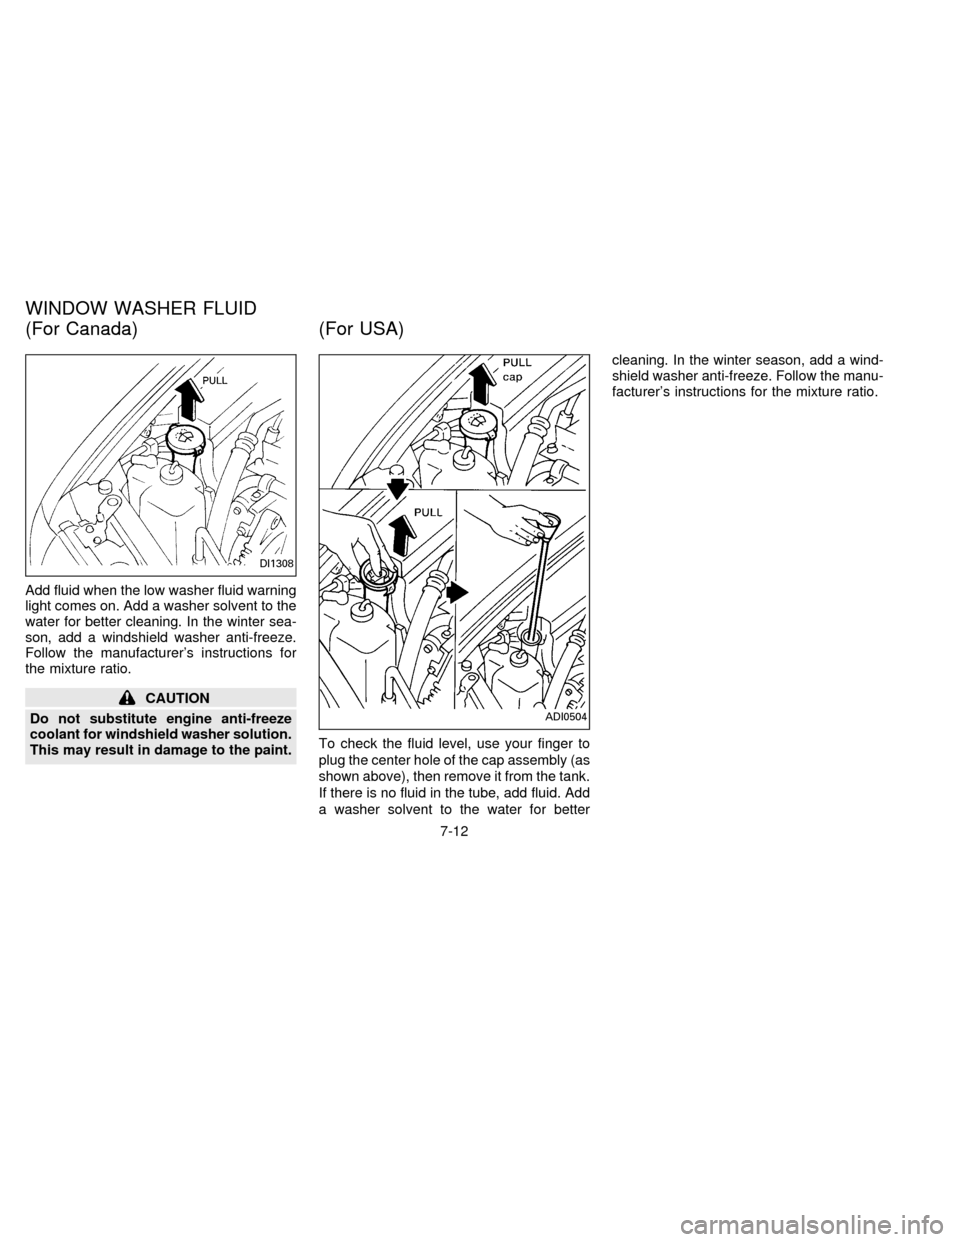
Add fluid when the low washer fluid warning
light comes on. Add a washer solvent to the
water for better cleaning. In the winter sea-
son, add a windshield washer anti-freeze.
Follow the manufacturer's instructions for
the mixture ratio.
CAUTION
Do not substitute engine anti-freeze
coolant for windshield washer solution.
This may result in damage to the paint.To check the fluid level, use your finger to
plug the center hole of the cap assembly (as
shown above), then remove it from the tank.
If there is no fluid in the tube, add fluid. Add
a washer solvent to the water for bettercleaning. In the winter season, add a wind-
shield washer anti-freeze. Follow the manu-
facturer's instructions for the mixture ratio.
DI1308
ADI0504
WINDOW WASHER FLUID
(For Canada) (For USA)
7-12
ZX
Page 133 of 183
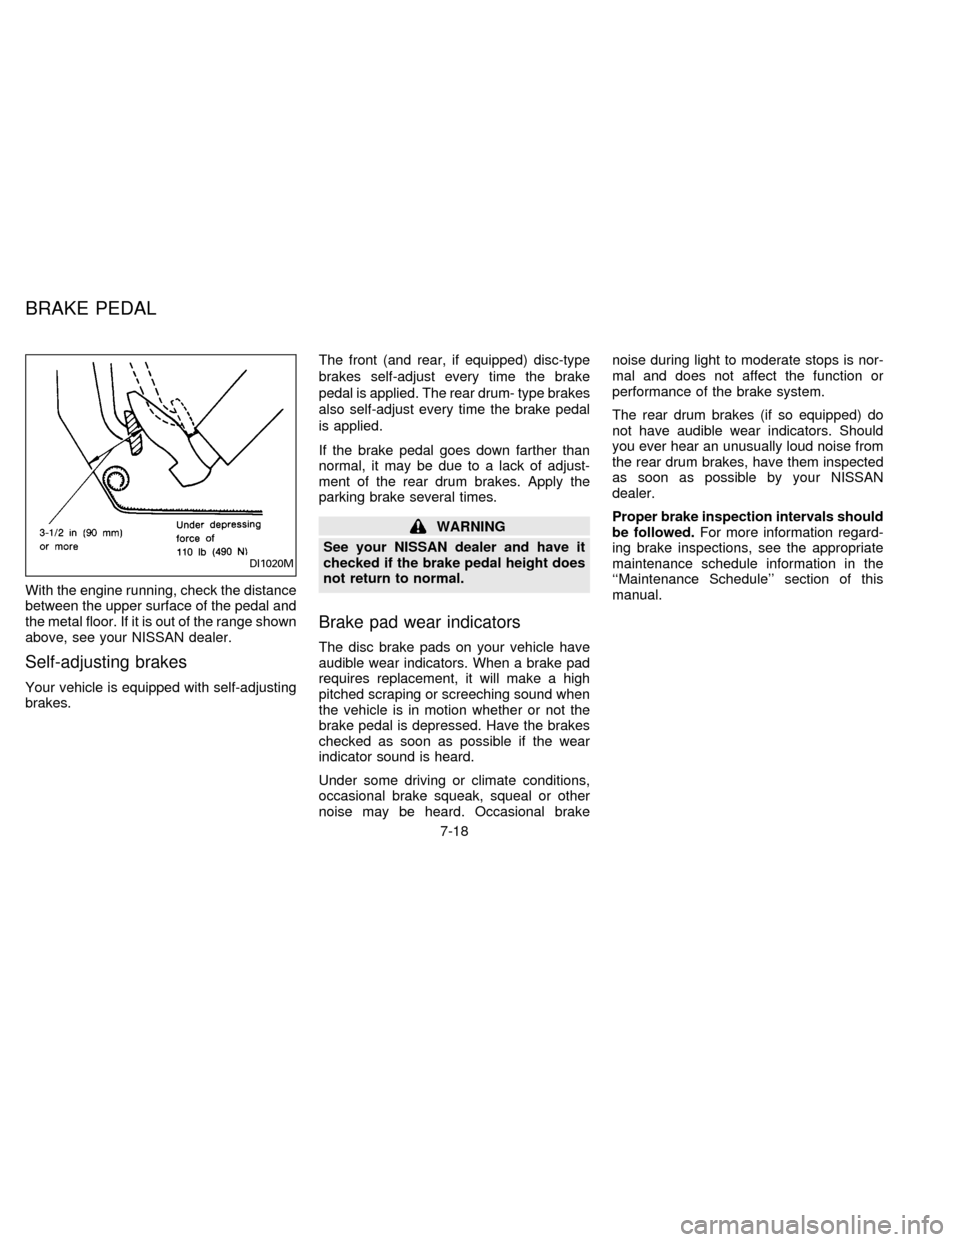
With the engine running, check the distance
between the upper surface of the pedal and
the metal floor. If it is out of the range shown
above, see your NISSAN dealer.
Self-adjusting brakes
Your vehicle is equipped with self-adjusting
brakes.The front (and rear, if equipped) disc-type
brakes self-adjust every time the brake
pedal is applied. The rear drum- type brakes
also self-adjust every time the brake pedal
is applied.
If the brake pedal goes down farther than
normal, it may be due to a lack of adjust-
ment of the rear drum brakes. Apply the
parking brake several times.
WARNING
See your NISSAN dealer and have it
checked if the brake pedal height does
not return to normal.
Brake pad wear indicators
The disc brake pads on your vehicle have
audible wear indicators. When a brake pad
requires replacement, it will make a high
pitched scraping or screeching sound when
the vehicle is in motion whether or not the
brake pedal is depressed. Have the brakes
checked as soon as possible if the wear
indicator sound is heard.
Under some driving or climate conditions,
occasional brake squeak, squeal or other
noise may be heard. Occasional brakenoise during light to moderate stops is nor-
mal and does not affect the function or
performance of the brake system.
The rear drum brakes (if so equipped) do
not have audible wear indicators. Should
you ever hear an unusually loud noise from
the rear drum brakes, have them inspected
as soon as possible by your NISSAN
dealer.
Proper brake inspection intervals should
be followed.For more information regard-
ing brake inspections, see the appropriate
maintenance schedule information in the
``Maintenance Schedule'' section of this
manual.
DI1020M
BRAKE PEDAL
7-18
ZX
Page 146 of 183
Improper service for a T-type spare tire
may result in serious personal injury. If
it is necessary to repair the T-type
spare tire, contact your NISSAN dealer.Changing tires and wheels
When replacing a tire, use the same size,
speed rating and load carrying capacity as
originally equipped. Recommended types
and sizes are shown in ``Wheels and tires''
in the ``Technical and consumer informa-
tion'' section. The use of tires other than
those recommended or the mixed use of
tires of different brands, construction (bias,
bias-belted or radial), or tread patterns can
adversely affect the ride, braking, handling,
ground clearance, body-to-tire clearance,
tire chain clearance, speedometer calibra-
tion, headlight aim and bumper height.
Some of these effects may lead to acci-
dents and could result in serious per-
sonal injury.
If the wheels are changed for any reason,
always replace with wheels which have the
same offset dimension. Wheels of a differ-
ent offset could cause early tire wear, pos-
sibly degraded vehicle handling character-
istics and/or interference with the brake
discs/ drums. Such interference can lead to
decreased braking efficiency and/or early
brake pad/shoe wear.
WARNING
Do not install a deformed wheel or tire
even if it has been repaired. Such
wheels or tires could have structural
damage and could fail without warning.
Wheel balance
Unbalanced wheels may affect vehicle han-
dling and tire life. Even with regular use,
wheels can get out of balance. Therefore,
they should be balanced as required.
Wheel balance service should be performed
with the wheels off the vehicle. Spin balanc-
ing the front wheels on the vehicle could
lead to transmission damage.
Care of wheels
cWash the wheels when washing the ve-
hicle to maintain their appearance.
cClean the inner side of the wheels when
the wheel is changed or the underside of
the vehicle is washed.
cDo not use abrasive cleaners when
washing the wheels.
cInspect wheel rims regularly for dents or
7-31
ZX
Page 150 of 183

Tire rotation*Ð Tires should be rotated
every 7,500 miles (12,000 km).
Wheel alignment and balanceÐIfthe
vehicle should pull to either side while driv-
ing on a straight and level road, or if you
detect uneven or abnormal tire wear, there
may be a need for wheel alignment.
If the steering wheel or seat vibrates at
normal highway speeds, wheel balancing
may be needed.
Windshield wiper blades*Ð Check for
cracks or wear if they do not wipe properly.
Doors and engine hoodÐ Check that all
doors and the engine hood operate prop-
erly. Also ensure all latches lock securely.
Lubricate hinges, latches, rollers and links if
necessary. Make sure that the secondary
latch keeps the hood from opening when
the primary latch is released.
When driving in areas using road salt or
other corrosive materials, check lubrication
frequently.
Lights*Ð Make sure the headlights, stop
lights, tail lights, turn signal lights, and other
lights are all operating properly and installed
securely. Also check headlight aim.INSIDE THE VEHICLE
The maintenance items listed here should
be checked on a regular basis, such as
when performing periodic maintenance,
cleaning the vehicle, etc.
Warning lights and chimesÐ Make sure
that all warning lights and buzzers/chimes
are operating properly.
Windshield wiper and washer*Ð Check
that the wipers and washer operate properly
and that the wipers do not streak.
Windshield defrosterÐ Check that the air
comes out of the defroster outlets properly
and in sufficient quantity when operating the
heater or air conditioner.
Steering wheelÐ Check for changes in
the steering conditions, such as excessive
freeplay, hard steering or strange noises.
SeatsÐ Check seat position controls such
as seat adjusters, seatback recliner, etc. to
ensure they operate smoothly and that all
latches lock securely in every position.
Check that the head restraints move up and
down smoothly and that the locks (if so
equipped) hold securely in all latched posi-
tions.Seat beltsÐ Check that all parts of the seat
belt system (for example, buckles, anchors,
adjusters and retractors) operate properly
and smoothly, and are installed securely.
Check the belt webbing for cuts, fraying,
wear or damage.
Accelerator pedalÐ Check the pedal for
smooth operation and make sure the pedal
does not catch or require uneven effort.
Keep the floor mats away from the pedal.
Clutch pedal*Ð Make sure the pedal
operates smoothly and check that it has the
proper free travel.
BrakesÐ Check that the brakes do not pull
the vehicle to one side when applied.
Brake pedal*Ð Check the pedal for
smooth operation and make sure it has the
proper distance under it when depressed
fully. Check the brake booster function. Be
certain to keep floor mats away from the
pedal.
Parking brake*Ð Check that the lever has
the proper travel and confirm that your
vehicle is held securely on a fairly steep hill
with only the parking brake applied.
8-3
ZX