Page 261 of 392
Downloaded from www.Manualslib.com manuals search engine Air Cleaner
To remove the air cleaner, remove the wing nuts that hold
the cover on. Remove the cover and
lift out the air filter.
Insert a new air filter, then replace the air cleaner cover.
Tighten the wing nuts
to hold the cover in place.
Refer to the Maintenance Schedule
to determine when to
replace the air filter.
See “Scheduled Maintenance Services”
in the Index.
A CAUTION:
Operating the engine with the air cleaner off can
cause you or others to be burned. The air cleaner
not only cleans the air, it stops flame if the engine
backfires.
If it isn’t there, and the engine
backfires, you could be burned. Don’t drive with
it off, and be careful working on the engine with
the air cleaner off.
I NOTICE:
If the air cleaner is off, a backfire can cause a
damaging engine fire. And, dirt can easily get
into your engine, which
will damage it. Always
have the air cleaner in place when you’re driving.
6-13
Page 262 of 392
Downloaded from www.Manualslib.com manuals search engine .. Automatic Transmission Fluid
When to Check and Change
A good time to check your automatic transmission fluid
level
is when the engine oil is changed.
Change both
the fluid and filter every 50,000 miles
(83 000 km) if the vehicle is mainly driven under one or
more
of these conditions:
In heavy city traffic where the outside temperature
regularly reaches
90°F (32°C) or higher.
0 In hilly or mountainous terrain.
When doing frequent trailer towing.
0 Uses such as found in taxi, police or delivery service.
If you do not use your vehicle under any of these
conditions, the fluid and filter
do not require changing.
See “Scheduled Maintenance Services” in the Index.
How to Check
Because this operation can be a little difficult, you
may choose to have this done at your GM dealer
Service Department.
If you do it yourself, be sure to follow all the instructions
here, or you could get
a false reading on the dipstick.
I NOTICE:
Too much or too little fluid can damage your
transmission.
Too much can mean that some of
the fluid could come out and fall on hot engine
parts or exhaust system parts, starting a fire. Be
sure to get an accurate reading if you check your
transmission fluid.
Wait at least 30 minutes before checking the
transmission fluid level
if you have been driving:
When outside temperatures are above 90°F (32°C).
At high speed for quite a while.
In heavy traffic -- especially in hot weather.
While pulling a trailer.
To get the right reading, the fluid should be at normal
operating temperature, which is
180°F to 200°F
(82°C to 93°C).
. 6-14
Page 265 of 392
Downloaded from www.Manualslib.com manuals search engine Manual Transmission Fluid
When to Check
A good time to have it checked is when the engine oil is
changed. However,
the fluid in your manual
transmission doesn't require changing.
How to Check
Because this operation can be a little difficult, you
may choose to have this done at your GM dealer's
Service Department.
If you do it yourself, be sure to follow all the
instructions here, or
you could get a false reading.
I NOTICE: I
I
, Too much or too little fluid can dafnage your
l transmission. Too much can mean that some of
the fluid could come out and fall on hot engine
parts or exhaust system parts, starting
a fire. Be
sure to get an accurate reading if you check your
transmission fluid.
Check the fluid level only when your engine is off, the
vehicle is parked on a level place and the transmission is
cool enough for you to rest your fingers on the
transmission case.
Then, follow these steps:
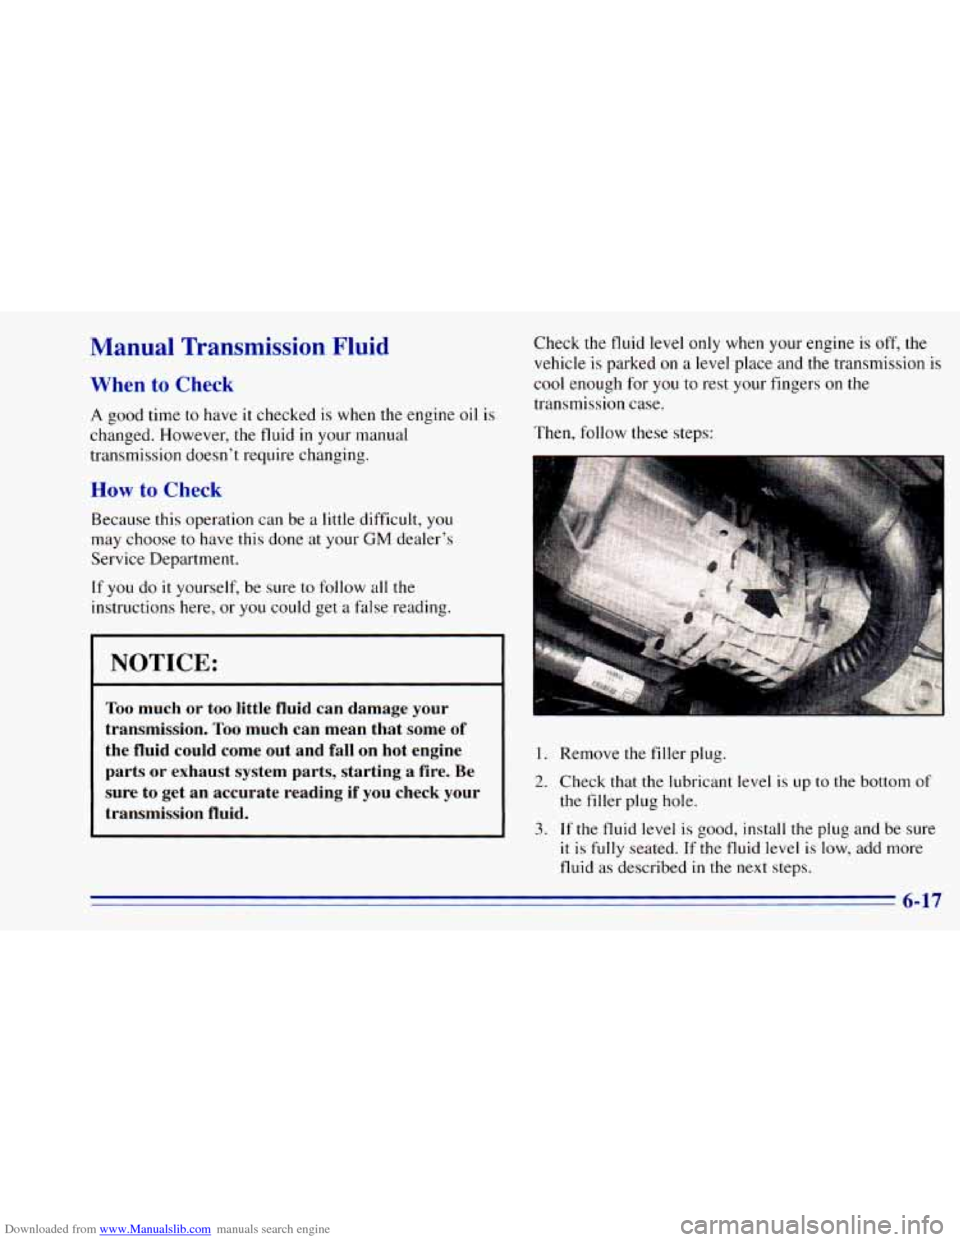
1. Remove the filler plug.
2. Check that the lubricant level is up to the bottom of
the filler plug hole.
3. , If the fluid level is good, install the plug and be sure
it is fully seated. If the fluid level is low, add more
fluid as described in
the next steps.
6-17
Page 267 of 392
Downloaded from www.Manualslib.com manuals search engine How to Check
The proper fluid should be added if the level does not
reach the bottom
of the diaphragm when it’s in place in
the reservoir. See the instructions on the reservoir cap.
Rear Axle
How to Check Lubricant
When
to Check and Change Lubricant
Refer to the Maintenance Schedule to determine how
often to check the lubricant and when to change
it. See
“Scheduled Maintenance Services”
in the Index.
If the level is below the bottom of the filler plug hole,
you’ll need to
add some lubricant. Add enough lubricant
to raise the level to the bottom of the filler plug hole.
6-19
Page 269 of 392
Downloaded from www.Manualslib.com manuals search engine What to Use
Refer to the Maintenance Schedule to determine what
kind of lubricant to use. See “Recommended Fluids and
Lubricants” in the Index.
Front Axle
When to Check and Change Lubricant
Refer to the Maintenance Schedule to determine how
often to check the lubricant and when to change it. See
“Scheduled Maintenance Services” in the Index.
How to Check Lubricant
If the level is below the bottom of the filler plug hole,
you’ll need
to add some lubricant.
If the differential is at operating temperature (warm),
add enough lubricant
to raise the level to the bottom of
the filler plug hole.
If the differential is cold, add enough lubricant to raise
the level to
1/2 inch (12 mm) below the filler plug hole.
6-21
Page 278 of 392
Downloaded from www.Manualslib.com manuals search engine NOTICE:
a
a
Using the wrong fluid can badly damage
brake system parts. For example, just a few
drops
of mineral-based oil, such as engine
oil, in your brake system can damage brake
system parts
so badly that they’ll have to be
replaced. Don’t let someone put in the
wrong kind of fluid.
If you spill brake fluid on your vehicle’s
painted surfaces, the paint finish can be
damaged. Be careful not to spill brake fluid
on your vehicle.
If you do, wash it off
immediately. See “Appearance Care’’ in
the Index.
Brake Wear
Your vehicle has front disc brakes and rear drum brakes.
Disc brake pads have built-in wear indicators that make a
high-pitched warning sound when
the brake pads are worn
and new pads
are needed. The sound may come and go or
be heard all the time your vehicle is moving (except when
you are pushinq
on the brake pedal firmly).
The brake wear warning sound means that sooner
or later your brakes won’t work well. That could
lead
to an accident. When you hear the brake wear
warning sound, have your vehicle serviced.
NOTICE:
Continuing to drive with worn-out brake pads
could result in costly brake repair.
Page 288 of 392
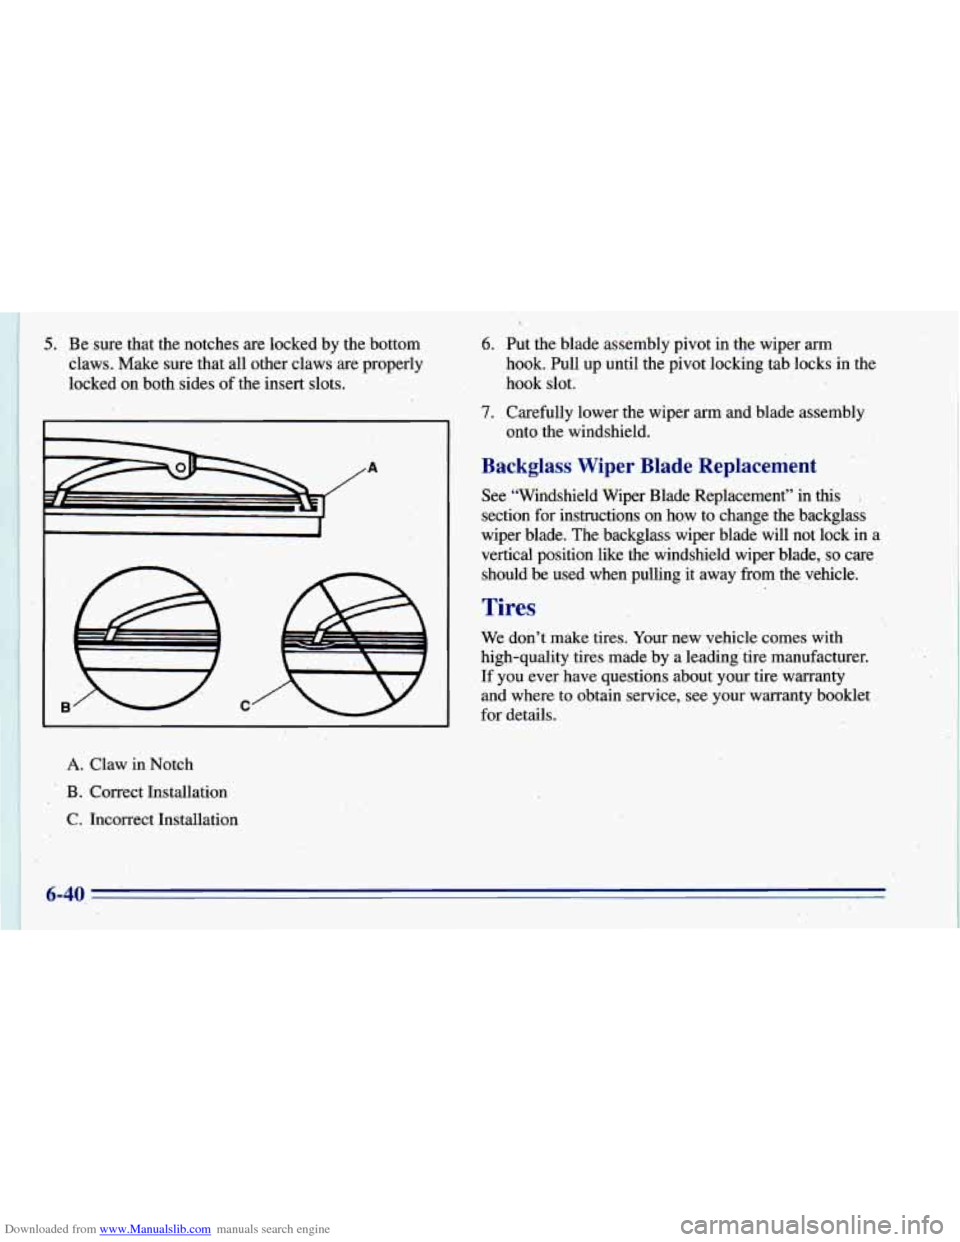
Downloaded from www.Manualslib.com manuals search engine 5. Be sure that the notches are locked by the bottom
claws. Make sure that all other claws are properly
locked on both sides of the insert slots.
C /
A. Claw in Notch
*. B. Cori-ect Installation
C. Incorrect Installation
?,
6. Put the blade assembly pivot in the wiper arm
hook. Pull up until the pivot locking tab locks in the
hook slot;
7. Carefully lower the wiper arrn and blade assembly
Backglass Wiper Blade Replacement
See “Windshield Wiper Blade Replacement” in this
section for instructions on how to change the backglass
wiper blade. The backglawwiper blade will not lock in a
vertical position like the windshield wiper blade,
so care
should
be used when pulling it away from the. vehicle.
onto the
windshield.
.I ’
Tires
We don’t make tires. Your new vehicle comes with
high-quality tires made by a leading tire manufacturer.
If you ever have questions about your tire warranty
and where to obtain service, see your warranty booklet
for details.
Page 291 of 392
Downloaded from www.Manualslib.com manuals search engine c
f
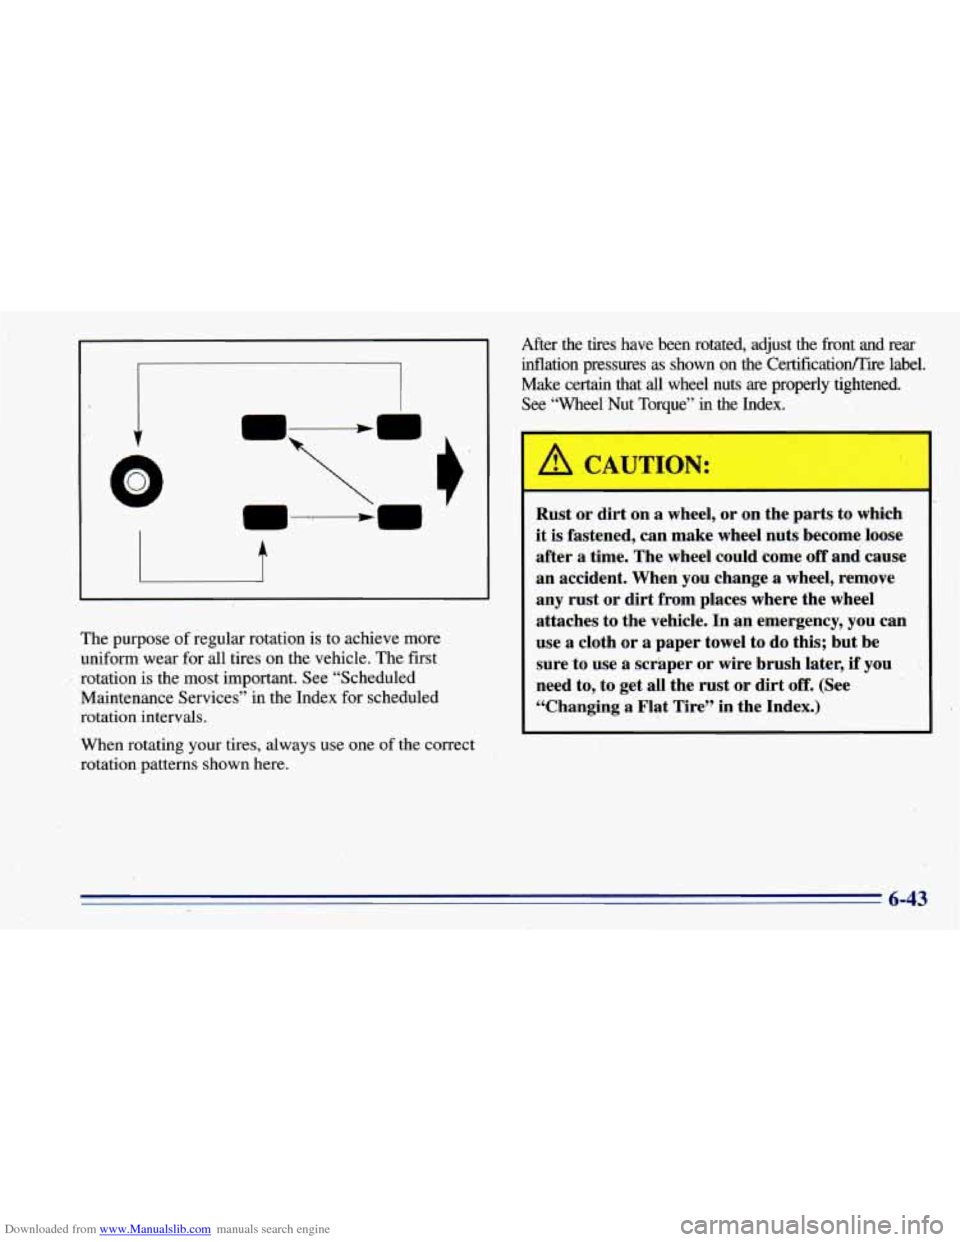
The purpose of regular rotation is to achieve more
uniform wear for all tires on the vehicle. The first
Maintenance Services” in the Index for scheduled
rotation intervals.
I rotation is the most important. See “Scheduled
When rotating your tires, always use one of the correct
rotation patterns shown here. After the tires have been rotated, adjust the front and rear
inflation pressures as shown on the
Certificatioflire label.
Make certain that
all wheel nuts are. properly tightened.
See “Wheel Nut Torque’’
in the Index.
Rust or dirt on
a wheel, or on .the parts to Which
it is fastened, can make wheel nuts become loose
after
a time. The wheel could come off and cause
an accident. When you change
a wheel, remove
any rust or dirt from places where the wheel
attaches to the vehicle. In an emergency, you can
use
a cloth or a paper towel to do this; but be
sure to use
a scraper or wire brush later, if you
need to, to get all the rust or dirt
off. (See
“Changing
a Flat Tire” in the Index.)
-_
6-43