1996 CHEVROLET BLAZER brake light
[x] Cancel search: brake lightPage 11 of 392
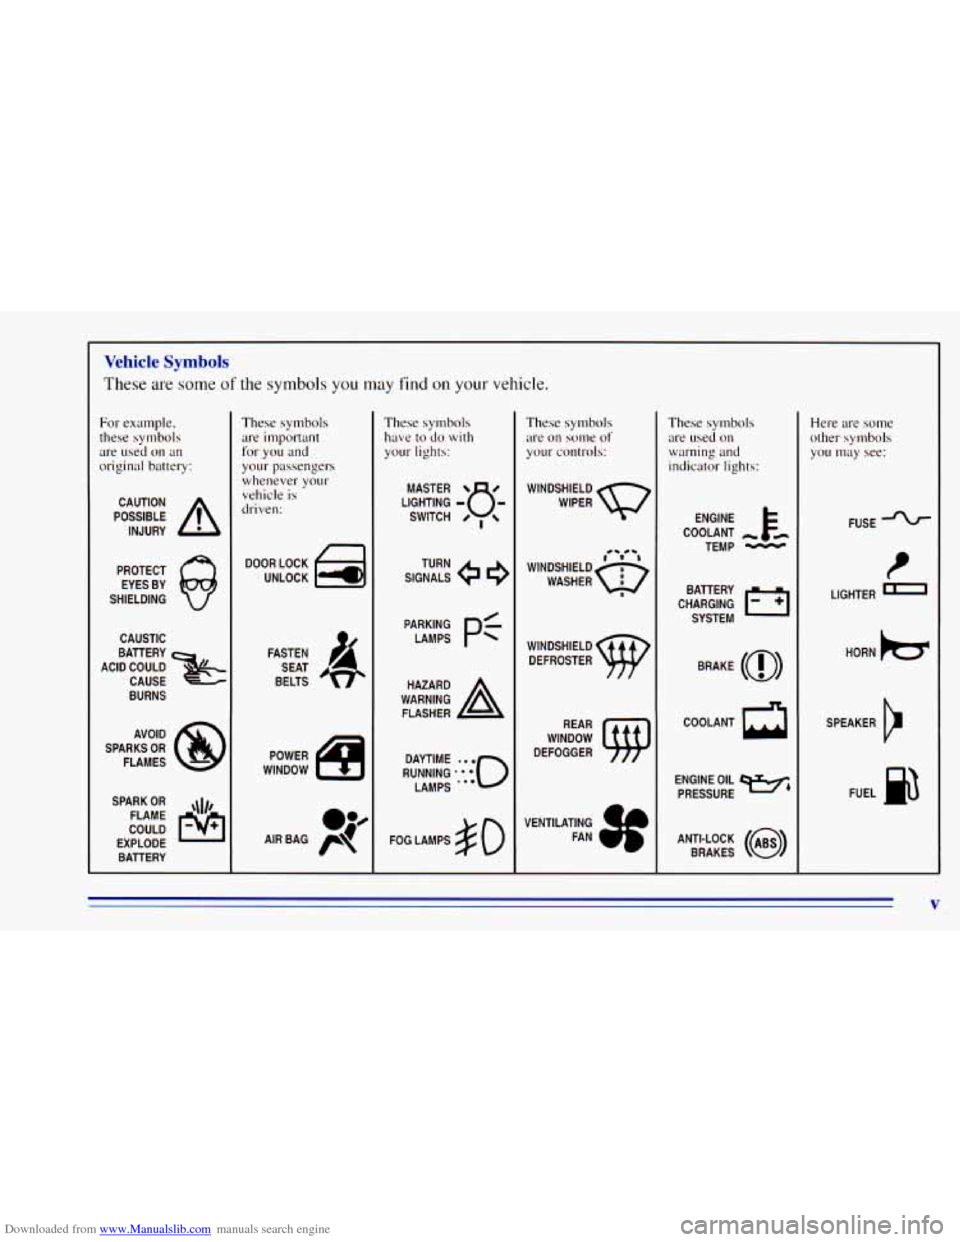
Downloaded from www.Manualslib.com manuals search engine Vehicle Symbols
These are some of the symbols you may find on your vehicle.
For example,
these symbols
are used on an
original battery:
POSSIBLE A
CAUTION
INJURY
PROTECT EYES BY
SHIELDING
CAUSTIC
BURNS AVOID
SPARKS
OR
FLAMES
SPARK
OR ,\I/,
COULD pq
FLAME
EXPLODE BATTERY
These symbols
are important
for you and
your passengers
whenever your
vehicle is
driven:
DOOR LOCK
FASTEN SEAT
BELTS
These symbols have to do
with
your lights:
SIGNALS e
TURN
FOG LAMPS
# 0
These symbols
are on some
of
yo11r controls:
WINDSHIELD
WIPER
These symbols are used on
warning and
indicator lights:
COOLANT -
TEMP -
CHARGING I-1
BATTERY
SYSTEM
BRAKE
(0)
COOLANT a
ENGINE OIL e,
PRESSURE
ANTI-LOCK
(a)
BRAKES
Here are some
other symbols
you
may see:
FUSE -%-
I
LIGHTER I
HORN )cr
SPEAKER
b
FUEL siE3
V
Page 78 of 392
Downloaded from www.Manualslib.com manuals search engine To stop, let up on the accelerator pedal and press the
brake pedal. Just before the vehicle stops, press the
clutch pedal and the brake pedal, and
shift to
NEUTRAL (N).
NEUTRAL (N): Use this position when you start or
idle your engine.
REVERSE (R): To back up, press the clutch pedal, wait
about six seconds, then shift into REVERSE
(R). Then
let up on the clutch pedal slowly while pressing the
accelerator pedal.
NOTICE:
Shift to REVERSE (R) only after your vehicle is
stopped. Shifting to REVERSE (R) while your
vehicle
is moving could damage your transmission.
Use REVERSE (R), along with the parking brake, for
parking your vehicle.
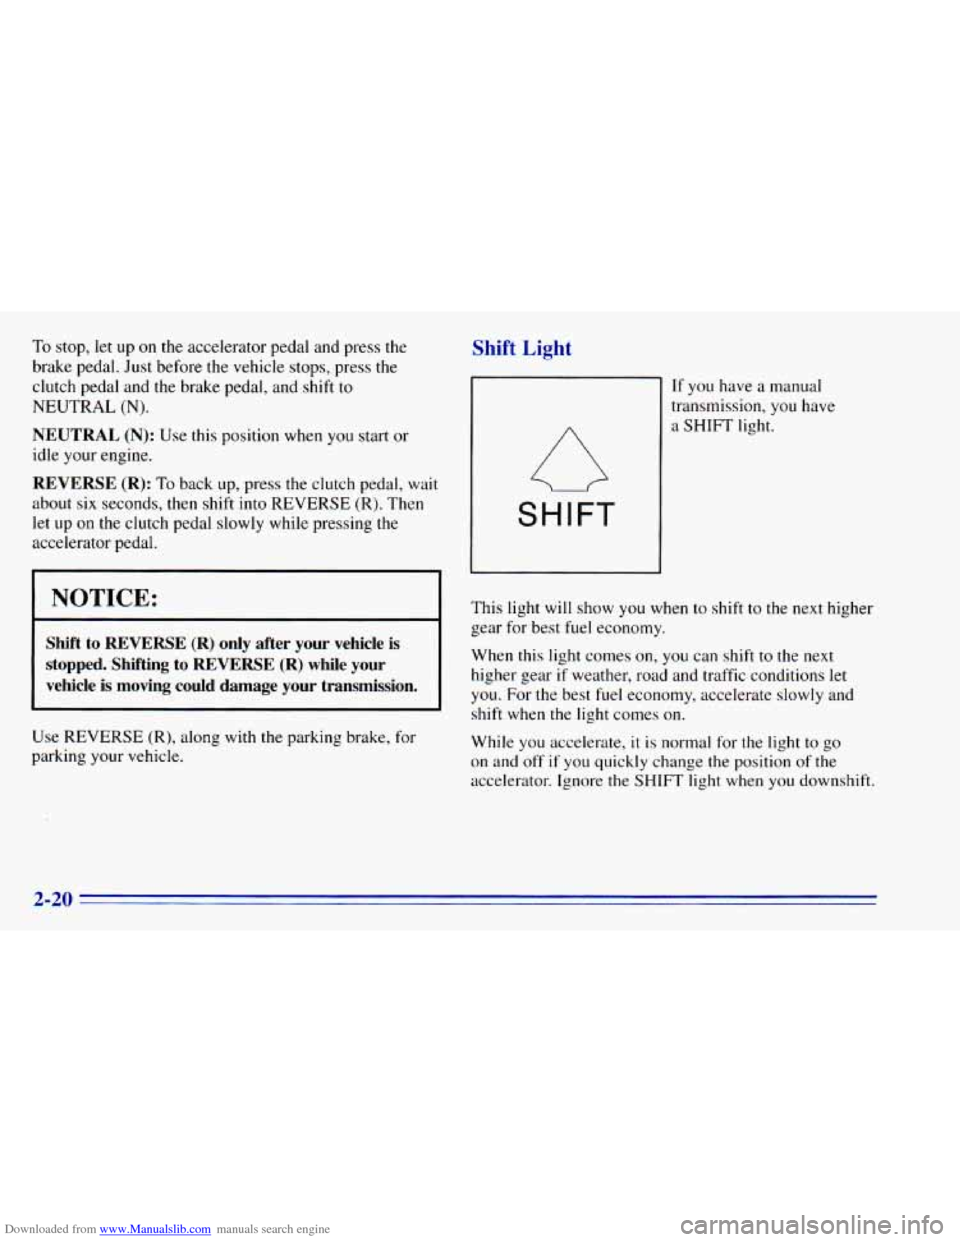
Shift Light
SHIFT
If you have a manual
transmission, you have
a SHIFT light.
This light
will show you when to shift to the next higher
gear for best fuel economy.
When this light comes on,
you can shift to the next
higher gear
if weather, road and traffic conditions let
you. For the best fuel economy, accelerate slowly and
shift when the light comes on.
While you accelerate,
it is normal for the light to go
on and
off if you quickly change the position of the
accelerator. Ignore the SHIFT light when you downshift.
2-20
Page 80 of 392
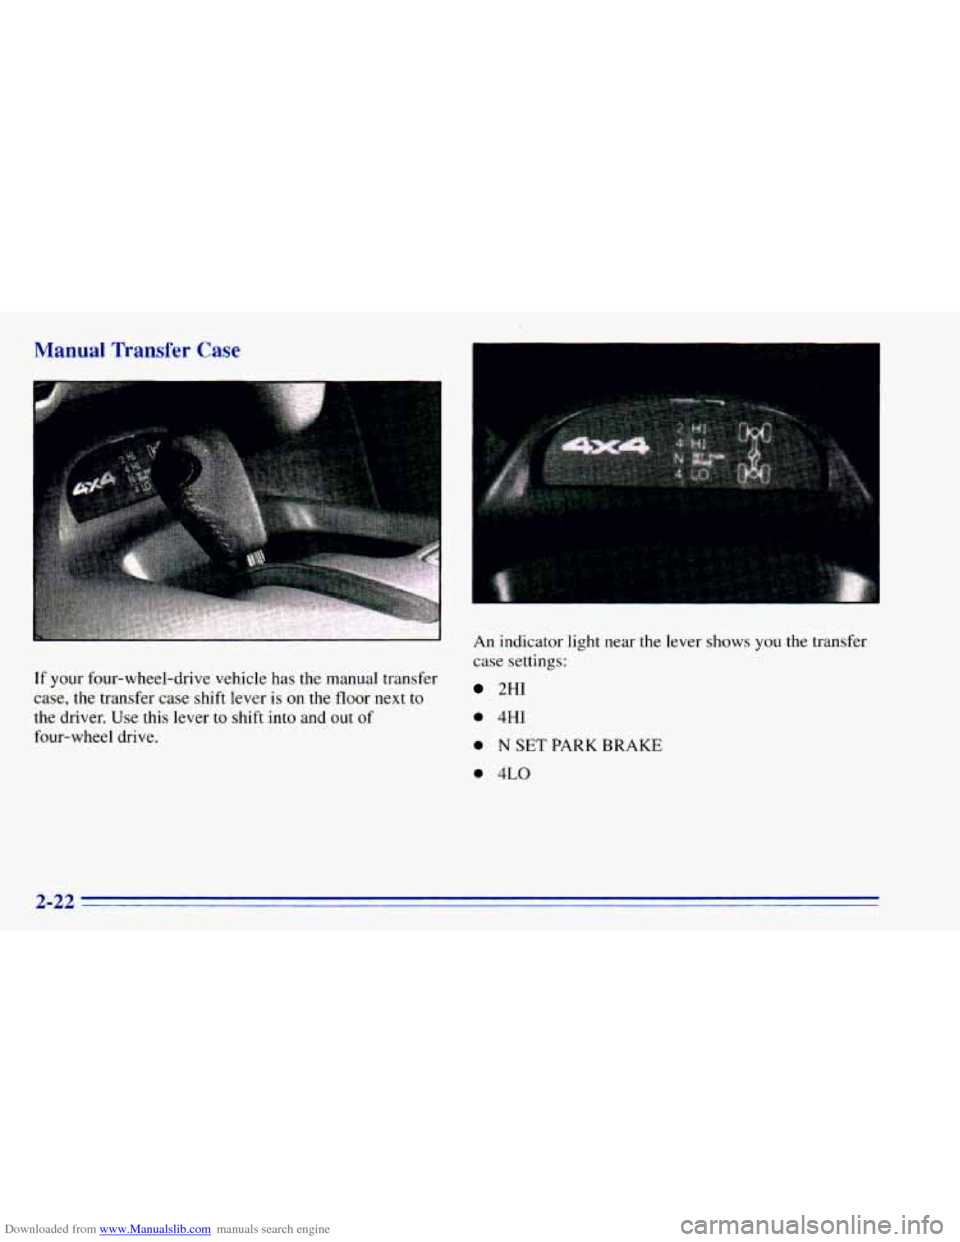
Downloaded from www.Manualslib.com manuals search engine Manual Transfer Case
If your four-wheel-drive vehicle has the manual transfer
case,
the transfer case shift lever is on the floor next to
the driver. Use this lever to shift into and out of
four-wheel drive. An
indicator light near
the lever shows you the transfer
case settings:
2HI
0 4HI
0 N SET PARK BRAKE
0 4LO
2-22
Page 81 of 392
Downloaded from www.Manualslib.com manuals search engine The front axle portion of the diagram on the indicator
will light up when
you shift into four-wheel drive. A
slight delay between shifting and the pattern’s lighting
is normal. If the pattern does
not light up, or if the front
axle lights do not go out after
you shift out of
four-wheel drive, have your dealer check your system.
Turn the INT LIGHTS switch located to the right of
your headlamp switch to dim your transfer case
indicator light when your headlamps or parking lamps
are
on. This will also cause your instrument panel
lights
to dim.
2HI: This setting is for driving in most street and
highway situations. Your front axle is
not engaged in
two-wheel drive.
4HI: This setting engages your front axle to help drive
your vehicle. Use 4HI when you need extra traction,
such as on snowy or icy roads, or in most off-road
situations.
N SET PARK BRAKE: Shift to this neutral setting
only when your vehicle needs
to be towed.
4LO: This setting also engages your front axle to give
you extra traction and provides extra gear reduction.
You may never need 4LO. It sends the maximum power
to all four wheels. You might choose 4LO if you were
driving off-road in sand, mud or deep snow and
climbing
or descending steep hills.
You can shift from 2HI to 4HI or from 4HI to 2HI while
the vehicle
is moving. Do not press the transfer case
shift lever button when shifting from 2HI to 4HI or from
4HI
to 2HI. Your front axle will engage faster if you
take your foot off of the accelerator for a few seconds
after
you shift.
To shift your transfer case into N SET PARK BRAKE:
1. Stop the vehicle and shift your transmission into
NEUTRAL
(N).
2. Set the parking brake. Your vehicle can roll unless
3. Pull the transfer case shift lever into N SET
the brakes are applied.
PARK BRAKE.
2-23
Page 84 of 392
Downloaded from www.Manualslib.com manuals search engine Shifting from 4LO to 4HI
To shift from 4LO to 4H1, your vehicle must be
stopped or moving
less than 3 mph (4.8 km/h) with the
transmission
in NEUTRAL (N) or the clutch pedal
engaged. The preferred method for shifting out
of
4LO is to have your vehicle moving 1 to 2 mph
(1.6 to 3.2 km/h). Press and release the 4HI switch.
You must wait for
the 4HI indicator light to stop
flashing and remain illuminated before shifting your
transmission into gear or releasing the clutch pedal.
If the 4HI switch is pressed when your vehicle is in
gear and/or moving, the 4HI indicator light will flash
for
30 seconds but not complete the shift unless the
vehicle is moving slower than
3 mph (4.8 km/h) and
the transmission is in NEUTRAL
(N) or the clutch
pedal engaged. On automatic transmission equipped vehicles,
if your
transfer case does not shift into 4H1, your transmission
indicator switch may require adjustment. With your
transmission in NEUTRAL
(N), press and release the
4HI switch. While the 4HI indicator light is flashing,
shift your transmission into PARK
(P). Wait until the
4HI indicator light remains illuminated before shifting
your transmission into gear. This will get you into 4H1,
but you should take your vehicle
in for service to restore
normal operation.
Parking Brake
To set the parking brake, hold the regular brake pedal
down with your right foot. Push down the parking brake
pedal with your left foot. If
the ignition is on, the brake
system warning light will come on.
To release
the parking brake hold the regular brake
pedal down.
2-26
Page 100 of 392
Downloaded from www.Manualslib.com manuals search engine Increasing Speed While Using Cruise Control
There are two ways to go to a higher speed:
Use the accelerator pedal to get to the higher speed.
Press the button at the end of the lever, then release
the button and the accelerator pedal. You’ll now
cruise at the higher speed.
Move the cruise switch from ON to WA. Hold it
there until you get up
to the speed you want, and
then release the switch.
To increase your speed in
very small amounts, move the switch to
R/A. Each
time
you do this, your vehicle will go about 1 mph
(1.6 kmh) faster.
Reducing Speed While Using Cruise Control
Press in the button at the end of the lever until you reach
the lower speed
you want, then release it.
To slow down in very small amounts, press the button
for less than a
112 second. Each time you do this, you’ll
go
1 mph (1.6 km/h) slower.
Passing Another Vehicle While Using Cruise Control
Use the accelerator pedal to increase your speed. When
you take your foot
off the pedal, your vehicle will slow
down to
the cruise control speed you set earlier.
Using Cruise Control on Hills
How well your cruise control will work on hills depends
upon your speed, load and the steepness
of the hills.
When going up steep hills, you may want to step on the
accelerator pedal to maintain your speed. When going
downhill, you may have to brake or shift to
a lower gear
to keep your speed down. Of course, applying the brake
takes you
out of cruise control. Many drivers find this to
be too much trouble and don’t use cruise control on
steep hills.
Ending Cruise Control
There are two ways to turn off the cruise control:
0 Step lightly on the brake pedal or push the clutch
pedal, if you have a manual transmission.
0 Move the cruise switch to OFF.
Erasing Speed Memory
When you turn off the cruise control or the ignition,
your cruise control set speed memory is erased.
2-42
Page 102 of 392
Downloaded from www.Manualslib.com manuals search engine Lamps On Reminder
A reminder tone will sound when your headlamps or
parking lamps are turned
on and your ignition is in OFF,
LOCK or ACCESSORY. To turn the tone off, press the
OFF switch.
Daytime Running Lamps (If So Equipped)
Daytime Running Lamps (DRL) can make it easier for
others to see the front
of your vehicle during the day.
DRL can be helpful in many different driving
conditions, but they can be especially helpful in the
short periods after dawn and before sunset.
The DRL system will make your headlamps come
on at
reduced brightness when:
the ignition is on,
the headlamp switch is off, and
the parking brake is released. When the
DRL are
on, only your headlamps will be on.
The taillamps, sidemarker and other lamps won’t be on.
The instrument panel won’t be lit up either.
When
it begins to get dark, your DRL indicator light
is a reminder to turn your headlamp switch on. The
other lamps that come
on with your headlamps will
also come
on.
When you turn the headlamp switch off, the regular
lamps will go off, and your headlamps will change to
the reduced brightness
of DRL.
To idle your vehicle with the DRL
off, set the parking
brake. The DRL will stay off until
you release the
parking brake.
As with any vehicle, you should turn on the regular
headlamp system when you need it.
2-44
Page 119 of 392
Downloaded from www.Manualslib.com manuals search engine 1. Air Vents
2. Instrument Cluster
3. Electronic Transfer Case (Option)
4. Comfort Controls
5. Glove Box
6. Ashtray
7. Cigarette Lighterpower Auxiliary Outlets (Option)
8. Storage Compartment
9. Audio System
10. Fog Lamps (Option)
1 1. Lamp Controls
12. Rear Endgate Release
13. Brake Release
14. Rear Window Washermiper
15. Rear Window Defogger (Option)
2-61