Page 16 of 2248
5) Check idle speed when unloaded. (With headlights,
heater fan, rear defroster, radiator fan, air conditioning, etc.
OFF)
Idle speed (No load and gears in neutral (MT) or N or
P (AT) position):
700±100 rpm
6) Check idle speed when loaded. (Turn air conditioning
switch to“ON”and operate compressor for at least one
minute before measurement.)
Idle speed [A/C“ON”, no load and gears in neutral
(MT) or N or P (AT) position]:
850±50 rpm
CAUTION:
Never rotate idle adjusting screw. If idle speed is out
of specifications, refer to General On-board Diagnosis
Table under “2-7 On-Board Diagnostics II System”.
4
2-2
3. Engine Idle Speed
Page 919 of 2248
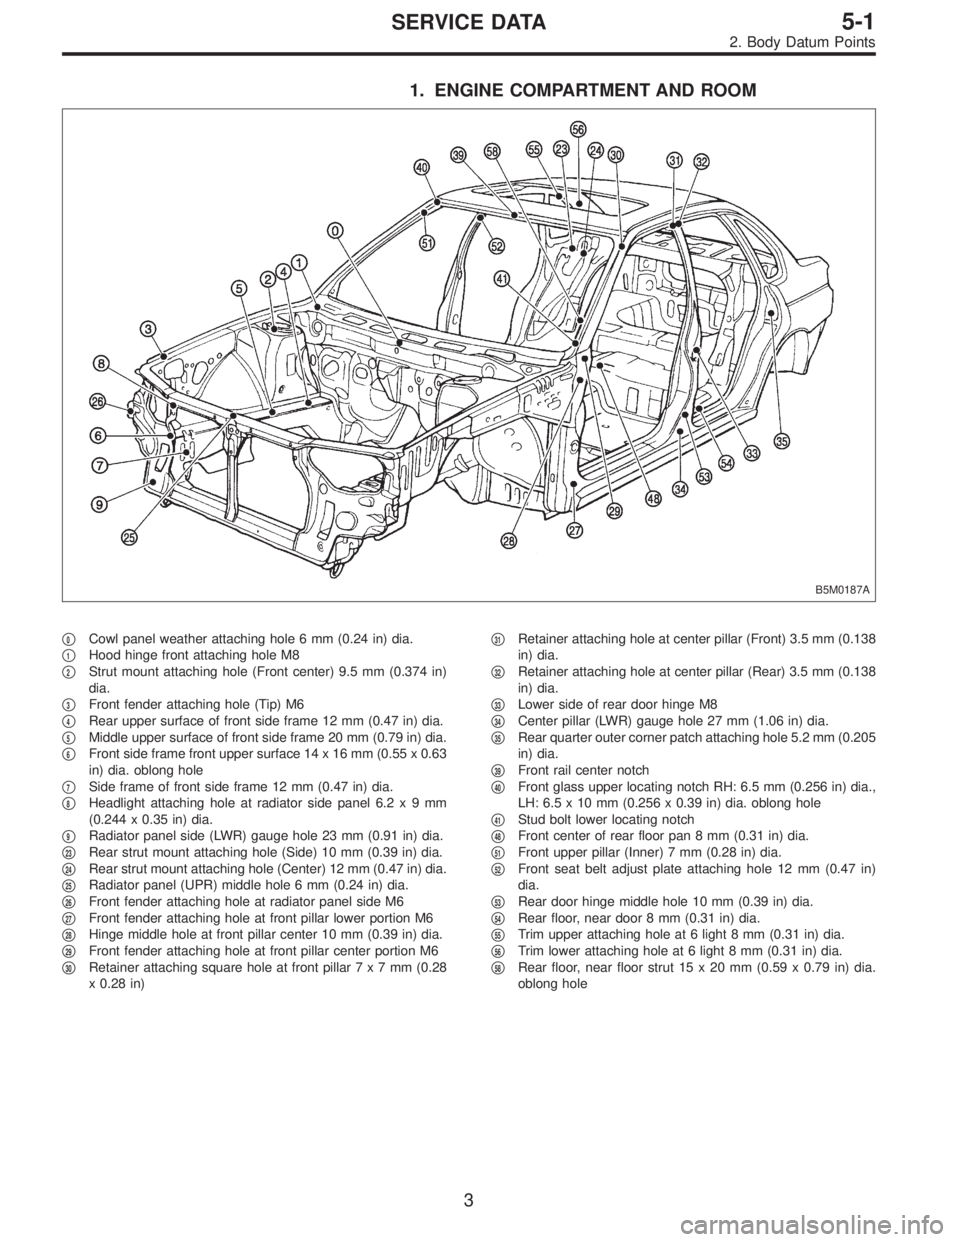
1. ENGINE COMPARTMENT AND ROOM
B5M0187A
�0Cowl panel weather attaching hole 6 mm (0.24 in) dia.
�
1Hood hinge front attaching hole M8
�
2Strut mount attaching hole (Front center) 9.5 mm (0.374 in)
dia.
�
3Front fender attaching hole (Tip) M6
�
4Rear upper surface of front side frame 12 mm (0.47 in) dia.
�
5Middle upper surface of front side frame 20 mm (0.79 in) dia.
�
6Front side frame front upper surface 14 x 16 mm (0.55 x 0.63
in) dia. oblong hole
�
7Side frame of front side frame 12 mm (0.47 in) dia.
�
8Headlight attaching hole at radiator side panel 6.2x9mm
(0.244 x 0.35 in) dia.
�
9Radiator panel side (LWR) gauge hole 23 mm (0.91 in) dia.
�
23Rear strut mount attaching hole (Side) 10 mm (0.39 in) dia.
�
24Rear strut mount attaching hole (Center) 12 mm (0.47 in) dia.
�
25Radiator panel (UPR) middle hole 6 mm (0.24 in) dia.
�
26Front fender attaching hole at radiator panel side M6
�
27Front fender attaching hole at front pillar lower portion M6
�
28Hinge middle hole at front pillar center 10 mm (0.39 in) dia.
�
29Front fender attaching hole at front pillar center portion M6
�
30Retainer attaching square hole at front pillar7x7mm(0.28
x 0.28 in)�
31Retainer attaching hole at center pillar (Front) 3.5 mm (0.138
in) dia.
�
32Retainer attaching hole at center pillar (Rear) 3.5 mm (0.138
in) dia.
�
33Lower side of rear door hinge M8
�
34Center pillar (LWR) gauge hole 27 mm (1.06 in) dia.
�
35Rear quarter outer corner patch attaching hole 5.2 mm (0.205
in) dia.
�
39Front rail center notch
�
40Front glass upper locating notch RH: 6.5 mm (0.256 in) dia.,
LH: 6.5 x 10 mm (0.256 x 0.39 in) dia. oblong hole
�
41Stud bolt lower locating notch
�
48Front center of rear floor pan 8 mm (0.31 in) dia.
�
51Front upper pillar (Inner) 7 mm (0.28 in) dia.
�
52Front seat belt adjust plate attaching hole 12 mm (0.47 in)
dia.
�
53Rear door hinge middle hole 10 mm (0.39 in) dia.
�
54Rear floor, near door 8 mm (0.31 in) dia.
�
55Trim upper attaching hole at 6 light 8 mm (0.31 in) dia.
�
56Trim lower attaching hole at 6 light 8 mm (0.31 in) dia.
�
58Rear floor, near floor strut 15 x 20 mm (0.59 x 0.79 in) dia.
oblong hole
3
5-1SERVICE DATA
2. Body Datum Points
Page 939 of 2248
4. Datum Points and Dimensions
Concerning On-Board Aiming
Adjustment
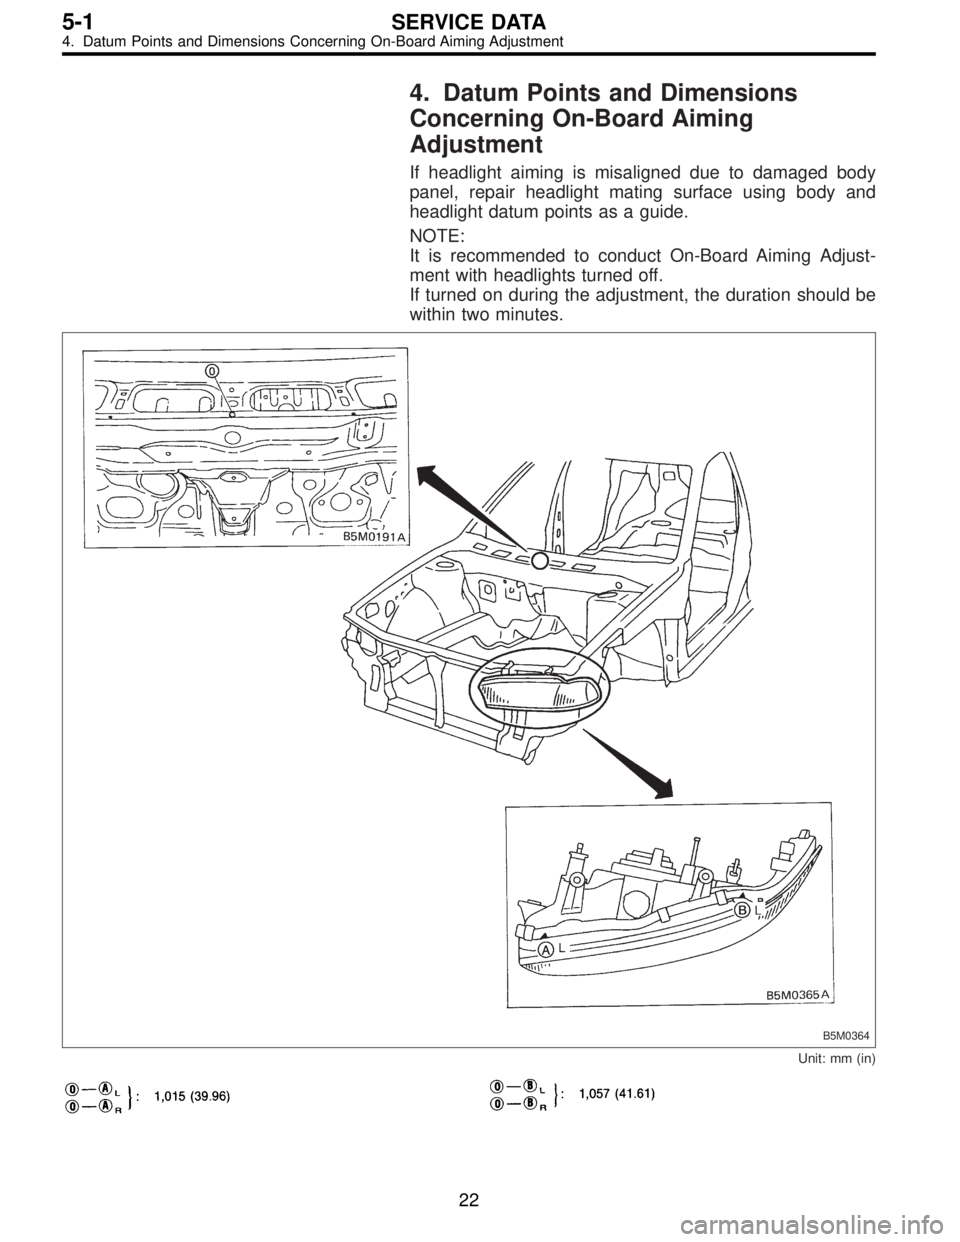
If headlight aiming is misaligned due to damaged body
panel, repair headlight mating surface using body and
headlight datum points as a guide.
NOTE:
It is recommended to conduct On-Board Aiming Adjust-
ment with headlights turned off.
If turned on during the adjustment, the duration should be
within two minutes.
B5M0364
Unit: mm (in)
22
5-1SERVICE DATA
4. Datum Points and Dimensions Concerning On-Board Aiming Adjustment
Page 953 of 2248
4. Front Bumper
A: REMOVAL
SUPPLEMENTAL RESTRAINT SYSTEM“AIRBAG”
Airbag system wiring harness is routed near the front
bumper assembly.
CAUTION:
�All Airbag system wiring harness and connectors
are colored yellow. Do not use electrical test equip-
ment on these circuits.
�Be careful not to damage Airbag system wiring har-
ness when servicing the front bumper assembly.
1) Disconnect the ground cable from the battery.
B5M0273
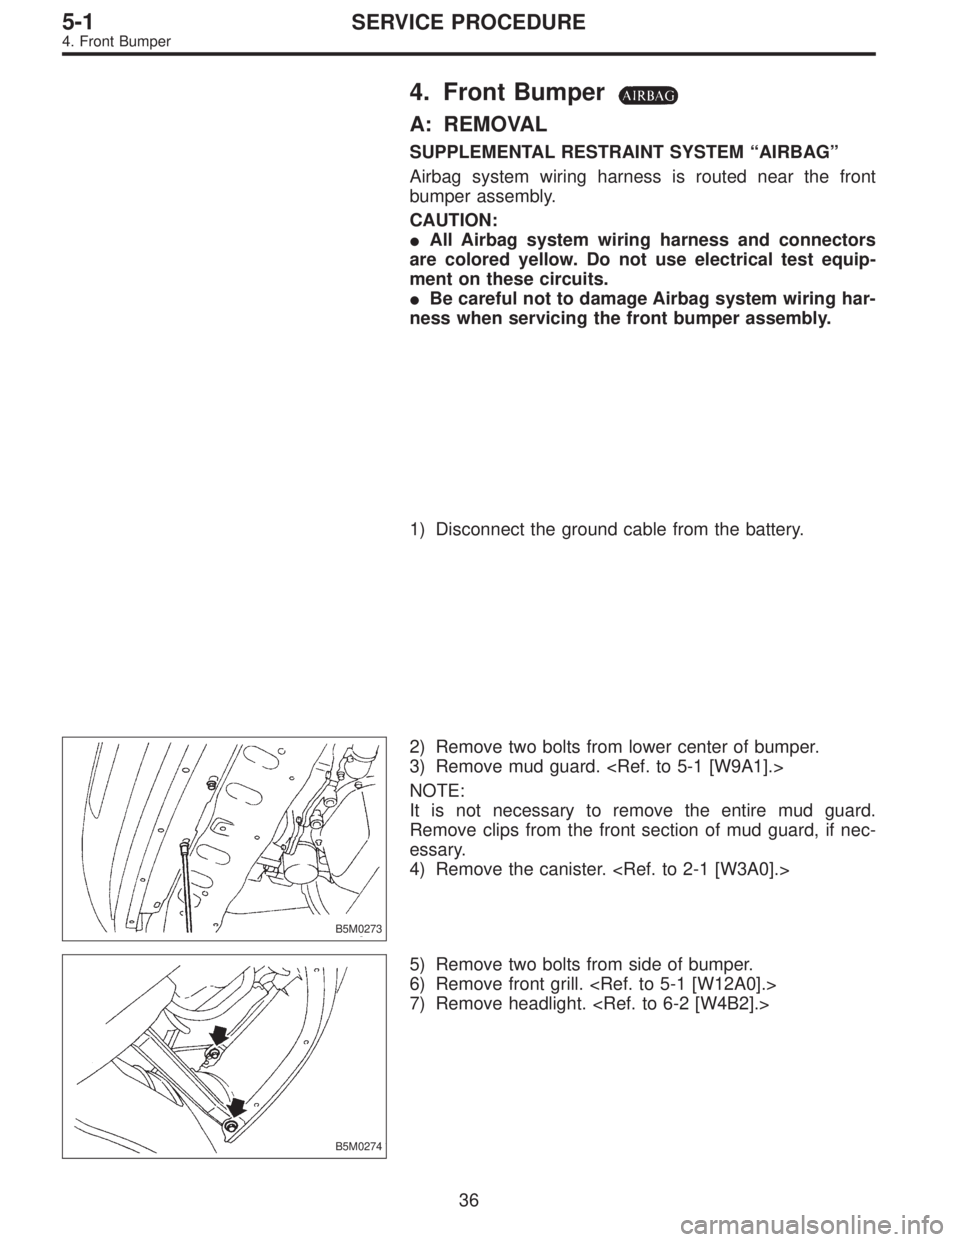
2) Remove two bolts from lower center of bumper.
3) Remove mud guard.
NOTE:
It is not necessary to remove the entire mud guard.
Remove clips from the front section of mud guard, if nec-
essary.
4) Remove the canister.
B5M0274
5) Remove two bolts from side of bumper.
6) Remove front grill.
7) Remove headlight.
36
5-1SERVICE PROCEDURE
4. Front Bumper
Page 954 of 2248
B5M0376
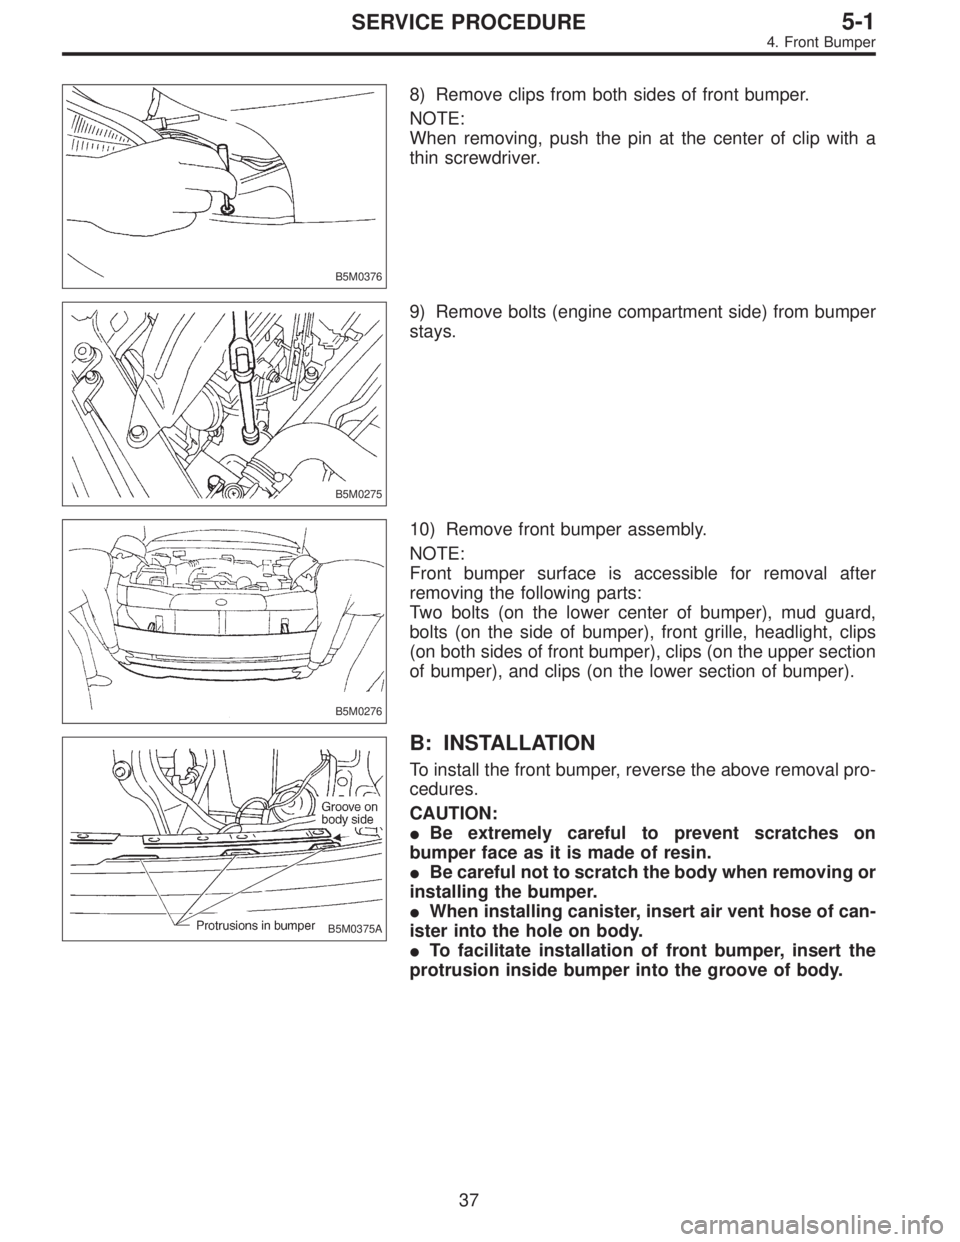
8) Remove clips from both sides of front bumper.
NOTE:
When removing, push the pin at the center of clip with a
thin screwdriver.
B5M0275
9) Remove bolts (engine compartment side) from bumper
stays.
B5M0276
10) Remove front bumper assembly.
NOTE:
Front bumper surface is accessible for removal after
removing the following parts:
Two bolts (on the lower center of bumper), mud guard,
bolts (on the side of bumper), front grille, headlight, clips
(on both sides of front bumper), clips (on the upper section
of bumper), and clips (on the lower section of bumper).
B5M0375A
B: INSTALLATION
To install the front bumper, reverse the above removal pro-
cedures.
CAUTION:
�Be extremely careful to prevent scratches on
bumper face as it is made of resin.
�Be careful not to scratch the body when removing or
installing the bumper.
�When installing canister, insert air vent hose of can-
ister into the hole on body.
�To facilitate installation of front bumper, insert the
protrusion inside bumper into the groove of body.
37
5-1SERVICE PROCEDURE
4. Front Bumper
Page 962 of 2248
8. Front Fender
A: REMOVAL
SUPPLEMENTAL RESTRAINT SYSTEM“AIRBAG”
Airbag system wiring harness is routed near the front
fender.
CAUTION:
�All Airbag system wiring harness and connectors
are colored yellow. Do not use electrical test equip-
ment on these circuits.
�Be careful not to damage Airbag system wiring har-
ness when servicing the front fender.
B5M0285A
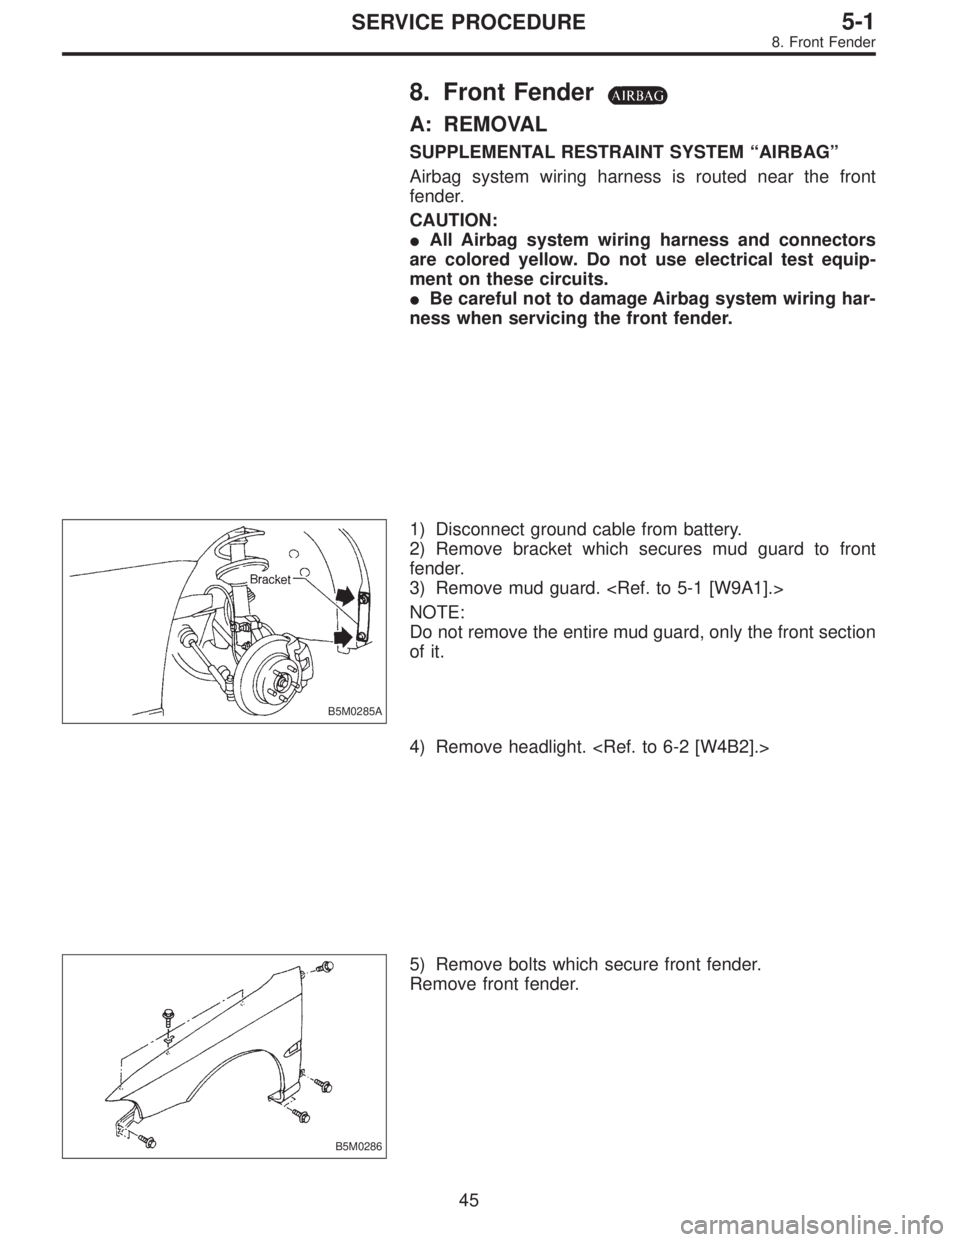
1) Disconnect ground cable from battery.
2) Remove bracket which secures mud guard to front
fender.
3) Remove mud guard.
NOTE:
Do not remove the entire mud guard, only the front section
of it.
4) Remove headlight.
B5M0286
5) Remove bolts which secure front fender.
Remove front fender.
45
5-1SERVICE PROCEDURE
8. Front Fender
Page 967 of 2248
B5M0292
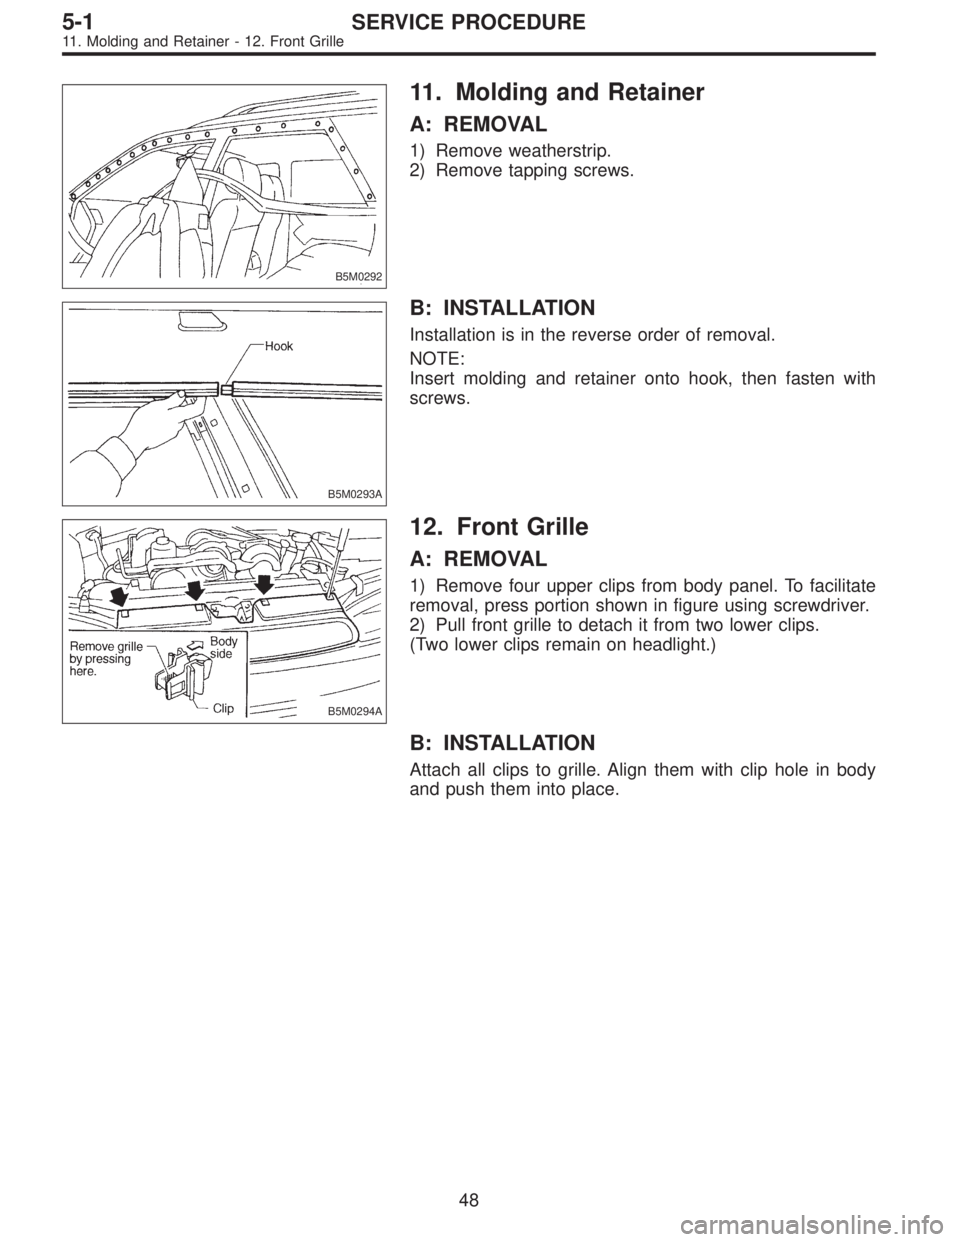
11. Molding and Retainer
A: REMOVAL
1) Remove weatherstrip.
2) Remove tapping screws.
B5M0293A
B: INSTALLATION
Installation is in the reverse order of removal.
NOTE:
Insert molding and retainer onto hook, then fasten with
screws.
B5M0294A
12. Front Grille
A: REMOVAL
1) Remove four upper clips from body panel. To facilitate
removal, press portion shown in figure using screwdriver.
2) Pull front grille to detach it from two lower clips.
(Two lower clips remain on headlight.)
B: INSTALLATION
Attach all clips to grille. Align them with clip hole in body
and push them into place.
48
5-1SERVICE PROCEDURE
11. Molding and Retainer - 12. Front Grille
Page 968 of 2248
B5M0292
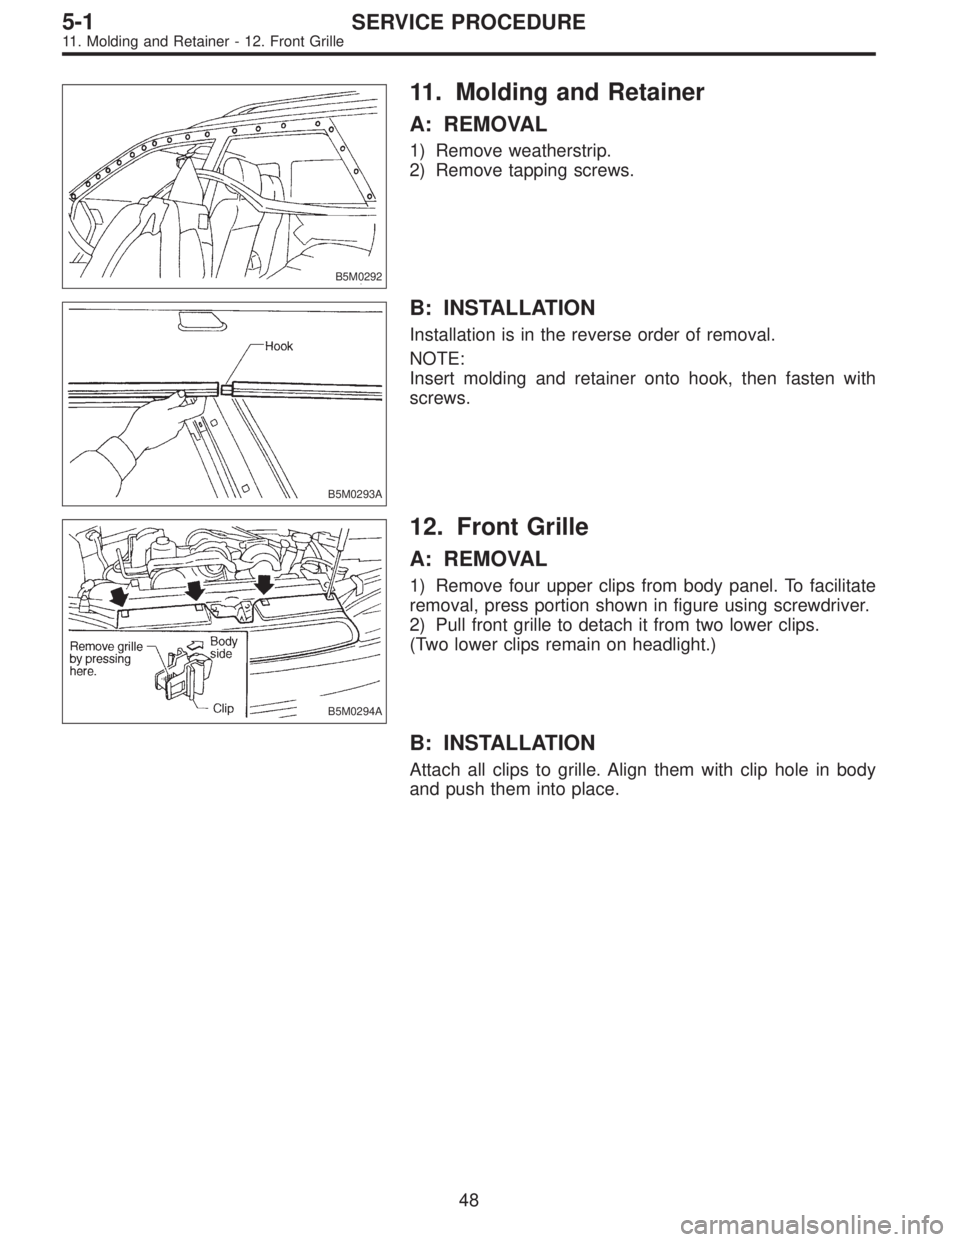
11. Molding and Retainer
A: REMOVAL
1) Remove weatherstrip.
2) Remove tapping screws.
B5M0293A
B: INSTALLATION
Installation is in the reverse order of removal.
NOTE:
Insert molding and retainer onto hook, then fasten with
screws.
B5M0294A
12. Front Grille
A: REMOVAL
1) Remove four upper clips from body panel. To facilitate
removal, press portion shown in figure using screwdriver.
2) Pull front grille to detach it from two lower clips.
(Two lower clips remain on headlight.)
B: INSTALLATION
Attach all clips to grille. Align them with clip hole in body
and push them into place.
48
5-1SERVICE PROCEDURE
11. Molding and Retainer - 12. Front Grille