1995 GMC SIERRA tow
[x] Cancel search: towPage 286 of 488
NOTICE:
Use only engine oil with the American Petroleum Institute
Certified For Gasoline Engines “Starburst” symbol. Failure \
to
use the proper oil can result in engine damage not covered
by
your warranty.
GM Goodwrench@ oil (in Canada, GM Engine Oil) meets all the
requirements for your vehicle.
Engine Oil Additives
Don’t add anything to your oil. Your GM dealer is ready to advise if you
think something should be added.
When to Change Engine Oil
See if any one of these is true for you:
Most trips are less than 5 to 10 miles (8 to 16 km). This is particularly
important when outside temperatures are below freezing.
Most trips include extensive idling (such as frequent driving in stop and
go traffic).
Most trips are through dusty areas.
You operate your vehicle in dusty areas or off-road frequently.
You frequently tow a trailer.
If any one
of these is true for your vehicle, then you need to change your oil
and filter every
3,000 miles (5 000 km) or 3 months - whichever comes
first.
Light Duty Emissions:
If none of them is true, change the oil and filter every 7,500 miles (12 500
km) or 12 months - whichever comes first.
Heavy Duty Emissions:
If none of them is true, change the oil and filter every 6,000 miles (10 000
km) or 12 months - whichever comes first.
6-20
ProCarManuals.com
Page 288 of 488
To Check Engine Oil
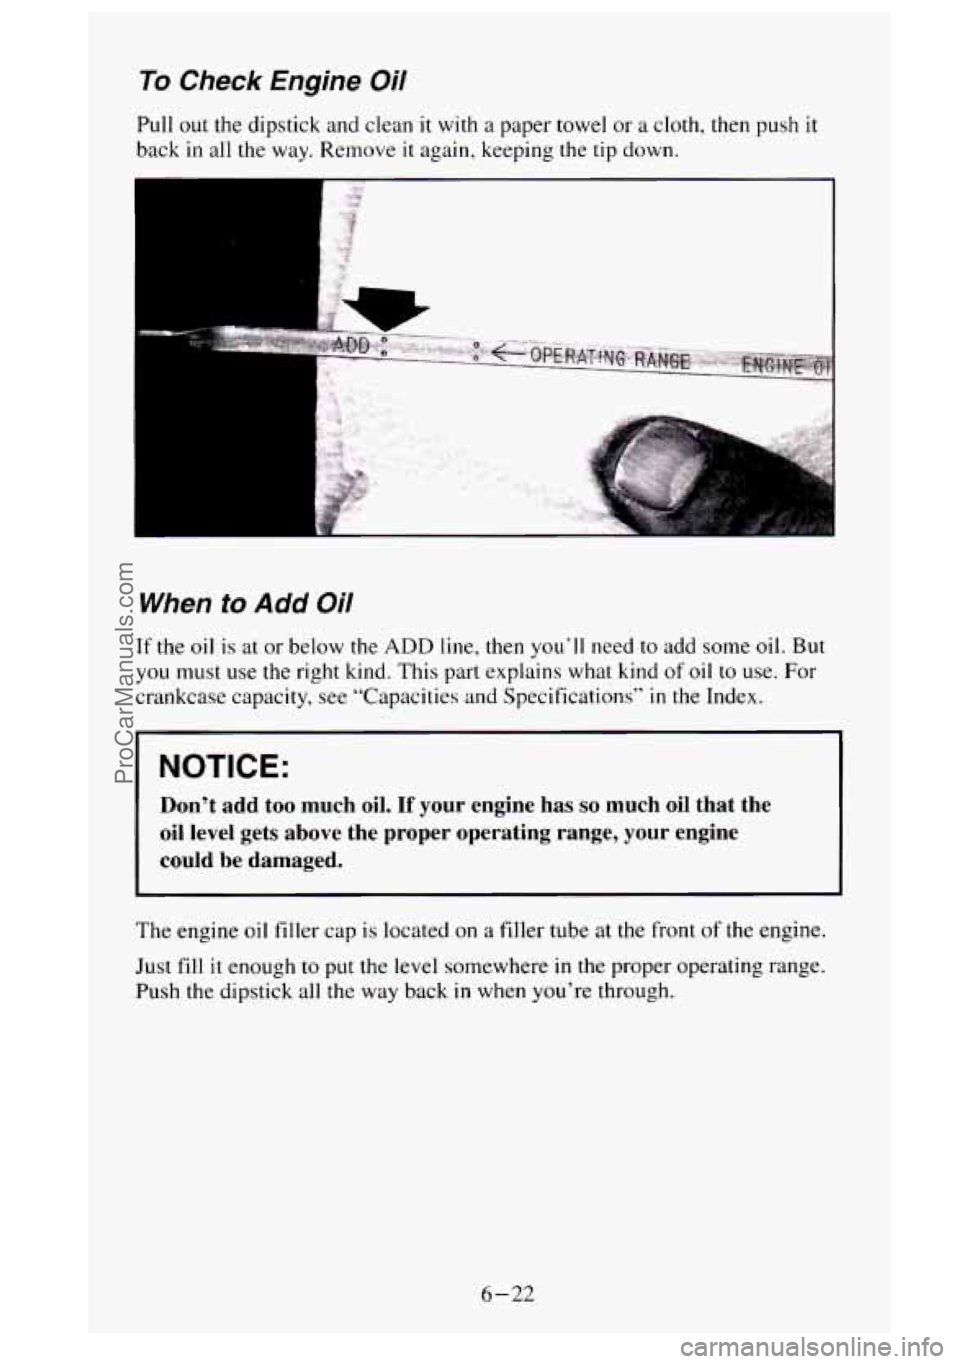
Pull out the dipstick and clean it with a paper towel or a cloth, then push it
back in all the way. Remove it again, keeping the tip down.
When to Add Oil
If the oil is at or below the ADD line, then you’ll need to add some oil. But
you must use the right kind. This part explains what kind of oil to use. For
crankcase capacity, see “Capacities and Specifications”
in the Index.
I I
I NOTICE: I
Don’t add too much oil. If your engine has so much oil that the
oil level gets above the proper operating range, your engine
could be damaged.
I I
The engine oil filler cap is located on a filler tube at the front of the engine.
Just fill it
enough to put the level somewhere in the proper operating range.
Push the dipstick
all the way back in when you’re through.
6-22
ProCarManuals.com
Page 291 of 488
This doughnut-shaped logo (symbol) is used on most oil containers to help
you select the correct oil.
You should look for this
on the oil container, and use only those oils that
display the logo.
GM Goodwrench‘ oil (in Canada, GM Engine Oil) meets all the
requirements for your vehicle.
Engine Oil Additives
Don’t add anything to your oil. Your GM dealer is ready to advise if you
think something should be added.
When to Change Engine Oil
See if any one of these is true for you:
0 Most trips are less than 5 to IO miles (8 to 16 km). This is particularly
important when outside temperatures are below freezing.
0 Most trips include extensive idling (such as frequent driving in stop and
e 00 traffic).
0 You operate your vehicle in dusty areas or off-road frequently.
0 You frequently tow a trailer or use a carrier on top of your vehicle.
If any of these is true for your vehicle, then you need to change your oil and
filter every
2,500 miles (4 000 km) or 3 months - whichever comes first.
If none of them is true, change the oil and filter every
5,000 miles (8 000
km) or 12 months - whichever comes first.
What to Do with Used Oil
Did you know that used engine oil contains certain elements that may be
unhealthy for your skin and could even cause cancer? Don‘t let used oil stay
on your skin for very long. Clean your skin and nails with soap and water,
or
a good hand cleaner. Wash or properly throw away clothing or rags
containing used engine oil. (See the manufacturer’s warnings about the use
and disposal
of oil products.)
Used oil can be a real threat
to the environment. If you change your own oil,
be sure
to drain all free-flowing oil from the filter before disposal. Don’t
ever dispose of oil by putting it
in the trash, pouring it on the ground, into
sewers, or into streams or bodies of water. Instead, recycle
it by taking it to
a place that collects used oil. If you have a problem properly disposing of
your used oil, ask your dealer, a service station or a local recycling center
for help.
6-25
ProCarManuals.com
Page 293 of 488
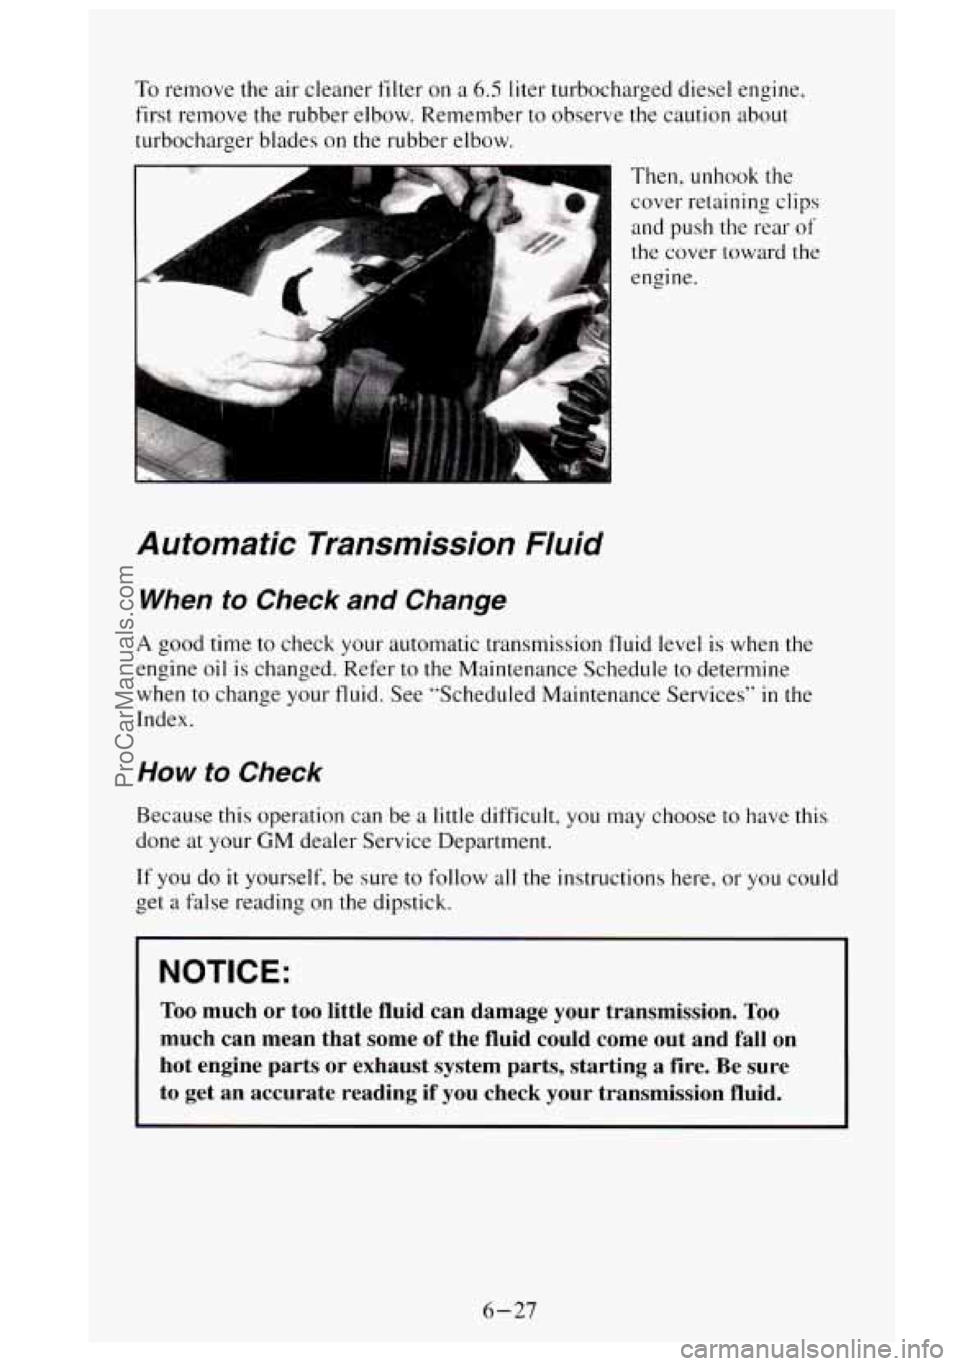
To remove the air cleaner filter on a 6.5 liter turbocharged diesel engine,
first remove the rubber elbow. Remember to observe the caution about
turbocharger blades on the rubber elbow.
Then, unhook the
cover retaining clips
and push the rear
of
the cover toward the
engine.
Automatic Transmission Fluid
When to Check and Change
A good time to check your automatic transmission fluid level is when the
engine
oil is changed. Refer to the Maintenance Schedule to determine
when to change your fluid. See "Scheduled Maintenance Services''
in the
Index.
How to Check
Because this operation can be a little difficult, you may choose to have this
done at your
GM dealer Service Department.
If you do
it yourself, be sure to follow all the instructions here, or you could
get
a false reading on the dipstick.
NOTICE:
Too much or too little fluid can damage your transmission. Too
much can mean that some of the fluid could come out and fall on
hot engine parts or exhaust system parts, starting a fire. Be \
sure
to get an accurate reading if you check your transmission fluid.
6-27
ProCarManuals.com
Page 295 of 488
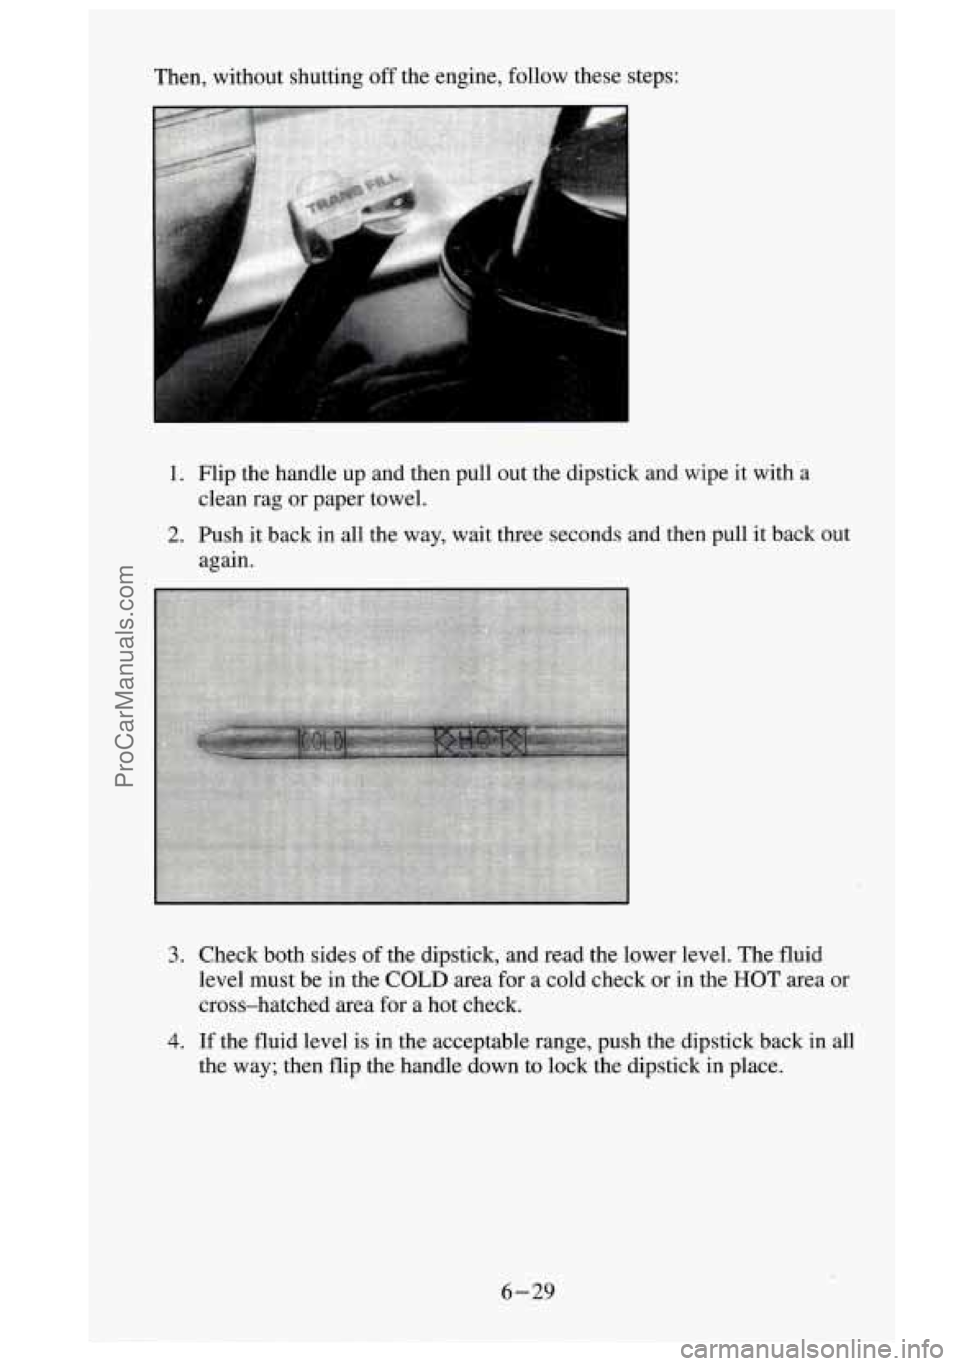
Then, without shutting off the engine, follow these steps:
,
1. Flip the handle up and then pull out the dipstick and wipe it with a
2. Push it back in all the way, wait three seconds and then pull it back out
clean rag
or paper towel.
again.
3. Check both sides of the dipstick, and read the lower level. The fluid
level must be in the
COLD area for a cold check or in the HOT area or
cross-hatched area for a hot check.
4. If the fluid level is in the acceptable range, push the dipstick back in all
the way; then
flip the handle down to lock the dipstick in place.
6-29
ProCarManuals.com
Page 299 of 488
What to Use
Refer to the Maintenance Schedule to determine what kind of lubricant to
use. See “Recommended Fluids and Lubricants”
in the Index.
C3 (3500 H.D.) Trucks Equipped with Dana Rear Axle
Additional rear axle scheduled maintenance is required on 3500 H.D.
models equipped with Dana rear axles when they are driven under the
following conditions:
0 Extreme loading (at or near GVWR) or trailer towing, and:
Operation above 45 mph for extended periods of time
Vehicles used
in any of these conditions require the rear axle lubricant (SAE
8OW-90 - GL-5) be changed every 3 months or 3,000 miles, whichever
comes first.
To reduce required maintenance, SAE 75W-140 synthetic gear lubricant
may be used. With the use of synthetic
SAE 75W-140 lubricant, the fluid
change intervals may be increased to 30,000 miles. Before using SAE
75W-140, it is important to drain and flush the axle with clean mineral
based (non-synthetic) axle lubricant. Fluid capacity is 4.12 qts. (3.9L).
Four- Wheel Drive
Most lubricant checks in this section also apply to four-wheel-drive
vehicles. However, they have two additional systems that need lubrication.
Transfer Case
When to Check Lubricant
Refer to the Maintenance Schedule to determine how often to check the
lubricant. See “Periodic Maintenance Inspections”
in the Index.
6-33
ProCarManuals.com
Page 334 of 488
0
e
0
0
0
0
C/eaning the Inside of Your Vehicle
Use a vacuum cleaner often to get rid of dust and loose dirt. Wipe vinyl or
leather with a clean, damp cloth.
Your
GM dealer has two CM cleaners, a solvent-type spot lifter and a
foam-type powdered cleaner. They will clean normal spots and stains very
well. Do
not use them on vinyl or leather.
Here are some cleaning tips:
Always read the instructions on the cleaner label.
Clean up stains as soon as you can - before they set.
0 Use a clean cloth or sponge, and change to a clean area often. A soft
brush may be used
if stains are stubborn.
0 Use solvent-type cleaners in a well-ventilated area only. If you use
them, don‘t saturate the stained area.
0 If a ring forms after spot cleaning, clean the entire area immediately or
it will set.
Using Foam-Type Cleaner on Fabric
Vacuum and brush the area to remove any loose dirt.
Always clean
a whole trim panel or section. Mask surrounding trim
along stitch or welt lines.
Mix Multi-Purpose Powdered Cleaner following the directions on the
container label.
Use suds
only and apply with a clean sponge.
Don’t saturate the material.
Don’t
rub it roughly.
As soon as you’ve cleaned the section, use a sponge to remove the
suds.
Rinse the
section with a clean, wet sponge.
Wipe
off what’s left with a slightly damp paper towel or cloth.
Then dry
it immediately with a blow dryer or a heat lamp.
NOTICE:
Be careful. A blow dryer may scorch the fabric.
~~ ~
0 Wipe with a clean cloth.
6-68
ProCarManuals.com
Page 335 of 488
Using Solvent-Type Cleaner on Fabric
First, see if you have to use solvent-type cleaner at all. Some spots and
stains will clean
off better with just water and mild soap.
If you need to use a solvent:
Gently scrape excess soil from the trim material with a clean, dull knife
or scraper. Use very little cleaner, light pressure and clean cloths
(preferably cheesecloth). Cleaning should start at the outside of the
stain, “feathering” toward the center. Keep changing to
a clean section
of the cloth.
When you clean a stain from fabric, immediately dry the area with a
blow dryer to help prevent a cleaning ring. (See the previous NOTICE.)
Fabric Protection
Your vehicle has upholstery and carpet that has been treated with
Scotchgard TM Fabric Protector, a 3M product. Scotchgard TN protects fabrics
by repelling oil and water, which are the carriers of most stains. Even with
this protection, you still need to clean your upholstery and carpet often to
keep
it looking new.
Further information
on cleaning is available by calling 1-800-433-3296 (in
Minnesota, 1-800-642-6 167).
Special Cleaning Problems
Greasy or Oily Stains
Stains caused by grease, oil, butter, margarine, shoe polish, coffee with
cream, chewing gum, cosmetic creams, vegetable oils, wax crayon, tar and
asphalt can be removed as follows:
Carefully scrape off excess stain.
Follow the solvent-type instructions described earlier.
Shoe polish, wax crayon, tar and asphalt will stain if left on a vehicle
seat fabric. They should be removed as soon
as possible. Be careful,
because the cleaner will dissolve them and may cause them to spread.
Non-Greasy Stains
Stains caused by catsup, coffee (black), egg, fruit, fruit juice, milk, soft
drinks, wine, vomit, urine and blood can be removed as follows:
Carefully scrape off excess stain, then sponge the soiled area with cool
water.
If a stain remains. follow the foam-type instructions described earlier.
6-69
ProCarManuals.com