Page 7 of 488
Table of Contents
Introduction - How to Use this Manual
This section tells you how to use your manual and includes safety
and vehicle damage warnings and symbols.
Section 1 - Seats and Restraint Systems
This section tells you how to use your seats and safety belts
properly.
It also explains the air ba, 0 s -y stem.
Section 2 - Features & Controls
This section explains how to start and operate your vehicle.
Section 3 - Comfort Controls & Audio Systems
This section tells you how to adjust the ventilation and comfort
controls and how to operate your audio system.
Section 4 - Your Driving and the Road
Here you’ll find helpful information and tips about the road and
how to drive under different conditions.
Section 5 - Problems on the Road
This section tells you what to do if you have a problem while
driving, such
as a flat tire or engine overheating. etc.
Section 6 - Service & Appearance Care
Here the manual tells you how to keep your vehicle running
properly and looking good.
Section 7 - Maintenance Schedule
This section tells you when to perform vehicle maintenance and
what fluids and lubricants to use.
Section 8 - Customer Assistance Information
L get service publications. It also gives you information on
This
section tells you how to contact
GM for assistance and how to
“Reporting Safety Defects” on page
8-4.
Index
Here’s an alphabetical listing of almost every subject in this
manual. You can use
it to quickly find something you want to read.
i
ProCarManuals.com
Page 130 of 488
instrument Panel
18 17 16 15
1. Dome Lamp Switch
2. Lamp and Light Controls
3. Air Vents
4. Multifunction Lever
5. Instrument Cluster
6. Gearshift Lever
7. Audio System
8. Comfort Control System
9. Glove
Box
14 13
instrument Cluster
12 1' 3 3
IO. Storage Tray
1 I. IP Cupholder
12. Ashtray, Auxiliary Outlets
I 3. Storage Area or Optional
Cassette Tape Player
14. Rear Window Defogger Switch
IS. Tilt Lever
16. Parking Brake Release Handle
17. Hood Release
18. Fuse
Block
Your instrument cluster is designed to let you know at a glance how your
vehicle is running. You'll
know how fast you're going, about how much
fuel you have and many other things you'll need to know to drive safely and
economically.
2-68
ProCarManuals.com
Page 147 of 488
Comfort Controls and Audio Systems
Secfion
In this section you’ll find out how to operate the comfort control systems
and audio systems offered with your vehicle. Be sure to read about the
particular system supplied with your vehicle.
Comfort Controls
Heater Controls
If your vehicle does not have air conditioning, your heater controls will look
like this.
The knob on the left side of the heating system control panel controls the
fan speed. The knob has four speed positions. To increase the air flow, move
the
knob toward HI. To decrease the air flow, move it toward LO. To turn
the fan off, move the knob to
OFF.
3-1
ProCarManuals.com
Page 152 of 488
When you enter a vehicle in cold weather, turn the blower fan to HI for
a few moments before driving off. This helps clear the intake ducts of
snow and moisture. and reduces the chance of fogging the inside. of
your windows.
Keep the air path under the front seats clear of objects. This helps air to
circulate throughout your vehicle.
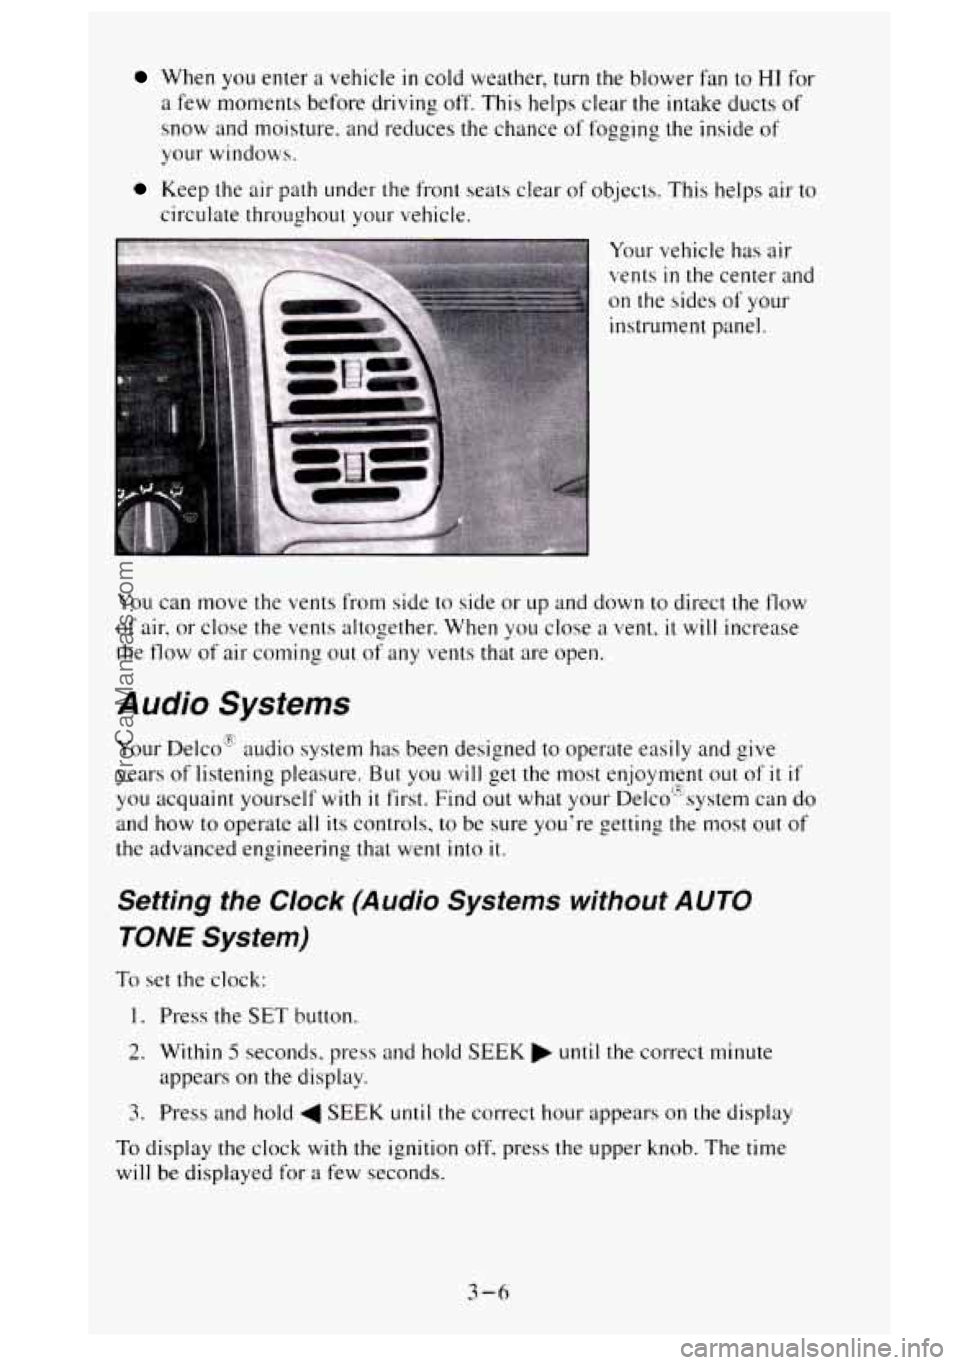
Your vehicle has air
vents
in the center a1
on the sides of your
instrument panel. nd
You can move the vents from side to side or
up and down to direct the flow
of air. or close the vents altogether. When you close a vent, it will increase
the
flow of' air corning out of any vents that are open.
Audio Systems
Your Delco'E audio system has been designed to operate easily and give
years of listening pleasure.
But you will get the most enjoyment out of it if
you acquaint yourself with it first. Find out what your De1co"system can do
and how to operate all its controls, to be sure you're getting the most
out of
the advanced engineering that went into it.
Setting the Clock (Audio Systems without AUTO
TONE System)
To set the clock:
1. Press the SET button.
2. Within 5 seconds, press and hold SEEK until the correct minute
appears
on the display.
3. Press and hold 4 SEEK until the correct hour appears on the display
To display the clock with the ignition off, press the upper knob. The time
will
be displayed for a few seconds.
3-6
ProCarManuals.com
Page 153 of 488
The buttons used to set the clock are located below the AUTO TONE button
in the bottom right corner of your audio system.
To set the clock:
1. Press and hold HR until the correct hour appears on the display.
2. Press and hold MIN until the correct minute appears on the display.
To display the clock with the ignition off, press the recall button. The time
will be displayed for
a few seconds.
There is
an initial two-second delay before the clock goes into the time-set
mode.
This part tells you how your ETR@AM-FM stereo audio system works.
Upper Knob (VOL-RECALL)
- The upper knob has these four functions:
Turn it to switch the system on and off.
Turn it to control the volume.
0 Press it to display the time when the ignition is off.
0 Press it to change between the clock and the radio station frequency
displayed when the radio
is on.
BAL (Balance)
- The control ring behind the upper knob adjusts the
lefvright speaker balance.
3-7
ProCarManuals.com
Page 155 of 488
How to Operate Your ETR@ AM-FM Stereo Audio
Cassette System
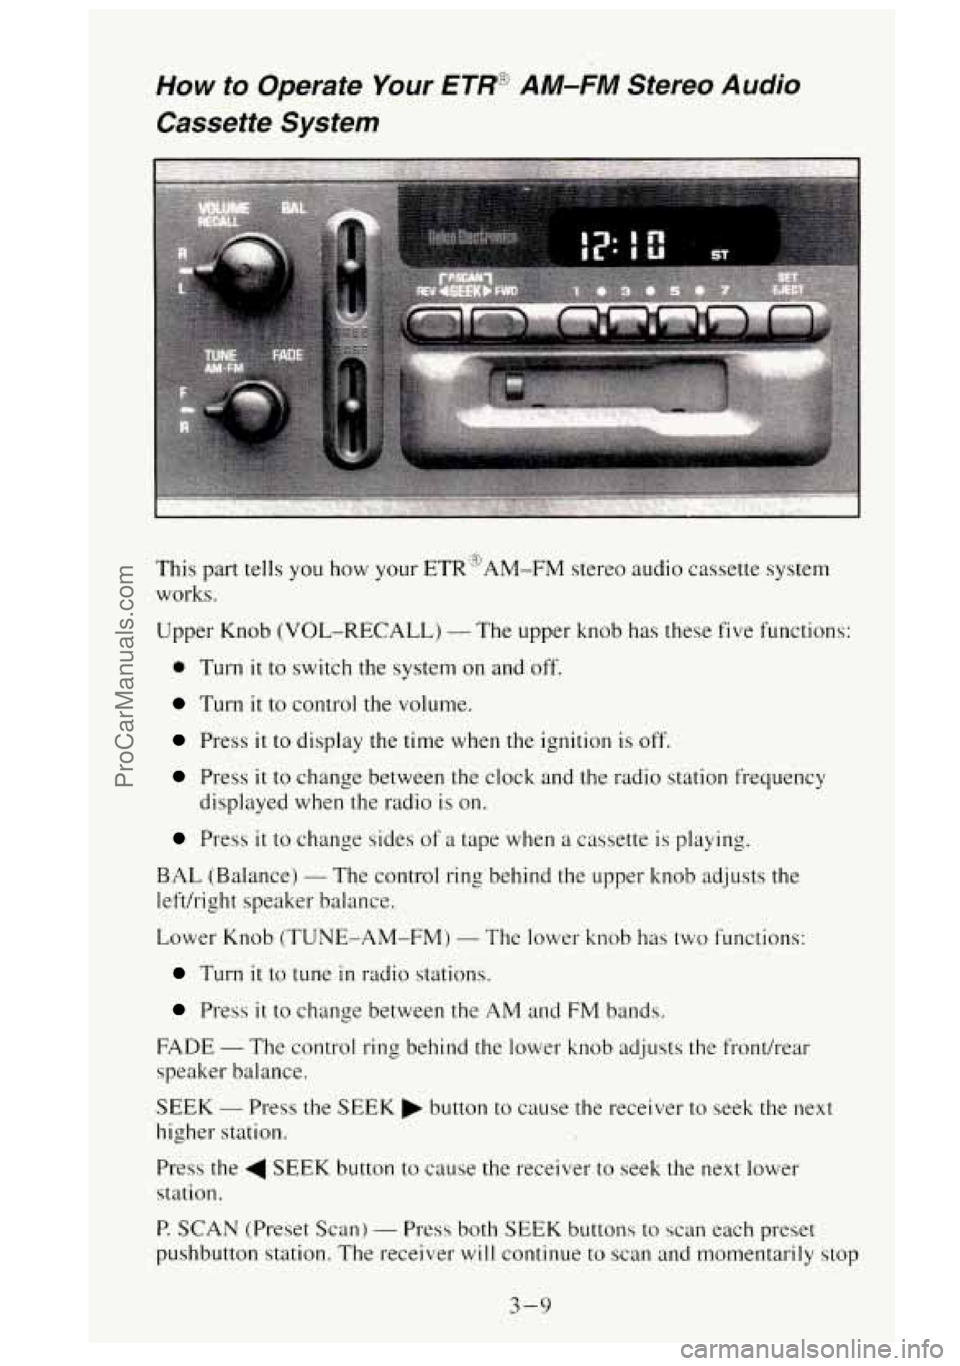
This part tells you how your ETR'3AM-FM stereo audio cassette system
works.
Upper Knob (VOL-RECALL)
- The upper knob has these five functions:
0 Turn it to switch the system on and off.
Turn it to control the volume.
Press it to display the time when the ignition is off.
Press it to change between the clock and the radio station frequency
displayed when the radio
is on.
Press it to change sides of a tape when a cassette is playing.
BAL (Balance) - The control ring behind the upper knob adjusts the
lefthight speaker balance.
Lower Knob (TUNE-AM-FM)
- The lower knob has two functions:
Turn it to tune in radio stations.
Press it to change between the AM and FM bands.
FADE
- The control ring behind the lower knob adjusts the front/rear
speaker balance.
SEEK - Press the SEEK button to cause the receiver to seek the next
higher station.
Press the
4 SEEK button to cause the receiver to seek the next lower
station.
P. SCAN (Preset Scan) - Press both SEEK buttons to scan each preset
pushbutton station. The receiver will continue to scan and momentarily stop
3-9
ProCarManuals.com
Page 157 of 488
EJECT - To remove the tape or stop the tape and switch to radio, press the
EJECT button.
If a tape is inserted with side “1” (or ”A”) up, then the right arrow means
that that side is being played. Likewise,
a left arrow would indicate that side
“2” (or “B”) had been selected. The player will automatically switch to the
other side of the tape when the first side ends.
How to Operate Your €TIT3’ AM-FM Stereo Audio
Cassette ATC System
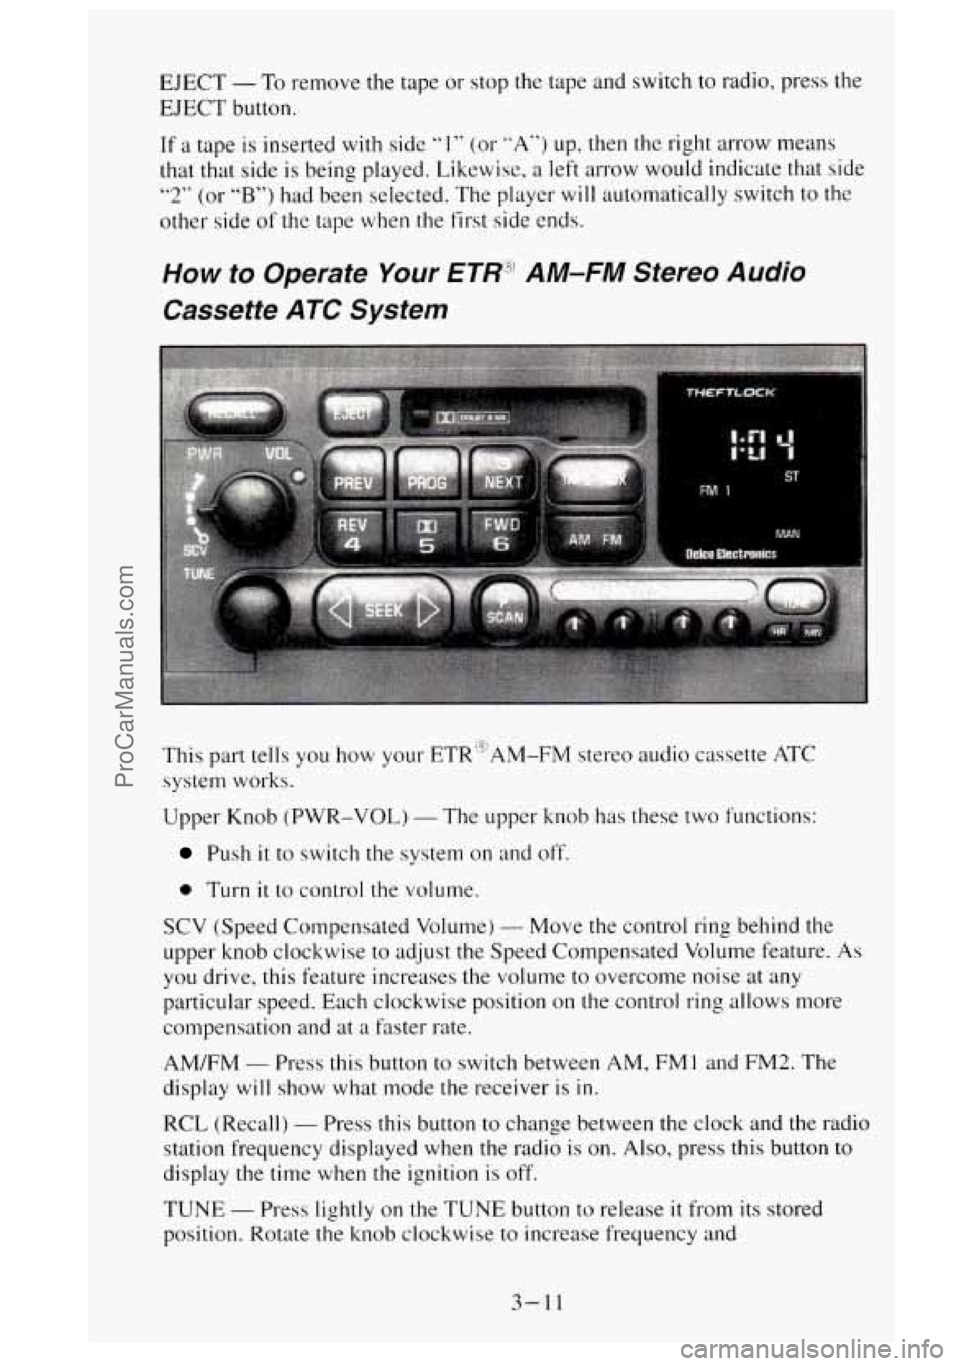
This part tells you how your ETRi3AM-FM stereo audio cassette ATC
system works.
Upper Knob (PWR-VOL)
- The upper knob has these two functions:
Push it to switch the system on and off.
0 Turn it to control the volume.
SCV (Speed Compensated Volume) - Move the control ring behind the
upper knob clockwise
to adjust the Speed Compensated Volume feature. As
you drive, this feature increases the volume to overcome noise at any
particular speed. Each clockwise position on the control ring allows more
compensation and at a faster rate.
AM/FM
- Press this button to switch between AM, FMl and FM2. The
display will show what mode the receiver is in.
RCL (Recall)
- Press this button to change between the clock and the radio
station frequency displayed when the radio is on.
Also, press this button to
display the time when the ignition is
off.
TUNE - Press lightly on the TUNE button to release it from its stored
position. Rotate the knob clockwise to increase frequency and
3-11
ProCarManuals.com
Page 162 of 488
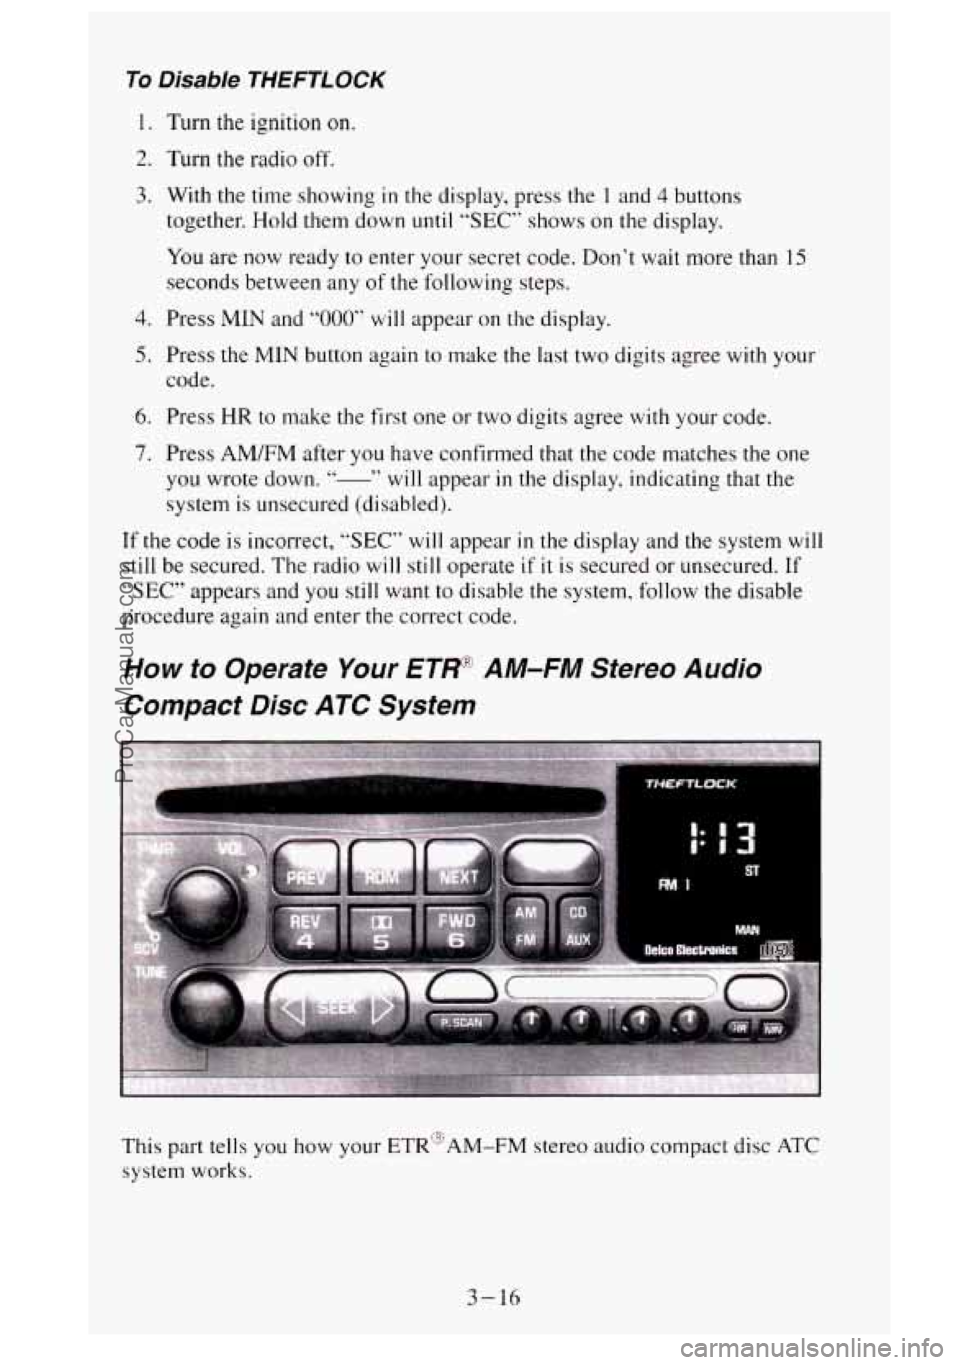
To Disable THEFTLOCK
1. Turn the ignition on.
2, Turn the radio off.
3. With the time showing in th e display, press th e 1 and 4 buttons
together. Hold them down
until “SEC” shows on the display.
You are now ready to enter your secret code. Don’t wait more than
15
seconds between any of the following steps.
4. Press MIN and “000” will appear on the display.
5. Press the MIN button again to make the last two digits agree with your
code.
6. Press HR to make the first one or two digits agree with your code,
7. Press AMFM after you have confirmed that the code matches the one
you wrote down. “- ” will appear in the display, indicating that the
system is unsecured (disabled).
If the code is incorrect, “SEC” will appear in the display and the system will
still be secured. The radio will still operate if it is secured or unsecured. If
“SEC” appears and you still want to disable the system, follow the disable
procedure again and enter the correct code.
How to Operate Your ETRq AM-FM Stereo Audio
Compact Disc ATC System
This part tells you how your ETR“AM-FM stereo audio compact disc ATC
system works.
3-16
ProCarManuals.com