1995 CHEVROLET TAHOE change time
[x] Cancel search: change timePage 167 of 486

Downloaded from www.Manualslib.com manuals search engine How to Operate Your ETP AM-FM Stereo Audio
Cassette System
This part tells you how your ETR@AM-FM stereo audio cassette system
works.
Upper Knob (VOL-RECALL)
- The upper knob has these five functions:
Turn it to switch the system on and off.
0 Turn it to control the volume.
Press it to display the time when the ignition is off.
Press it to change between the clock and the radio station frequency
displayed when the radio
is on.
Press it to change sides of a tape when a cassette is playing.
BAL (Balance)
- The control ring behind the upper knob adjusts the
lefthight speaker balance.
Lower Knob (TUNE-AM-FM)
- The lower knob has two functions:
0 Turn it to tune in radio stations.
Press it to change between the AM and FM bands.
FADE
- The control ring behind the lower knob adjusts the fronthear
speaker balance.
SEEK
- Press the SEEK button to cause the receiver to seek the next
higher station.
Press the
4 SEEK button to cause the receiver to seek the next lower
station.
3-12
Page 170 of 486
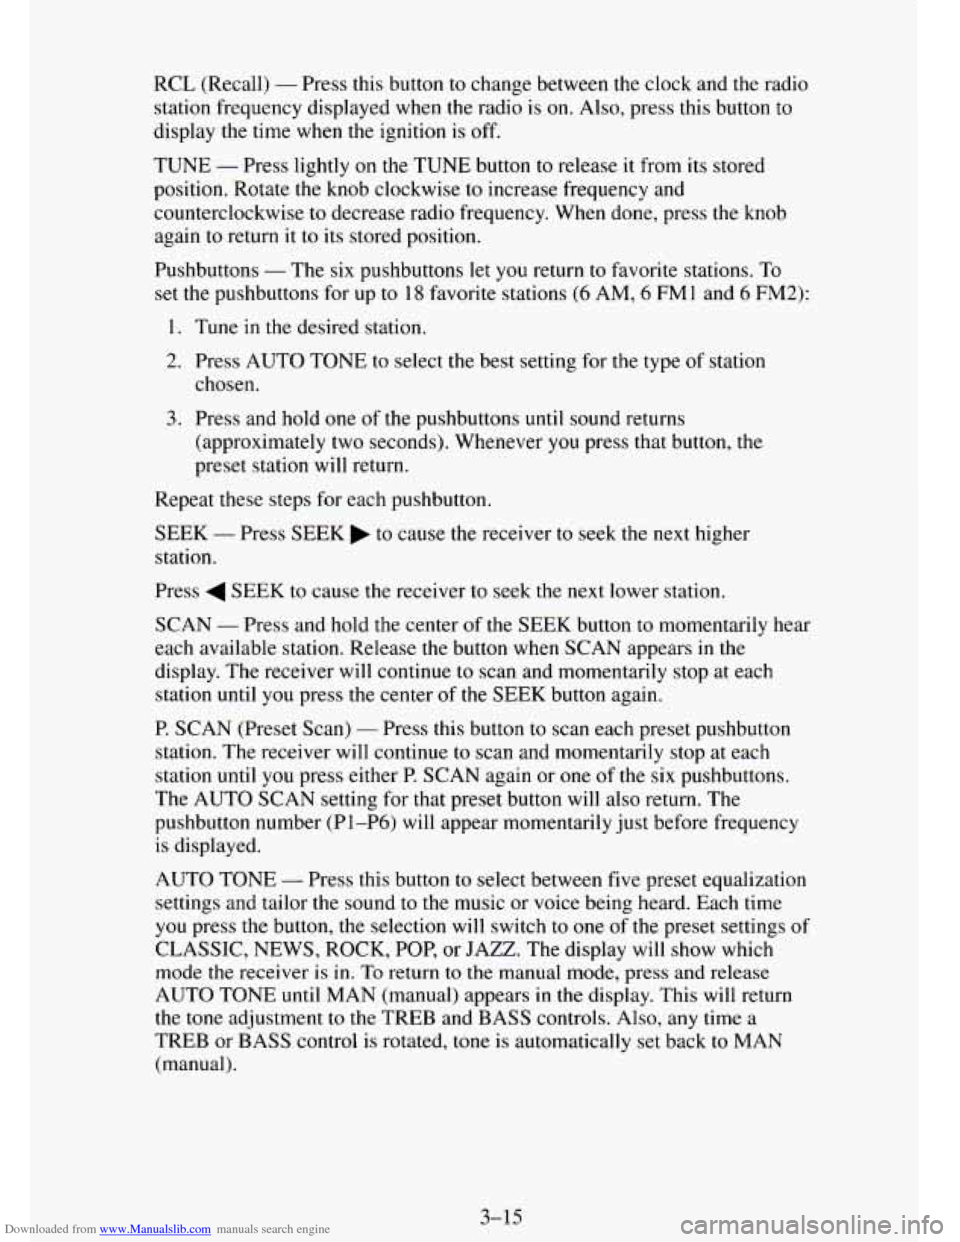
Downloaded from www.Manualslib.com manuals search engine RCL (Recall) - Press this button to change between the clock and the radio
station frequency displayed when the radio is on. Also, press this button to
display the time when the ignition is off.
TUNE - Press lightly on the TUNE button to release it from its stored
position. Rotate
the knob clockwise to increase frequency and
counterclockwise to decrease radio frequency. When done, press
the knob
again to return
it to its stored position.
Pushbuttons
- The six pushbuttons let you return to favorite stations. To
set the pushbuttons for up to
18 favorite stations (6 AM, 6 FM1 and 6 FM2):
1. Tune in the desired station.
2. Press AUTO TONE to select the best setting for the type of station
chosen.
3. Press and hold one of the pushbuttons until sound returns
(approximately two seconds). Whenever you press
that button, me
preset station will return.
Repeat these steps for each pushbutton.
SEEK
- Press SEEK to cause the receiver to seek the next higher
station.
Press
4 SEEK to cause the receiver to seek the next lower station.
SCAN
- Press and hold the center of the SEEK button to momentarily hear
each available station. Release the button when SCAN appears
in the
display. The receiver will continue to scan and momentarily stop at each
station
until you press the center of the SEEK button again.
P. SCAN (Preset Scan)
- Press this button to scan each preset pushbutton
station. The receiver will continue to scan and momentarily stop at each
station
until you press either P. SCAN again or one of the six pushbuttons.
The AUTO SCAN setting for
that preset button will also return. The
pushbutton number (PI-P6)
will appear momentarily just before frequency
is displayed.
AUTO TONE
- Press this button to select between five preset equalization
settings and tailor the sound to
the music or voice being heard. Each time
you press the button, the selection
will switch to one of the preset settings of
CLASSIC, NEWS, ROCK, POP, or
JAZZ. The display will show which
mode the receiver is in. To return to the manual mode, press and release
AUTO TONE until
MAN (manual) appears in the display. This will return
the tone adjustment to the TREB and BASS controls. Also, any time a
TREB or BASS control is rotated, tone is automatically set back to MAN
(manual).
3-15
Page 175 of 486
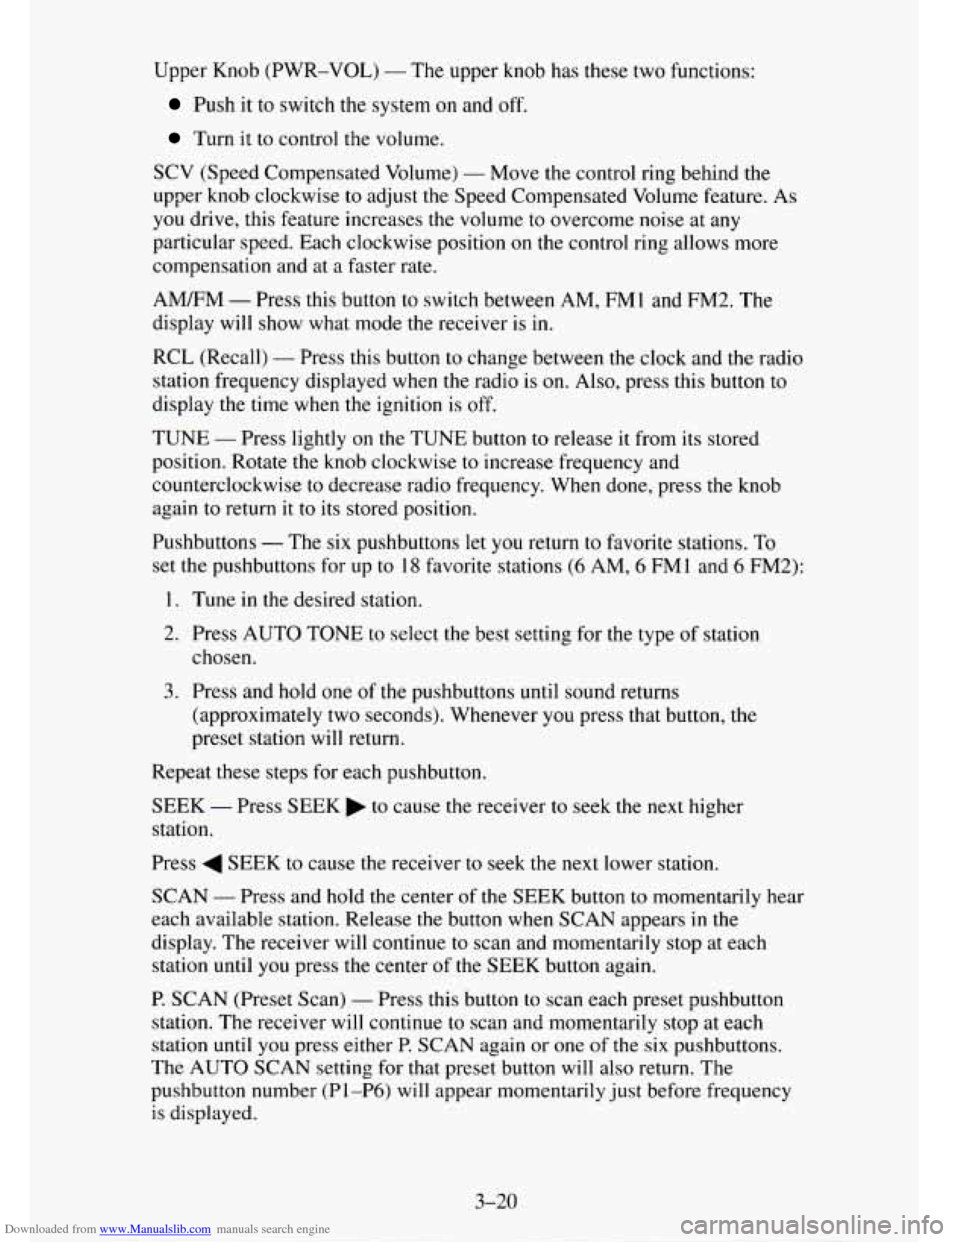
Downloaded from www.Manualslib.com manuals search engine Upper Knob (PWR-VOL) - The upper knob has these two functions:
Push it to switch the system on and off.
Turn it to control the volume.
SCV (Speed Compensated Volume) - Move the control ring behind the
upper knob clockwise
to adjust the Speed Compensated Volume feature. As
you drive, this feature increases the volume to overcome noise at any
particular speed. Each clockwise position
on the control ring allows more
compensation and at
a faster rate.
AM/FM - Press this button to switch between AM, FMl and FM2. The
display will
show what mode the receiver is in.
RCL (Recall) - Press this button to change between the clock and the radio
station frequency displayed when the radio is
on. Also, press this button to
display the time when the ignition is off.
TUNE
- Press lightly on the TUNE button to release it from its stored
position. Rotate the knob clockwise
to increase frequency and
counterclockwise
to decrease radio frequency. When done, press the knob
again to return it to its stored position.
Pushbuttons
- The six pushbuttons let you return to favorite stations. To
set the pushbuttons for up
to 18 favorite stations (6 AM, 6 FM1 and 6 FM2):
1. Tune in the desired station.
2. Press AUTO TONE to select the best setting for the type of station
chosen.
3. Press and hold one of the pushbuttons until sound returns
(approximately two seconds). Whenever
you press that button, the
preset station will return.
Repeat these steps for each pushbutton.
SEEK - Press SEEK to cause the receiver to seek the next higher
station.
Press
4 SEEK to cause the receiver to seek the next lower station.
SCAN - Press and hold the center of the SEEK button to momentarily hear
each available station. Release the button when SCAN appears in the
display. The receiver will
continue to scan and momentarily stop at each
station until you press the center of the
SEEK button again.
P. SCAN (Preset Scan) - Press this button to scan each preset pushbutton
station. The receiver will continue to scan and momentarily stop at each
station until you press either P.
SCAN again or one of the six pushbuttons.
The AUTO
SCAN setting for that preset button will also return. The
pushbutton number (Pl-P6) will appear momentarily just before frequency
is displayed.
3-20
Page 189 of 486
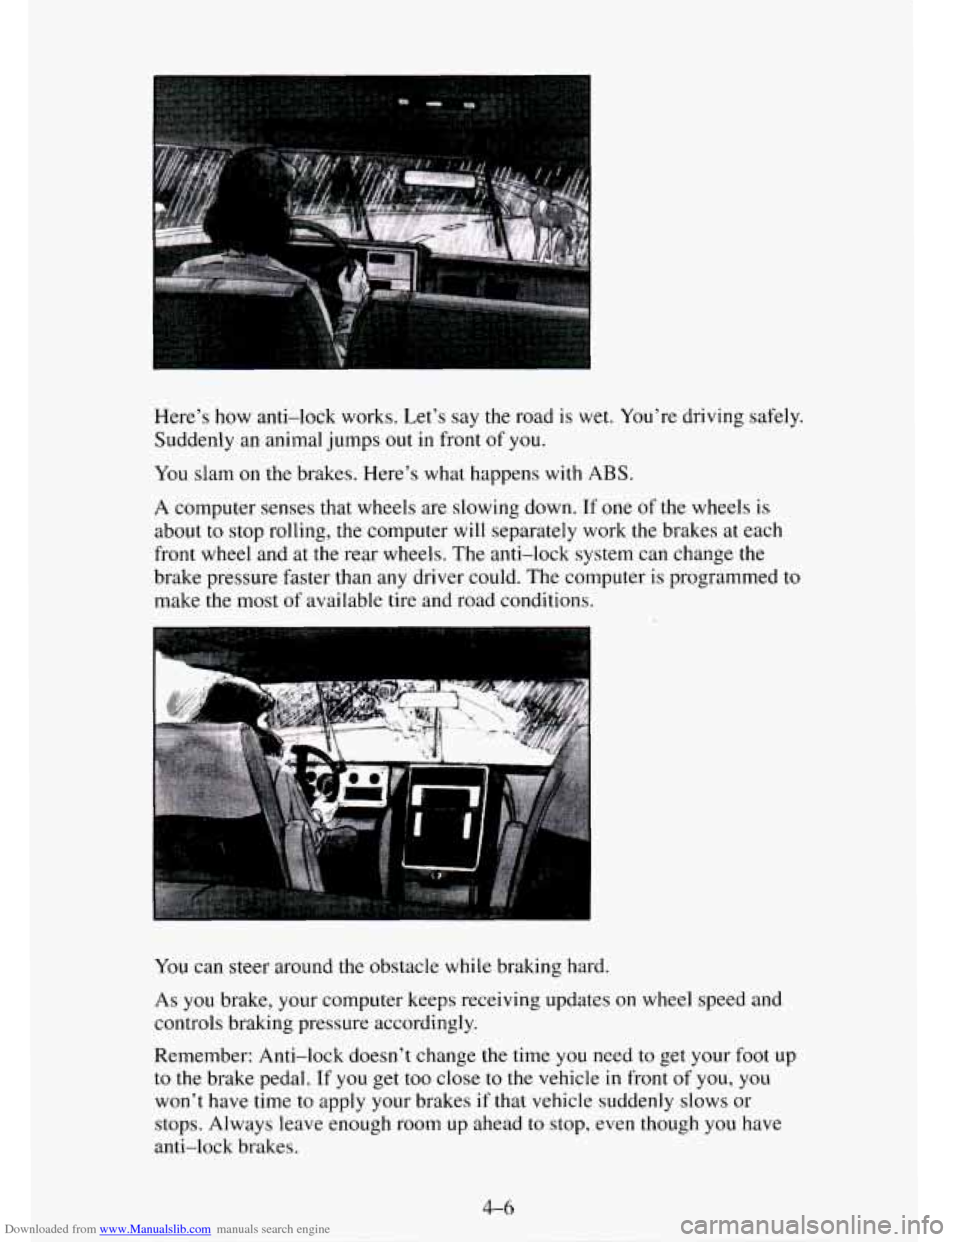
Downloaded from www.Manualslib.com manuals search engine Here’s how anti-lock works. Let’s say the road is wet. You’re driving safely.
Suddenly an animal jumps
out in front of you.
You slam on the brakes. Here’s what happens with ABS.
A computer senses that wheels are slowing down. If one of the wheels is
about to stop rolling, the computer will separately work the brakes at each
front wheel and at
the rear wheels. The anti-lock system can change the
brake pressure faster than any driver could. The computer is programmed to
make the most of available tire and road conditions.
You can steer around the obstacle while braking hard.
As
you brake, your computer keeps receiving updates on wheel speed and
controls braking pressure accordingly.
Remember: Anti-lock doesn’t change the time you need
to get your foot up
to the brake pedal.
If you get too close to the vehicle in front of you, you
won’t have time to apply your brakes if that vehicle suddenly slows or
stops. Always leave enough room up ahead
to stop, even though you have
anti-lock brakes.
Page 190 of 486
Downloaded from www.Manualslib.com manuals search engine To Use Anti-Lock
Don’t pump the brakes. Just hold the brake pedal down and let anti-lock
work for
you. You may feel the brakes vibrate, or you may notice some
noise, but this is normal. On vehicles with four-wheel drive, your anti-lock
brakes work at all times
- whether you are in two-wheel drive or
four-wheel drive.
Braking in Emergencies
Use your anti-lock braking system when you need to. With anti-lock, you
can steer and brake at the same time. In many emergencies, steering can
help
you more than even the very best braking.
Steering
Power Steering
If you lose power steering assist because the engine stops or the system is
not functioning, you can steer but it will take much more effort.
Steering Tips
Driving on Curves
It’s important to take curves at a reasonable speed.
A lot of the “driver lost control” accidents mentioned on the news happen
on curves. Here’s why:
Experienced driver or beginner, each
of us is subject to the same laws of
physics when driving on curves. The traction
of the tires against the road
surface makes it possible for the vehicle to change its path when
you turn
the front wheels.
If there’s no traction, inertia will keep the vehicle going in
the same direction. If you’ve ever tried to steer a vehicle on wet ice, you’ll
understand this.
The traction
you can get in a curve depends on the condition of your tires
and the road surface,
the angle at which the curve is banked, and your
speed. While you’re in a curve, speed is the
one factor you can control.
Suppose you’re steering through a sharp curve. Then you suddenly
accelerate. Both control systems
- steering and acceleration - have to do
their work where the tires meet the road. Adding
the sudden acceleration
can demand
too much of those places. You can lose control.
What should you do if this ever happens? Ease up on the accelerator pedal,
steer the
vehicle the way you want it to go, and slow down.
4-7
Page 193 of 486
Downloaded from www.Manualslib.com manuals search engine 0
0
0
0
0
0
0
Do not get too close to the vehicle you want to pass while you’re
awaiting an opportunity. For
one thing, following too closely reduces
your area of
vision, especially if you’re following a larger vehicle.
Also,
you won’t have adequate space if the vehicle ahead suddenly
slows or stops. Keep back a reasonable distance.
When it looks like
a chance to pass is coming up, start to accelerate but
stay in the right lane and don’t get too close. Time your move
so you
will be increasing speed as the time comes to move into the other lane.
If the way
is clear to pass, you will have a “running start” that more
than makes up for the distance
you would lose by dropping back. And
if something happens to cause you to cancel your pass, you need only
slow down and drop back again and wait for another opportunity.
If other cars are lined up
to pass a slow vehicle, wait your turn. But
take care that someone isn’t trying to pass
you as you pull out to pass
the slow vehicle. Remember
to glance over your shoulder and check
the blind spot.
Check your mirrors, glance over your shoulder, and start your left lane
change signal before moving
out of the right lane to pass. When you
are far enough ahead
of the passed vehicle to see its front in your inside
mirror, activate your right lane change signal and move back
into the
right lane. (Remember that if your right outside mirror is convex, the
vehicle
you just passed may seem to be farther away from you than it
really is.)
Try not to pass more
than one vehicle at a time on two-lane roads.
Reconsider before passing
the next vehicle.
Don’t overtake a slowly moving vehicle
too rapidly. Even though the
brake lights are not flashing, it may be slowing down or starting to turn.
If you’re being passed, make it easy for the following driver to get
ahead of
you. Perhaps you can ease a little to the right.
Loss of Control
Let’s review what driving experts say about what happens when the three
control systems (brakes, steering and acceleration) don’t have enough
friction where
the tires meet the road to do what the driver has asked.
In any emergency, don’t give up. Keep trying
to steer and constantly seek an
escape route or area of less danger.
Skidding
In a skid, a driver can lose control of the vehicle. Defensive drivers avoid
most skids by taking reasonable care suited
to existing conditions, and by
not “overdriving” those conditions. But skids are always possible.
4-10
Page 197 of 486
Downloaded from www.Manualslib.com manuals search engine Controlling your vehicle is the key to successful off-road driving. One of
the best ways to control your vehicle is to control your speed. Here are some
things to keep
in mind. At higher speeds:
you approach things faster and you have less time to scan the terrain for
obstacles.
you have less time to react.
you have more vehicle bounce when you drive over obstacles.
you’ll need more distance for braking, especially since you’re on an
unpaved surface.
Scanning the Terrain
Off-road driving can take you over many different kinds of terrain. You
need to be familiar with the terrain and its many different features. Here are
some things to consider.
Surface Cunditiuns. Off-roading can take you over hard-packed dirt,
gravel, rocks, grass, sand, mud, snow or ice. Each
of these surfaces affects
the steering, acceleration, and braking of your vehicle in different ways.
Depending upon the kind
of surface you are on, you may experience
slipping, sliding,
wheel spinning, delayed acceleration, poor traction, and
longer braking distances.
Surface Obstacles . Unseen or hidden obstacles can be hazardous. A rock,
log, hole, rut, or bump can startle you if you’re not prepared for them. Often
these obstacles are hidden by grass, bushes, snow or even the rise and fall
of
the terrain itself. Here are some things to consider:
Is the path ahead clear?
Will the surface texture change abruptly up ahead?
Does the travel take you uphill or downhill? (There’s more discussion
of these subjects later.)
0 Will you have to stop suddenly or change direction quickly?
When you drive over obstacles or rough terrain, keep a firm grip
on the
steering wheel. Ruts, troughs, or other surface features can jerk the wheel
out
of your hands if you’re not prepared.
4-14
Page 198 of 486
Downloaded from www.Manualslib.com manuals search engine When you drive over bumps, rocks, or other obstacles, your wheels can
leave the ground.
If this happens, even with one or two wheels, you can’t
control the vehicle as well or at all.
Because you will be on an unpaved surface, it’s especially important to
avoid sudden acceleration, sudden turns, or sudden braking.
In a way, off-road driving requires a different kind of alertness from driving
on paved roads and highways. There are no road signs, posted speed limits
or signal lights. You have to use your own good judgment about what is safe
and what isn’t.
Drinking and driving can be very dangerous on any road. And this is
certainly
true for off-road driving. At the very time you need special
alertness and driving skills, your reflexes, perceptions and judgment can be
affected by even
a small amount of alcohol. You could have a serious - or
even fatal
- accident if you drink and drive or ride with a driver who has
been drinking. (See “Drunken Driving” in the Index.)
Driving On Off-Road Hills
Off-road driving often takes you up, down, or across a hill. Driving safely
on hills requires good judgment and an understanding of what your vehicle
can and can’t do. There are some hills that simply can’t be driven, no matter
how well built the vehicle.
Approaching a Hill
When you approach a hill, you need to decide if it’s one of those hills that’s
just too steep to climb, descend, or cross. Steepness can be hard to judge.
On a very small hill, for example, there may be a smooth, constant incline
with only
a small change in elevation where you can easily see all the way
to the top. On a large hill, the incline may get steeper as you near the top,
but you may not see this because the crest of the hill is hidden by bushes,
grass, or shrubs.
4-15