1995 CHEVROLET TAHOE change time
[x] Cancel search: change timePage 2 of 486
Downloaded from www.Manualslib.com manuals search engine Supplement to the 1995 Sierra, C/K Series,
Yukon and Tahoe Owner’s Manuals
This supplement includes the latest information at the time of printing. We
reserve the right to make changes in the product acfter that time without
further notice.
For vehicles first sold in Canada, substitute the name
“General Motors
of Canada” for General Motors wherever it appears in
this supplement.
‘Copyright 1995 General Motors Corporation. All rights reserved. Printed in
U.S.A. General Motors, Tahoe, Sierra and Yukon are registered trademarks of
General Motors Corporation.
STFF6S
1
Page 8 of 486
Downloaded from www.Manualslib.com manuals search engine Important Notes to Owners and Drivers
About This Manual
Please keep this manual in your vehicle so it will be there if you ever need it
when you’re on the road. If you sell the vehicle, please leave this manual in
it
so the new owner can use it.
This manual includes the latest information at the time it was printed. We
reserve the right to make changes in the product after that time without
further notice. For vehicles first sold in Canada, substitute the name
“General Motors
of Canada Limited” for Chevrolet Motor Division
whenever it appears in this manual.
About Driving Your Tahoe
As with other vehicles of this type, failure to operate this vehicle correctly
may result in loss
of control or an accident. Be sure to read the
“on-pavement” and “off-road” driving guidelines
in this manual. (See
“Driving Guidelines” and “Off-Road Driving With your Four-wheel Drive
Vehicle”
in the Index.)
WE SUPPORT
VOLUNTARY TECHNICIAN
CERTIFICATION THROUGH
National Institute for
AUTOMOTIVE
EXCELLENCE
iii
Page 76 of 486
Downloaded from www.Manualslib.com manuals search engine Operation
To unlock the driver’s door, press the UNLOCK button. If you press this
button again within
five seconds, all the doors will unlock. Press the rear
door
UNLOCK button to unlock the rear door only.
Press the
LOCK button to lock all the doors.
The illuminated entry feature activates
the interior dome lamps for
40 seconds or until the ignition switch is turned on.
Matching Transmitterfs) To Your Vehicle
Each key chain transmitter is coded to prevent another transmitter from
unlocking your vehicle.
If a transmitter is lost or stolen, a replacement can
be purchased through your dealer. Remember to bring any remaining
transmitters with you when
you go to your dealer. When the dealer matches
the replacement transmitter
to your vehicle, the remaining transmitters must
also be matched. Once the new transmitter
is coded, the lost transmitter will
not unlock your vehicle.
You can match a transmitter to as many different vehicles as you own,
provided they are equipped with
exactly the same 17ZOdd system. (General
Motors offers several different models
of these systems on their vehicles.)
Each vehicle can have
only two transmitters matched to it.
See your dealer to match transmitters to another vehicle.
Battery Replacement
Under normal use, the batteries in your key chain transmitter should last
about two years.
You can tell the batteries are weak
if the transmitter won’t work at the
normal range in any location. If you have to get close to your vehicle before
the transmitter works,
it’s probably time to change the batteries.
Use two Duracell@ type
DL2016, or a similar type.
2-9
Page 85 of 486
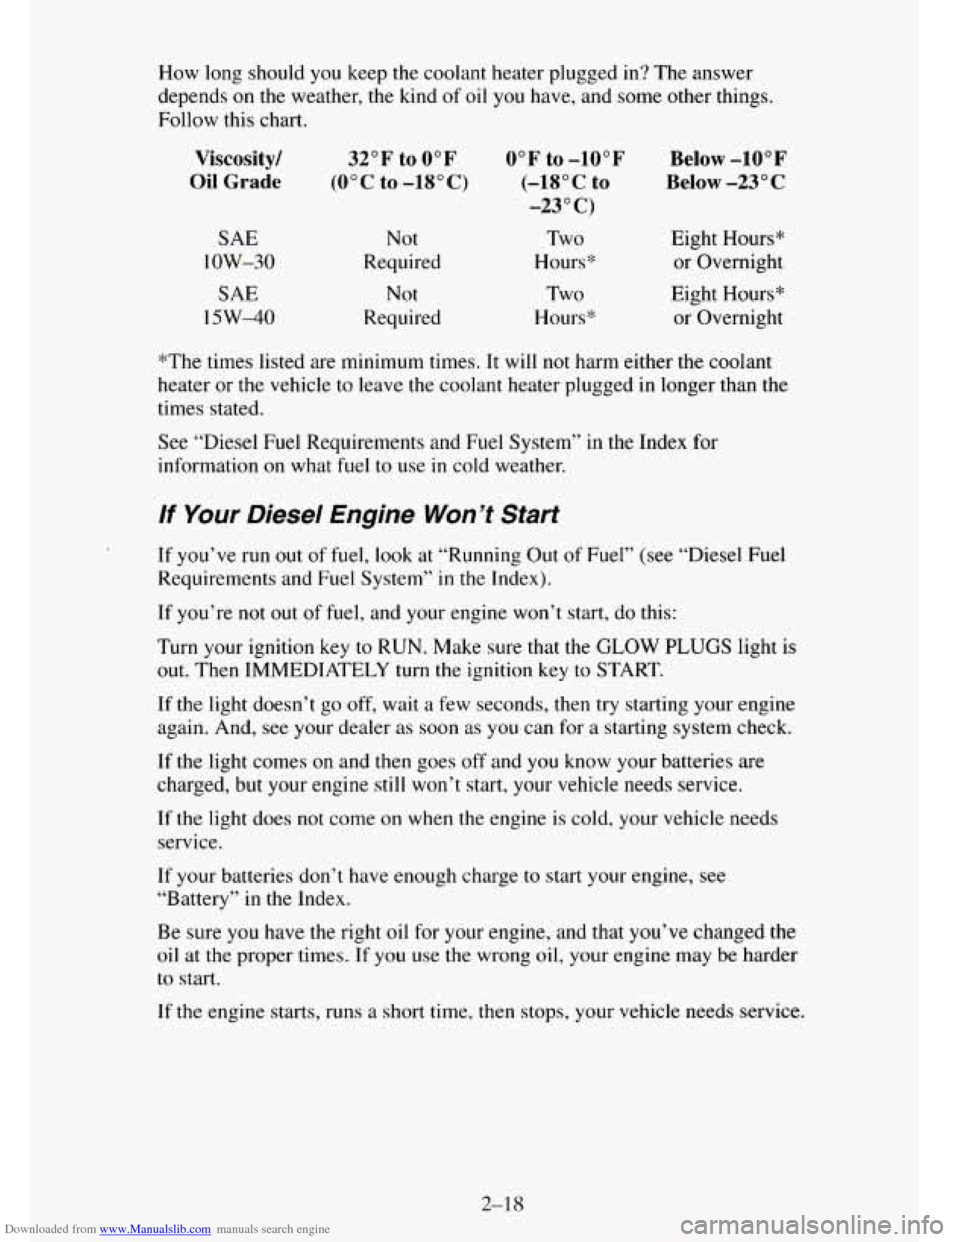
Downloaded from www.Manualslib.com manuals search engine How long should you keep the coolant heater plugged in? The answer
depends
on the weather, the kind of oil you have, and some other things.
Follow this chart.
Viscosity/
Oil Grade
SAE
low-30
SAE
15W40
32°F to 0°F
(OOC to -18OC)
Not
Required
Not
Required
0°F to -10°F
(-18” c to
-23 O C)
Two
Hours*
Two
Hours*
Below -10°F
Below
-23 O C
Eight Hours*
or Overnight
Eight Hours*
or Overnight
*The times listed are minimum times.
It will not harm either the coolant
heater or
the vehicle to leave the coolant heater plugged in longer than the
times stated.
See “Diesel Fuel Requirements and
Fuel System” in the Index for
information
on what fuel to use in cold weather.
lf Your Diesel Engine Won’t Start
If you’ve run out of fuel, look at “Running Out of Fuel” (see “Diesel Fuel
Requirements and Fuel System” in the Index).
If you’re
not out of fuel, and your engine won’t start, do this:
Turn your ignition
key to RUN. Make sure that the GLOW PLUGS light is
out. Then IMMEDIATELY
turn the ignition key to START.
If the light doesn’t go off, wait a few seconds, then try starting your engine
again. And, see your dealer
as soon as you can for a starting system check.
If the light comes
on and then goes off and you know your batteries are
charged, but your engine still
won’t start, your vehicle needs service.
If the light does
not come on when the engine is cold, your vehicle needs
service.
If your batteries don’t have enough charge to start your engine, see
“Battery”
in the Index.
Be sure you have the right oil for your engine, and that you’ve changed
the
oil at the proper times. If you use the wrong oil, your engine may be harder
to start.
If the engine starts, runs a short time, then stops, your vehicle needs service.
2-18
Page 92 of 486
Downloaded from www.Manualslib.com manuals search engine While you accelerate, it is normal for the light to go on and off if you
quickly change
the position of the accelerator. Ignore the SHIFT light when
you downshift.
Four-Wheel-Drive Vehicles Only: If your vehicle has four-wheel drive
and
is equipped with a manual transmission, disregard the SHIFT light
when the transfer case
is in 4-LOW.
Manual Transmission Shift Speeds
If your speed drops below 20 mph (32 km/h), or if the engine is not running
smoothly,
you should downshift to the next lower gear. You may have to
downshift two or more gears
to keep the engine running smoothly or for
good performance.
A CAUTION:
If you skip more ;than one gear when you downshift, you could
lose control of your vehicle. And you could injure yourself or
others. Don’t shift down more than one gear when you
downshift.
NOTICE:
If you skip more than one gear when you downshift, or if you
race the engine when you downshift, you can damage the engine,
clutch or transmission.
Locking Rear Axle
If you have this feature, your rear axle can give you additional traction on
snow, mud, ice, sand or gravel. It works like a standard axle most of the
time, but when
one of the rear wheels has no traction and the other does, the
locking feature will allow the wheel with traction to move the vehicle.
2-25
Page 100 of 486
Downloaded from www.Manualslib.com manuals search engine Four- Wheel Drive
If your vehicle has four-wheel drive, you can send your engine’s driving
power to all four wheels for extra traction.
To get the most satisfaction out
of four-wheel drive, you must be familiar with its operation. Read the part
that follows before using four-wheel drive. You should use 2-WHEEL
HIGH (2H) for most normal driving conditions.
NOTICE:
Driving in the 4-WHEEL HIGH (4H) or &WHEEL LOW (4L)
positions for a long time on dry or wet pavement could shorten
the life of your vehicle’s drivetrain.
I NOTICE:
Changing your vehicle’s body height can damage your vehicle’s
suspension, drivetrain, or other vehicle components.
It may also
affect the way your vehicle handles, and the function of your
vehicle’s safety features. Do not change your vehicle’s height
from the original design specifications.
Transfer Case
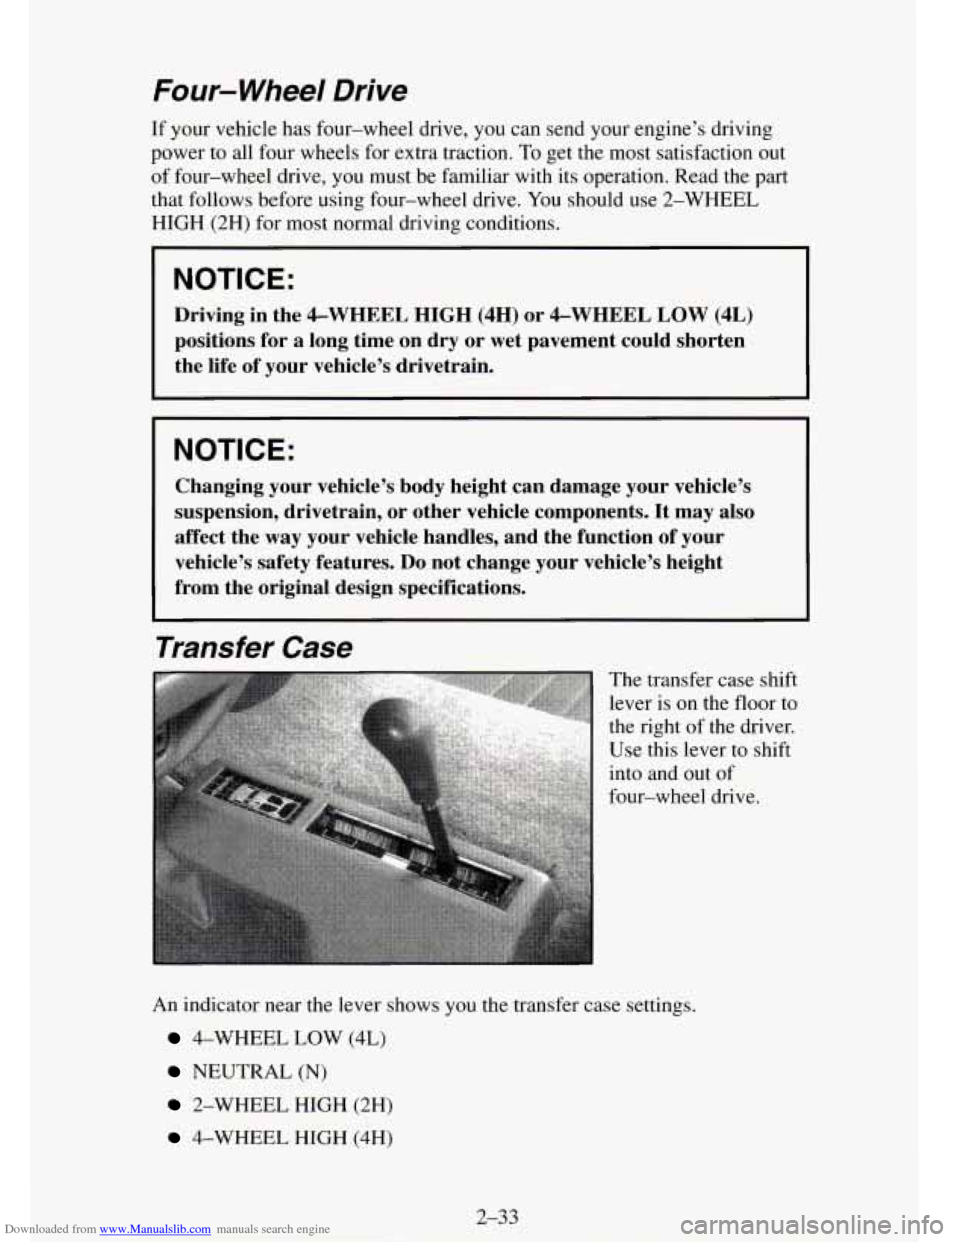
The transfer case shift
lever is on the floor to
the right of the driver.
Use this lever to shift
into and out
of
four-wheel drive.
An indicator near the lever shows you the transfer case settings.
4-WHEEL LOW (4L)
NEUTRAL (N)
2-WHEEL HIGH (2H)
4-WHEEL HIGH (4H)
2-33
Page 165 of 486

Downloaded from www.Manualslib.com manuals search engine Setting the Clock (Audio Systems with AUTO TONE
System)
The buttons used to set the clock are located below the AUTO TONE button
in the bottom right corner of your audio system.
To set the clock:
1. Press and hold HR until the correct hour appears on the display.
2. Press and hold MIN until the correct minute appears on the display.
To display the clock with the ignition off, press the recall button. The time
will be displayed for a few seconds.
There is an initial two-second delay before the clock goes into the time-set
mode.
How to Operate Your ETW AM-FM Stereo Audio
System
This part tells you.how your ETR@AM-FM stereo audio system works.
Upper Knob (VOL-RECALL)
- The upper knob has these four functions:
Turn it to switch the system on and off.
Turn it to control the volume.
Press it to display the time when the ignition is off.
Press it to change between the clock and the radio station frequency
displayed when the radio is
on.
BAL (Balance) - The control ring behind the upper knob adjusts the
left/right speaker balance.
3-10
Page 166 of 486
Downloaded from www.Manualslib.com manuals search engine Lower Knob (TUNE-AM-FM) - The lower knob has two functions:
Turn it to tune in radio stations.
Press it to change between the AM and FM bands.
FADE
- The control ring behind the lower knob adjusts the front/rear
speaker balance.
SEEK
- Press the SEEK b button to cause the receiver to seek the next
higher station.
Press the
4 SEEK button to cause the receiver to seek the next lower
station.
SCAN
- Press the SCAN button to momentarily hear each available
station.
SCAN is a two button function and requires that you also press the
SEEK
b or 4 SEEK. “SCAN” appears in the display while you are in the
SCAN mode.
Press and hold
SEEK b, then press 4 SEEK to cause the receiver to scan
to the next higher station.
Press and hold
4 SEEK, then press SEEK to cause the receiver to scan
to the next lower station.
The receiver
will continue to scan until you press the VOL-RECALL knob
or
both SEEK buttons again.
Pushbuttons
- The four pushbuttons let you return to favorite stations. To
set the pushbuttons for up to fourteen favorite stations (7 AM and 7 FM):
1. Tune in the desired station.
2. Press the SET button. “SET” appears in the display.
3. Within 5 seconds, press one of the four pushbuttons to store the station.
Whenever you press that button, the preset station will return.
Repeat these steps
for each pushbutton.
NOTE:
In addition to the four stations set as above, up to three additional stations
may be preset on each band by pressing two adjoining buttons at the same
time. Then do the following:
1. Tune in the desired station.
2. Press the SET button. “SET” appears in the display momentarily.
3. Within 5 seconds, press any two adjoining pushbuttons at the same
time. (The station
will return when the same two buttons are pressed
again.)
TREBLE
- Slide the TREBLE lever up to increase the treble response. If a
station is weak or noisy, slide the TREBLE lever down to reduce the noise.
BASS - Slide the BASS lever up to increase the bass response. Adjust the
BASS lever to give a pleasing sound to your ear.
3-1 1