1995 CHEVROLET TAHOE wiring
[x] Cancel search: wiringPage 71 of 486

Downloaded from www.Manualslib.com manuals search engine A CAUTION:
It can be dangerous to drive with the tailgate glass, tailgate or
rear doors open because carbon monoxide (CO) gas can come
into your vehicle. You can’t see or smell
CO. It can cause
unconsciousness and even death.
If you must drive with the tailgate glass, tailgate or rear doors
open or
if electrical wiring or other cable connections must pass
through the seal between the body and the tailgate glass, tailgate
or rear doors:
Make sure all windows are shut.
Turn the fan on your heating or cooling system to its highest
speed with the setting on any function. Make sure the
recirculation button is not pressed in. That will force outside
air into your vehicle. See “Comfort Controls” in the Index.
If you have air outlets on or under the instrument panel, open
them all the
way.
See “Engine Exhaust” in the Index.
Tailgate Glass and Tailgate
If your vehicle has a tailgate, you must raise the rear glass before lowering
the tailgate.
.. . ...
To open the glass
from
the outside, use
your door key. With
the key
in the lock,
turn the key clockwise
I to release the glass,
then lift it up.
To release the glass from the inside, use the electric tailgate glass release
switch
on the instrument panel. For more information, see “Fdilgate-
Electric Glass Release”
in the Index.
2-4
Page 115 of 486

Downloaded from www.Manualslib.com manuals search engine To Erase Speed Memory
When you turn off the Cruise Control or the ignition, your Cruise Control
set speed memory
is erased.
Headamps and Vehicle Lighting
Your parWheadlamp
switch
is on the
drivers side
of your
instrument panel.
Rotate
the switch knob clockwise to the park lamp symbol to turn on:
Parking Lamps
Sidemarker Lamps
Clearance Lamps (if you have them}
Taillamps
License Plate Lamps
0 Instrument Panel Lights
0 Transfer Case Shift Indicator Light (four-wheel drive vehicles)
Rotate
the switch knob clockwise again to the master lighting symbol to
turn on all the lamps and lights listed above as well as the headlamps.
Rotate the switch counterclockwise to the off sylnbol to turn
off your lamps
and lights.
Rotate the thumb wheel
next to the switch knob up to adjust instrument
panel lamps. Rotate the thumb wheel up to the first notch to return
the radio
display and gearshift indicator LED display
to full intensity when the
headlamps or parklamps are on.
You can switch your headlamps from high to low beam by pulling on the
turn signal/high beam lever.
A circuit breaker protects your headlamps. If you have an electrical
overload, your headlamps
will flicker on and off. Have your headlamp
wiring checked right away
if this happens.
2-48
Page 137 of 486
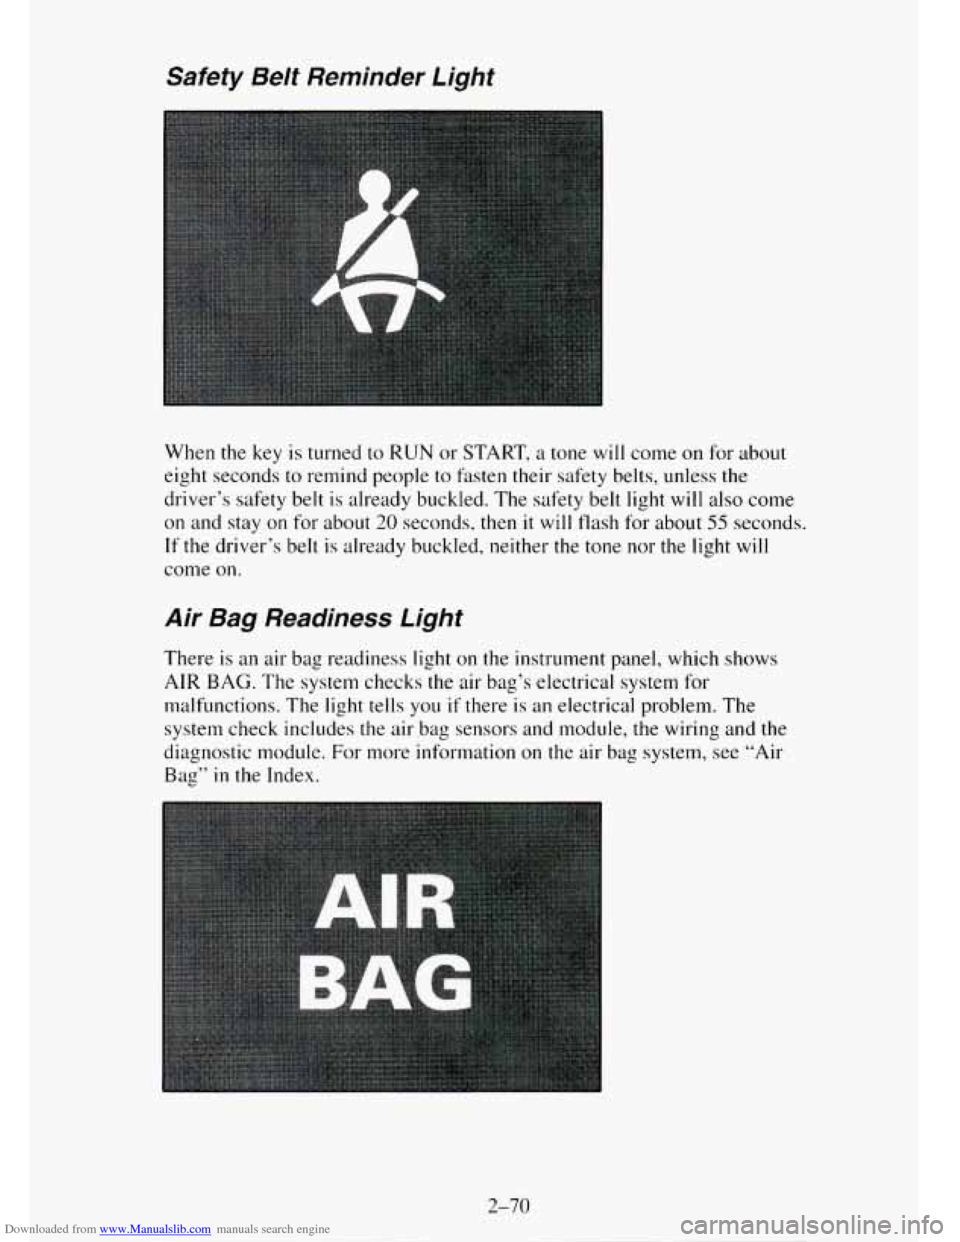
Downloaded from www.Manualslib.com manuals search engine Safety Belt Reminder Light
When the key is turned to RUN or START, a tone will come on for about
eight seconds to remind people to fasten their safety belts, unless the
driver’s safety belt is already buckled. The safety belt light will also come
on and stay on for about 20 seconds, then it will flash for about 55 seconds.
If the driver’s belt is already buckled, neither the tone nor the light will
come on.
Air Bag Readiness Light
There is an air bag readiness light on the instrument panel, which shows
AIR BAG. The system checks the air bag’s electrical system for
malfunctions. The light tells you
if there is an electrical problem. The
system check includes the air bag sensors and module, the wiring and the
diagnostic module. For more information
on the air bag system, see “Air
Bag” in the Index.
2-70
Page 152 of 486
Downloaded from www.Manualslib.com manuals search engine Luggage Carrier
If you have a luggage carrier, you can load things on top of your vehicle.
The luggage carrier has slats and side rails attached to the roof, and cross
rails which can be moved fore and aft in the side rails to help secure cargo.
Tie the load to
the side rails or side rail supports. Use the cross rails mostly
for fore and aft stops.
NOTICE:
Loading cargo that weighs more than 200 pounds (90.6 kg) on
the luggage carrier may damage your vehicle. When you carry
large things, never let them hang over the rear or the sides of
your vehicle. Load your cargo
so that it rests on the slats and
does not scratch or damage the vehicle. Put the cargo against the
side rails and fasten it securely to the luggage carrier.
Don’t exceed the maximum vehicle capacity when loading your vehicle. For
more information on vehicle capacity and loading, see “Loading Your
Vehicle”
in the Index.
To prevent damage or loss of cargo as you’re driving, check now and then to
make sure the luggage carrier and cargo are still securely fastened.
Be sure
the cargo is properly loaded.
0 If small heavy objects are placed on the roof, place the load in the area
over the rear wheels (behind the rear side door on Suburbans).
If you
need
to, cut a piece of 3/8 inch plywood to fit inside the cross rails and
side rails to spread the load.
If plywood is used, tie it to the side rail
supports.
Tie the load to the cross rails or the side rail supports. Use the cross
rails
only to keep the load from sliding.
If you need to carry long items, move the cross rails as far apart as they
will go. Tie
the load to the cross rails and the side rails or side rail
supports. Also tie
the load to the bumpers. Do not tie the load so tightly
that the cross rails or side rails are damaged.
0 After moving the cross rails, be sure to tighten all the slider screws.
Trailer Wiring Harness
A 7-wire harness is stored under your vehicle along the rear frame
crossmember. The harness connects
to the underhood electrical center and
no connector, and should be wired by a qualified electrical technician.
2-85
Page 153 of 486
Downloaded from www.Manualslib.com manuals search engine Securely attach the harness to the trailer, then tape or strap it to your
vehicle’s frame rail.
Be sure you leave it loose enough so the wiring won’t
bind or break when turning with the trailer, but not
so loose that it drags on
the ground.
Store the harness in its original position. Wrap the harness together and tie it
neatly
so it won’t be damaged.
If you do tow a trailer, your Center High Mount Stoplamp (CHMSL) may
not be properly visible from behind.
You should select a trailer with a
CHMSL on it or, if one is not available, have one installed. See your GM
dealer about how to connect your vehicle’s wiring to a trailer CHMSL.
Step-Bumper Pad
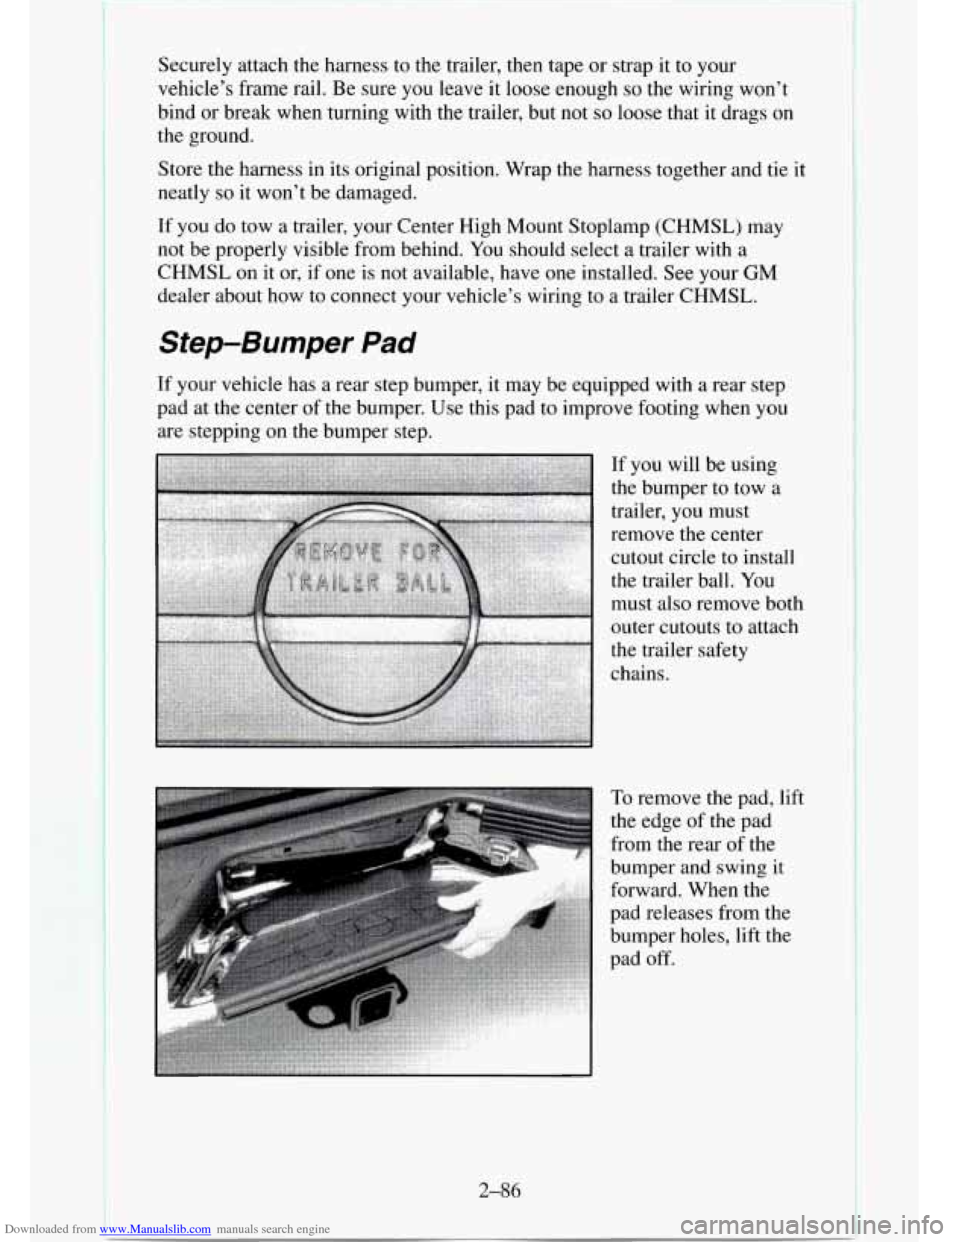
If your vehicle has a rear step bumper, it may be equipped with a rear step
pad at the center
of the bumper. Use this pad to improve footing when you
are stepping on the bumper step.
If you will be using
the bumper to tow a
trailer, you must
remove the center
cutout circle
to install
the trailer ball. You
must also remove both
outer cutouts to attach
the trailer safety
chains.
2-86
Page 228 of 486

Downloaded from www.Manualslib.com manuals search engine Turn Signals When Towing a Trailer
When you tow a trailer, your vehicle has to have extra wiring (included in
the optional trailering package). The green arrows
on your instrument panel
will flash whenever
you signal a turn or lane change. Properly hooked up,
the trailer lamps will
also flash, telling other drivers you’re about to turn,
change lanes or stop.
When towing a trailer, the green arrows on your instrument panel will flash
for turns even if the bulbs
on the trailer are burned out. Thus, you may think
drivers behind you are seeing your signal when they are not. It’s important
to check occasionally to be sure the trailer bulbs are still working.
Driving On Grades
Reduce speed and shift to a lower gear before you start down a long or steep
downgrade. If
you don’t shift down, you might have to use your brakes so
much that they would get hot and no longer work well.
On
a long uphill grade, shift down and reduce your speed to around 45 mph
(70 kdh) to reduce the possibility of engine and transmission overheating.
If
you have an automatic transmission you should use DRIVE (3) (or, as
you need to, a lower gear) when towing a trailer. Operating your vehicle in
DRIVE (3) when towing a trailer will minimize heat build-up and extend
the life
of your transmission.
If
you have a manual transmission and you are towing a trailer, it’s better
not to use FIFTH (5) gear. Just drive in FOURTH (4) gear (or, as you need
to,
a lower gear).
When towing at high altitude
on steep uphill grades, consider the following:
Engine coolant will boil at a lower temperature than at normal altitudes. If
you turn your engine off immediately after towing at high altitude on steep
uphill grades, your vehicle may show signs similar
to engine overheating.
To avoid this, let the engine run while parked (preferably on level ground)
with the automatic transmission
in PARK (P) (or the manual transmission
out of gear and the parking brake applied) for a few minutes before turning
the engine off.
If you do get the overheat warning, see “Engine
Overheating” in the Index.
Parking on Hills
You really should not park your vehicle, with a trailer attached, on a hill. If
something goes wrong, your rig could start to move. People can be injured,
and both your vehicle and
the trailer can be damaged.
But
if you ever have to park your rig on a hill, here’s how to do it:
1. Apply your regular brakes, but don’t shift into PARK (P) yet, or in gear
for a manual transmission.
Page 230 of 486
Downloaded from www.Manualslib.com manuals search engine Maintenance When Trailer Towing
Your vehicle will need service more often when you’re pulling a trailer. See
the Maintenance Schedule for more on this. Things that are especially
important
in trailer operation are automatic transmission fluid (don’t
overfill), engine oil, axle lubricant, belt, cooling system, an\
d brake
adjustment. Each
of these is covered in this manual, and the Index will help
you find them quickly. If you’re trailering, it’s a good idea to review these
sections before you start your trip.
Check periodically to see
that all hitch nuts and bolts are tight.
Trailer Lighting Systems Wiring
See “Trailer Wiring Harness” in the Index.
Page 352 of 486
Downloaded from www.Manualslib.com manuals search engine Fuses and Circuit Breakers
The wiring circuits in your vehicle are protected from short circuits by a
combination of fuses, circuit breakers, and fusible thermal links
in the
wiring itself. This greatly reduces the chance
of fires caused by electrical
problems. See “Fuses and Circuit Breakers”
in the Index for more
information.
Headlamps
The headlamp wiring is protected by a circuit breaker in the lamp switch.
An electrical overload will cause
the lamps to flicker on and off, or in some
cases to remain off. If this happens, have your headlamp wiring checked
right away.
Windshield Wipers
The windshield wiper motor is protected by a circuit breaker and a fuse. If
the motor overheats due
to heavy snow, etc., the wiper will stop until the
motor cools. Although the circuit is protected from electrical overload,
overload due
to heavy snow, etc., may cause wiper linkage damage. Always
clear ice and heavy snow from the the windshield before using the
windshield wipers. If the overload
is caused by some electrical problem and
not snow, etc., be sure to get it fixed.
Power Windows and Other Power Options
Circuit breakers in the fuse panel protect the power windows and other
power accessories. When the current load is
too heavy, the circuit breaker
opens and closes. This protects the circuit
until the current load returns to
normal
or the problem is fixed.
Trailer Wiring Harness
The seven-wire trailer wiring harness is protected by an in-line fuse in the
battery feed wire. This fuse is near the junction block. See “Trailer Wiring
Harness”
in the Index for more information.
6-75