1995 CHEVROLET CORVETTE center console
[x] Cancel search: center consolePage 141 of 386
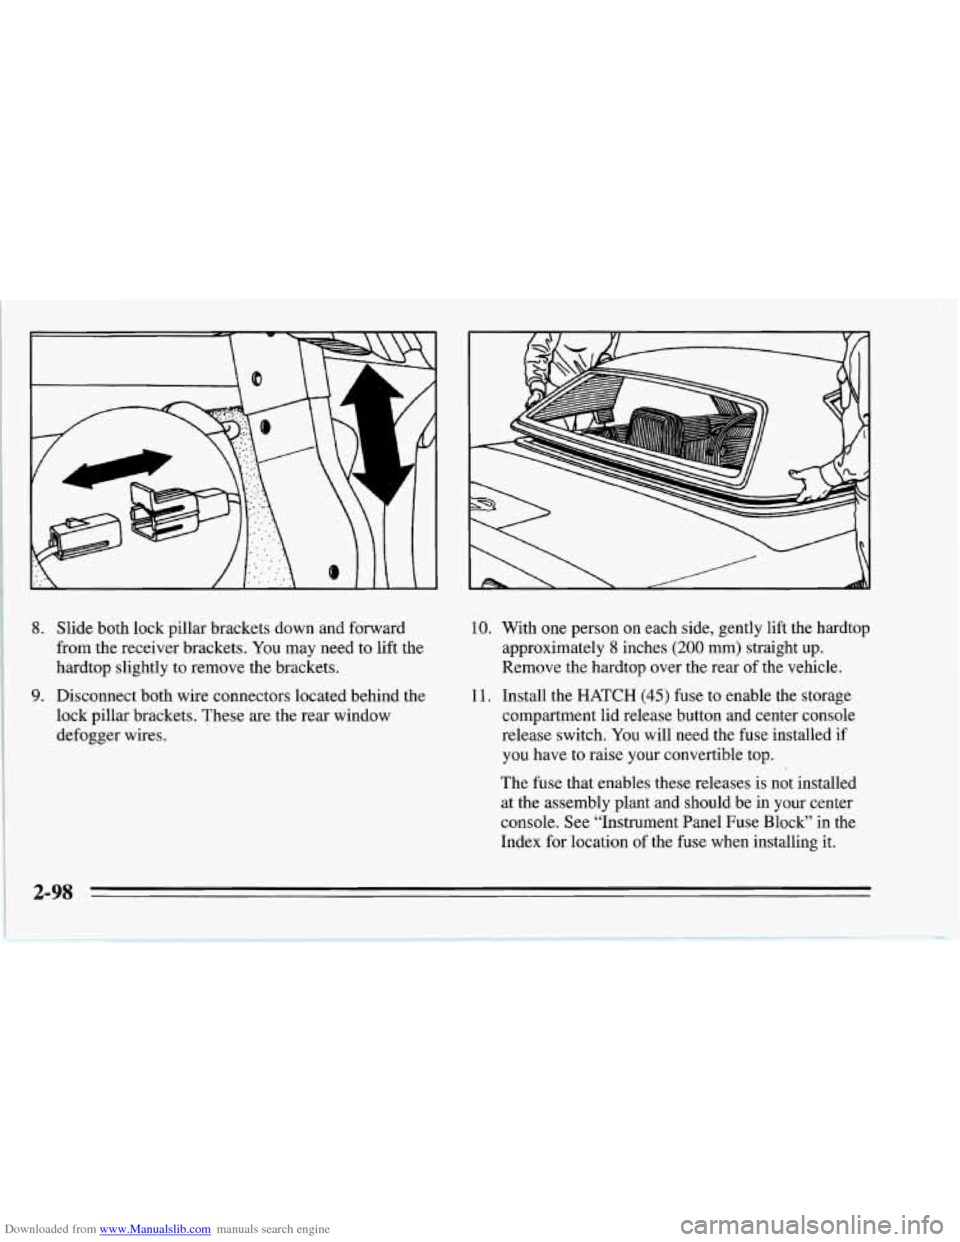
Downloaded from www.Manualslib.com manuals search engine 8. Slide both lock pillar brackets down and forward
from the receiver brackets. You may need to lift the
hardtop slightly to remove the brackets.
9. Disconnect both wire connectors located behind the
lock pillar brackets. These
are the rear window
defogger wires.
10. With one person on each side, gently lift the hardtop
approximately
8 inches (200 mm) straight up.
Remove the hardtop over the rear of the vehicle.
11. Install the HATCH (45) fuse to enable the storage
compartment lid release button and center console
release switch. You will need the fuse installed
if
you have to raise your convertible top.
The fuse that enables these releases
is not installed
at the assembly plant and should be in your center
console. See "Instrument Panel Fuse Block" in the
Index for location
of the fuse when installing it.
I
2-98
Page 142 of 386
Downloaded from www.Manualslib.com manuals search engine NOTICE:
To help avoid damaging the hardtop when not in
use:
Store the hardtop in its normal position,
0 Store hardware and trim panel with the
resting
on its mounting brackets.
hardtop.
12. Connect the rear window defogger electrical
connectors.
To Install Your Convertible Hardtop
1. Park on a level surface, set the parking brake firmly
and shift an automatic transmission into PARK
(P).
Shift a manual transmission into REVERSE (R).
Lower both windows and sunshades. Turn off the
radio to lower the power antenna and turn the
ignition key to LOCK.
2. Disconnect both rear window defogger electrical
connectors behind the lock pillar.
3. Lower the convertible top. Refer to “Convertible
Top” in the Index.
This procedure will require the use
of the storage
compartment lid release button behind the dnver’s
seat or the center console release switch. The fuse that
enables these releases is not installed at the assembly
plant and should be in your center console. See
“Instrument Panel Fuse Block” in the Index for
location
of the fuse. The fuse is labeled HATCH (45).
4. With one person on each side, carefully position the
hardtop over the vehicle. Lower the hardtop slowly,
aligning the rear bolt spacers onto the bezels, and
front conical nuts into the tapered receivers. Realign
the hardtop, if necessary.
NOTICE:
To help avoid damage, don’t force the rear of the
hardtop down. The hardtop may rest slightly
above the storage compartment lid until the
release lever is pulled. See Step
8 in this
procedure.
2-99
Page 143 of 386
Downloaded from www.Manualslib.com manuals search engine 5.
6.
7.
8.
9.
LO.
Move both seatbacks forward. Slide the lock pillar
bracket into the receiver bracket until the scribed
line
is even with the lower edge of the receiver
bracket.
Connect the electrical connectors and make sure
they
are inside the vehicle.
Insert the two upper bolts into both receiver
brackets. You may have to lift the hardtop slightly
to install the lock pillar bracket.
If the hardtop hasn’t lowered into position, pull the
release lever behind the driver’s seat under the
storage compartment lid.
Secure but don’t tighten the rear corner bracket
bolts using the ratchet.
Tighten the front bolts using the wrench.
11. Insert the lower bolt into the bottom flange of the
lock pillar brackets and tighten. Install and tighten
the remaining bolts into the lock pillar brackets.
12. Using the ratchet, tighten the rear corner bracket
bolts.
Do not over-tighten these bolts.
13. Slide the rear trim panel in place.
14. Remove the
HATCH (45) fuse. Store it in the center
console while the convertible hardtop is
in use.
(This will prevent accidental unlatching
of the
storage compartment lid.)
! 2-100
Page 305 of 386
Downloaded from www.Manualslib.com manuals search engine 1. Heater, A/C Programmer
2. Bl@k
3. Windshield Wipermasher Switch Assembly
4, Radio Receiver (Ignition)
5. Heated Mirrors, Heater and A/C Control Head,
Heater and NC Programmer
6. Light Switch, Daytime Running Lamps Module
7. Horn Relay
8. Hazard Flashers; Brake Switch
9. Crank-Air Bag
10. Crank-ParWNeutral Switch (Automatic); Clutch
Switch (Manual)
1 1. RH Illumination
12. LH Illumination
13. Console Illumination
14. Fuel Pump 1
15. Fuel Pump 2 (LT5)
16. Central Control Module; Daytime R
Module unning Lamps 17. Generator;
Automatic Transmission Vacuum Pump
(LT5); Valet Mode (LT5); EGR Circuit (LT5);
Oxygen Sensors (LT5)
18. A/C Compressor Clutch; Heater and A/C Control
Head; Heater and NC Programmer; Rear Defog
Relay
19. Accessory Plug
20. Heated Oxygen Sensors (LT1)
21. Fuel Pump Relay #2 (LT5); Selective Ride Control
Module; ABS Module; Brake Switch (Automatic);
Air Pump Relay; Air Bypass Valve (LT5)
22. Injectors #1,4,6,7 (LTl); Primary Injectors #1-8
(LT5); Ignition Coil (LT5)
23. Injectors #2,3,5, 8 (LTl); Secondary SF1 Control
Modules (LT5)
24. Turn Signal Flashers
25. Ignition Coil and Ignition Coil Module (LT1)
26. Passive Keyless Entry Module
27. Instrument Cluster; Driver Information Center;
Air Bag Denn; Acceleration Slip Regulation
Switch (LT5)
Page 309 of 386
Downloaded from www.Manualslib.com manuals search engine Leaving your hood open and your underhood lamps on
can drain your battery
. If you need to keep the hood
open for an extended period
of time. remove the
underhood lamps fuse
.
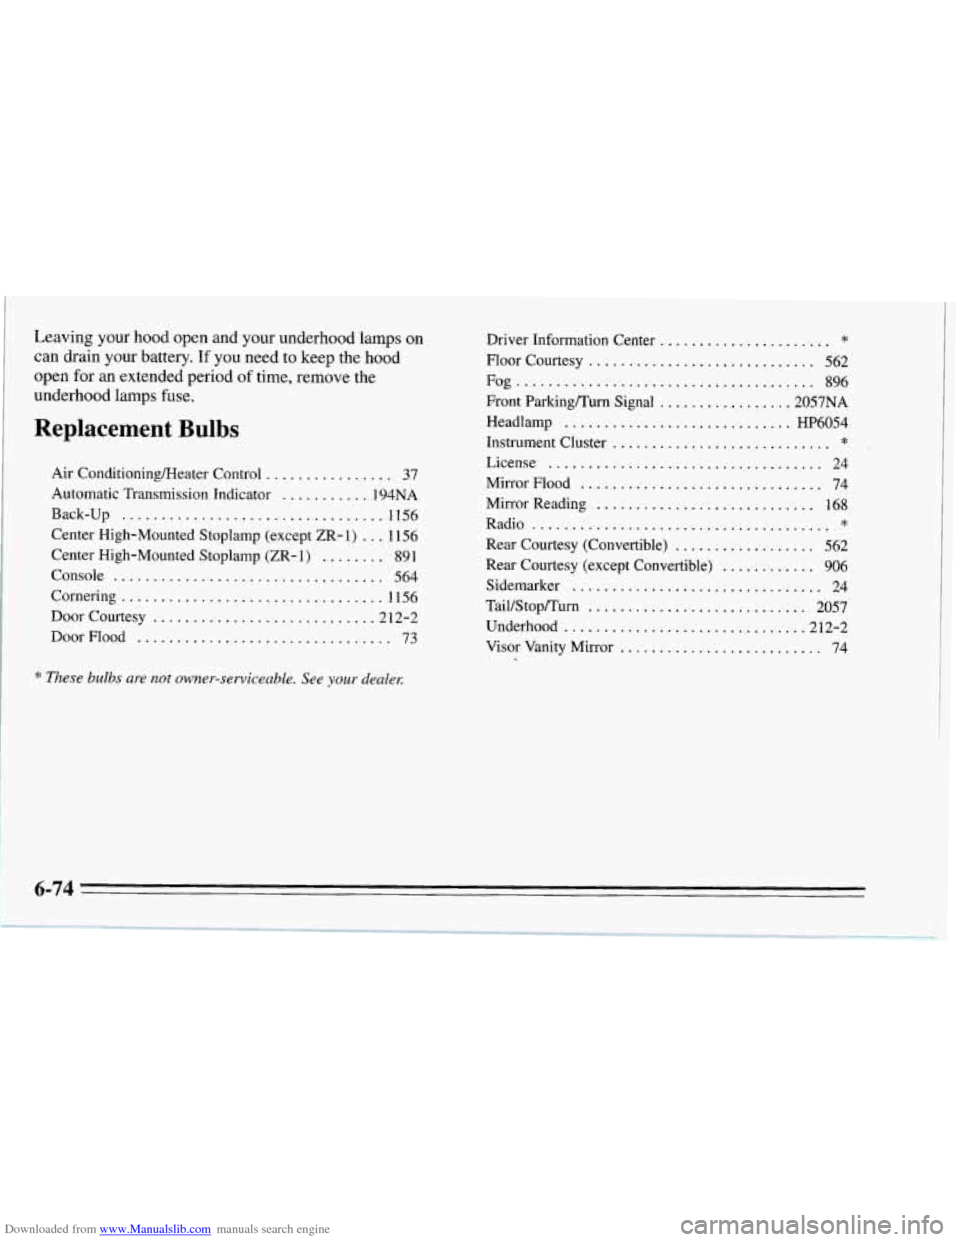
Replacement Bulbs
Air Conditioningmeater Control ................ 37
Automatic Transmission Indicator
........... 194NA
Back-up
................................. 1156
Center High-Mounted Stoplamp (except ZR-
1) ... 1156
Center High-Mounted Stoplamp (ZR-
1) ........ 89 1
Console
.................................. 564
Cornering
................................. 1156
Door Courtesy
........................... .21 2-2
DoorFlood
................................ 73
* These bulbs are not owner.serviceab1e . See your dealer.
Driver Information Center * ......................
Floor Courtesy ............................. 562
Fog
...................................... 896
Front Parkingmurn Signal
................. 2057NA
Headlamp ............................. HP6054
Instrument Cluster
License
................................... 24
MirrorFlood
............................... 74
* ............................
Mirror Reading ............................ 168
Rear Courtesy (Convertible)
.................. 562
Rear Courtesy (except Convertible)
............ 906
Sidemarker
................................ 24
Tail/Stop/Turn
............................ 2057
Visor Vanity Mirror
.......................... 74
Radio
* ......................................
Underhood ................................. 2-2
6-74
Page 375 of 386
Downloaded from www.Manualslib.com manuals search engine Park (P) Position ............................. 2-24
Reverse (R) Position
.......................... 2-25
Second (2) Position
........................... 2-27
Automatic Transmission Fluid
..................... 6-20
Temperature Reading
......................... 2-84
Adding
.................................... 6-22
Checking
................................... 6-21
Axle, Rear
.................................... 6-26
Back-up Lamp. Bulb Replacement
................ 6-41
Battery
....................................... 6-35
Replacement, Passive Keyless Entry
.............. 2-8
Warnings .................................... 5-2
BBB Auto Line
................................. 8-3
Bi-Level
....................................... 3-3
Blizzard
...................................... 4-26
Brake
Adjustment
................................. 6-35
Fluid, Adding
............................... 6-34
Master Cylinder
............................. 6-32
System Parts, Replacing
....................... 6-35
System Warning Light
........................ 2-70
Transmission Shift Interlock (BTSI)
.............. 7-42
Brake, Parking
................................. 2-32
Brakes, Anti-Lock
............................... 4-6
Braking, In Emergencies
.......................... 4-9
Brightness Control
.............................. 2-46
PedalTravel
................................ 6-35
Wear
...................................... 6-34
Braking
........................................ 4-5
“Break-In,
” New Vehicle .......................... 2- 15
BTSI (Brake-Transmission Shift Interlock) ........... 7-42
Bulb Replacement Back-up Lamp
.............................. 6-41
Center High-Mounted Stoplamp (ZR-
1) .......... 6-46
Cornering Lamp
............................. 6-43
Front Turn Signal Lamps
...................... 6-39
Center High-Mounted
Stoplamp (Except ZR-1)
.... 6-45
Chart
...................................... 6-74
FogLamp
.................................. 6-38
Headlamps
................................. 6-37
Rear Cargo Compartment Lamp (Convertible)
..... 6-44
Rear Cargo Compartment Lamp (Coupe)
.......... 6-44
Rear Turn Signal and Taillamp
.................. 6-40
Sidemarker
................................. 6-42
Canada. Vehicles First Sold in
11 .. .......................
Canadian Roadside Assistance ...................... 8-8
Capacities and Specifications ...................... 6-75
Carbon Monoxide
......................... 2.36. 4.27
Care of Your Cassette Tape Player
.................. 3-18
Care
of Your Compact Discs ...................... 3-19
Cassette Tape Player. Care of Your
................. 3-18
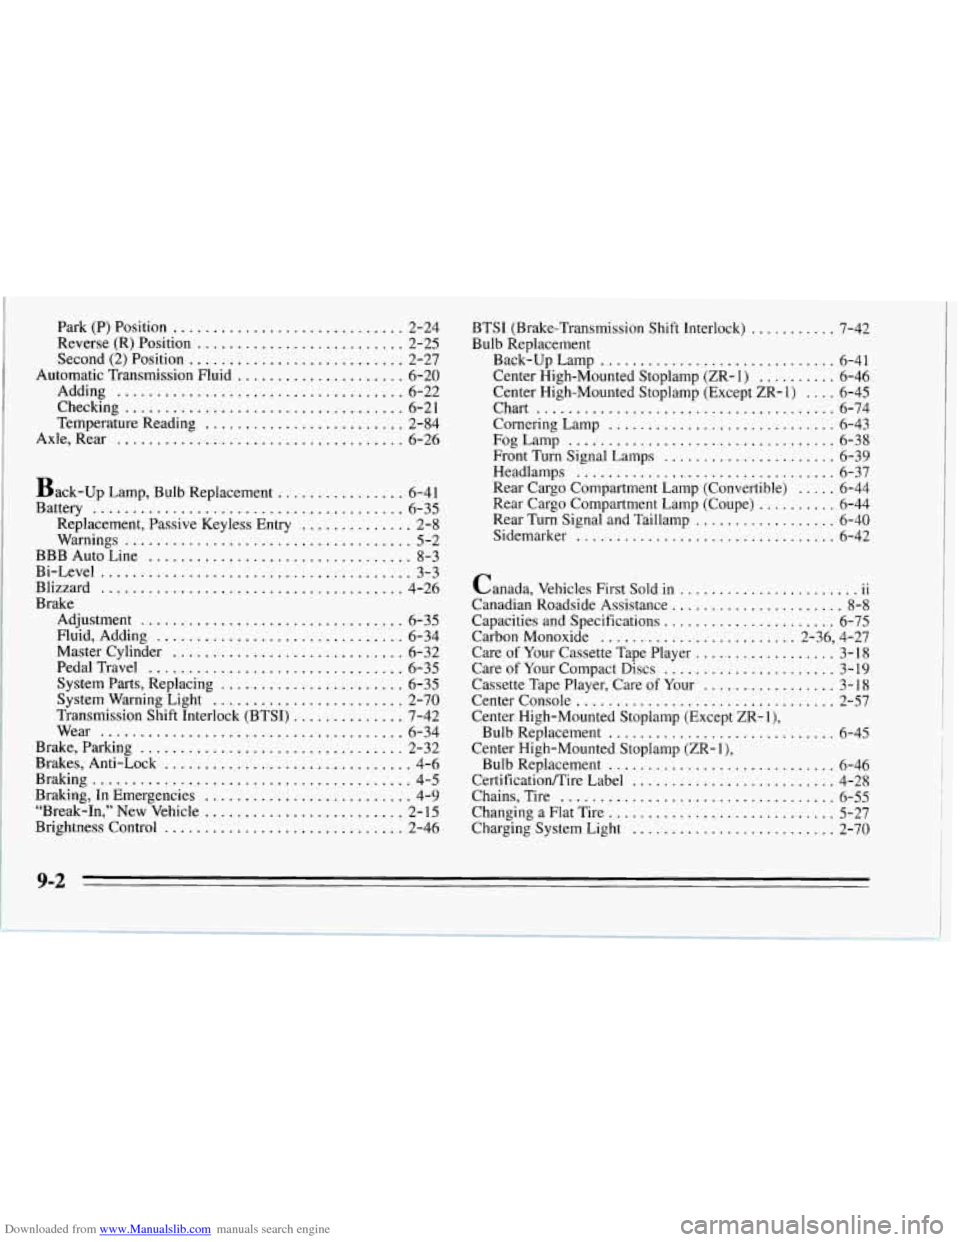
Center Console
................................. 2-57
Bulb Replacement
............................. 6-45
Bulb Replacement
............................. 6-46
CertificationRire Label
.......................... 4-28
Changing a Flat Tire
............................. 5-27
Charging System Light
.......................... 2-70
Center High-Mounted
Stoplamp (Except
ZR- 1).
Center High-Mounted Stoplamp (ZR- 1).
Chains. Tire ................................... 6-55
9-2
Page 376 of 386
Downloaded from www.Manualslib.com manuals search engine Check Gauges Light ............................. 2-85
Checking Your Restraint Systems
.................. 1-30
Checking Automatic Transmission Fluid
.................. 6-21
BrakeFluid
................................. 6-33
Engine Coolant
.............................. 6-28
Manual Transmission Fluid
.................... 6-23
Power Steering Fluid
......................... 6-30
Restraint Systems
............................ 1-30
Things Under the
Hood ........................ 6-8
Checking and Adding Hydraulic Clutch Fluid
........ 6-25
Chemical Paint Spotting
.......................... 6-64
Child Restraints
................................ 1-25
Securing in the Passenger Seat Position
........... 1-26
TopStrap
................................... 1-25
WheretoPut
................................ 1-25
Cigarette Lighter
............................... 2-6 1
Cinch Feature. Lap Belt
.......................... 1- 12
Cleaner. Air
................................... 6-17
Cleaning Aluminum Wheels
........................... 6-63
Dulso-Coated Moldings ....................... 6-58
Engine
..................................... 6-63
Fabric
..................................... 6-56
Glass
...................................... 6-59
Leather
.................................... 6-58
Outside
of the Windshield and Wiper Blades ....... 6-60
Removable Roof Panel
........................ 6-60
Soft-Touch Surfaces
.......................... 6-58
Speakercovers
.............................. 6-59
Special Problems
............................ 6-57
EngineOil
.................................. 6-13
Stains
...................................... 6-57
The Inside
of Your Corvette .................... 6-56
The Outside of Your Corvette
................... 6-61
Tires
...................................... 6-63
Top
of the Instrument Panel .................... 6-59
Your Convertible Top
......................... 6-62
Cleaning and Storage. Hardtop
.................... 6-63
Climate Control. Automatic Electronic
............... 3-4
Clock. Setting the
............................... 3-10
Clutch. Hydraulic
............................... 6-24
Comfort Controls
................................ 3-1
Compact Discs. Care of Your
...................... 3-19
Compact Spare Tire
............................. 5-40
Compartment. Door Storage ...................... 2-59
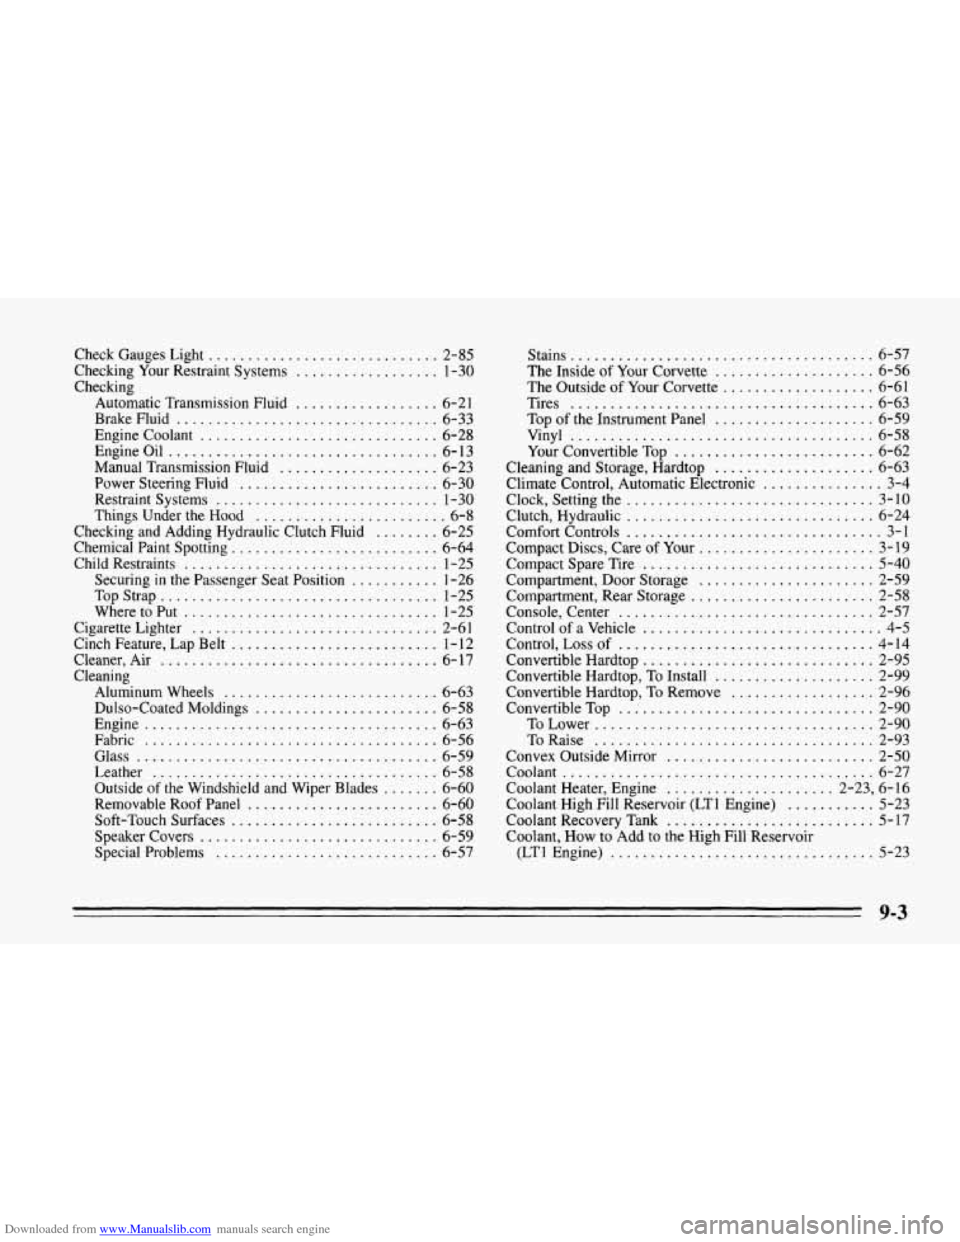
Console. Center
................................ 2-57
Control
of a Vehicle .............................. 4-5
Control. Loss of ................................ 4-14
Convertible Hardtop
............................. 2-95
Convertible Hardtop.
To Install .................... 2-99
Convertible Hardtop. To Remove
.................. 2-96
ConvertibleTop
................................ 2-90
ToLower
................................... 2-90
ToRaise
................................... 2-93
Convex Outside Mirror
.......................... 2-50
Coolant ....................................... 6-27
Coolant Heater. Engine
..................... 2-23. 6- 16
Coolant High Fill Reservoir
(LT1 Engine) ........... 5-23
Coolant. How to Add to the High Fill Reservoir
Vinyl
...................................... 6-58
Compartment.
Rear Storage ....................... 2-58
Coolant Recovery Tank
.......................... 5-17
(LTl Engine)
................................. 5-23