Page 65 of 386
Downloaded from www.Manualslib.com manuals search engine Racing or Other Competitive Driving
See your Warranty Book before using your Corvette for
racing
or other competitive driving.
NOTICE:
If you use your Corvette for racing or other
competitive driving, your engine may use more oil than
it would with normal use. Low oil levels
can damage the engine. Be sure to check the oil
level often during racing or other competitive
driving and keep the level at or near the upper
mark on the engine oil dipstick. You may need to
add oil. See “Engine Oil” in the Index.
J
Driving Through Deep Standing
Water
NOTICE:
If you drive too quickly through deep puddles or
standing water, water can come in through your
engine’s air intake and badly damage your
engine. Never drive through water that is slightly
lower than the underbody of your vehicle.
If you
can’t avoid deep puddles or standing water, drive
through them very slowly.
2-22
Page 209 of 386
Downloaded from www.Manualslib.com manuals search engine If the coolant inside the coolant recovery tank is boiling,
don’t do anything else until it cools down.
When you decide it’s safe to lift the hood, here’s what
you’ll see on the LT5 engine:
1. Coolant recovery tank
2. Coolant high fill reservoir with pressure cap
3. Electric engine fans
When it
is cool, remove the coolant recovery tank cap
and
look at the dipstick.
5-16
Page 244 of 386
Downloaded from www.Manualslib.com manuals search engine You’ll see the following when you open the hood with
the
LTl engine:
1.
2.
3.
4.
5.
6.
7.
8.
9.
10.
11.
12.
Hydraulic Clutch Fluid Reservoir (if equipped)
Brake Fluid Reservoir
Battery
Electric Engine Fan
Air Cleaner
Coolant Recovery Tank Power Steering Fluid Reservoir
Engine Oil Fill Cap
Engine Oil Dipstick Windshield Washer Fluid Reservoir
Coolant High
Fill Reservoir
Automatic Transmission Dipstick (if equipped)
6-9
Page 246 of 386
Downloaded from www.Manualslib.com manuals search engine 5.
6.
7.
8.
9.
10.
11.
Air Cleaner Coolant Recovery Tank
Power Steering Fluid Reservoir
Engine Oil Fill Cap
Engine Oil Dipstick
Windshield Washer Fluid Reservoir
Coolant High Fill Reservoir
Then release the hood strut by moving it
to the centered
position and lowering the hood. Lower the hood until
the bottom of the hood is the same height as the top of
the windshield, then release it.
Before closing the hood, be sure all the filler caps are
on,
6-11
Page 247 of 386
Downloaded from www.Manualslib.com manuals search engine Engine Oil
If you have the LT1 engine, it’s a good idea to check
your engine oil level every time you get fuel. In order to
get
an accurate reading, the oil must be warm and the
vehicle must be on level ground.
Turn
off the engine and give the oil a few minutes to
drain back into the oil pan.
If you don’t, the oil dipstick
might not show the actual level. If
you have the LT5
~ engine,
the best time to ~ check your engine oil
is when the engine is cold.
If
you run the engine, the engine oil won’t drain back
into the pan fast enough. Give the oil two hours to drain
back into the oil pan.
If you don’t, the oil dipstick might
not show the actual level.
6-12
Page 248 of 386
Downloaded from www.Manualslib.com manuals search engine - e... . .... *.*.*.
To Check Engine Oil
Pull out the dipstick and clean it with a paper towel or a
cloth, then push it back in all the way. Remove it again,
keeping the tip down.
LTl Engine
When to Add Oil
If the oil is at or below the ADD mark you’ll need to
add some oil.
But you must use the right kind. This part
explains what kind of oil to use.
For crankcase capacity,
see “Capacities and Specifications” in the Index.
NOTICE:
Don’t add too much oil. If your engine has so
much oil that the oil level gets above the upper
mark that shows the proper operating range,
your engine could be damaged.
6-13
Page 249 of 386
Downloaded from www.Manualslib.com manuals search engine LT5 Engine
Just fill it enough
to put the level somewhere in the
proper operating range. Push the
dipstick all the way back in when
you’re through. What Kind of Oil to Use
Look for two things:
0 GM4718M
The Corvette engine requires a special oil meeting
GM Standard GM4718M. Oils meeting this Standard
may be identified as synthetic. However, not all
synthetic oils will meet this GM Standard. You
should look for and use only an oil that meets GM
Standard GM47 1 8M.
NOTICE:
If you use oils that don’t have the GM4718M
Standard designation, you can cause engine
damage not covered by your warranty.
6-14
Page 255 of 386

Downloaded from www.Manualslib.com manuals search engine Automatic Transmission Fluid
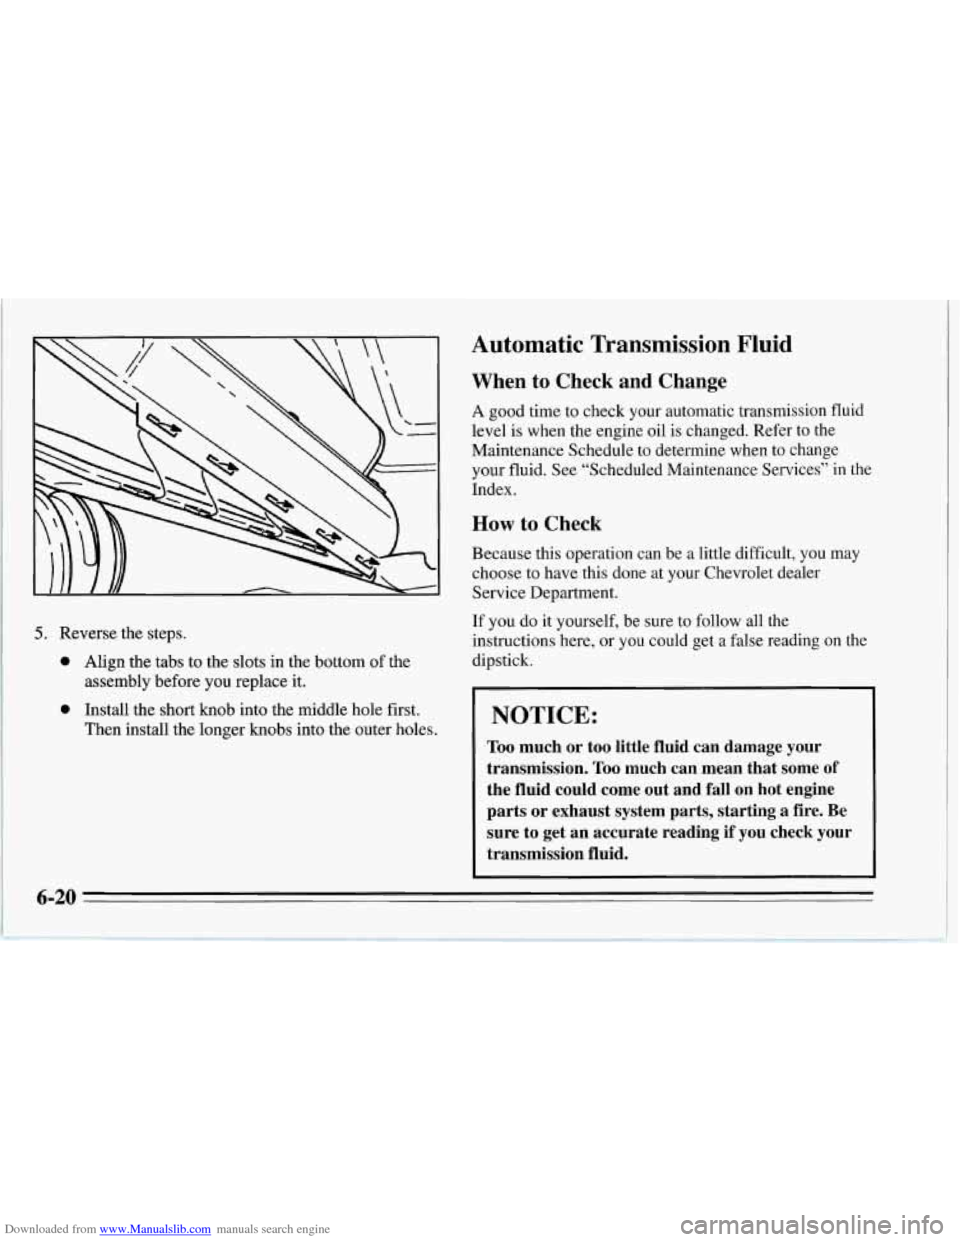
5. Reverse the steps.
0 Align the tabs to the slots in the bottom of the
0 Install the short knob into the middle hole first.
assembly before you
replace it.
Then install the longer knobs into the outer holes.
When to Check and Change
A good time to check your automatic transmission fluid
level is when the engine oil is changed. Refer to the
Maintenance Schedule to determine when to change
your fluid. See “Scheduled Maintenance Services” in the
Index.
How to Check
Because this operation can be a little difficult, you may
choose to have this done at your Chevrolet dealer
Service Department.
If you do it yourself, be sure to follow all the
instructions here, or you could get a false reading on the
dipstick.
I
I NOTICE:
Too much or too little fluid can damage your
transmission.
Too much can mean that some of
the fluid could come out and fall on hot engine
parts or exhaust system parts, starting a fire. Be sure to get an accurate reading if you check your
transmission fluid.
6-20