1995 CHEVROLET CAVALIER tow
[x] Cancel search: towPage 12 of 340
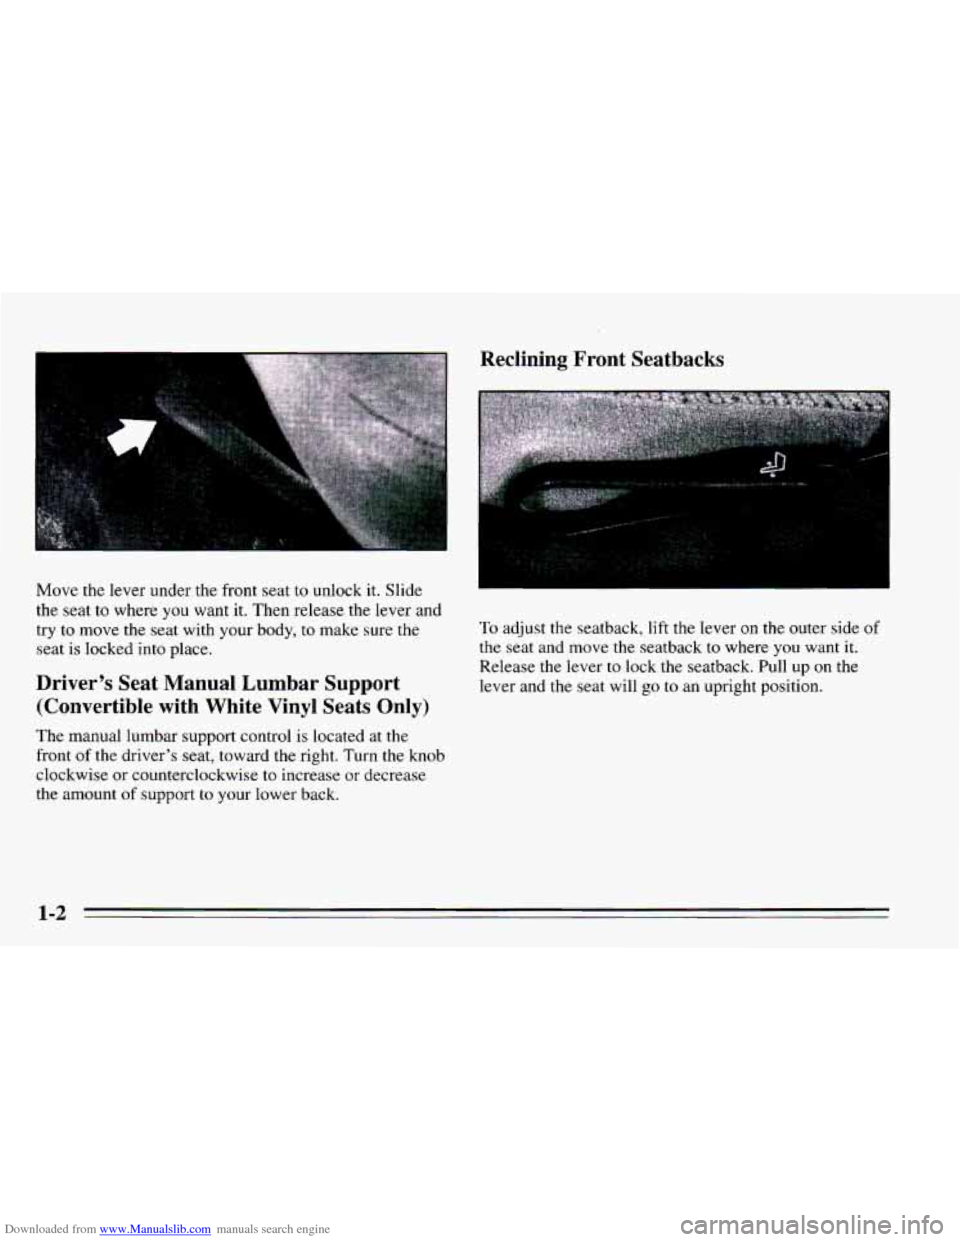
Downloaded from www.Manualslib.com manuals search engine Move the lever under the front seat to unlock it. Slide
the seat to where you want it. Then release the lever and
try to move the seat with your body, to make sure the
seat is locked into place.
Driver’s Seat Manual Lumbar Support
(Convertible with White Vinyl Seats Only)
The manual lumbar support control is located at the
front
of the driver’s seat, toward the right. Turn the knob
clockwise or counterclockwise
to increase or decrease
the amount
of support to your lower back.
Reclining Front Seatbacks
To adjust the seatback, lift the lever on the outer side of
the seat and move the seatback to where you want it.
Release the lever
to lock the seatback. Pull up on the
lever and the seat will go to an upright position.
1-2
Page 14 of 340
Downloaded from www.Manualslib.com manuals search engine Head Restraints Easy-Entry Seat (Option)
Slide the head restraint up or down so that the top of the
restraint is closest
to the top of your ears. This position
reduces the chance of a neck injury in a crash.
Front Seatback Latches (2-Door Models)
On two-door models, the right front seat of your vehicle
makes it easy
to get in and out of the rear seat.
0 When you tilt the right front seatback fully forward,
the whole seat will slide forward.
After someone gets into the rear seat area, move the
right front seatback to its original position. Then
move the seat rearward until it locks.
To get out, tilt the seatback fully forwara.
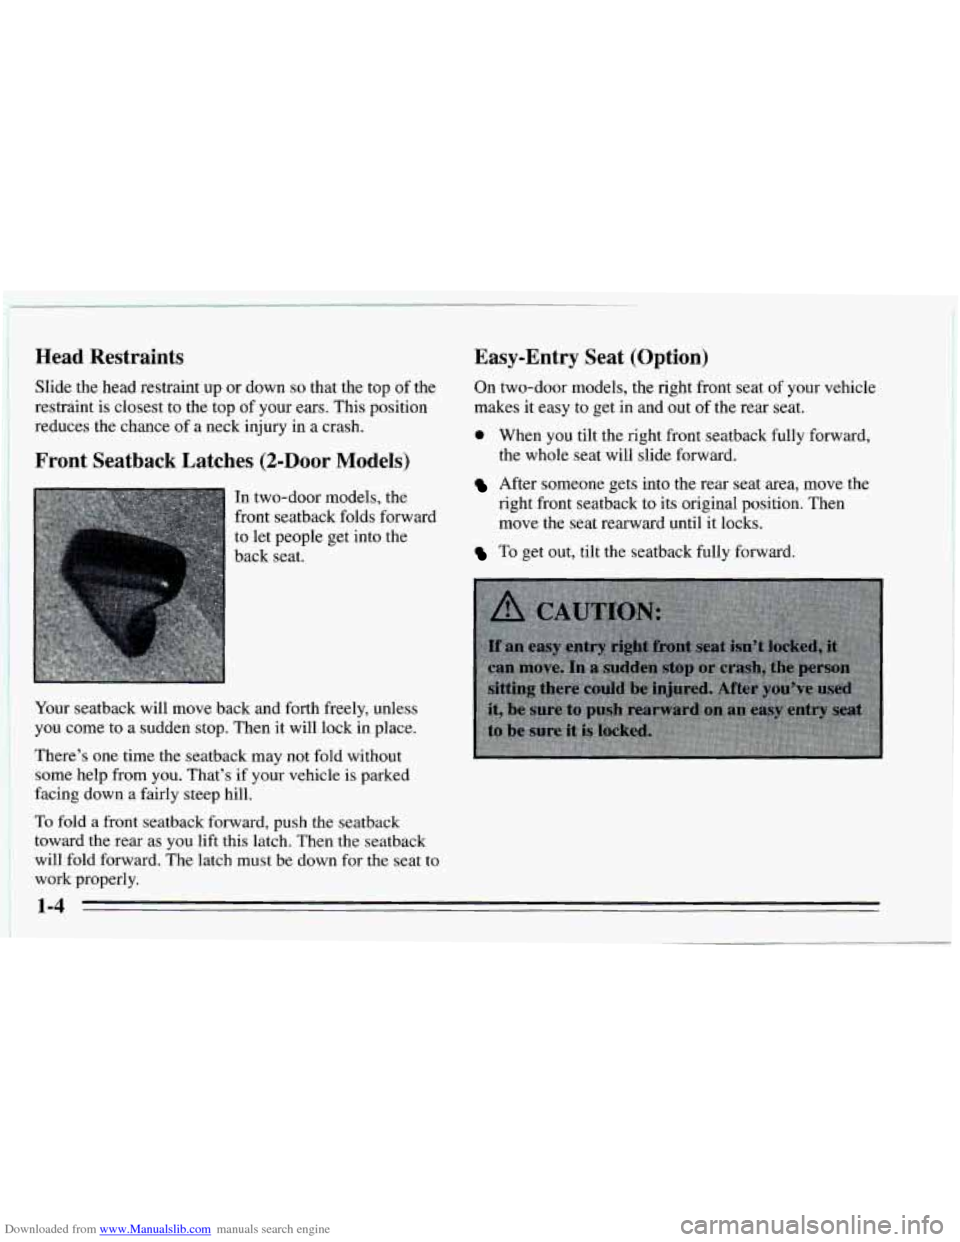
Your seatback will move back and forth ‘freely, unless
you come to a sudden stop. Then it will lock in place.
There’s one time the seatback may not fold without
some help from you. That’s if your vehicle is parked
facing down a fairly steep hill.
To fold a front seatback forward, push the seatback
toward the rear as you lift this latch. Then the seatback
will fold forward. The latch must be down for the seat to
work properly.
1-4
Page 32 of 340
Downloaded from www.Manualslib.com manuals search engine It is possible that in a crash only one of the two air bags
in your Cavalier will deploy. This is rare, but can happen
in a crash just severe enough
to make an air bag inflate.
In any particular crash,
no one can say whether an air
bag should have inflated simply because of the damage
to a vehicle or because of what the repair costs were.
Inflation
is determined by the angle of the impact and
the vehicle’s deceleration. Vehicle damage
is only one
indication of this.
What makes an air bag inflate?
In a frontal or near-frontal impact of sufficient severity,
the air bag sensing system detects that the vehicle is
suddenly stopping as a result
of a crash. The sensing
system triggers a chemical reaction of
the sodium azide
sealed in the inflator. The reaction produces nitrogen
gas, which inflates the air bag. The inflator, air bag, and
related hardware are all part
of the air bag modules
packed inside the steering wheel and in the instrument
panel in front
of the right front passenger.
How does an air bag restrain?
In moderate to severe frontal or near-frontal collisions,
even belted occupants
can contact the steering wheel or
the instrument panel. The air bag supplements
the
protection provided by safety belts. Air bags distribute
the force
of the impact more evenly over the occupant’s
upper body, stopping the occupant more gradually. But
air bags would not help
you in many types of collisions,
including rollovers and rear and side impacts, primarily
because an occupant’s motion is
not toward the air bag.
Air bags should never be regarded as anything more
than a supplement to safety belts, and then only in
moderate to severe frontal or near-frontal collisions,
What will you see after an air bag inflates?
After the air bag inflates, it quickly deflates. This occurs
so quickly that some people may not even realize the air
bag inflated. Some components of the air bag module
in
the steering wheel hub for the driver’s air bag, or the
instrument panel for the right front passenger’s bag, will
be
hot for a short time, but the part of the bag that comes
into contact with you will
not be hot to the touch. There
will be some smoke and dust coming from vents in the
deflated air bags. Air bag inflation will
not prevent the
driver from seeing or from being able
to steer the
vehicle, nor will it stop people from leaving the vehicle.
1-22
Page 53 of 340
Downloaded from www.Manualslib.com manuals search engine . , . , , . ..
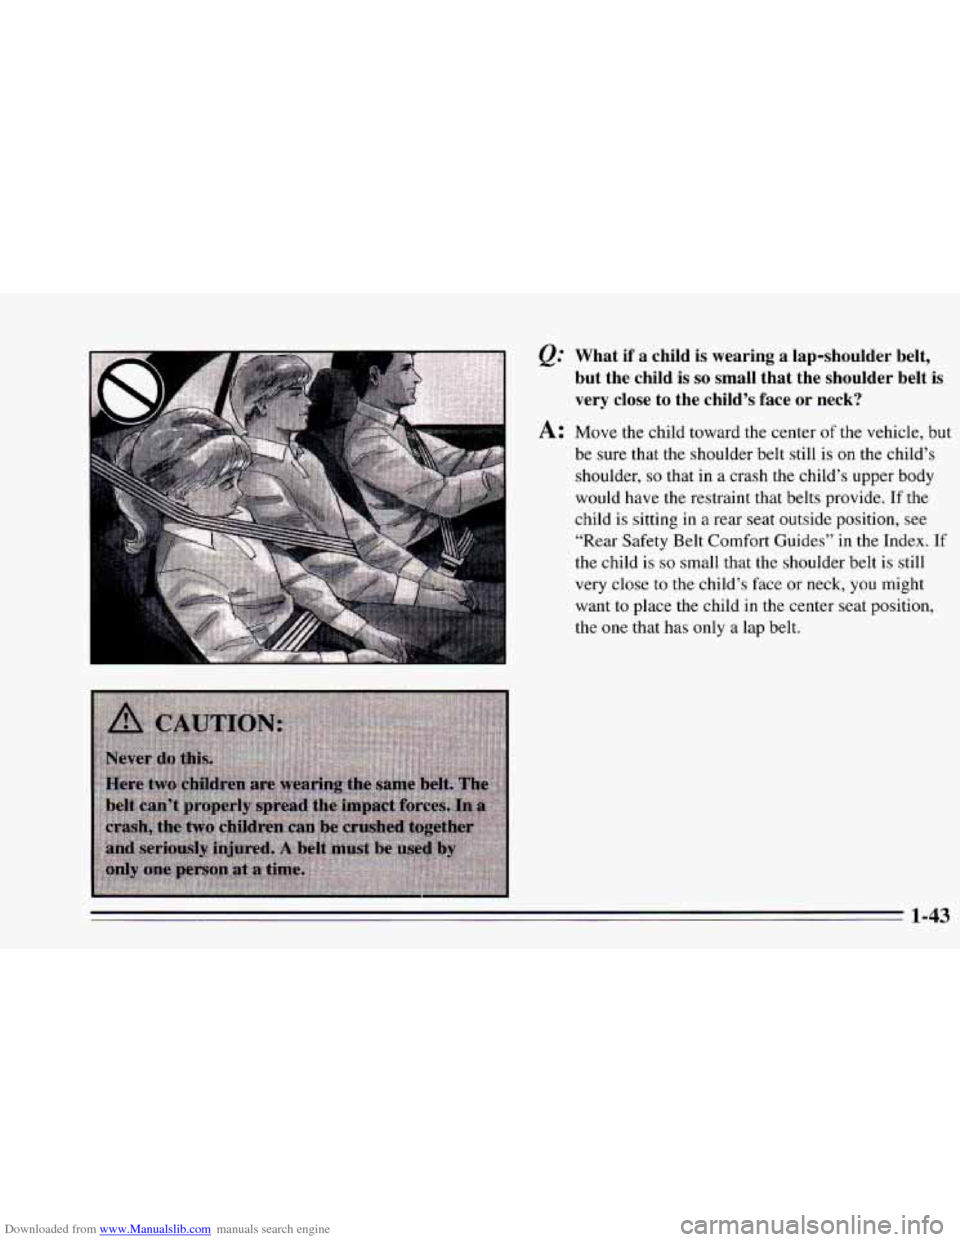
&= What if a child is wearing a lap-shoulder belt,
but the child
is so small that the shoulder belt is
very close to the child’s face or neck?
A: Move the child toward the center of the vehicle, but
be sure that the shoulder belt still is
on the child’s
shoulder,
so that in a crash the child’s upper body
would have the restraint that belts provide.
If the
child
is sitting in a rear seat outside position, see
“Rear Safety Belt Comfort Guides” in the Index.
If
the child is so small that the shoulder belt is still
very close to the child’s face or neck, you might
want
to place the child in the center seat position,
the one that has only a lap belt.
1-43
Page 63 of 340
Downloaded from www.Manualslib.com manuals search engine Passlock (Option)
Your vehicle may be equipped with the Passlock
theft-deterrent system.
To find out if your vehicle has
Passlock, turn the ignition key to RUN position.
If the
THEFT SYSTEM light comes on, then your vehicle is
equipped with Passlock. Passlock
is a passive
theft-deterrent system. The system is armed once the
key is removed from the ignition. Passlock enables fuel
if the ignition lock cylinder is turned with a valid key. If
a correct key is not used, fuel is disabled.
During normal operation, the
THEFT SYSTEM light will
go
off after the engine is started. In the unlikely event that
the engine stalls and the
THEFI’ SYSTEM light flashes,
wait until the light stops flashing before
trying to restart
the engine. Remember to release the key from.the START
position
as soon as the engine starts. If after several tries
the vehicle still does not start, the vehicle may need
service. At
this the, you may also want to check the fuses
(see “Fuses and Circuit Breakers” in the Index).
See your
Chevrolet dealer for service.
If the THEFT SYSTEM light comes on while the engine
is running, a problem has been detected and
the system
may need service. See your Chevrolet dealer for service.
In an emergency, call the Chevrolet Roadside Assistance
Program at 1-800-CHEV USA (1-800-243-8872).
New Vehicle “Break-In”
Your modern Chevrolet doesn’t need an
elaborate “break-in.” But it will perform better
in the long run if you follow these guidelines:
e
e
0
Don’t drive at any one speed -- fast or
slow
-- for the first 500 miles (804 h).
Don’t make full-throttle starts.
Avoid making hard stops for the
first
200 miles (322 km) or so. During this time
your new brake linings aren’t yet broken
in. Hard stops with new linings can mean
premature wear and earlier replacement.
Follow this “breaking-in” guideline every
time you get new brake linings.
Don’t tow a trailer during “break-in.” See
“Towing a Trailer’’ in the Index for more
information.
2-7
Page 64 of 340
Downloaded from www.Manualslib.com manuals search engine Ignition Switch
E
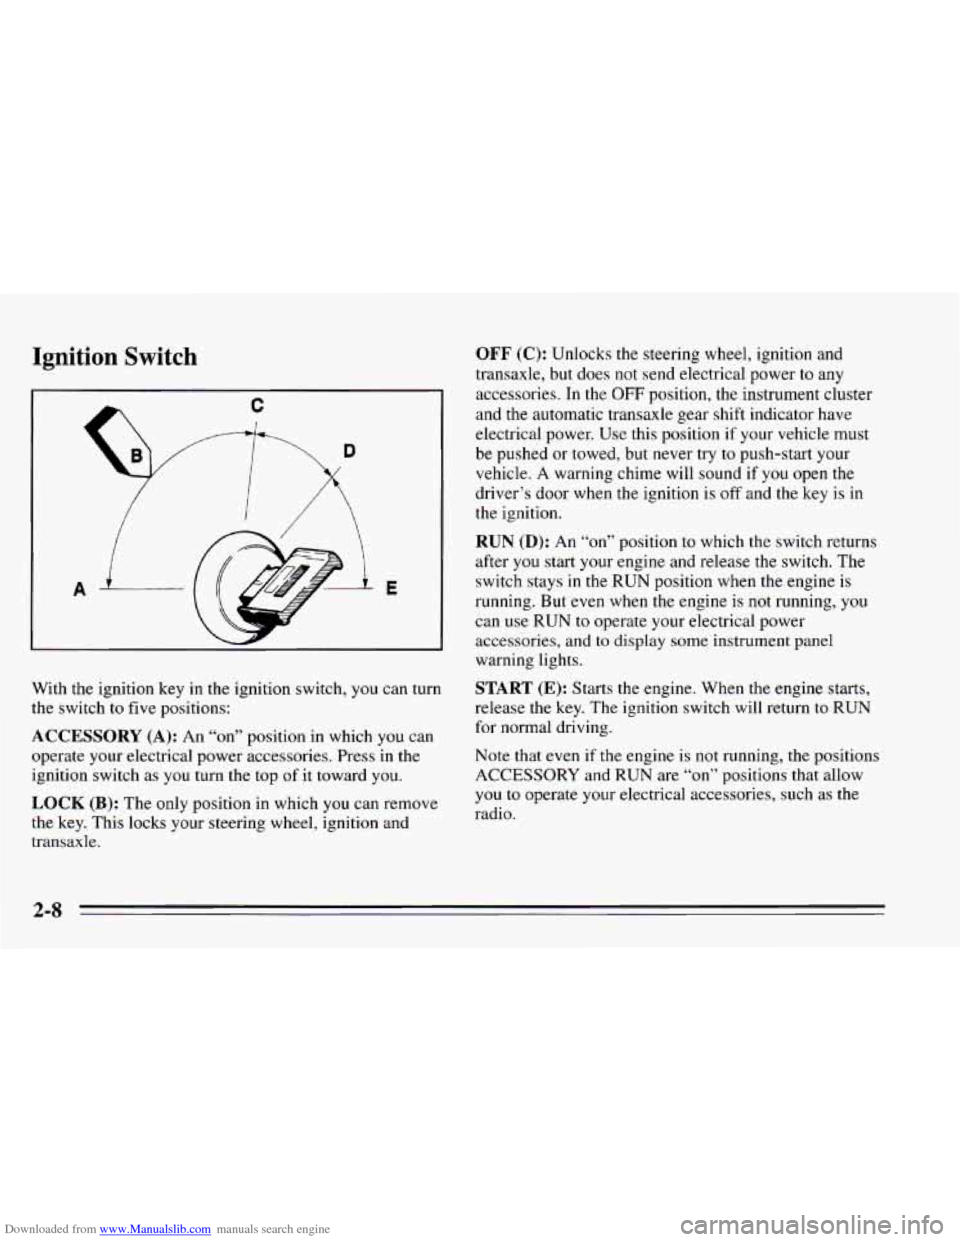
With the ignition key in the ignition switch, you can turn
the switch to five positions:
ACCESSORY (A): An “on” position in which you can
operate your electrical power accessories. Press in the
ignition switch as
you turn the top of it toward you.
LOCK (B): The only position in which you can remove
the key. This locks your steering wheel, ignition and
transaxle.
OFF (C): Unlocks the steering wheel, ignition and
transaxle, but does not send electrical power
to any
accessories. In the
OFF position, the instrument cluster
and the automatic transaxle gear shift indicator have
electrical power. Use this position if your vehicle must
be pushed or towed, but never try
to push-start your
vehicle. A warning chime will sound if
you open the
driver’s door when the ignition is
off and the key is in
the ignition.
RUN (D): An “on7’ position to which the switch returns
after
you start your engine and release the switch. The
switch stays
in the RUN position when the engine is
running. But
even when the engine is not running, you
can use
RUN to operate your electrical power
accessories,
and to display some instrument panel
warning lights.
START (E): Starts the engine. When the engine starts,
release the key. The ignition switch will return
to RUN
for normal driving.
Note that even if
the engine is not running, the positions
ACCESSORY and RUN are
“on” positions that allow
you
to operate your electrical accessories, such as the
radio.
Page 67 of 340
Downloaded from www.Manualslib.com manuals search engine NOTICE:
Your engine is designed to work with the
electronics in your vehicle.
If you add electrical
parts or accessories, you could change the way
the fuel injection system operates. Before adding
electrical equipment, check with your dealer.
If
you don’t, your engine might not perform
properly.
If you ever have to have your vehicle towed, see
the part
of this manual that tells how to do it
without damaging your vehicle. See “Towing
Your Vehicle” in the Index.
To start your
2.3 Liter engine:
1. Without pushing the accelerator pedal, turn your
ignition key to START. When the engine starts,
let
go of the key. The idle speed will go down as your
engine gets warm.
NOTICE:
Holding your key in START for longer than
15 seconds at a time will cause your battery to be
drained much sooner. And the excessive heat can
damage your starter motor.
2. If it doesn’t start right away, and if the weather is
very cold (below
-20” F, or -29” C), push the
accelerator pedal about one-quarter of the way down
while you turn the key
to START. Do this until the
engine starts. As soon as it does, let go
of the key.
stops), it could be flooded with too much gasoline.
Try pushing your accelerator pedal all the way to the
floor and holding it there as
you hold the key in
START for about three seconds. This clears the extra
gasoline from the engine. If the vehicle starts briefly
but then stops again, do the same thing, but this time
keep the pedal about one-quarter of the way down
for five
or six seconds.
3. If your engine still won’t start (or starts but then
2-11
Page 68 of 340
Downloaded from www.Manualslib.com manuals search engine NOTICE:
Your engine is designed to work with the
electronics in your vehicle.
If you add electrical
parts or accessories, you could change the
way
the fuel injection system operates. Before adding
electrical equipment, check with your dealer. If
you don’t, your engine might not perform
properly.
If you ever have to have your vehicle towed, see
the part of this manual that tells how to do
it
without damaging your vehicle. See “Towing
Your Vehicle” in the Index.
Driving Through Deep Standing
Water
I
I NOTICE:
If you drive too quickly through deep puddles or
standing water, water can come in through your engine’s air intake and badly damage your
engine. Never drive through water that is slightly
lower than the underbody
of your vehicle. If you
can’t avoid deep puddles or standing water, drive
through them very slowly.
Engine Coolant Heater (Option)
In very cold weather, 0°F (- 18°C) or colder, the engine
coolant heater can help. You’ll get easier starting and
better fuel economy during engine warm-up. Usually,
the coolant heater should be plugged in a minimum of
four hours prior to starting your vehicle.
To use the coolant heater:
I. Turn off the engine.
2. Open the hood and unwrap the electrical cord.
3. Plug it into a normal, grounded 110-volt outlet.
2-12