Page 149 of 340

Downloaded from www.Manualslib.com manuals search engine Speed limit signs near curves warn that you should
adjust
your speed. Of course, the posted speeds are
based on good weather and road conditions. Under less
favorable conditions you’ll want
to go slower.
If you need to reduce your speed as you approach a
curve, do
it before you enter the curve, while your front
wheels are straight ahead.
Try to adjust your speed
so you can “drive” through the
curve. Maintain a reasonable, steady speed. Wait to
accelerate until you are out of the curve, and then
accelerate gently
into the straightaway.
Steering in Emergencies
There are times when steering can be more effective than
braking. For example, you come over
a hill and find a
truck stopped
in your lane, or a car suddenly pulls out
from nowhere, or a child darts out from between parked
cars and stops right
in front of you. You can avoid these
problems by braking
-- if you can stop in time. But
sometimes
you can’t; there isn’t room. That’s the time for
evasive action
-- steering around the problem.
Your Chevrolet can perform very well
in emergencies
like these. First apply your brakes. (See “Braking
in
Emergencies” earlier in this section.) It is better to
remove
as much speed as you can from a possible collision. Then
steer around the problem,
to the left or
right depending on the space available.
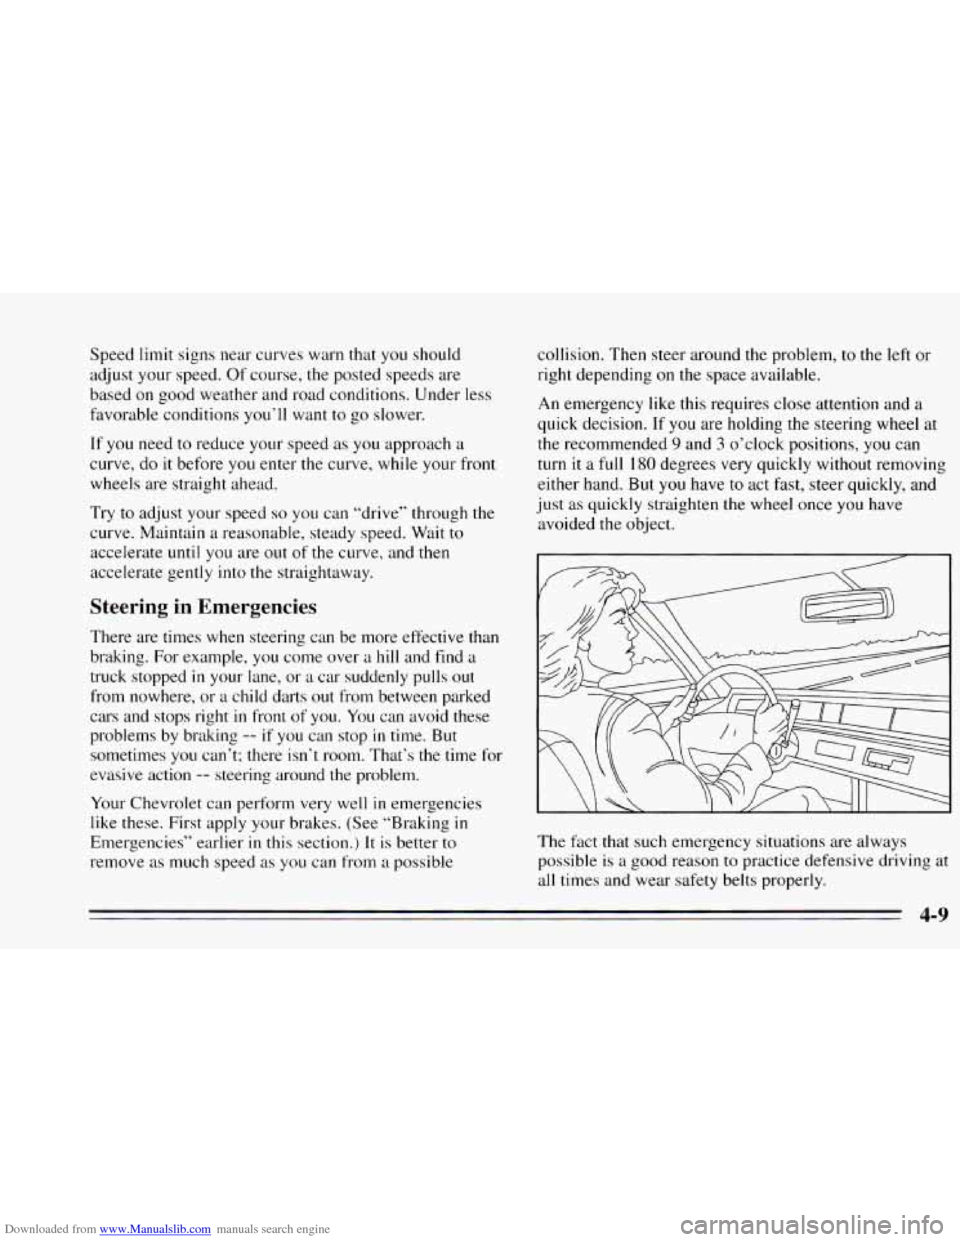
An emergency like this requires close attention and a
quick decision. If
you are holding the steering wheel at
the recommended
9 and 3 o’clock positions, you can
turn it
a full 180 degrees very quickly without removing
either hand. But
you have to act fast, steer quickly, and
just as quickly straighten the wheel once
you have
avoided the object.
The
fxt that such emergency situations are always
possible
is a good reason to practice defensive driving at
all times and wear safety belts properly.
4-9
Page 197 of 340
Downloaded from www.Manualslib.com manuals search engine The following steps will tell you how to use the jack and
change a tire.
The equipment you'll need is in the trunk.
1.
2.
3.
Turn the center retainer nut on the compact spare tire
housing counterclockwise to remove it, then lift the
tire cover. You will find the jacking instructions label
on the underside of the tire cover.
Remove the wing bolt securing the compact spare
tire, spacer and wheel wrench by turning it
counterclockwise. Then lift
off the spacer and
remove the spare tire.
Your vehicle has a foam tray for storing the jack and
the tools.
Remove the jack and the wheel wrench from the
foam tray.
5-21
Page 198 of 340
Downloaded from www.Manualslib.com manuals search engine 4. Remove the band around the jack. Turn the jack
handle clockwise
to raise the jack head a few inches.
5. Using the wheel wrench, remove the plastic cap nuts.
If your vehicle has aluminum wheels,
you may have
to remove a cover plate to access the wheel nuts. Use
the flat end
of the wheel wrench to remove the cover
plate.
Loosen all the wheel nuts. Don’t remove the
wheel nuts yet.
6. Near each wheel well is a notch in the frame which
the jack head fits in. The front notch
is 9 inches
(23 cm) back from the front wheel well. The rear
notch
is 8 inches (20 cm) forward from the rear
wheel well. If your vehicle has flared side moldings,
both front and rear notches are 18 inches
(46 cm)
from the wheel wells.
Position the jack under the vehicle. Raise the jack
head
until it fits firmly into the notch in the vehicle’s
frame nearest the flat tire. Put the compact spare tire
near
you.
5-22
Page 199 of 340
Downloaded from www.Manualslib.com manuals search engine NOTICE:
Raising your vehicle with the jack improperly
positioned will damage the vehicle or may allow
the vehicle
to fall off the jack. Be sure to fit the
jack lift head into the proper location before
raising your vehicle.
I
NOTICE:
Do not jack or lift the vehicle using the oil pan.
Pans could crack and begin to leak fluid.
7. Raise the vehicle by rotating the jack handle
clockwise. Raise the vehicle
far enough off the
ground
so there is enough room for the spare tire
to fit.
5-23
Page 201 of 340
Downloaded from www.Manualslib.com manuals search engine c
11. Lower the vehicle by rotating the jack handle
counterclockwise. Lower the jack completely.
12. Tighten the wheel nuts
firmly in
a criss-cross
sequence, as shown.
5-25
Page 209 of 340
Downloaded from www.Manualslib.com manuals search engine P
The cap is behind a hinged door on the right side of your
vehicle.
While refueling, hang the cap inside the
fuel door.
To take off the cap, turn it slowly to the left
(counterclockwise).
Be careful not to spill gasoline. Clean gasoline from
painted surfaces as soon
as possible. See “Cleaning the
Outside of
Your Chevrolet” in the Index.
When
you put the cap back on, turn it to the right until
you hear at least three clicks.
6-5
Page 235 of 340
Downloaded from www.Manualslib.com manuals search engine 4. Disconnect the bulb base from the socket by lifting
the plastic locking tab.
5. Snap a new bulb into the socket.
6. Replace the bulb assembly by reversing steps 1-3.
For the type of bulb, see “Replacement Bulbs” in the
Index..
1. Pull the carpet away from the rear of the trunk.
2. Remove the taillamp bulb assembly by turning it 1/4
turn counterclockwise.
6-31
Page 329 of 340

Downloaded from www.Manualslib.com manuals search engine TopStrap ................................... 1-35
Wheretoput
................................ 1-34
Circuit Breaker. Power Windows and Other
Power Options
................................ 6-54
Cleaner. Air
................................... 6-15
Cleaning Aluminum Wheels
; .......................... 6-48
Fabric
..................................... 6-43
Glass
...................................... 6-45
Outside of the Windshield and Wiper Blades
....... 6-45
Special Problems
............................ 6-44
Stains
...................................... 6-44
The Inside of Your Chevrolet
................... 6-42
The Outside
of Your Chevrolet .................. 6-46
Tires
...................................... 6-48
Top of the Instrument Panel .................... 6-45
Vinyl
...................................... 6-44
YourConvertibleTop
......................... 6-47
Climate Control System
........................... 3-1
Clock, Setting
the ................................ 3-5
Clutch Adjustment
.............................. 6-20
Comfort Controls
................................ 3-1
Compact Disc Care
............................. 3-14
Compact Spare Tire
............................. 5-27
Console, Center Compartment
..................... 2-46
Control of a Vehicle
.............................. 4-5
Control,
Lossof ................................ 4-12
Convenience Net
................................ 2-44
Convertible Top
................................ 2-47
Cleaning
................................... 6-47
LoweringtheTop
............................ 2-47
Lowering the Top Manually
.................... 2-54
Raising
the Top .............................. 2-51
Raising the Top Manually
...................... 2-54 Convex Outside Mirror
.......................... 2-43
Coolant .................................. 5- 14.
6.21
Coolant Heater. Engine
..................... 2- 12. 6. 14
Coolant Surge Tank
............................. 5-16
Coolant.
How to Add to the Coolant Surge Tank ...... 5-16
Cooling System
................................ 5-14
Courtesy Transportation ........................... 8-7
Cruise Control
................................. 2-33
Erasing Speed Memory
........................ 2-36
Getting Out of
............................... 2-36
Increasing Speed
............................. 2-35
Passing Another Vehicle While Using
............ 2-36
ReducingSpeed
............................. 2-36
Resuming a Set Speed
........................ 2-35
Setting
..................................... 2-34
UseonHills
................................ 2-36
Customer Assistance for the Hearing or Speech Impaired
. . 8-2
Customer Assistance Information
................... 8-1
Customer Satisfaction Procedure
.................... 8-1
Damage. Finish
............................... 6-48
Damage. Sheet Metal
............................ 6-48
Daytime Running Lamps
......................... 2-38
Dead Battery
................................... 5-2
Defects. Reporting
............................... 8-4
Defensive Driving
............................... 4-1
Defogger. Rear Window
.......................... 3-4
Defogging
..................................... 3-3
Defrosting
. 's' .................................. 3-3
Delco LOC I1 Feature
.......................... 3-10
DoorLocks
..................................... 2-3
Drive (D). 3 Speed Automatic Transaxle
............. 2-16
CupHolders
................................... 2-46
9-3