1994 PONTIAC BONNEVILLE turn signal
[x] Cancel search: turn signalPage 6 of 290
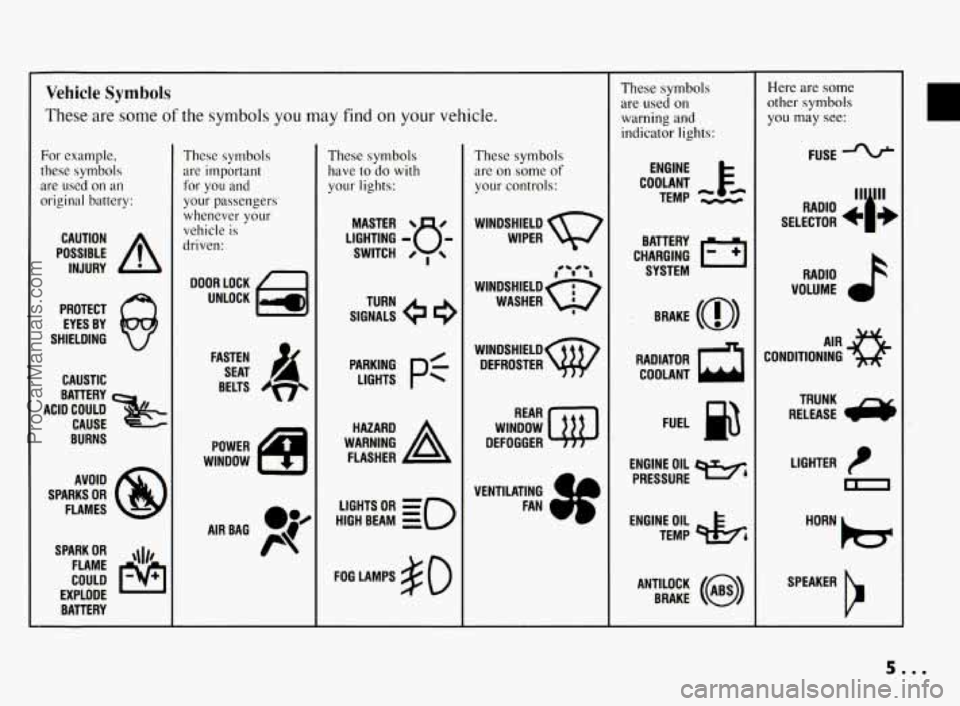
Vehicle Symbols
These are some of the symbols you may find on your vehicle.
For example,
these symbols
are used on an
original battery:
POSSIBLE A
CAUTION
INJURY
PROTECT EYES BY
SHIELDING
CAUSTIC
ACID COULD BATTERY
CAUSE
BURNS
AVOID
SPARKS
OR
FLAMES
SPARK
OR ,111,
COULD FLAME
EXPLODE BATTERY
These symbols
are important
for you and
your passengers
whenever your
vehicle
is
driven:
DOOR LOCK
UNLOCK
FASTEN SEAT
4
BELTS
POWER
WINDOW
'* -- I
These symbols
have to do with
your lights:
SIGNALS e
TURN
HIGH BEAM
OR = =o
FOG LAMPS $0
These symbols
are
on some of
your controls:
WIPER Q7
WINDSHIELD
DEFROSTER
WINDOW
DEFOGGER
VENTILATING
4
FAN (I
These symbols
are used
on
warning and
indicator lights:
COOLANT Fa
TEMP --
ENGINE
CHARGING
I-1
BATTERY SYSTEM
BRAKE
(0)
RADIATOR COOLANT
FUEL
ENGINE OIL
PRESSURE
Wb
TEMP OIL ?b
ANTILOCK (@)
BRAKE
Here are some
other symbols
you may see:
FUSE
11lp RADIO , - -
SELECTOR b I JE
RADIO
VOLUME
CONDITIONING
AIR 43
LIGHTER
m
SPEAKER
b
5.00
ProCarManuals.com
Page 69 of 290
Features & Controls
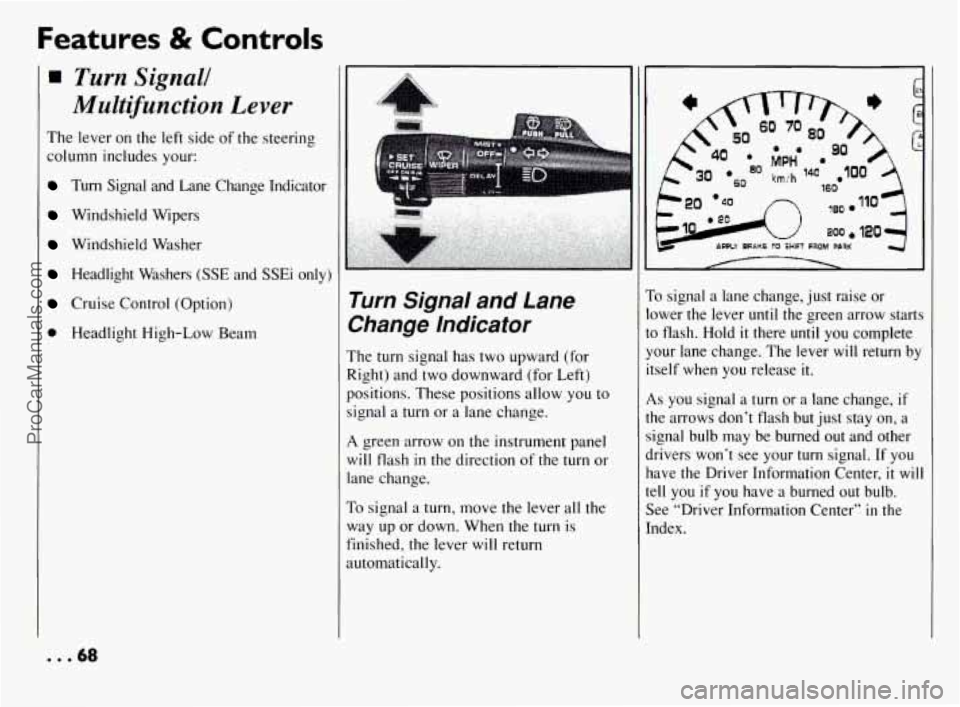
Turn Signall
Multifunction Lever
The lever on the left side of the steering
column includes your:
Turn Signal and Lane Change Indicator
Windshield Wipers
Windshield Washer
Headlight Washers (SSE and SSEi only)
Cruise Control (Option)
0 Headlight High-Low Beam
Turn Signal and Lane
Change Indicator
The turn signal has two upward (for
Right) and two downward (for Left)
positions. These positions allow
you to
signal a turn or a lane change.
A green arrow on the instrument panel
will flash
in the direction of the turn or
lane change.
To signal a turn, move the lever all the
way up or down. When the turn is
finished, the lever will return
automatically.
so MPH
30 km/h
/ 1 I
To signal a lane change, just raise or ,
lower the lever until the green arrow starts
to flash. Hold it there until you complete
your lane change. The lever will return by
itself when you release
it.
As you signal a turn or a lane change, if
the arrows don’t flash but just stay on, a
signal bulb may be burned
out and other
drivers won’t see your
turn signal. If you
have the Driver Information Center, it will
tell you if you have a burned out bulb.
See “Driver Information Center”
in the
Index.
... 68
ProCarManuals.com
Page 70 of 290
If a, bulb is burned out, replace it to help
avoid an accident. If the green arrows
don’t go on at all when
you signal a turn,
check the fuse (see “Fuses
& Circuit
Breakers”
in the Index) and for
burned-out bulbs.
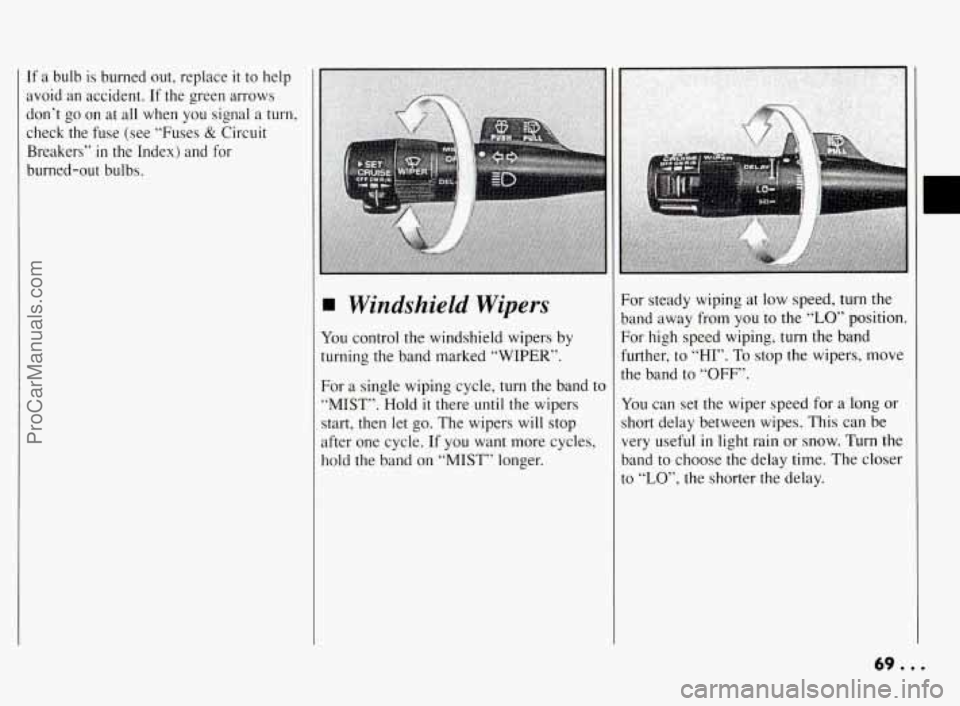
Windshield Wipers
You control the windshield wipers by
turning the band marked “WIPER’.
For a single wiping cycle, turn the band to
“MIST”. Hold it there until the wipers
start, then let
go. The wipers will stop
after one cycle.
If you want more cycles,
hold the band on “MIST” longer. For
steady wiping at low speed, twxn the
band away from you
to the “LO” position.
For high speed wiping, turn the ba*d
further, to “HI”. To stop the wipers, move
the band to
“OFF”.
You can set the wiper speed for a,bng or
short delay between wipes. This can be
very useful
in light rain or snow. Turn the
band to choose the delay time.
The closer
to
“LO”, the s’horter the delay.
69 ...
ProCarManuals.com
Page 71 of 290
Features & Controls
Windshield Wipers
(CONT)
Heavy snow or ice can overload your
wiper motor.
A circuit breaker will stop
the motor until it cools. Clear away snow
or ice to prevent an overload.
Keep in mind that damaged wiper blades
may prevent you from seeing well enough
to drive safely. To avoid damage, be sure
to clear ice and snow from the wiper
blades before using them.
If your blades
do become damaged, get new blades or
blade inserts. Some models have
a “WASHER FLUID’
warning, that indicates
if the fluid level in
the windshield washer is low. See “Low
Washer Fluid Warning Light” in the
II
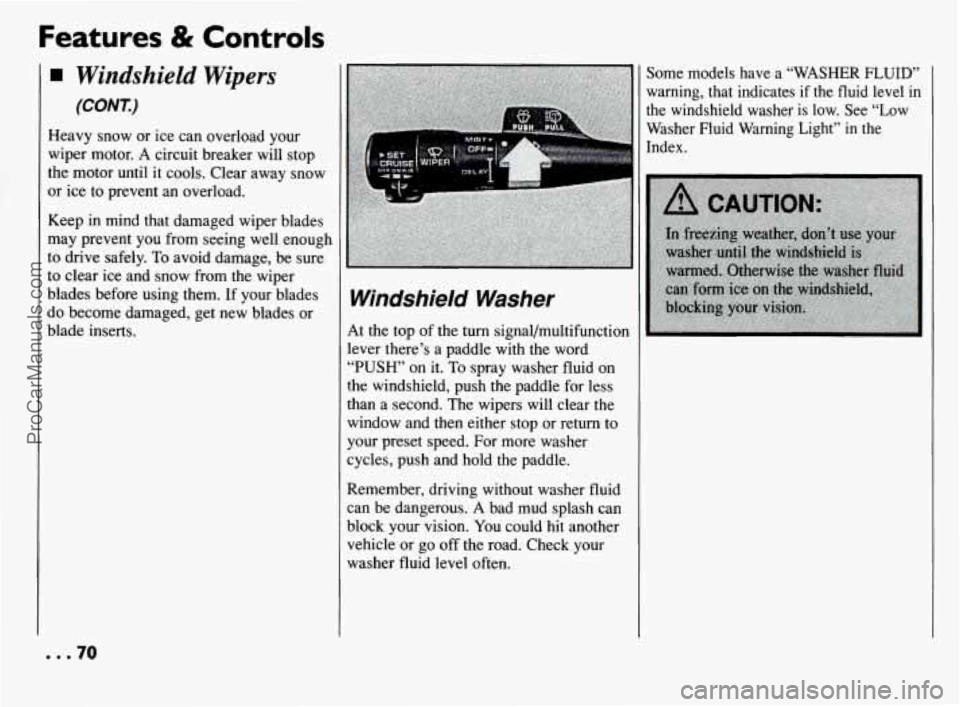
Windshield Washer
At the top of the turn signal/multifunction
lever there’s a paddle with the word
“PUSH’ on it. To spray washer fluid on
the windshield, push the paddle for less
:han a second. The wipers will clear the
window and then either stop or return to
your preset speed. For more washer
cycles, push and hold the paddle.
Remember, driving without washer fluid
can be dangerous.
A bad mud splash can
block your vision.
You could hit another
vehicle or go off the road. Check your
washer fluid level often.
... 70
ProCarManuals.com
Page 72 of 290
NOTICE:
0
a
When using concentrated
washer fluid, follow the
manufacturer’s instructions
for adding water.
Don’t mix water with
ready-to-use washer fluid.
Water can cause the solution
to freeze and damage your
washer fluid tank and other
parts
of the washer system.
Also, water doesn’t clean as
well as washer fluid.
Fill your washer fluid tank
only
314 full when it’s very
cold. This allows for
expansion, which could
damage the tank
if it is
completely
full.
Don’t use radiator antifreeze
in your windshield washer. It
can damage your washer
system and paint.
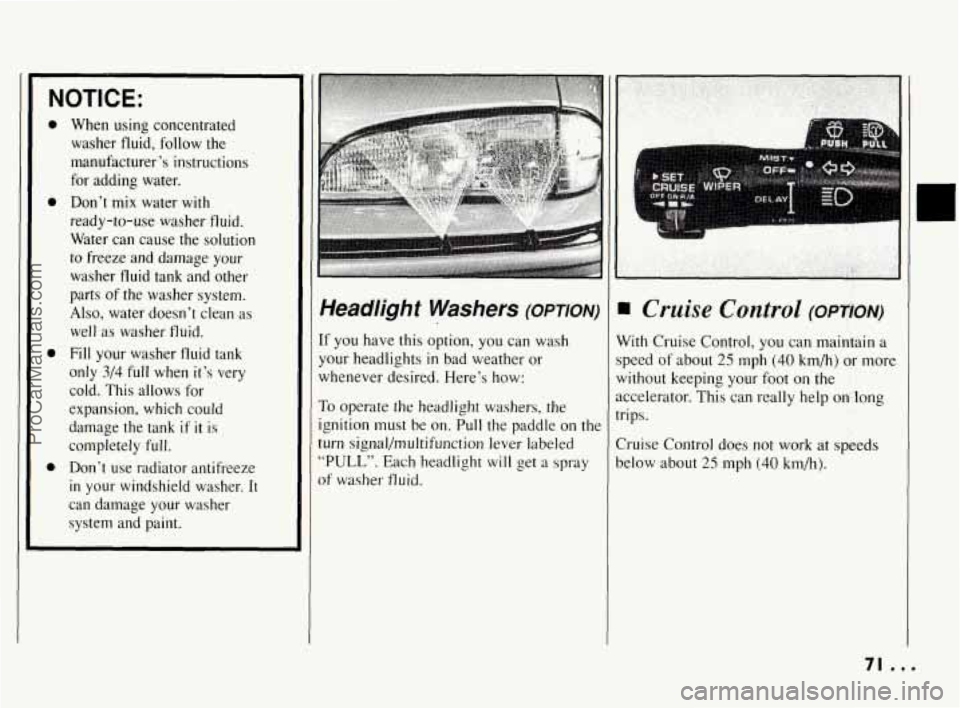
Headlight Washers (OPTION)
If you have this option, you can wash
your headlights
in bad weather or
whenever desired. Here’s how:
To operate the headlight washers, the
ignition must be
on. Pull the paddle on the
turn signal/multifunction lever labeled
“PULL”. Each headlight will get a spray
of washer fluid.
I
Cruise Control (opnoN)
With Cruise Control, you can maintain a
speed of about
25 mph (40 km/h) or more
without keeping
your foot on the
accelerator. This can really help
on long
trips.
Cruise Control does
not work at speeds
below about
25 mph (40 km/h).
71 ...
ProCarManuals.com
Page 77 of 290
Features & Controls
Headlight High-Low Beam Changer
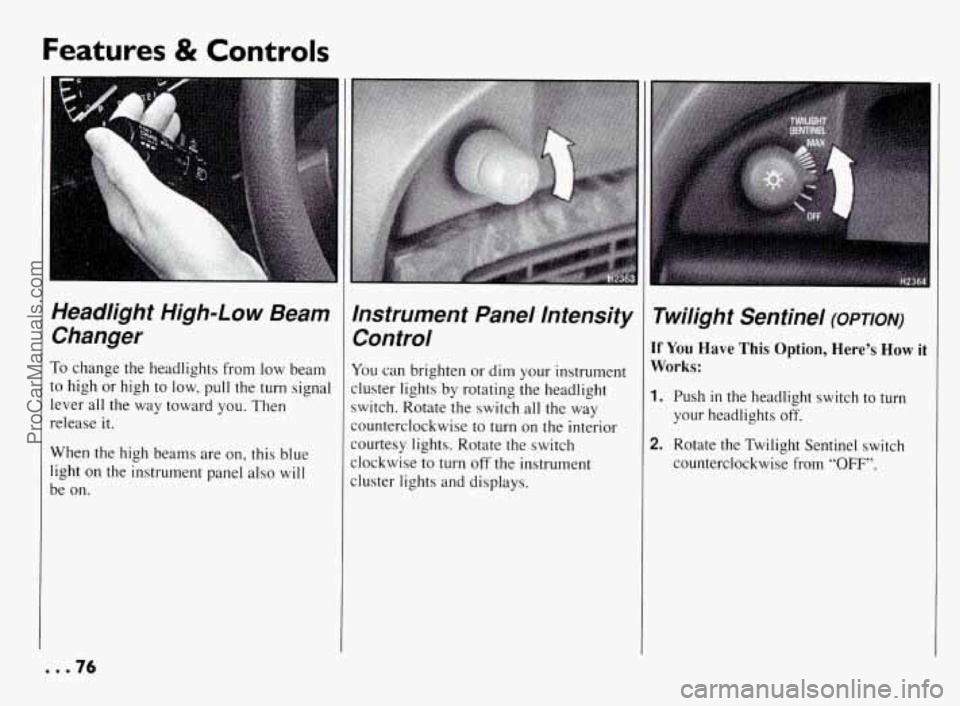
To change the headlights from low beam
to high or high
to low, pull the turn signal
lever all the way toward you. Then
release it.
When the high beams are on, this blue
light on the instrument panel
also will
be on.
Instrument Panel Intensity Control
You can brighten or dim your instrument
cluster lights by rotating the headlight
switch. Rotate the switch all the way
counterclockwise
to turn on the interior
courtesy lights. Rotate the switch
clockwise
to turn off the instrument
cluster lights and displays.
Twilight Sentinel (OPTION)
If You Have This Option, Here’s How it
Works:
1. Push in the headlight switch to turn
your headlights off.
2. Rotate the Twilight Sentinel switch
counterclockwise from
“OFF”.
... 76
ProCarManuals.com
Page 88 of 290
The Instrument
Panel-Your
Information System
Your instrument panel is designed to let
you
know at a glance how your vehicle is
running.
You’ll know how fast you’re
going, how much fuel you’re using, and
many other things you’ll need to drive
safely and economically;
.. .L .
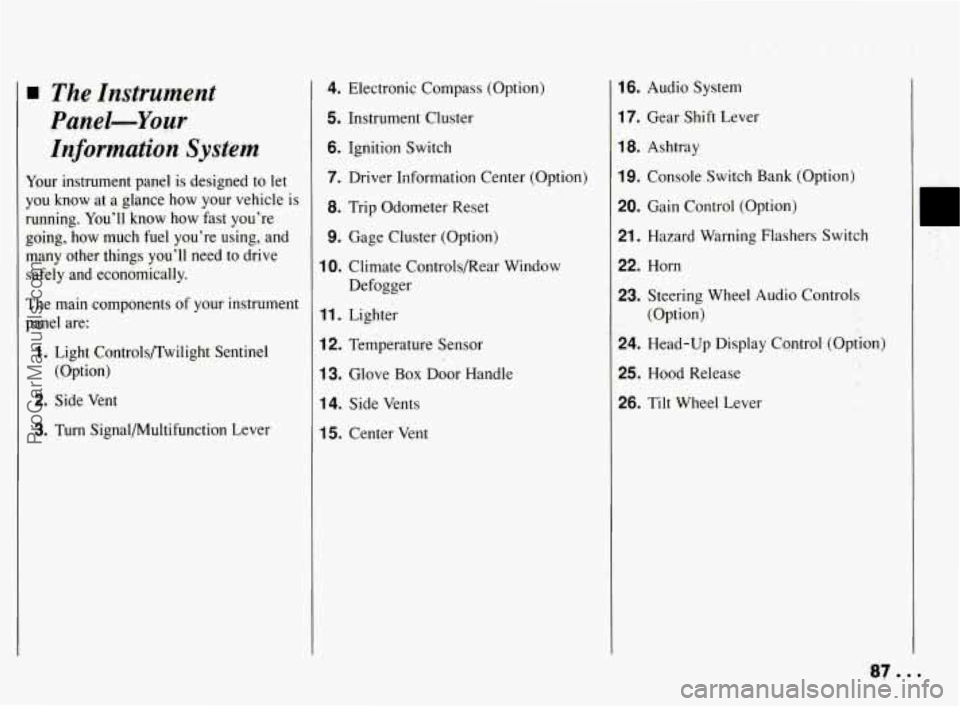
The main components of your instrument
panel are:
1. Light Controls/Twilight Sentinel
(Option)
2. Side Vent
3. Turn Signal/Multifunction Lever
4. Electronic Compass (Option)
5. Instrument Cluster
6. Ignition Switch
7. Driver Information Center (Option)
8. Trip Odometer Reset
9. Gage Cluster (Option)
10. Climate Controls/Rear Window
Defogger
11. Lighter
12. Temperature Sensor
13. Glove Box Door Handle
14. Side Vents
15. Center Vent
16. Audio System
17. Gear Shift Lever
18. Ashtray
19. Console Switch Bank (Option)
20. Gain Control (Option)
21. Hazard Warning Flashers Switch
22. Horn
23. Steering Wheel Audio Controls
(Option)
24. Head-Up Display Cqntrol. (Option)
25. Hood Release
26. Tilt Wheel Lever
I
ProCarManuals.com
Page 92 of 290
Warning Lights, Gages
and Indicators
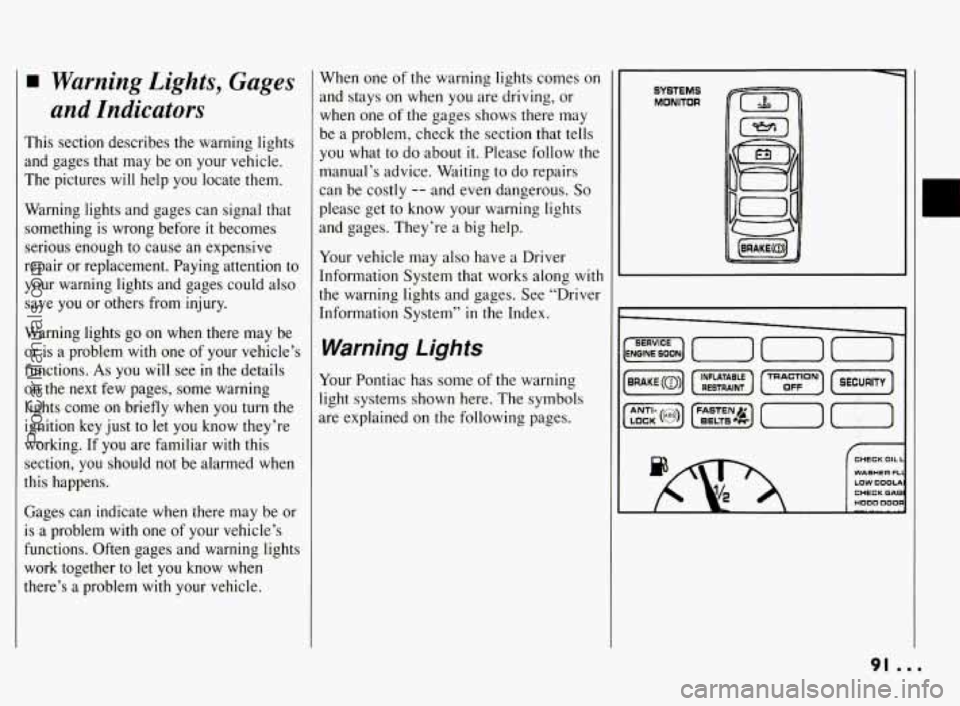
This section describes the warning lights
and gages that may be on your vehicle.
The pictures will help you locate them.
Warning lights and gages can signal that
something is wrong before it becomes
serious enough to cause an expensive
repair or replacement. Paying attention to
your warning lights and gages could also
save you or others from injury.
Warning lights go on when there may be
or is a problem with one of your vehicle’s
functions.
As you will see in the details
on the next few pages, some warning
lights come on briefly when you turn the
ignition key just to let you know they’re
working. If you are familiar with this
section, you should not be alarmed when
this happens.
Gages can indicate when there may be or
is a problem with one of your vehicle’s
functions. Often gages and warning lights work together to let you know when
there’s a problem with your vehicle. When one of the warning lights
comes on
and stays on when
you are driving, or
when one of the gages shows there may
be a problem, check the section that tells
you what to do about it. Please follow the
manual’s advice. Waiting to do repairs
can be costly
-- and even dangerous. So
please get to know your warning lights
and gages. They’re a big help.
Your vehicle may also have a Driver
Information System that works along with
the warning lights and gages. See “Driver
Information System”
in the Index.
Warning Lights
Your Pontiac has some of the warning
light systems shown here. The symbols
are explained on the following pages.
SYSTEMS MONITOR
[-I [T) (-1
-g r-1 [-I I-]
7 CHECK OIL
WASHER FL
CHECKOAC LOW coau
91 ...
ProCarManuals.com