1994 PONTIAC BONNEVILLE high beam
[x] Cancel search: high beamPage 6 of 290
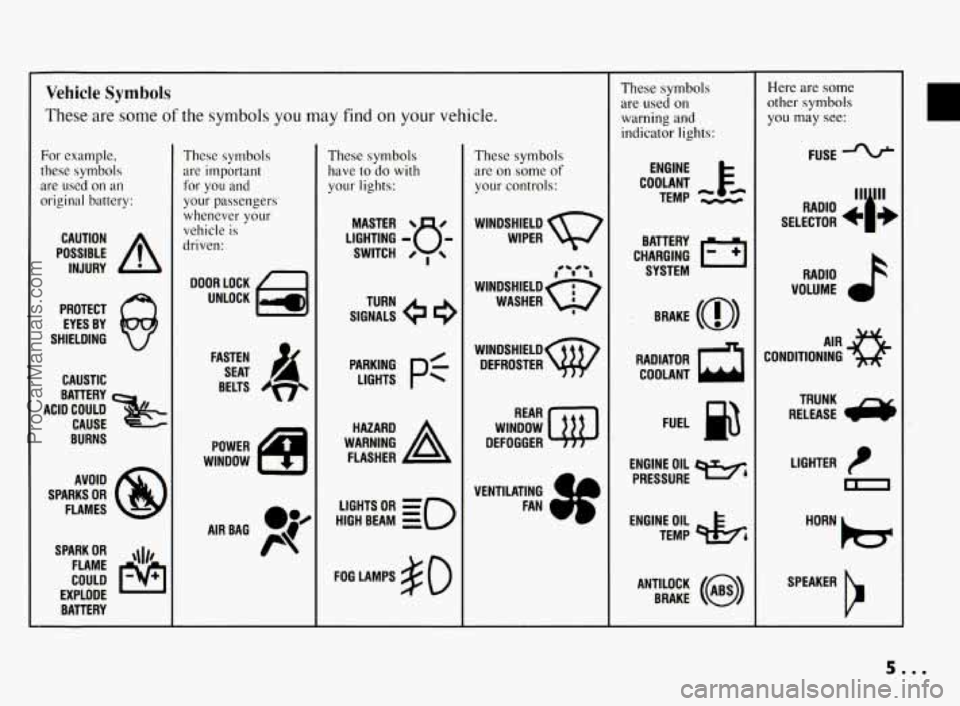
Vehicle Symbols
These are some of the symbols you may find on your vehicle.
For example,
these symbols
are used on an
original battery:
POSSIBLE A
CAUTION
INJURY
PROTECT EYES BY
SHIELDING
CAUSTIC
ACID COULD BATTERY
CAUSE
BURNS
AVOID
SPARKS
OR
FLAMES
SPARK
OR ,111,
COULD FLAME
EXPLODE BATTERY
These symbols
are important
for you and
your passengers
whenever your
vehicle
is
driven:
DOOR LOCK
UNLOCK
FASTEN SEAT
4
BELTS
POWER
WINDOW
'* -- I
These symbols
have to do with
your lights:
SIGNALS e
TURN
HIGH BEAM
OR = =o
FOG LAMPS $0
These symbols
are
on some of
your controls:
WIPER Q7
WINDSHIELD
DEFROSTER
WINDOW
DEFOGGER
VENTILATING
4
FAN (I
These symbols
are used
on
warning and
indicator lights:
COOLANT Fa
TEMP --
ENGINE
CHARGING
I-1
BATTERY SYSTEM
BRAKE
(0)
RADIATOR COOLANT
FUEL
ENGINE OIL
PRESSURE
Wb
TEMP OIL ?b
ANTILOCK (@)
BRAKE
Here are some
other symbols
you may see:
FUSE
11lp RADIO , - -
SELECTOR b I JE
RADIO
VOLUME
CONDITIONING
AIR 43
LIGHTER
m
SPEAKER
b
5.00
ProCarManuals.com
Page 69 of 290
Features & Controls
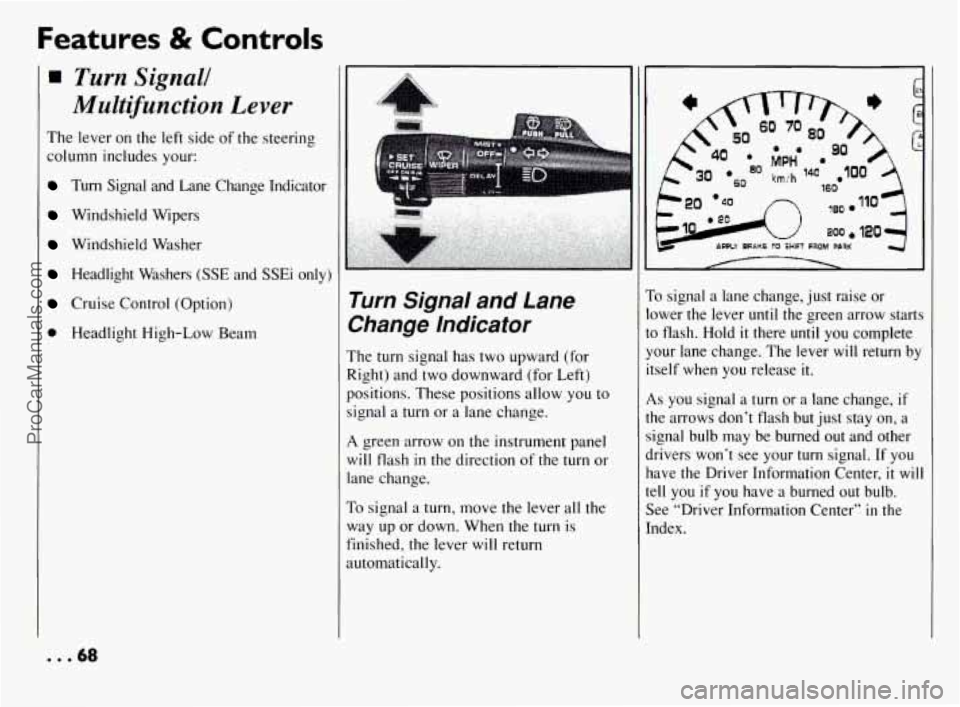
Turn Signall
Multifunction Lever
The lever on the left side of the steering
column includes your:
Turn Signal and Lane Change Indicator
Windshield Wipers
Windshield Washer
Headlight Washers (SSE and SSEi only)
Cruise Control (Option)
0 Headlight High-Low Beam
Turn Signal and Lane
Change Indicator
The turn signal has two upward (for
Right) and two downward (for Left)
positions. These positions allow
you to
signal a turn or a lane change.
A green arrow on the instrument panel
will flash
in the direction of the turn or
lane change.
To signal a turn, move the lever all the
way up or down. When the turn is
finished, the lever will return
automatically.
so MPH
30 km/h
/ 1 I
To signal a lane change, just raise or ,
lower the lever until the green arrow starts
to flash. Hold it there until you complete
your lane change. The lever will return by
itself when you release
it.
As you signal a turn or a lane change, if
the arrows don’t flash but just stay on, a
signal bulb may be burned
out and other
drivers won’t see your
turn signal. If you
have the Driver Information Center, it will
tell you if you have a burned out bulb.
See “Driver Information Center”
in the
Index.
... 68
ProCarManuals.com
Page 76 of 290
0 Taillights
0 Instrument Panel Lights
Push the switch
in all the way to turn all
the lights off.
Operation of Lights
Although your vehicle’s lighting system
(headlights, parking lights, fog lamps,
side marker lights and taillights) meets all
applicable federal lighting requirements,
certain states and provinces may apply
their own lighting regulations that may
require special attention before you
operate these lights.
For example, some jurisdictions may
require that you operate your fog lamps
only when your lower beam headlights
are also on, or that headlights be turned
on whenever you must use your
windshield wipers. In addition, most
jurisdictions prohibit driving solely
with
parking lights, especially at dawn or dusk.
It is recommended that you check with
your own state or provincial highway
authority for applicable lighting
regulations.
Lights On Reminder
[f you open the driver’s door while
leaving the lights on, you will hear a
warning tone.
Daytime Running Lights
(Canada Only)
The Canadian Federal Government has
decided that Daytime Running Lights
(DRL) are a useful feature,
in that DRL
can make your vehicle more visible to
pedestrians and other drivers during
daylight hours. DRL are required on new
vehicles sold
in Canada.
Your DRL work with a light sensor on top
of the instrument panel. Don’t cover it up.
The low beam headlights will come on at
reduced brightness
in daylight when:
0 The igdition is on
The headlight switch is off, and
The transaxle is not in “P” (Park).
4t dusk, the exterior lights will come on
mtornatically and the low beams will
:hange to full brightness. At dawn, the
:xterior lights will go out and the low
beams will change to the reduced
brightness of DRL (if the headlight switch
is off).
Of course, you may still turn on the
headlights any time you need to.
To idle your vehicle with the DRL ,off,
shift the transaxle into “P’ (Park). The
DRL will stay off until you shift out of
“P” (Park).
At night, you can turn off all exterior
lights when you are
in “P” (Park) by
moving the Twilight Sentinel control all
[he way past
“MIN” to turn it off, if it was
m. If it was off, move the control to the
right to turn it on, then back off. The
lights will come back on when you put
the transaxle
in gear.
75.0.
ProCarManuals.com
Page 77 of 290
Features & Controls
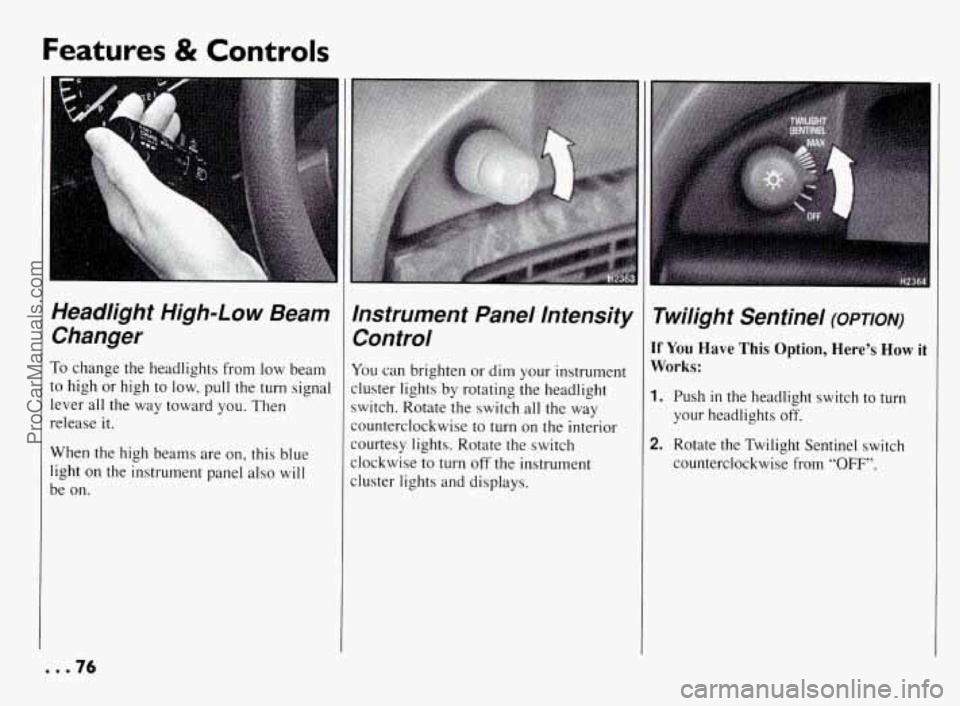
Headlight High-Low Beam Changer
To change the headlights from low beam
to high or high
to low, pull the turn signal
lever all the way toward you. Then
release it.
When the high beams are on, this blue
light on the instrument panel
also will
be on.
Instrument Panel Intensity Control
You can brighten or dim your instrument
cluster lights by rotating the headlight
switch. Rotate the switch all the way
counterclockwise
to turn on the interior
courtesy lights. Rotate the switch
clockwise
to turn off the instrument
cluster lights and displays.
Twilight Sentinel (OPTION)
If You Have This Option, Here’s How it
Works:
1. Push in the headlight switch to turn
your headlights off.
2. Rotate the Twilight Sentinel switch
counterclockwise from
“OFF”.
... 76
ProCarManuals.com
Page 105 of 290
Features & Controls
Driver Information Center
(CONI)
0 Brake Lamp and Center High
Mounted
0 Back-up Lamp
0 Tail Lamp/Turn/Side
MarkerLicense
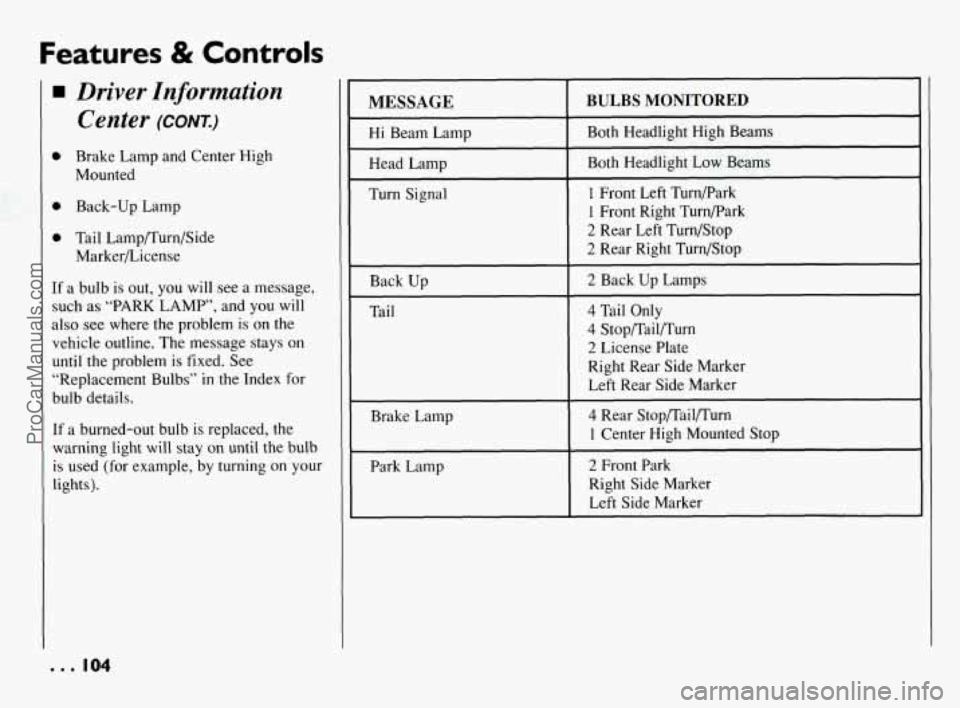
If a bulb is out, you will see a message,
such as “PARK LAMP’, and you will
also see where the problem
is on the
vehicle outline. The message stays on
until the problem is fixed. See
“Replacement Bulbs” in the Index
for
bulb details.
If a burned-out bulb is replaced, the
warning light will stay
on until the bulb
is used
(for example, by turning on your
lights).
Turn Signal
MESSAGE
Both Headlight Low Beams
Head Lamp Both Headlight
High Beams
Hi Beam Lamp
BULBS MONITORED
1 Front Left Turnpark
1 Front Right Turnpark
2 Rear Left Turn/Stop
2 Rear Right Turn/Stop
Back
Up
4 Tail Only
Tail
2 Back Up Lamps
4 Stop/Tail/Turn
2 License Plate
Right Rear Side Marker
Left Rear Side Marker
Brake Lamp
4 Rear Stop/Tail/Turn
1 Center High Mounted Stop
Park Lamp
2 Front Park
Right Side Marker
Left Side Marker
. . . 104
ProCarManuals.com
Page 108 of 290
[MODE)
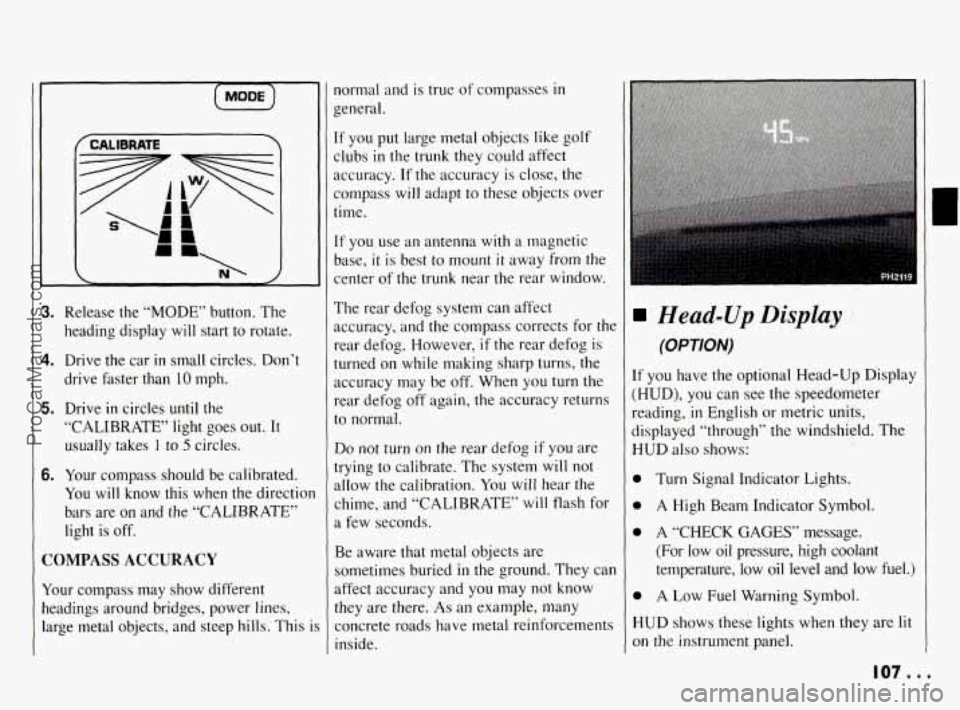
3. Release the “MODE” button. The
heading display
will start to rotate.
4. Drive the car in small circles. Don’t
drive faster than 10 mph.
5. Drive in circles until the
“CALIBRATE’ light goes out. It
usually takes
I to 5 circles.
6. Your compass should be calibrated.
You will know this when the directior
bars are on and the “CALIBRATE”
light is off.
COMPASS ACCURACY
Your compass may show different
headings around bridges, power lines,
large metal objects, and steep hills. This
i
normal and is true of compasses in
general.
If you put large metal objects like golf
clubs
in the trunk they could affect
accuracy.
If the accuracy is close, the
compass will adapt to these objects over
time.
If you use an antenna with a magnetic
base,
it is best to mount it away from the
center of the trunk near the rear window.
The rear defog system can affect
accuracy, and the compass corrects for the
rear defog. However,
if the rear defog is
turned on while making sharp turns, the
accuracy may be
off. When you turn the
rear defog
off again, the accuracy returns
to normal.
Do not turn on the rear defog if you are
trying
to calibrate. The system will not
allow the calibration.
You will hear the
chime, and “CALIBRATE’ will flash for
a few seconds.
Be aware that metal objects are
sometimes buried
in the ground. They can
affect accuracy and you may not know
they are there.
As an example, many
concrete roads have metal reinforcements
inside.
Head-Up Display
(OPTION)
If you have the optional Head-Up Display
(HUD),
you can see the speedometer
reading,
in English or metric units,
displayed “through” the windshield. The
HUD also shows:
0
0
0
0
H
01
Turn Signal Indicator Lights.
A High Beam Indicator Symbol.
A
“CHECK GAGES” message.
(For low oil pressure, high coolant
temperature, low
oil level and low fuel.)
A Low Fuel Warning Symbol.
UD shows these lights when they are lit
I the instrument panel.
107 ...
ProCarManuals.com
Page 150 of 290
You can be temporarily blinded by
approaching lights.
It can take a second or
two, or even several seconds, for your eyes to readjust to the dark. When you are
faced with severe glare (as
from a driver
who doesn’t lower the high beams, or a
vehicle with misaimed headlights), slow
down a little. Avoid staring directly into
the approaching lights.
Keep your windshield and all the glass
on
your vehicle clean -- inside and out.
Glare at night is made much worse by dirt
on the glass. Even the inside of the glass
can build up a film caused by dust. Dirty
glass makes lights dazzle and flash more
than clean glass would, making the pupils
of your eyes contract repeatedly.
Remember that your headlights light up
far less of a roadway when you are in a
turn or curve. Keep your eyes moving;
that way, it’s easier to pick
out dimly
lighted objects. Just as your headlights
should be checked regularly for proper
aim,
so should your eyes be examined
regularly. Some drivers suffer from night
blindness
-- the inability to see in dim
light
-- and aren’t even aware of it.
....
rn Driving in the Rain
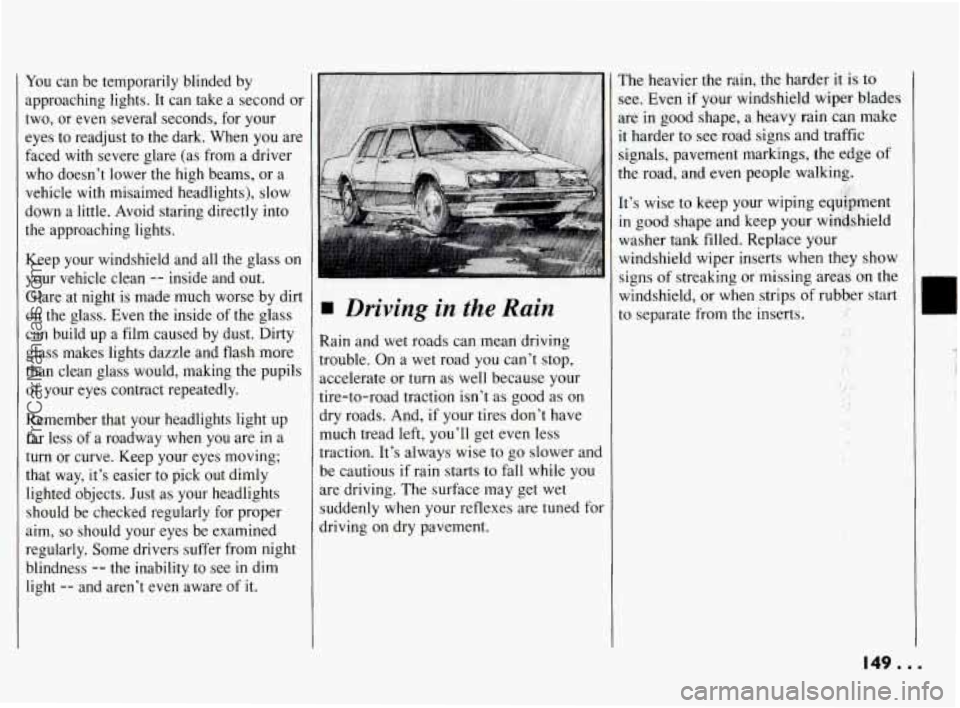
Rain and wet roads can mean driving
trouble. On a wet road you can’t stop,
accelerate or turn as well because your
tire-to-road traction isn’t as good as on
dry roads. And, if your tires don’t have
much tread left, you’ll get even less
traction. It’s always wise to
go slower and
be cautious if rain starts
to fall while you
are driving. The surface may get wet
suddenly when your reflexes are tuned for
driving on dry pavement.
The heavier the rain, the harder it is to
;ee. Even if your Windshield wiper blades
Lre in good shape, a heavy rain can make
t harder to see road signs and traffic
;ignals, pavement markings, the edge of
:he road, and even people walking.
[t’s wise
to keep your wiping equi*rnent
:n good shape and keep your wihhield
washer tank filled. Replace your
windshield wiper inserts when they show
;ips of streaking or missing are& on the
windshield, or when strips
of rubher start
to separate from the inserts.
;,‘+,’>
.. I
..
:, . ..
‘.I * ’
.ll
‘4 .t
6.. ’ E .. ..
149...
ProCarManuals.com
Page 151 of 290
Your Driving and the Road
I
Driving in the Rain
(CONX)
Driving too fast through large water
puddles or even going through some car
washes can cause problems, too. The
water may affect your brakes.
Try to
avoid puddles. But
if you can’t, try to
slow down before you hit them.
Hydroplaning
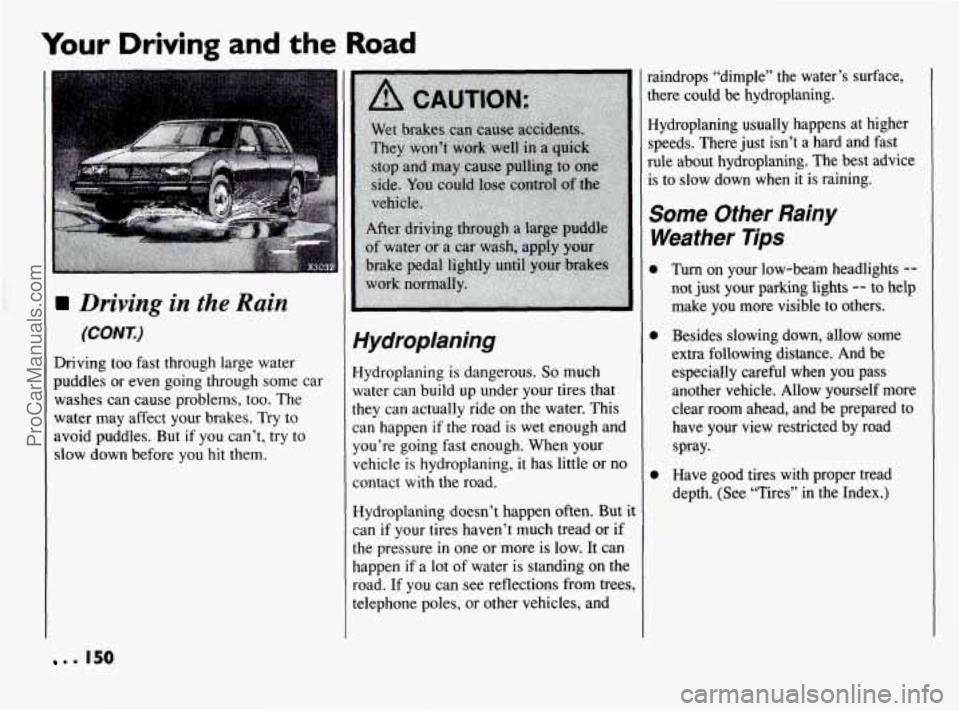
Hydroplaning is dangerous. So much
water can build up under your tires that
they can actually ride on the water. This
can happen
if the road is wet enough and
you’re going fast enough. When your
vehicle is hydroplaning, it has little or no
contact with the road.
Hydroplaning doesn’t happen often.
But it
can if your tires haven’t much tread or if
the pressure in one or more is low.
It can
happen if a lot of water is standing on the
road. If you can see reflections from trees,
telephone poles, or other vehicles, and *aindrops “dimple” the water’s surface,
;here
could be hydroplaning.
Hydroplaning usually happens at higher
;peeds. There just isn’t a hard and fast
ule about hydroplaning. The best advice
is to slow down when it is raining.
Some Other Rainy
Weather Tips
Turn on your low-beam headlights --
not just your parking lights -- to help
make you more visible to others.
Besides slowing down, allow some
extra following distance. And be
especially careful
when you pass
another vehicle. Allow yourself more
clear room ahead, and be prepared to
have your view restricted by road
spray.
Have good tires with proper tread
depth. (See “Tires” in the Index.)
. . 150
ProCarManuals.com