1994 PONTIAC BONNEVILLE tire type
[x] Cancel search: tire typePage 148 of 290
0
0
0
cause you to cancel your pass, you
need only slow down and drop back
again’and wait for another
opportunity.
If other cars are lined up to pass a
slow vehicle, wait your turn. But take
care that someone isn’t trying to pass
you as you pull out to pass the slow
vehicle. Remember to glance over
your shoulder and check the blind
spot.
Check your mirrors, glance over your
shoulder, and start your left lane
change signal before moving out of
the right lane to pass. When you are
far enough ahead of the passed vehicle
to see its front
in your inside mirror,
activate your right lane change signal
and move back into the right lane.
(Remember that your right outside
mirror is convex. The vehicle you just
passed may seem to be farther away
from you than it really is.)
Try not to pass more than one vehicle
at a time on two-lane roads.
Reconsider before passing the next
vehicle.
0 Don’t overtake a slowly moving
vehicle too rapidly. Even though the
brake lights are not flashing, it may be
slowing down or starting to turn.
0 If you’re being passed, make it easy
for the following driver
to get ahead
of you. Perhaps you can ease a little to
the right.
Loss of Control
Let’s review what driving experts say
about what happens when the three
zontrol systems (brakes, steering and
acceleration) don’t have enough friction
where the tires meet the road to do what
the driver has asked.
In any emergency, don’t give up. Keep
trying to steer and constantly seek an
escape route or area of less danger.
Skidding
In a skid, a driver can lose control of the
vehicle. Defensive drivers avoid most
skids by taking reasonable care suited to
existing conditions, and by not
“overdriving” those conditions. But skids
are always possible. The
three types of skids correspond
to
your Pontiac’s three control systems. In
the braking skid your wheels aren’t
rolling. In the steering
or cornering skid,
too much speed or steering in a curve
causes tires to slip and lose cornering
force. And
in the acceleration skic€-.too
much throttle causes the driving wheels to
spin.
A cornering skid is best handled by
easing your foot off the accelerato? pedal.
If you have the traction control system,
remember: It helps avoid only the,
acceleration skid.
If you do not have traction control$ or if
the system is off, then an acceleration
skid is
also best handled by easing your
foot off the accelerator pedal.
If your vehicle starts to slide, ease your
foot off the accelerator pedal and quickly
steer the way you want the vehicle to
go.
If you start steering quickly enough, your
vehicle may straighten out. Always
be
ready for a second skid if it occurs.
147...
ProCarManuals.com
Page 162 of 290
The bumpers on yaur vehicfe are not
intended for hitches.
Do not attach
rental hitches or other bumper-type
hitches to them. Use
only a
frame-mounted hitch that does not
attach to the bumper.
Safety Chains
You should always attach chains- between
your vehicle and your trailer. Cross the
safety chains under the tongue of.the
trailer
so that the tongue will not drop to
the road
if it becomes separated from the
hitch. Instructions about safety chains
may be provided by the hitch
manufacturer or by the trailer
manufacturer. Follow the manufacturer’s
recommendation for attaching safety
chains. Always leave just enough slack
so
you can turn with your rig. And, never
allow safety chains to drag
on the ground.
Trailer Brakes
Does your trailer have its own brakes? Be
sure to read and follow the instructions
for the trailer brakes
so you’ll be able to
install, adjust and maintain them properly.
Because you have anti-lock brakes, do not
try to tap into your vehicle’s brake
system. If you do both brakes systems
won’t work well, or at all.
Driving with a Trailer
Towing a trailer requires a certain amount
of experience. Before setting out for the
open road, you’ll want to get to know
your rig. Acquaint yourself with the feel
of handling and braking with the added
weight of the trailer. And always keep in
mind that the vehicle
you are driving is
now a good deal longer and not nearly
so
responsive as your vehicle is by itself. Before you
start, check the trailer hitch
and platform, safety chains, electrical
Eonnector, lights, tires and mirror
adjustment.
If the trailer has electric
brakes, start your vehicle and trailer
moving and then apply ‘the trailer brake
controller by hand to be sure the brakes
are working. This lets you check your
electrical connection at the same time.
During your trip, check occasionakky to be
sure that the load is secure, and that the
lights and any trailer brakes are still
working.
i.
,.
ProCarManuals.com
Page 171 of 290
Problems on the Road
To Jump Start Your
Pontiac: (CONT.)
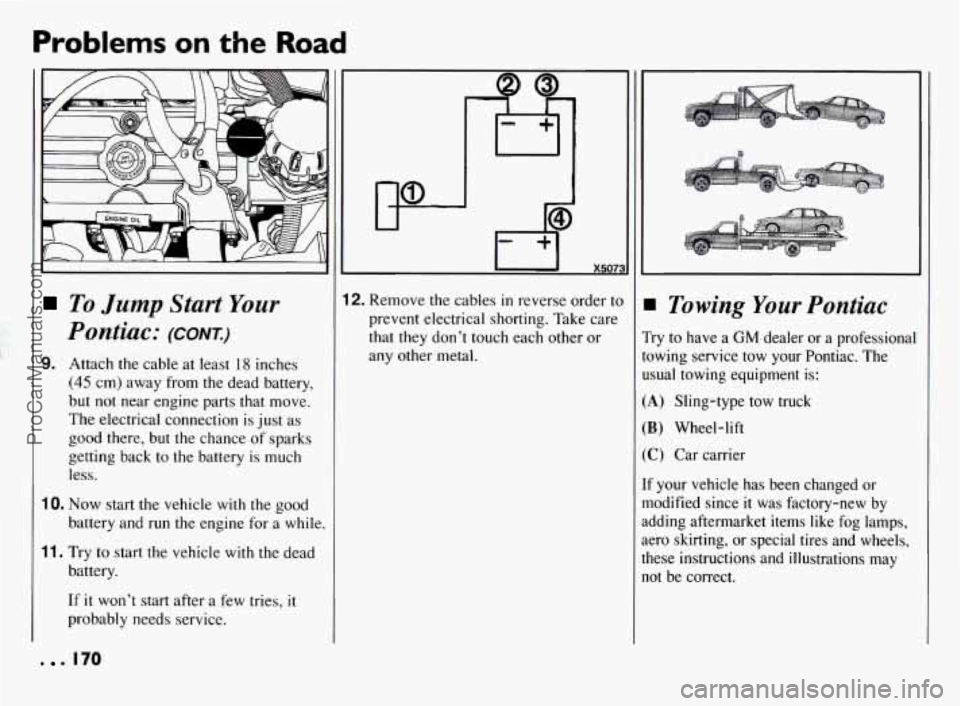
9. Attach the cable at least 18 inches
(45 cm) away from the dead battery,
but not near engine parts that move.
The electrical connection is just as
good there, but the chance of sparks
getting back to the battery is much
less.
16. Now start the vehicle with the good
battery and
run the engine for a while.
11. Try to start the vehicle with the dead
battery.
If it won't start after a few tries, it
probably needs service.
I 0 170
12. Re'move the cables in reverse order to
prevent electrical shorting. Take care
that they don't touch each other or
any other metal. Towing Your Pontiac
Try to have a GM dealer or a professional
towing service tow your Pontiac. The
usual towing equipment is:
(A) Sling-type tow truck
(B) Wheel-lift
(C) Car carrier
If your vehicle has been changed or
modified since it was factory-new by
adding aftermarket items like fog lamps,
aero skirting, or special tires and wheels,
these instructions and illustrations may
not be correct.
ProCarManuals.com
Page 221 of 290
Service & Appearance Care
Battery
Every new Pontiac has a Delco Freedom@
battery. You never have to add water to
one of these. When it’s time for a new
battery, we recommend a Delco
Freedom@ battery. Get one that has the
catalog number shown on the original
battery’s label.
Vehicle Storage
If you’re not going to drive your vehicle
for
25 days or more, take off the black,
negative
(-) cable from the battery. This
will help keep your battery from running
down. Contact your dealer to learn
how to
prepare your vehicle for longer storage
periods.
Jump Starting
For jump starting instructions, see “Jump
Starting” in the Index
.
Halogen Bulbs
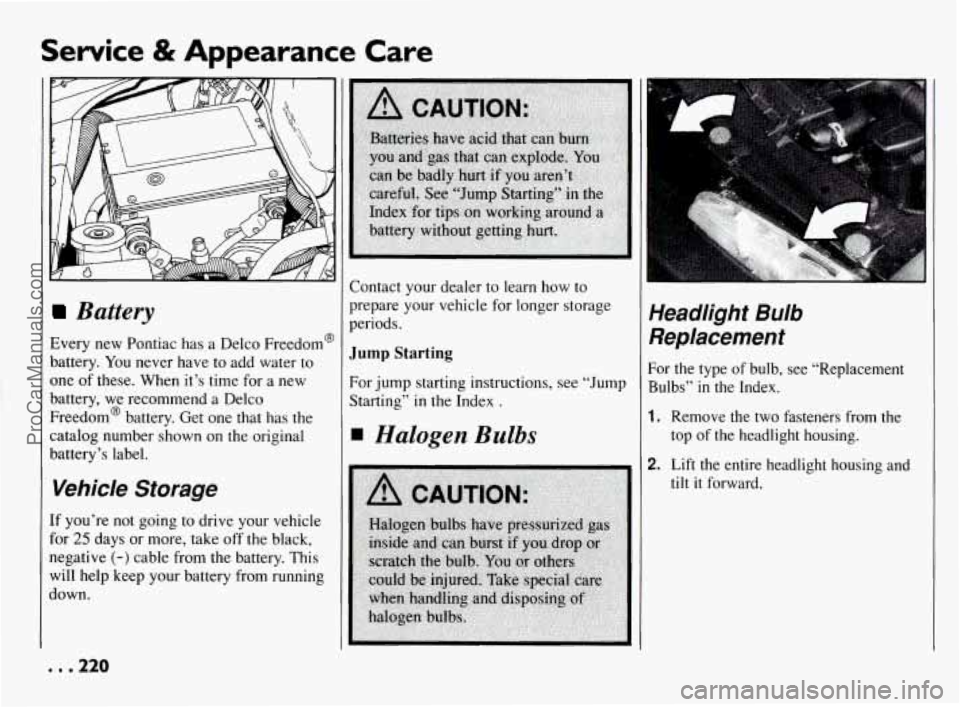
Headlight Bulb
Replacement
For the type of bulb, see “Replacement
Bulbs”
in the Index.
1. Remove the two fasteners from the
top of the headlight housing.
2. Lift the entire
tilt it forward. headlight housing and
ProCarManuals.com
Page 223 of 290
Service & Appearance Care
Taillight Bulb
Seplacement
(CONT.)
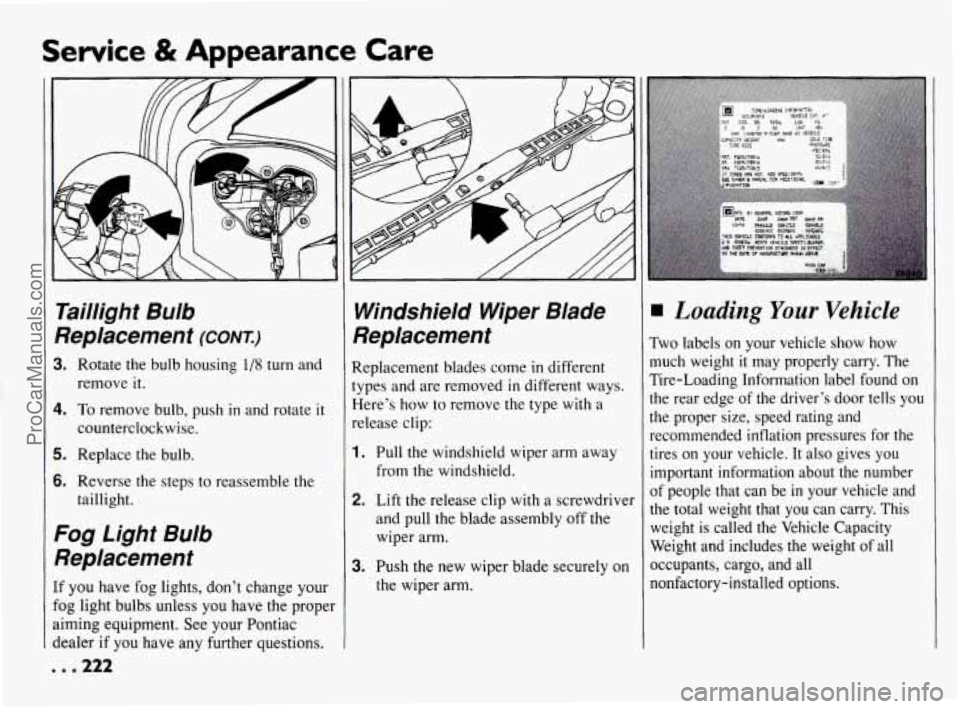
I. Rotate the bulb housing 1/8 turn and
1. To remove bulb, push in and rotate it
counterclockwise.
i. Replace the bulb.
i. Reverse the steps to reassemble the
remove
it.
taillight.
:og Light Bulb
qeplacement
F you have fog lights, don’t change your
lg light bulbs unless you have the proper
iming equipment. See your Pontiac
ealer if you have any further questions.
. .222
Windshield Wiper Blade
Replacement
Replacement blades come in different
types and are removed
in different ways.
Here’s how
to remove the type with a
release clip:
1.
2.
3.
Pull the windshield wiper arm away
from the windshield.
Lift the release clip with a screwdriver
and pull the blade assembly off the
wiper arm.
Push the new wiper blade securely on
the wiper arm.
Loading Your Vehicle
Two labels on your vehicle show how
much weight
it may properly carry. The
Tire-Loading Information label found on
the rear edge
of the driver’s door tells you
the proper size, speed rating and
recommended inflation pressures for the
tires on your vehicle. It also gives you
important information about the number
of people that can be in your vehicle and
the total weight that
you can carry. This
weight is called the Vehicle Capacity
Weight and includes the weight of all
occupants, cargo, and all
nonfactory-installed options.
ProCarManuals.com
Page 226 of 290
When to Check
Check your tires once a month or more.
Don’t forget your compact spare tire. It
should be at
60 psi (420 kPa).
How to Check
Use a good quality pocket-type gage to
check tire pressure. Simply looking at the
tires will.not tell you the pressure,
especially
if you have radial tires --
which may look properly inflated even if
they’re underinflated.
If your tires have valve caps, be sure to
put them back on. They help prevent
leaks by keeping out dirt and moisture.
Tire lnspecfion and
Rotafion
To make your tires last longer, have them
inspected and rotated at the mileages
recommended
in the Maintenance
Schedule. See “Scheduled Maintenance Services” in the Index.
X5028
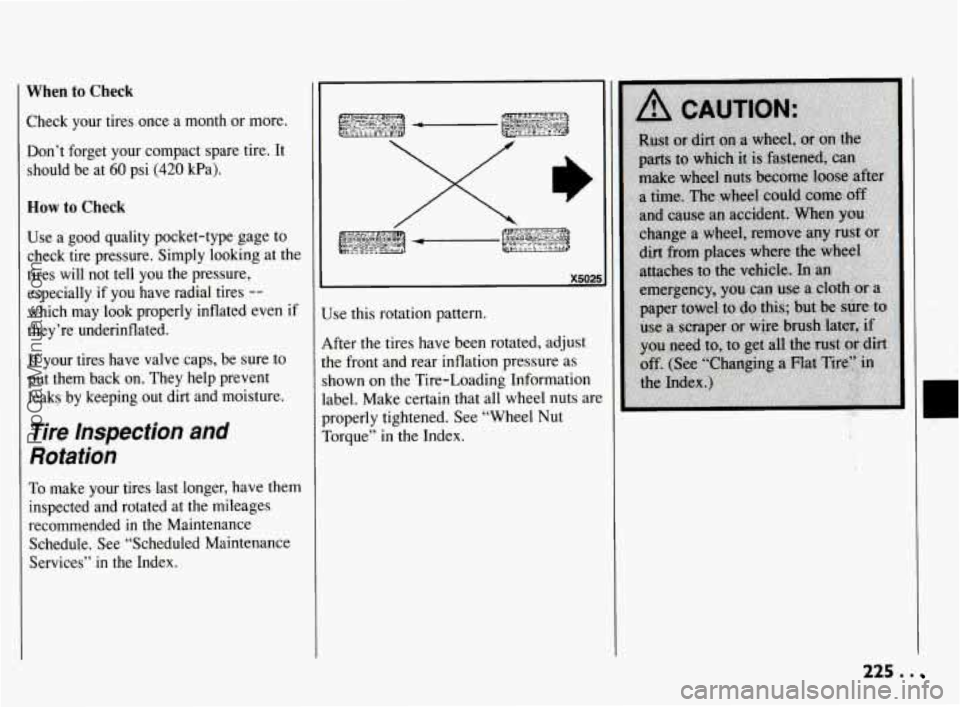
Use this rotation pattern.
After the tires have been rotated, adjust
the front and rear inflation pressure as
shown on the Tire-Loading Information
label. Make certain that all wheel nuts are
properly tightened. See “Wheel Nut
Torque” in the Index.
e
225 . .
ProCarManuals.com
Page 227 of 290
Service, & Appearance Care
When It’s Time for New Tires
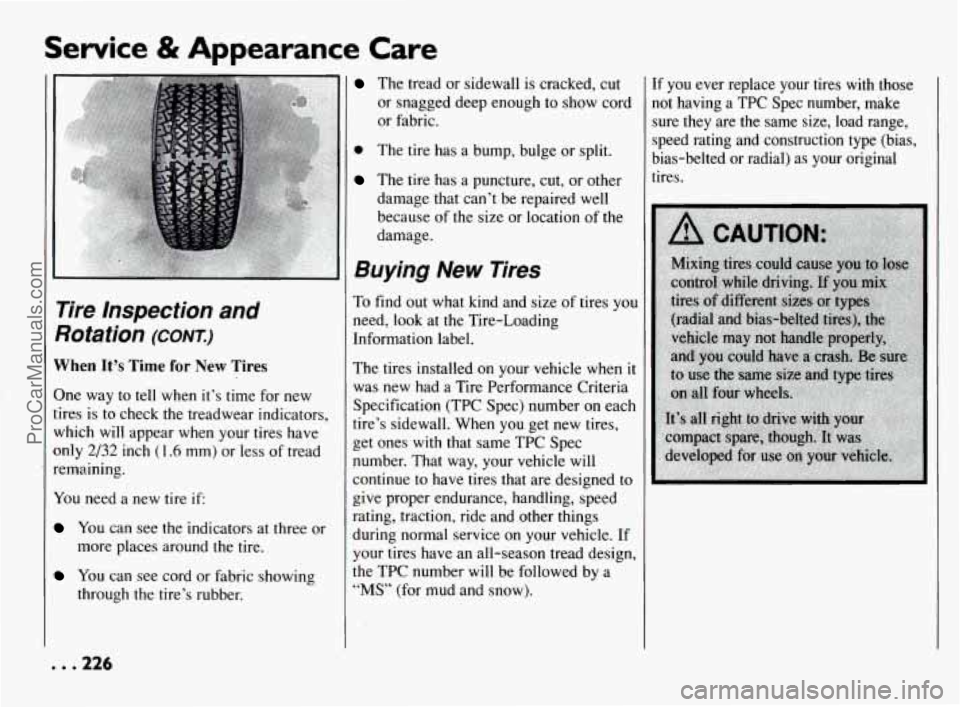
One way to tell when it’s time for new
tires is to check the treadwear indicators,
which will appear when your tires have
only
2/32 inch (1.6 mm) or less of tread
remaining,
You need a new tire if
You can see the indicators at three or
more places around the tire.
You can see cord or fabric showing
through the tire’s rubber.
The tread or sidewall is cracked, cut
or snagged deep enough to show cord
or fabric.
0 The tire has a bump, bulge or split.
The tire has a puncture, cut, or other
damage that can’t be repaired well
because of the size or location of the
damage.
Buying New Tires
To find out what kind and size of tires you
need,
look at the Tire-Loading
Information label.
The tires instaljed on your vehicle
when it
was new had a Tire Performance Criteria
Specification (TPC Spec) number on each
tire’s sidewall. When you get new tires,
get ones
with that same TPC Spec
number. That way, your vehicle will
zontinue to have tires that are designed to
give proper endurance, handling, speed
rating, traction, ride and other things
during normal service on your vehicle. If
your tires have an all-season tread design,
the
TPC number will be followed by a
“MS” (for mud and snow). If you
ever replace your tires with those
not having a TPC Spec number, make
sure they are the same size, load range,
speed rating and construction type (bias,
bias-belted or radial) as your original
tires.
. . .226
ProCarManuals.com
Page 228 of 290
Uniform Tire Quality
Grading
The following information relates to the
system developed by the United States
National Highway Traffic Safety
Administration which grades tires by
treadwear, traction and temperature
performance. (This applies only to
vehicles sold
in the United States.)
Treadwear
The treadwear grade is a comparative
rating based on the wear rate of the tire
when tested under controlled conditions
on a specified government test course. For
example, a tire graded
150 would wear
one and a half
(1 1/2) times as well on the
government course as a tire graded 100.
The relative performance of tires depends
upon the actual conditions of their use,
however, and may depart significantly
from the norm due to variations in driving
habits, service practices and differences
in
road characteristics and climate.
Traction - A, B, C
The traction grades, from highest to
lowest are: A,
B, and C. They represent
i the tire's ability to stop on wet pavement as measured under controlled conditions
on specified government test surfaces
of
asphalt and concrete. A tire marked
C
may have poor traction performance.
Warning: The traction grade assigned to
this tire is based on braking (straight-ahead) traction tests and does
not include cornering (turning) traction.
Temperature - A, B, C
The temperature grades are A (the
highest),
B, and C, representing the tire's
resistance to the generation of heat and its
ability
to dissipate heat when tested under
controlled conditions on a specified
indoor laboratory test wheel. Sustained
high temperature can cause the material
of the tire to degenerate and reduce tire
life, and excessive temperature can lead
to
sudden tire failure. The grade C
corresponds to a level of performance
which all passenger car tires must meet
under the Federal Motor Vehicle Safety
Standard No.
109. Grades B and A
represent higher levels of performance on
the laboratory test wheel than the minimum required by law. Warning:
The temperature grade for this
tire
is established for a tire that is properly
inflated and not overloaded. Excessive
speed, underinflation, or excessive
loading, either separately or in
combination, can cause heat buildup and
possible tire failure.
These grades are molded on the sidewalls
of passenger car tires.
While the tires available as standard or
optional equipment on General Motors
vehicles may vary with respect to these
grades, all such tires meet General Motors
performance standards and have been
approved for use on General Motors
vehicles. All passenger type
(P Metric)
tires must conform
to Federal safety
requirements in addition
to these grades.
Wheel Alignment and Tire
Balance
The wheels on your vehicle were aligned
and balanced carefully at the factory to
give you the longest tire life and best
overall performance.
ProCarManuals.com