1994 PONTIAC BONNEVILLE check engine
[x] Cancel search: check enginePage 213 of 290

Service & Appearance Care
How to Check (cow.)
If you do it yourself, be sure to follow all
the instructions here, or
you could get a
false reading on the dipstick.
NOTICE:
Too much or too little fluid can
damage your transaxle. Too much
can mean that some of
the fluid
could come out and fall on hot
engine parts or exhaust system
parts, starting a fire. Be sure to get
an accurate reading
if you check
your transaxle
fluid.
Wait at least 30 minutes before checking
the transaxle fluid
level if you have been
driving:
0 When outside temperatures are above
90°F (32°C).
0 At high speed for quite a while.
0 In heavy traffic -- especially in hot
weather.
I
To get the right reading, the fluid should
be at normal operating temperature,
which is 180°F to 200°F (82°C to 93°C).
Get the vehicle warmed up by driving
about 15 miles (24 km) when outside
temperatures are above 50°F (10°C). If
it's colder than 50°F ( 10°C), you may
have
to drive longer.
To Check the Fluid Level
Park your vehicle on a level place.
Keep the engine running.
With the parking brake applied, place
the shift lever
in "P" (Park).
With your
foot on the brake pedal,
move the shift lever through each gear
range, pausing for about three seconds
in each range. Then, position the shift
lever
in "P" (Park).
Let the engine run at idle for three
to
five minutes. Then. Without Shutting
Off the Engine,
Follow These Steps:
1. Pull out the dipstick and wipe it with a
clean rag or paper towel.
2. Push it back in all the way, wait three
seconds and then pull it back
out
again.
ProCarManuals.com
Page 214 of 290
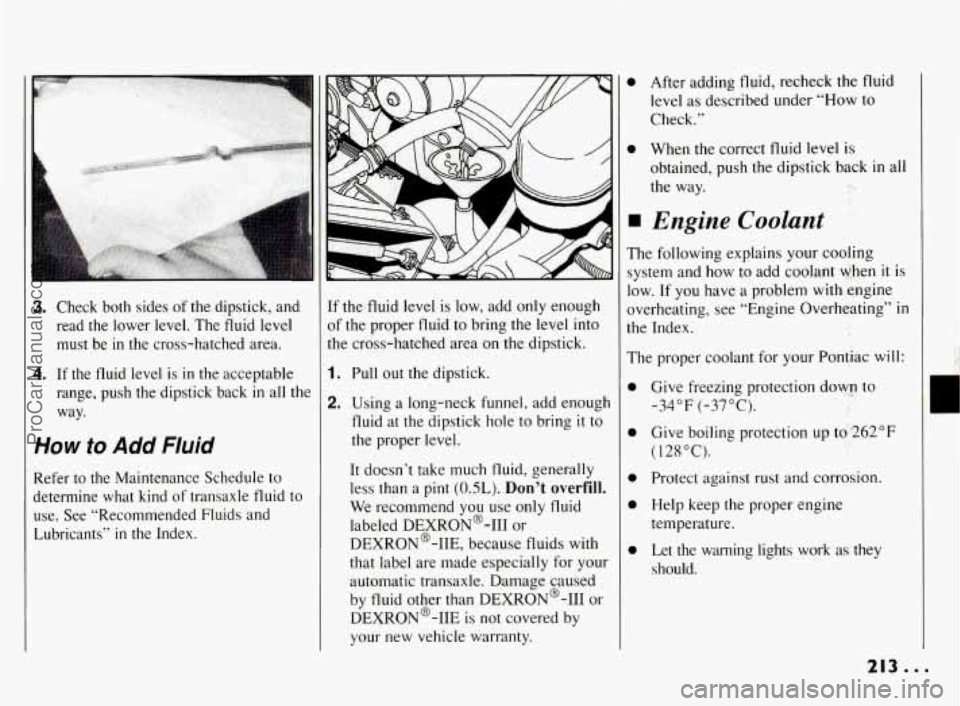
3. Check both sides of the dipstick, and
read the lower level. The fluid level must be in the cross-hatched area.
4. If the fluid level is in the acceptable
range, push the dipstick back in all the
way.
How to Add Fluid
Refer to the Maintenance Schedule to
determine what kind of transaxle fluid to
use. See “Recommended Fluids and
Lubricants’’
in the Index. If
the fluid level is low, add only enough
of the proper fluid to bring the level into
the cross-hatched area on the dipstick.
1. Pull out the dipstick.
2. Using a long-neck funnel, add enough
fluid at the dipstick hole to bring
it to
the proper level.
It doesn’t take much fluid, generally
less than a pint
(OSL). Don’t overfill.
We recommend you use only fluid
labeled DEXR0N’-I11
or
DEXRON@-IIE, because fluids with
that label are made especially for your
automatic transaxle. Damage caused
by fluid other than DEXRON@-I11 or
DEXR0N’-IIE is not covered by your new vehicle warranty.
0 After adding fluid, recheck the fluid
level as described under “How to
Check.”
0 When the correct fluid level is
obtained, push the dipstick back in all
the way. ..
Engine Coolant
The following explains your cooling
system and how to add coolant when
it is
1.0~. If
you have a problem with engine
overheating, see “Engine Overheating” in
the Index.
The proper coolant for your Pontiac will:
0
0
0
0
0
Give freezing protection down to
-34°F (-37°C).
Give boiling protection up to
,262”F
( 128 “C).
Protect against rust and corrosion.
Help keep the proper engine
temperature.
Let the warning lights work as they should.
r
213...
ProCarManuals.com
Page 215 of 290

Service & Appearance Care
Engine Coolant (CONT.)
What to Use
Use a mixture of one-half clean water
(preferably distilled) and one-half
antifreeze that meets
“GM Specification
1825-M,” which won’t damage aluminum
parts.
You can also use a recycled coolant
conforming to
GM Specification 1825-M
with a complete coolant flush and refill. If
you use this mixture, you don’t need to
add anything else.
NOTICE:
If you use an improper coolant mix,
your engine could overheat and be
badly damaged. The repair cost
wouldn’t be covered by your
warranty.
Too much water in the
mix can freeze and crack the engine,
radiator, heater core and other parts.
Adding Coolant
To Check Coolant
When your engine is cold, the coolant
level should be at
“FULL COLD” or a
little higher. When your engine is warm,
‘.he level should be up to “FULL HOT” or
1 little higher.
. . .214
ProCarManuals.com
Page 217 of 290
Service & Appearance Care
Thermostat
Engine coolant temperature is controlled
by a thermostat
in the engine coolant
system. The thermostat stops the flow
of
coolant through the radiator until the
coolant reaches a preset temperature.
When you replace your thermostat, an
AC@ thermostat is recommended.
Power Steering Fluid
How To Check Power
Steering
Fluid
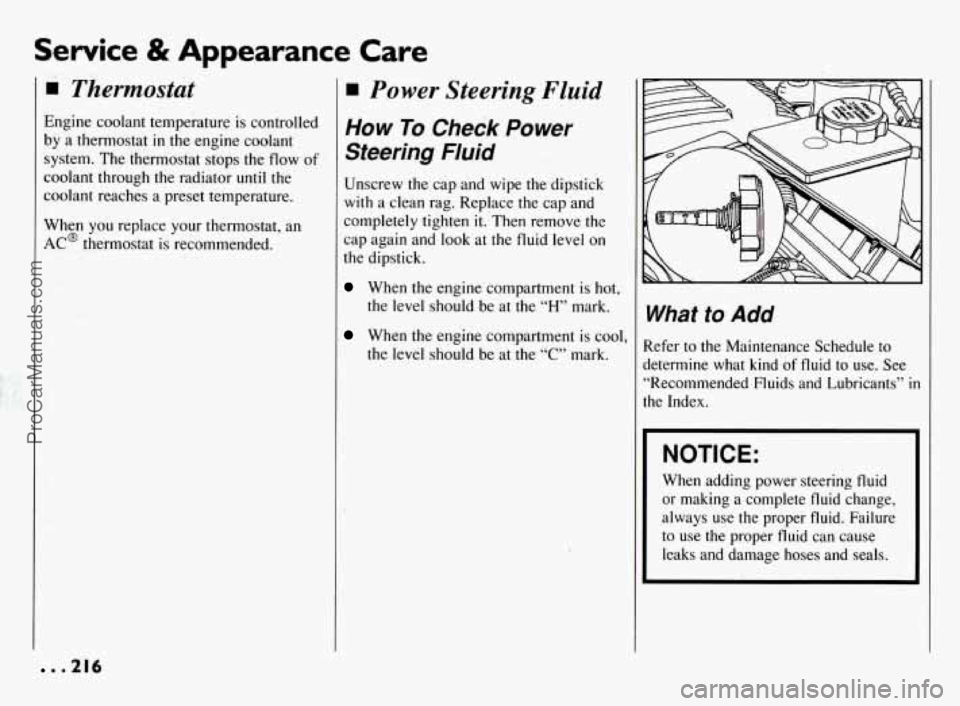
Unscrew the cap and wipe the dipstick
with a clean rag. Replace the cap and
completely tighten
it. Then remove the
cap again and look at the fluid level on
the dipstick.
When the engine compartment is hot,
the level should be at the
“H” mark.
When the engine compartment is cool,
the level should be at the “C” mark.
What to Add
Refer to the Maintenance Schedule to
determine what kind
of fluid to use. See
“Recommended Fluids and Lubricants”
in
the Index.
NOTICE:
When adding power steering fluid
or making a complete fluid change,
always
use the proper fluid. Failure
to use the proper fluid can cause
leaks and damage hoses and seals.
. .216
ProCarManuals.com
Page 238 of 290

I
A ’ ASSEMBLY
CODE
MODEL
YEAR 1994 PLANT
Vehicle Identification
Number (VZN)
This is the legal identifier for your
Pontiac. It appears
on a plate in the front
corner of the instrument panel, on the
driver’s side.
You can see it if you look
through the windshield from outside your
vehicle. The VIN also appears on the
Vehicle Certification and Service Parts
labels and the certificates of title and
registration.
Engine Identification
The eighth character in your VIN is the
engine code. This code will help
you
identify your engine, specifications, and
replacement parts.
Service Parts
Identification Label
You’ll find this label on your spare tire
cover.
It’s very helpful if
you ever need to order
parts. On this label is:
0 your VIN,
0 the model designation,
0 paint information, and
0 a list of all production options and
special equipment.
Be sure that this label
is not removed
from the vehicle.
Add-on Electrical
Equipment
NOTICE:
Don’t add anything electrical to
your Pontiac unless
you check with
your dealer first. Some electrical
equipment can damage your vehicle
and the damage wouldn’t be
covered by your warranty. Some
add-on electrical equipment can
keep other components from
working as they should.
Your vehicle has an air bag system.
Before attempting to add anything
electrical to your Pontiac, see “Servicing
Your Air Bag-Equipped Pontiac” in the
Index.
c
237.. .
ProCarManuals.com
Page 248 of 290

IMPORTANT:
KEEP ENGINE OIL
AT THE PROPER
LEVEL
AND CHANGE AS
RECOMMENDED
This part covers the maintenance
required for your Pontiac
. Your vehicle
needs these services to retain its
safety. dependability and emission
control performance
.
Have you purchased the
GM Protection Plan?
The Plan supplements your
new vehicle warranties
.
See your Pontiac dealer for details .
Part 7
Maintenance Schedule
Introduction
A Word About Maintenance ..................................... 248
Your Vehicle and the Environment
................................ 248
How This Part is Organized ..................................... 248
A . Scheduled Maintenance Services
Using Your Maintenance Schedules ............................... 249
Selecting the Right Schedule
.................................... 249
Schedule1
............................................... 250
Schedule11
......................................... . . 252
Explanation
of Scheduled Maintenance Services ..................... 254
AtEachFuelFill
............................................. 256
At Least Once a Month ......................................... 257
AtLeastOnceaYear
.......................................... 257
C . Periodic Maintenance Inspections ................................ 260
D . Recommended Fluids & Lubricants ............................... 261
E . Maintenance Record ........................................... 263
B . Owner Checks & Services
ProCarManuals.com
Page 255 of 290
Maintenance Schedule
Explanation of Scheduled Maintenance
Services
Following are explanations of the services listed in Schedule I
and Schedule
11.
The proper fluids and lubricants to use are listed in Section D.
Make sure whoever services your vehicle uses these. All parts
should be replaced and all necessary repairs done before you or
anyone else drives the vehicle.
1. Engine Oil and Filter Change* -- Always use SH or SG
Energy Conserving I1 oils
of proper viscosity. The “SH” or
“SG” designation may be shown alone or in combination
with others, such as “SH/CD,” or “SH, SG, CD,” “SG/CD,”
etc. To determine the preferred viscosity for your vehicle’s
engine (e.g., SAE 5W-30 or SAE
10W-30), see “Engine
Oil”
in the Index.
2. Chassis Lubrication -- Lubricate suspension and steering
linkage. Lubricate the transaxle shift linkage, and parking
brake cable guides, underbody contact points and linkage.
3. Tire and Wheel Rotation and Inspection -- For proper
wear and maximum tire
life, rotate your tires following the
instructions in this manual. See “Tires, Inspection &
Rotation” in the Index. Check the tires for uneven wear or
damage. If
you see irregular or premature wear, check the
wheel alignment. Check for damaged wheels also.
4. Engine Accessory Drive Belt(s) Inspection* -- Inspect
the belt(s) for cracks, fraying, wear and proper tension.
Replace as needed. (Belts can have many small cracks
in
individual ribs without affecting performance.)
5. Cooling System Service* -- Drain, flush and refill the
system with new or approved recycled coolant conforming
to GM Specification 1825M. Keep coolant at the proper
mixture as specified. See “Coolant”
in the Index. This
provides proper freeze and boil protection, corrosion inhibitor level and maintains proper engine operating
temperature.
Inspect hoses and replace
if they are cracked, swollen or
deteriorated. Tighten screw-type hose clamps. Clean the
outside of the radiator and air conditioning condenser. Wash
the pressure cap and neck.
To help ensure proper operation, we recommend a pressure
test of both the cooling system and the pressure cap.
ProCarManuals.com
Page 256 of 290

6. Transaxle Service -- Change both the fluid and filter every
15,000 miles (25
000 km) if the vehicle is mainly driven
under one or more of these conditions:
0 In heavy city traffic where the outside temperature
regularly reaches
90°F (32 “C) or higher.
0 In hilly or mountainous terrain.
0 When doing frequent trailer towing. (With some
models, you shouldn’t ever tow a trailer. See “Towing a
Trailer”
in the Index.)
0 Uses such as found in taxi, police car or delivery
service.
If you do not use your vehicle under any of these
conditions, change both the fluid and filter every 100,000
miles (166
000 km).
7. Spark Plug Replacement* -- Replace spark plugs with the
proper type. See “Replacement Parts’’
in the Index.
8. Spark Plug Wire Inspection”? -- Inspect for burns,
cracks or other damage. Check the boot fit at the coils and
at the spark plugs. Replace wires as needed.
9. Supercharger Oil Check -- Check oil every 30,000 miles
(50
000 km) or 36 months. Add the proper synthetic oil.
See “Recommended Fluids and Lubricants’’ and
“Supercharger Oil”
in the Index. (Engine must be cold
before checking oil level. Oil is pressurized when hot and
will blow out of bearing case).
1 O.Air Cleaner Filter Replacement* -- Replace every
30,000 miles (50
000 km) or more often under dusty
conditions. Ask your dealer for the proper replacement
intervals for your driving conditions.
11. Fuel Tank, Cap and Lines Inspection”? -- Inspect fuel
tank, cap and lines (including fuel rails and injection
assembly) for damage or leaks. Inspect fuel cap gasket for
an even filler neck imprint
or any damage. Replace parts as
needed. Periodic replacement of the fuel filter is
not
required.
* An Emission Control Service.
The
U.S. Environmental Protection Agency or the California Air Resources Board has determined that the failure to perform this maintenance item will not nullify the
emission warranty or limit recall liability prior to the completion of vehicle useful life. General Motors, however, urges that all recommended maintenance services be
performed at the indicated intervals and the maintenance be recorded in “Section E: Maintenance Record”.
255 .
ProCarManuals.com