Page 111 of 385
To use a rear ashtray,
pull at the top of the
ashtray door to flip the
door open.
To remove a rear ashtray, press down on the inside tabs and open the door
Don't put papers and other things that burn into your ashtrays. If you do,
cigarettes or other smoking materials could set them on fire, causing
damage. fully.
Storage Compartments
Your vehicle has a variety of storage compartments provided for your
convenience.
Glove Box
To open your glove
box, press the button
down and pull the
door open.
ProCarManuals.com
Page 119 of 385
Instrument Panel
13 1’2
1. Side Window Defogger Vents
2. Light Controls
3. Air Vents
4. Multifunction Lever
5. Tilt Lever
6. Instrument Cluster
7. Gearshift Lever
8. Audio System
9. Comfort Control System
10. Glove Box
1 1. Audio System
12. Ashtray
13. Rear Window Defogger Switch
or Rear Heater Switch
15. Dome Light Override Switch
16. Fuse Panel
17. Parking Brake Release Handle
Instrument Cluster
Your instrument cluster is designed to let you know at a glance how your
vehicle is running.
You’ll know how fast you’re going, about how much
fuel you have
and many other things you’ll need to know to drive safely and
economically.
Tachometer Cluster
If you have the tachometer cluster, it looks different but will tell you
everything the standard cluster does, with the addition of displaying your
engine’s revolutions per minute (rpm).
2-64 ProCarManuals.com
Page 230 of 385
e
To take the jack out,
turn the wing
nut to
the left and take it and
the retainer
off. Take
the jack and storage
box
out and then take
the
tools out of the
box.
Your vehicle may have
a pair of emergency gloves secured to the jack. You
can use them when changing the tire, or during other emergency situations.
Remember to replace them
with the jack, so you will have them handy if
needed later.
Jack and Tools -Wagon Models
If your wagon model
has a jack cover,
lift
the tab up to release
the cover. Slide your
hand under the edge
of the cover, swing the
cover open
and then
take
it off.
5-27
ProCarManuals.com
Page 231 of 385
.... .. . . .. ...... . ... .. Your vehicle’s jack
and
jacking tools are
stored in the
compartment.
To take
the jack out,
turn the
wing nut to the left
and take it and the
retainer
off. Take the
jack and storage
box
out and then take the
tools out
of the box.
Your vehicle may have a pair
of emergency gloves secured to the jack. You
can
use them when changing the tire, or during other emergency situations.
Remember to replace them with the jack,
so you will have them handy if
needed later.
Jacking Tool Storage - All Models
1. Socket
2. Jack Handle
3. Ratchet
4. Jacking Tool Storage Box
5. Jack Handle Extension
5-28
ProCarManuals.com
Page 240 of 385
Storing the Jack and Tire
Storing the Jack
Put the tools into the storage box and close it tightly. Fit the storage box into
the bracket with the bolt through the box. Put the jack onto the box. Be sure
the jack points in the right direction as shown for your model. See the jack
and jack tools storage diagrams earlier in this section. Secure the emergency
gloves,
if your vehicle has them, to the jack using the provided strap.
Slide the retainer over the bolt onto the jack and put the wing nut on. Turn
the nut to the right until it is tight against the retainer.
Replace the jack storage cover, if your vehicle has one, by simply reversing
the removal procedure described earlier.
5-37
ProCarManuals.com
Page 325 of 385
Service Parts Identification Label
You’ll find this label on the inside of the glove box.
WHEELBASE
I
MODEL DESIGNATION
OPTION CONTENT K19 K64 LC3 MXl M31 NA5 NB1 QMXVK3 VC2 VYl VY4 V73 Y19 ZJ7
6BJ 62L 62U 67D 671
679 7BJ 8HJ BHJ
I PAINT TECHNOLOGY I ORDER NUMBER
EXTERIOR COLORS
It’s very helpful if you ever need to order parts. On this label is:
0 your VIN,
the model designation,
paint information, and
a list of all production options and special equipment.
Be sure that this label is not removed from the vehicle.
Add-on E/ectrical Equipment
NOTICE:
Don’t add anything electrical to your vehicle unless you che\
ck
with
your dealer first. Some electrical equipment can damage
your vehicle and the damage wouldn’t be covered by your
warranty. Some add-on electrical equipment can keep other
components
from working as they should.
6-80
ProCarManuals.com
Page 330 of 385

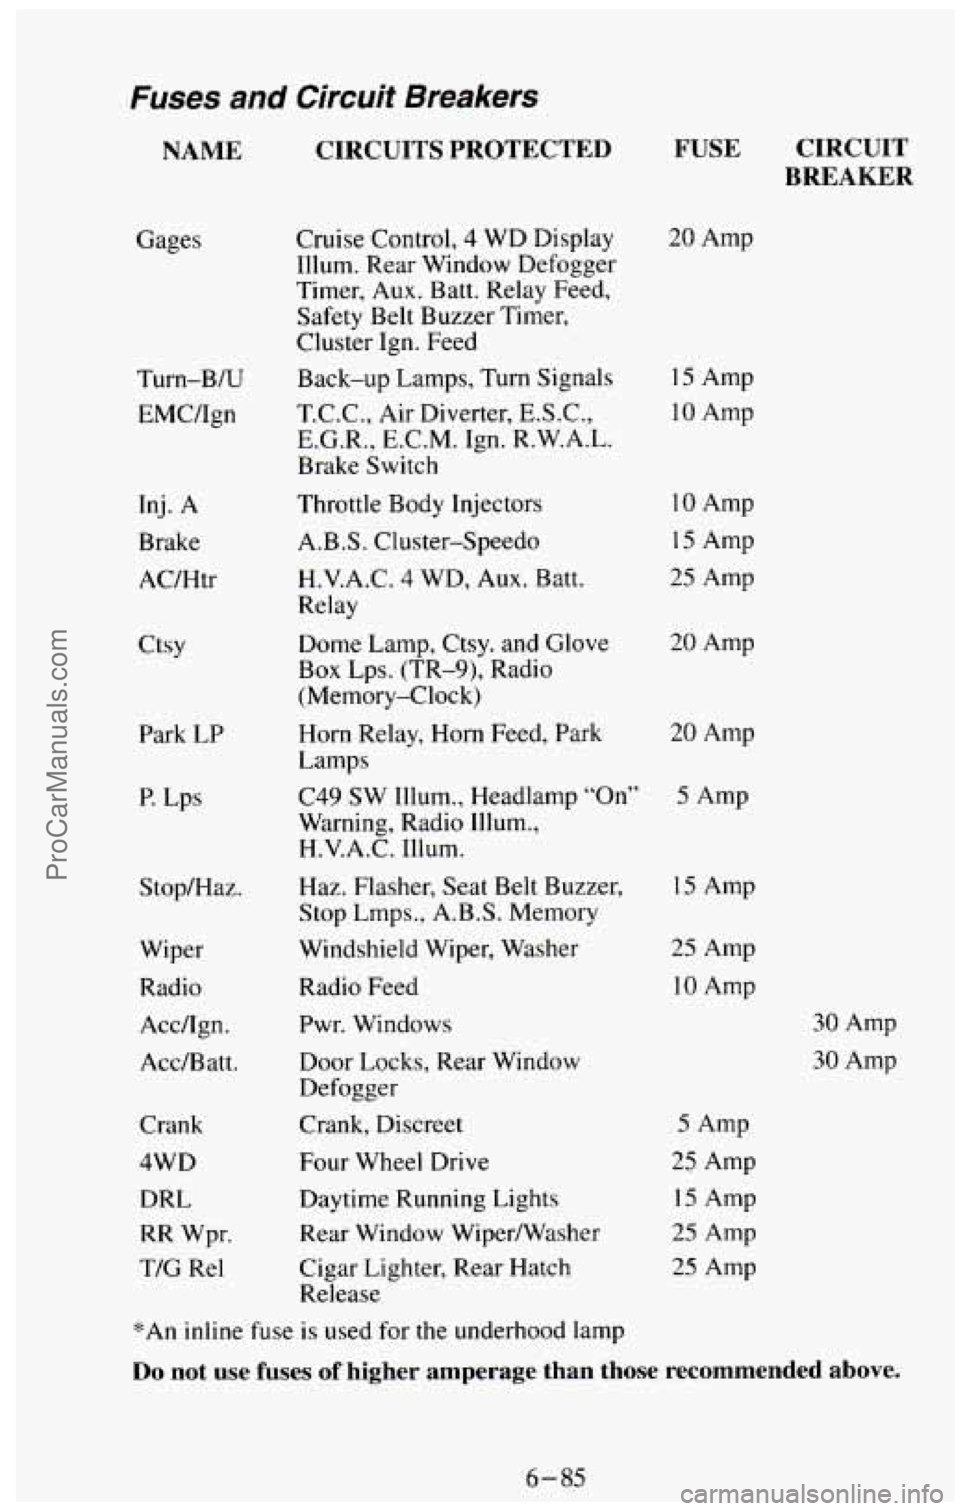
Fuses and Circuit Breakers
NAME CIRCUITS PROTECTED
Gages Turn-B/U
EMC/Ign
Inj. A
Brake
AC/Htr
Ctsy Park
LP
P. Lps
Stop/Haz.
Wiper
Radio Acc/Ign.
Acc/Batt.
Crank
4WD DRL
RR Wpr.
TIC Re1 Cruise Control,
4 WD Display
Illum. Rear Window Defogger
Timer, Aux. Batt. Relay Feed,
Safety Belt Buzzer Timer,
Cluster Ign. Feed
Back-up Lamps, Turn Signals
T.C.C., Air Diverter, E.S.C.,
E.G.R., E.C.M. Ign. R.W.A.L.
Brake Switch
Throttle Body Injectors
A.B.S. Cluster-Speed0
H.V.A.C.
4 WD, Aux. Batt.
Relay
Dome Lamp, Ctsy. and Glove
Box Lps. (TR-9), Radio
(Memory-Clock)
FUSE CIRCUIT
BREAKER
20 Amp
15 Amp
10 Amp
10 Amp
15 Amp
25 Amp
20 Amp
Horn Relay,
Horn Feed, Park 20 Amp
Lamps
C49 SW Illum., Headlamp
“On” 5 Amp
Warning, Radio Illum.,
H.V.A.C.
Illum.
Haz. Flasher, Seat Belt Buzzer,
Stop
Lmps., A.B.S. Memory
Windshield Wiper, Washer
Radio Feed Pwr. Windows
Door Locks, Rear Window
Defogger
Crank, Discreet
Four Wheel Drive
Daytime Running Lights
Rear Window Wipermasher
Cigar Lighter, Rear Hatch
Release
15 Amp
25 Amp
10 Amp
5 Amp
25 Amp
15 Amp
25 Amp
25 Amp
30 Amp
30 Amp
*An inline fuse is used for the underhood lamp
Do not use fuses of higher amperage than those recommended above.
6-85
ProCarManuals.com
Page 357 of 385

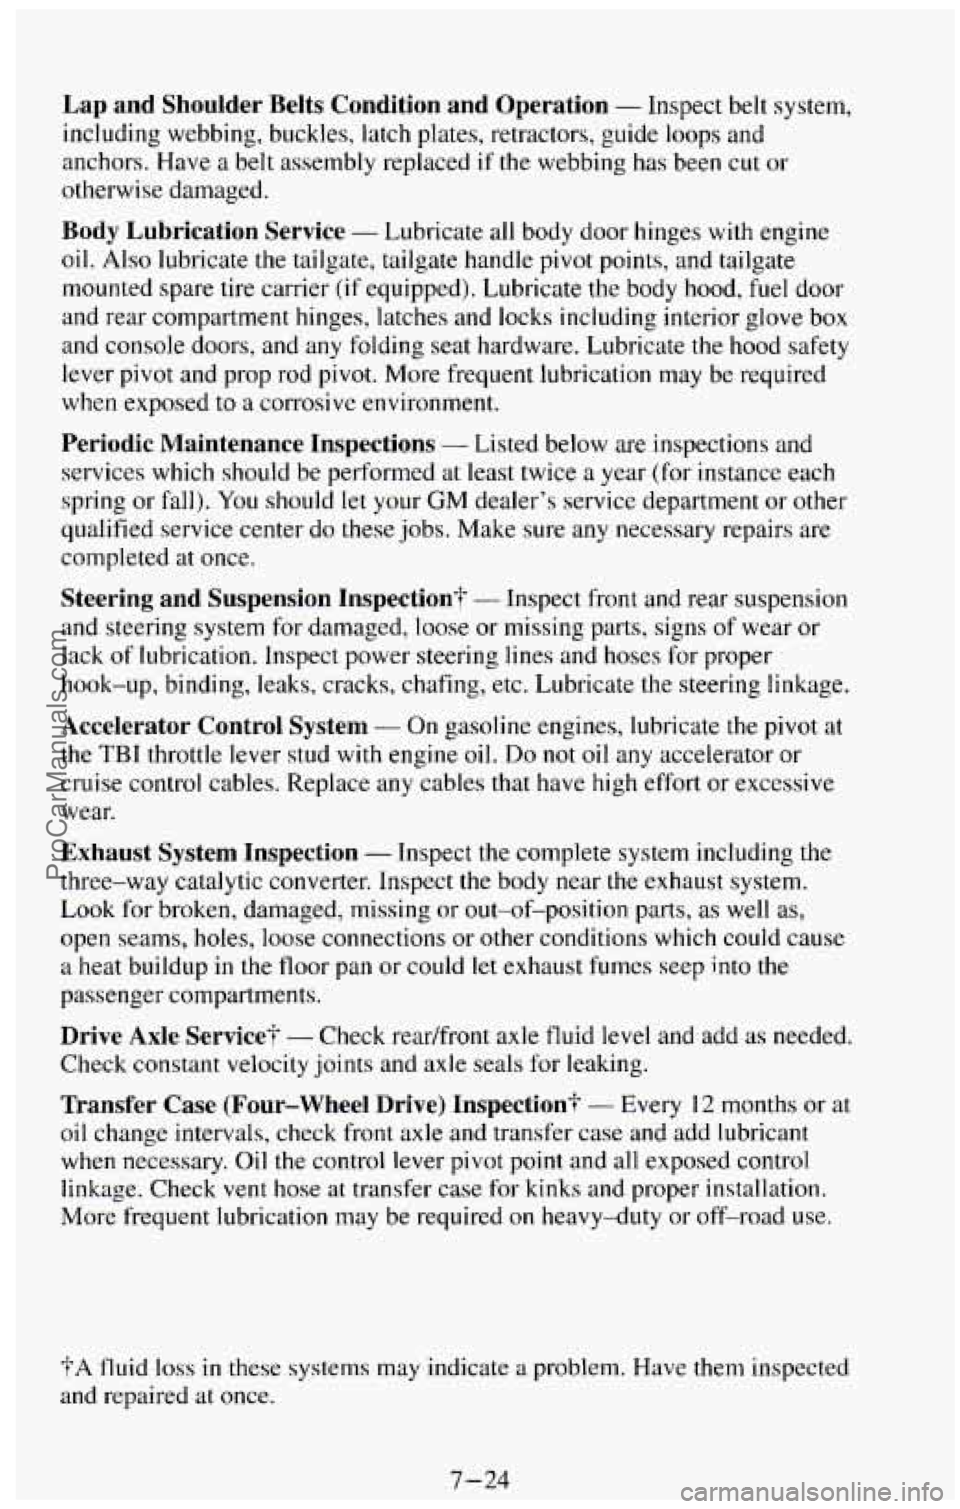
Lap and Shoulder Belts Condition and Operation - Inspect belt system,
including webbing, buckles, latch plates, retractors, guide loops\
and
anchors. Have
a belt assembly replaced if the webbing has been cut or
otherwise damaged.
Body Lubrication Service - Lubricate all body door hinges with engine
oil.
Also lubricate the tailgate, tailgate handle pivot points, and tailgate
mounted spare tire carrier (if equipped). Lubricate the body hood,
fuel door
and rear compartment hinges, latches and locks including interior glove box
and console doors, and any folding seat hardware. Lubricate the hood safety
lever pivot and prop rod pivot. More frequent lubrication may be required
when exposed to
a corrosive environment.
Periodic Maintenance Inspections - Listed below are inspections and
services which should be performed at least twice
a year (for instance each
spring or fall). You should let your
GM dealer’s service department or other
qualified service center do
these jobs. Make sure any necessary repairs are
completed at once.
Steering and Suspension Inspection? - Inspect front and rear suspension
and steering system for damaged, loose or missing parts, signs
of wear or
lack of lubrication. Inspect power steering lines and hoses for proper
hook-up, binding, leaks, cracks, chafing, etc. Lubricate the steering linkage.
Accelerator Control System - On gasoline engines, lubricate the pivot at
the
TBI throttle lever stud with engine oil. Do not oil any accelerator or
cruise control cables. Replace any cables that have high effort or excessive
wear.
Exhaust System Inspection - Inspect the complete system including the
three-way catalytic converter. Inspect the body near
the exhaust system.
Look for broken, damaged, missing or out-of-position parts,
as well as,
open seams, holes, loose connections or other conditions which could cause
a heat buildup
in the floor pan or could let exhaust fumes seep into the
passenger compartments.
Drive Axle Service? - Check readfront axle tluid level and add as needed,
Check constant velocity joints and axle seals for leaking.
Transfer Case (Four-wheel Drive) Inspection+ - Every 12 months or at
oil change intervals, check front axle and transfer case and add lubricant
when necessary. Oil the control lever pivot point and all exposed control
linkage. Check
vent hose at transfer case for kinks and proper installation.
More frequent lubrication may be required on heavy-duty or off-road use.
?A fluid loss in these systems may indicate a problem. Have them inspected
and repaired at once.
7-24
ProCarManuals.com