1993 VOLKSWAGEN GOLF wheel bolts
[x] Cancel search: wheel boltsPage 111 of 156

Downloaded from www.Manualslib.com manuals search engine GENERAL MAINTENANCE
Winter tyres
winter conditions win ter tyres w ill dis
- n ctly improve the vehicle's handling even
th e case of four
wheel drive ve hicles. This
ap plies In particular to veh icles that are
eq uipped with wide/high -speed tyres (Code
e
tters H or V in the tyre designation on the
: r e wall). Because of their construction
,lIdth, rubber mixture, tread formation etc) :n se tyres provide less traction on ice and
sn ow.
h
en fitting winter tyres note the follow
n g:
• Onl y radial ply winter tyres may
be fitted.
h e factory recommended tyre sizes are given on page 139.
•
To obtain the best possible handling ch aracteristics, wint er tyres must be fitted o n all fou r wheels.
• The pressures for
winter tyres must be
0.2 bar higher than with summer tyres
s e e Technical Data on page 142.
•
Winter tyres are no longe r fully effec tive
h en the tread has worn down to a depth
o f 4 mm.
The following speed limits are valid for winter tyres:
Code letter
Q max. 160 km/h
Code letter T max. 190 km/h
Code letter H ma
x. 210 km/h
In Germany, vehicles w hich can exceed this
speed must have an appropriate sticker in the driver's field of view. Suitable stickers
are available from Volkswagen dealers.
Please note regulations to this effect
in your
cou ntry .
• All-weath er t yres
can also be used in
stead of winter ty res .
• If you have a flat tyre the remarks on
using the spare wheel on page 114 should
be noted .
•
Do not leave winter tyres fitted for an un
necessary long period because w hen the
roads are free of
snow and ice the handling with summer tyres is better.
r:lil:.-. For environmental reasons (!Jtf summer tyres should be fitted again as soon as possible because normally they are quieterin running, tyre wear is reduced and the fuel consumption is lower_
Snow chains
Snow chains can be used on all tyre sizes
listed on page 139. The chains may only be fitted on the front wheels -this applies also to the syncro.
The use of sno w chains on the temporary
spare wheel is not permitted for technical
reasons. Further details are given on page
114 .
Only use thin chains w hich do not stand
clea r
more than 15 mm (including ten
sioner).
When using snow chains wheel trim plates
and trim rings must be ta ken off . For sa fety
reasons the w heel bolts must then be fitted with caps w hich are available from Volks
wagen dealers.
When driving over roads whic h are free of snow you must remo ve the chains. On such
road s they are detrimental to vehic le handl
ing, damage
the tyres and wear out Quickly .
In Germany , the maximum permissible
speed w ith snow chains is 50 m/h
109
Page 116 of 156

Downloaded from www.Manualslib.com manuals search engine -----------------------DO-lT-YOURSELF
Vehicle tools Spare wheel
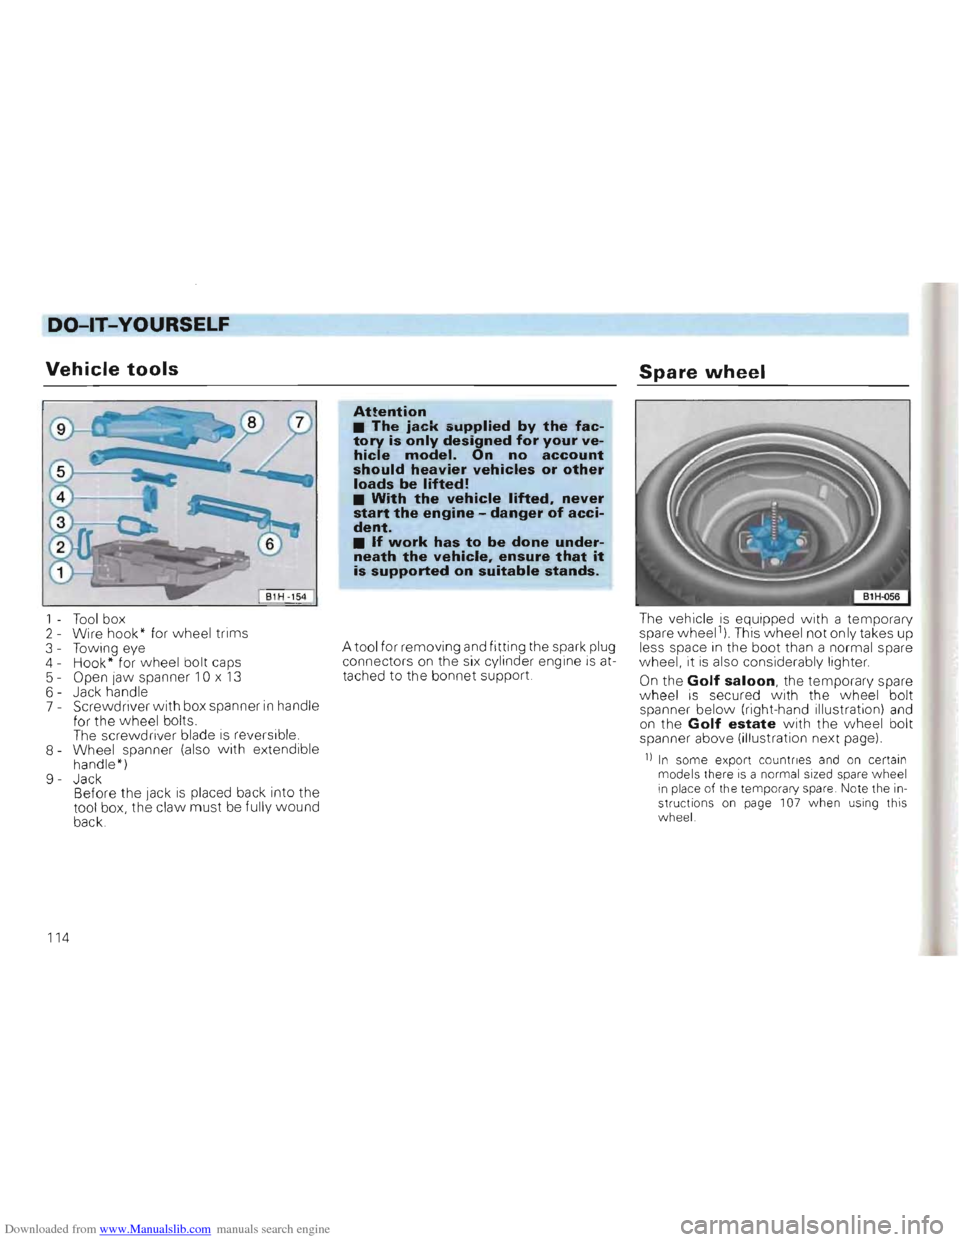
1 - Too l box
2 - Wire hook" for wheel trim s
3 - Towing eye
4 - Hook* for w heel bolt caps
5 - Open
Jaw spanner 10 x 13 6 -Jack handle
7 -Screwdriver with box spanner in handle
for the wheel bolts.
The scre
wdriver blade is reversible.
8 Wheel spanner (a lso with extendible
handle ")
9 Jack
Bef ore the
Jack is place d back into the
tool box, the claw must be fully wound
back.
Attention • The jack supplied by the factory is only designed for your vehicle model. On no account should heavier vehicles or other loads be lifted! • With the vehicle lifted. never start the engine -danger of accident. • If work has to be done underneath the vehicle. ensure that it is supported on suitable stands.
A tool for removing and fitting the spark plug
co nne ctors on the six cy linder engine is attac hed to the bonnet support. The
vehicle is
equippe d with a temporary spare wheel1
) This wheel not only takes up
less space in the boot than a norm al spare
w heel , it is a l
so considerabl y lighter .
On the Golf saloon, the temporary spare wheel is secured with the wheel bolt spanner below (right-hand illustration) and on the Golf estate with the vvheel bolt
spanner above (illustration next page).
11 In some export countries and on certain mod els there is a norma l sized spare wheel in place of the temporary spare. Note the in
structio ns o n page 107 when USing this
w heel.
114
Page 118 of 156

Downloaded from www.Manualslib.com manuals search engine DO-lT-YOURSELF
Changing wheels
Park the vehicle as far as possible away
from the traffic flow. If necessary switch on
emergency warning lights
and place the
warning triangle in position -note legal reQuirements,
• A
ll veh icles occupa nts shou ld leave the
vehicle and move to a safe area (e,g, behind
the barrier),
• App ly handbrake firml
y, If the car is on a
slope, block one of the wheels on the oppo
site side with a stone or some similar ob
ject.
•
Take too ls and spare wheel out of lug
gage compartment.
• Remove wheel bolt caps:
- Remove wheel bolt caps
with hook (from
vehicle tools),
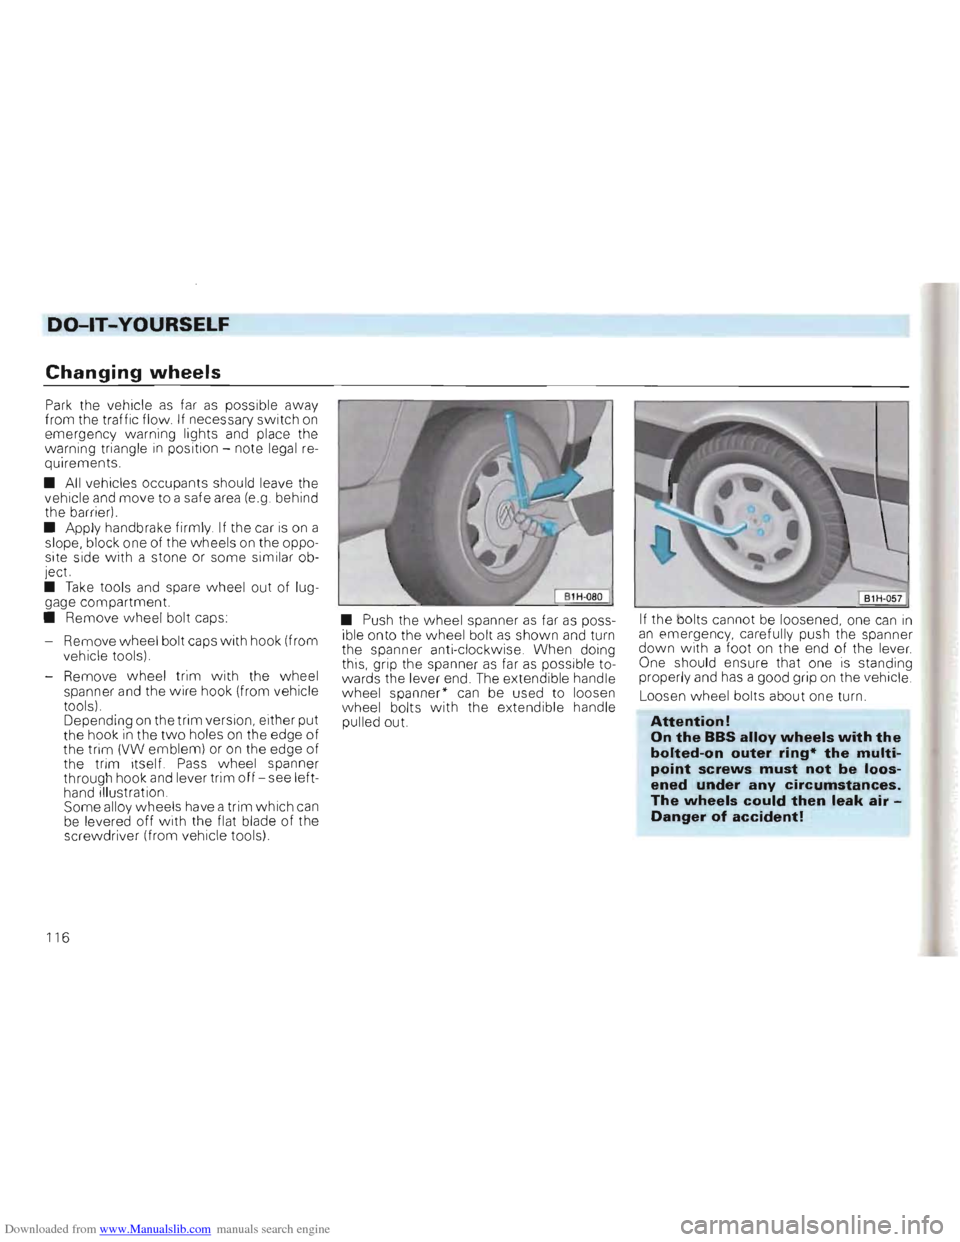
- Remove wheel trim with the
wheel
spanner and the wire hook (from vehicle
tools) ,
Depending
on the trim version , either put
the hook in the two holes on the edge of the trim (VW emblem) or on the edge of
the trim itself, Pass wheel spanner
through hook and lever trim off -see left
hand illustration ,
Some alloy wheels have a trim which can be levered off with the flat blade of the
screwdriver (from vehicle tools) •
Push the wheel spanner
as far as poss
ible onto the wheel bolt as shown and turn
the spanner anti-clockwise, When doing
this, grip the spanner
as far as possib le to
wards the lever end, The extend ib le handle
wheel spanner"
can be used to loosen wheel bolts with the extendible handle
pulled out. If
the bolts cannot be loosened, one can
in an emergency, carefully push the spanner down wi th a foot on the end of the lever.
One should ensure that one is standing
proper ly and has a good grip on the vehic le ,
Loosen
wheel bolts about one turn,
Attention!
On the BBS alloy wheels with the
bolted-on outer ring· the multi
point screws must not be loos
ened under any circumstances.
The wheels could then leak air Danger of accident!
116
Page 120 of 156

Downloaded from www.Manualslib.com manuals search engine DO-lT-YOURSELF
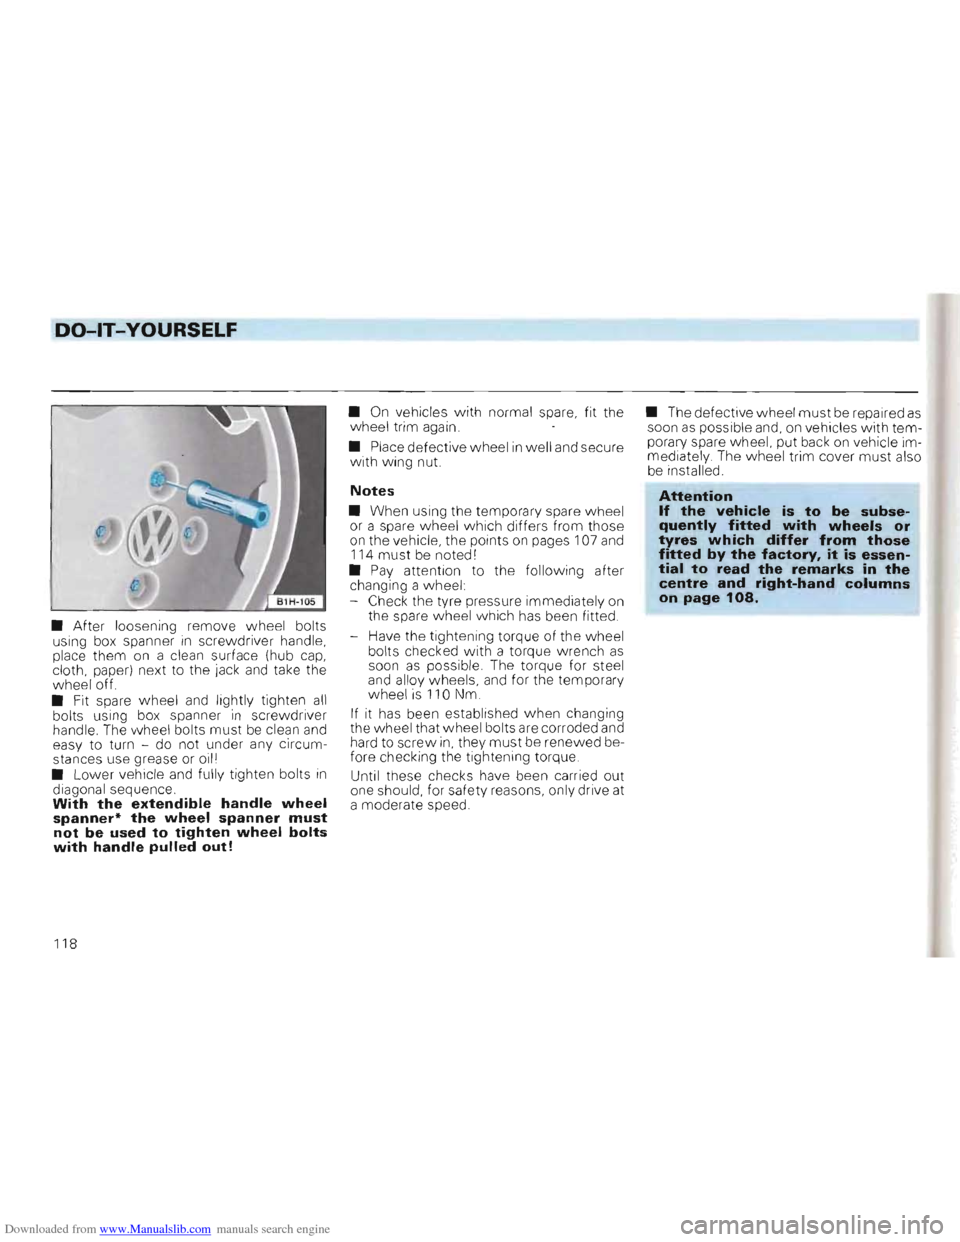
• After loosening remove wheel bolts
using box spanner in screwdriver handle,
place them on a clean surface (hub cap, cloth, paper) next to the jack and take the
wheel off.
• Fit spare w heel
and lightly tighten all bolts using box spanner in screwdriver
handle. The wheel bolts must be clean and
easy to turn -do not under any circum
stances use grease or oill
• L o
wer vehicle and fully tighten bolts in diagonal sequence. With the extendible handle wheel spanner* the wheel spanner must not be used to tighten wheel bolts with handle pulled out!
• On vehicles w ith normal spare, fit the
wheel trim again.
• Place defective wheel
in well and secure
with wing nut.
Notes
• When using the temporary spare wheel
or a spare wheel wh ich differs from those
on the vehicle, the points on pages 107 and
114 must be noted I
• Pay attention to the following after
changing a wheel:
- Check the tyre pressure immediatel y on
the spare wheel which has been fitted .
-
Have the tightening torque of the wheel
bolts checked with a torque wrench as soon as possible. The torque for steel and alloy wheels, and for the temporary
wheel is 110 Nm .
If it has been established when changing
the wheel that wheel bolts are corroded and
hard to screw
in, they must be renewed be
fore checking the tightening torque.
Until these checks have been carried out
one should, for safe ty reasons, only drive at
a moderate speed. •
The defective wheel
must be repaired as soon as possible and, on vehicles with tem
porary spare wheel, put back on vehicle im
mediately. The wheel trim cover must also be installed.
Attention If the vehicle is to be subsequently fitted with wheels or tyres which differ from those fitted by the factory. it is essential to read the remarks in the centre and right-hand columns on page 108.
118