Page 105 of 338

Features & Controls
Malfunction Incfkator Lamp
(Semite Engine Soon Light)
A computer monitors operation of your
fuel, ignition and emission control
systems. This light should
come on
when the ignition is on, but the engine
is not running, as a check to show you
it is,
working. If it does not come on at
all, have it fixed right away. If it stays
on, or it comes on while you are driving,
the computer is indicating that yo8u
have a problem. You should take your
vehicle in for service soon.
If you keep driving your vehicle
with
this light on, after a while th
emission controls won't work as
well, your fuel economy won't be
as good and your engine may not
run as smoothly. This could lead to
costly repai+p@,cqered
by your warranty :',~: ~;'='-- ~ -'--:< .:-
Check Gauges Light (OPTION)
The CHECK GAUGES light will come
on
if your oil pressure gage or engine
coolant temperature gage
is pointing to
the red area.
If these gages do not indicate a
problem, the CHECK GAUGES light
means there is
a problem with your
vehicle's charging system.
ProCarManuals.com
Page 106 of 338

Driver Information Center
(OPTION)
The Driver Information Center provides
useful information while you travel. It
will tell you:
Date and Time
Direction of Travel
Average Speed
Average Fuel Economy
Instant Fuel Economy
Driving Range before Refueling
Condition of Vehicle Systems
Using the Driver Information
Center
When you start your engine, the Driver
Information Center displays the date,
time and direction of travel. For other
information, press the control buttons.
On some models, the Driver
Information Center also checks nine
vehicle systems when you start your
engine. It flashes messages as it checks
these systems. The messages do not
mean something is wrong with your
vehicle unless they continue to flash.
Control Buttons
Ten buttons control Driver Information
Center functions.
RANGE Shows how much farther
you can travel with the fuel
you have.
AVG SPEED: Shows your average
speed since the last time
you reset the
function. It counts only the time the
engine is running.
AVG ECON: Shows your average fuel
economy since the last time you reset
the function.
INST ECON: Shows your fuel
economy at the time you
push the
button.
RESET: Works with other buttons to
reset the functions.
ProCarManuals.com
Page 107 of 338

Features GL Controls
Control Buttons (CONT.)
SYSTEMS CHECK: Tells you when
routine service is needed and, on some
models, checks your vehicle's operating
systems.
Two buttons control adjustments to the
calendar:
MODE and SET. MODE
also controls selection of English or
metric units for the Driver Information
Center and Head-Up Display, if your
vehicle has one. See
Cakndar later in
this section. See the Index under Head-
Wp Display.
Twlo, buttons control adjustments to the
compass:
NORTH and CAL. See the
Index under Compass.
106
RANGE: Press to see how much
farther you can travel before refueling.
If this is less than
40 miles (64 km), a
message will be displayed. Press again to turn
off the display.
Range calculations are based
on how
much fuel is in the tank and your
average fuel economy. For best results,
each time you refuel you should reset
the range function.
To Reset Range:
1. Press RANGE.
2. Press and hold RESET for one
Range is updated automatically
w
you reset average fuel economy.
second.
rhen
AVG SPEED: Press to display your
vehicle's average speed during all the
time the engine was running since the
last time
you reset the function. Press
again to turn
off the display.
To Reset Average Speed:
1. Press AVG SPEED.
2. Press and hold RESET for one
AVG ECON: Press to display your
average fuel economy since the last time
you reset the function. Press again to
turn
off the display.
To Reset Average Economy:
1. Press AVG ECON.
2. Press and hold RESET for one
second.
second.
ProCarManuals.com
Page 108 of 338

INST ECON: Press to display your
fuel economy at the time you press the
button. The display will be updated
every five seconds until you turn it off.
Press again to turn off the display.
SYSTEMS CHECK: Press to display
the systems monitor
(STE Model only).
If your model does not have the systems
monitor, it will display the sewice
reminder sequence.
If it has the systems
monitor, press again to display the
service reminder sequence.
Systems Monitor: This checks to be
sure the following systems in your
vehicle are in proper working order:
Front lights
Rear lights
Side lights
Doors
Hood
Washer fluid
Trunk
Fuel tank
Anti-lock brakes (if equipped)
The systems monitor briefly displays
messages as it checks these systems. If
it finds a problem, the systems monitor
will display a continuous
or flashing
message about the problem. If all
systems are satisfactory, the service
reminder sequence will begin.
If you pull a trailer, the extra trailer
lamp bulbs will not allow the systems
monitor to properly detect a burned-out
bulb. When the trailer lights are
disconnected, the systems monitor will
again monitor the bulbs.
Service Reminder Sequence: This
shows the distance remaining to the
next recommended:
Oil change (OIL)
Oil filter change (OIL FILT)
Air filter change (AIR FILT)
Tire rotation (ROT TIRE)
Tune up (TUNE UP)
Press SYSTEMS CHECK each time
you want to see the next item in the
sequence.
When you have any of these services
performed, be sure to reset the service
reminder.
ProCarManuals.com
Page 109 of 338

Control Buttons (CONT.)
To Reset the Service Reminder:
1. Press SYSTEMS CHECK until the
2. Press and hold RESET for one
service
appears.
second. The maximum recommended
interval before the next service will
be displayed.
You can reduce the interval by
continuing to hold
RESET. The interval
will decrease by 500 miles (800 krn) for
each second you hold the button. When
it reaches
100 miles (160 km) , it will go
back to the maximum.
As you are driving, when less than 100
miles (160 km) remains until a
recommended service, a message will be
displayed when you start your engine. It
will periodically flash
on the screen
until you reset it.
I os
Calendar
With the engine running, the day and
date are displayed unless you select
another function, such as average
speed.
MODE Press to display the following
sequence:
AWPM
Hour
Minute
Month
Day
Year
EnglisWMetric
Press
MODE each time you want to see
the next item in the sequence.
To Reset the Calendar:
1. Press MODE until the function you
want to reset appears.
2. Press and hold SET.
3. Release SET when the function is
Repeat for each function you want to
reset. If more than five seconds pass
before you press
SET or MODE, start
the procedure again to continue making
changes.
To Choose English or Metric Units:
1, Using the tip of a ball point pen (or
something similar), press
MODE
seven times to cycle through the
calendar functions.
2. Press SET to change from English to
metric units,
or metric to English.
This changes the units shown in the
Driver Information Center and the
Head-Up Display,
if your vehicle has
one.
correct.
ProCarManuals.com
Page 110 of 338

Compass
The compass shows the direction your
vehicle is facing whenever the engine is
running. For best accuracy, it should be
calibrated:
Whenever it displays the message
“CALIBRAT/COMPASS”
Whenever it doesn’t seem to be
showing the correct direction.
Mobile telephones, two-way radios,
and other electronic devices can
cause inaccurate compass readings
if they are placed near the
compass, and
you may need to
recalibrate the compass.
To Calibrate the Compass:
1. Drive to an open area, like a large
empty parking lot.
You need to be
able to drive safely
in circles. Be sure
the place is not only free
of other
vehicles but also away from power
lines or large metal buildings.
2. With the engine running and all
accessories
off, press CAL. The word
“CALIB” will appear.
3. Be sure there’s no traffic, then slowly
drive in a circle. Don’t
go faster than
5 mph (8 ldh), because the vehicle
needs to stay level. The compass will
orient itself.
4. When the compass is oriented, the
word “CALSET” will appear. Locate
north and point the front
of the
vehicle at north.
5. Press NORTH. The words “N SET”
will appear. Your compass is now
calibrated.
If you travel more than 500 miles
(804 km) east or west, you can quickly
recalibrate
to compensate for variations
in the earth’s magnetic field. Simply
point the front of the vehicle at true
north and press
NORTH.
log...
ProCarManuals.com
Page 111 of 338

Features & Controls
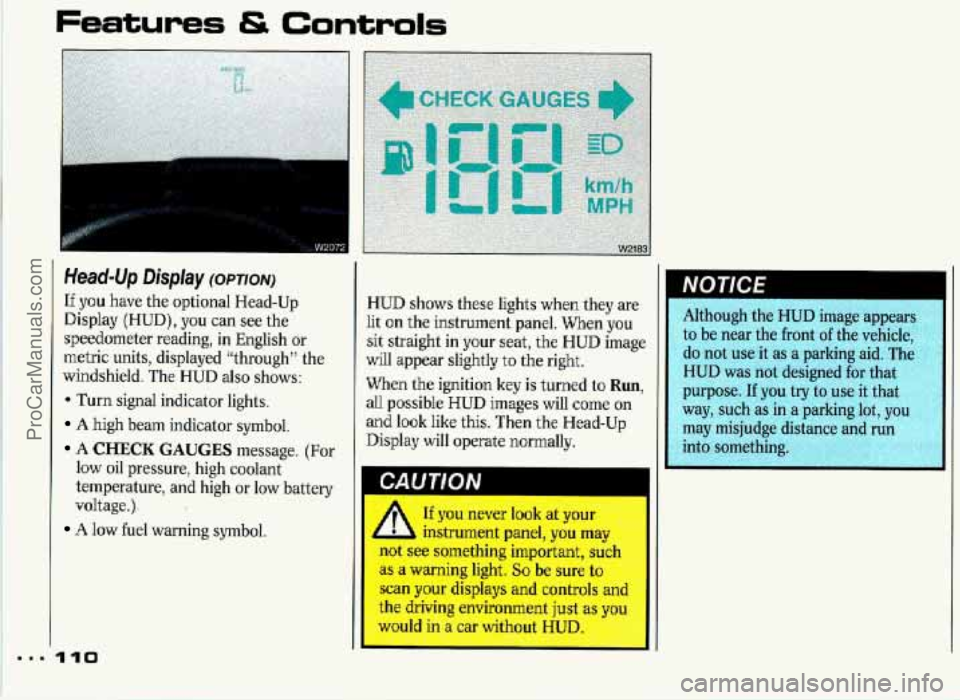
Head-Up Display (OPTION)
If you have the optional Head-Up
Display (HUD), you can see the
speedometer reading,
in English or
metric units, displayed “through” the
windshield. The HUD
also shows:
* Turn signal indicator lights.
A high beam indicator symbol.
A CHECK GAUGES message. (For
low oil pressure, high coolant
t.emperature, and high or low battery
voltage.).
A low fuel warning symbol.
HUD shows these lights when they are
lit on the instrument panel. When you
sit straight in your seat, the HUD image
will appear slightly to the right.
When the ignition key
is turned to Run,
all possible HUD images will! come on
and look like this. Then the Head-Up
Display will operate normally. Although
the HUD image appears
to be near the front
of the vehicle,
do not use it as a parking aid. The
HUD was
not designed for that
purpose.
If you try to use it that
way, such as in a parking lot, you
may misjudge distance and run
r,y, into something. R
A If you never look at your
,A instrument panel, you rnL
not see something important, si1
as a warning light. So be sure tc
scan your displays and controls
an
th’e driving environment ju,st as xou --. W n a car w- out UD. .:g:~$ I. A,..+-
.- -. rA .-
ProCarManuals.com
Page 112 of 338

_1
To adjust the HUD so you can see it
properly:
1. Start your engine and slide the HUD
dimmer control (to the right
of the
steering wheel, below the wiper/
washer control) all the way to
HI.
The brightness of the HUD image is
determined
by whether the headlight
switch is on or off, and where you
have set the HUD dimmer control.
2. Adjust the seat, if necessary, before
setting the height control. Slide the
HUD image height control all the
way toward you, raising the image as
far as possible, Then slide the HUD
image height control away from you
so the image is as low as possible but
in full view.
3. Slide the dimmer control toward
OFF until the HUD image is no
brighter than necessary. To turn the
HUD off, slide the HUD dimmer
control to OFF. If the
sun comes out,
or it becomes cloudy,
or if you turn
on your headlights,
you may need to
adjust the HUD’s brightness
using
the HUD dimmer control. Polarizing
sunglasses could make
the HUD
image harder to see.
If the HUD image is too
1 L bright, or too high in your
field of view, it may take you more
time to see things you need to see
when it’s dark outside. Be sure to
keep the HUD image dim and
placed low in your field of view.
ProCarManuals.com